Help

Mt. Oret

  • Grade context: SA
  • Photos: 21
  • Ascents: 4
  • Aka: Kalongo
3
SA

Seasonality

J
F
M
A
M
J
J
A
S
O
N
D

Summary

This huge, 500m tall rock on the edge of Kalongo in Agago District (Acholiland) has the best, highest, longest multi pitch trad climbing in all of Uganda.

©

Description

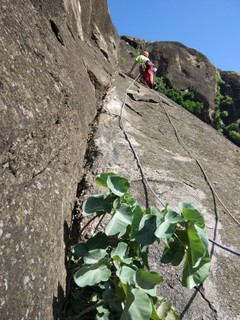
This huge rock has many potential lines and an easy hike down following a service road that supplies the tiny military base on the top of the rock. As of 2018, only two lines (13 and 10 pitches) had been established.

During rainy season, or after any rain at all, these routes can be impassable. Mt. Oret dries out slowly and these routes in particular can take days to dry out after a rain.

©

Access issues

Access is free and the local community is friendly. You may need to pay a few shillings to park near the rock and to have someone look after your car. Make sure to ask a local for permission and agree on a price beforehand if possible. We paid 2k for a day's parking. Once you reach the top of the rock, the soldiers might threaten to arrest you. So far, climbers have just been friendly with the soldiers, shared some stories, showed and explained our gear, shared a few snacks and laughs with the UPDF men on top of Oret and walked away without much hassle.

After the hike down, you can grab a boda boda to retrieve your car. After dark, locals might be drunk and therefore quite pushy for exorbitant parking fees. Possibly just park at your guest house and hike to the base or retrieve your car earlier in the daytime when folks are more likely to be reasonable.

©

Approach

Park on the back side of the sprawling Kalongo Hospital complex as near to the rock as you can find, which is next to some huts. Hike up the bush to the base from there. There is no trail and it can be quite bushy and steep. Should take 30 mins or so.

Maybe wear long sleeves and pants on this one. The approach can be thorny and the rock is pretty sun exposed. You might see a snake or two along the approach and lower pitches.

©

Where to stay

There are a number of guest houses in Kalongo. As there is huge potential for climbing in this part of Uganda, maybe negotiate to stay for a week or more.

We stayed in Kalongo town at the Lim Welo Guest House, which was 15k per night for non-self contained rooms and not including breakfast.

©

Ethic

Very few climbers have enjoyed these rocks over the years, but the potential is immense. Please do climbers a favor and work to cultivate a positive image of climbers in this area.

©

History

History timeline chart

Mt. Oret was first trad climbed in 2015 by Emmanuel Fredenthal and Luke Hodgkinson. Since then, a handful of climbers have summited this. The nearby rocks of Rwot and Amiel were first climbed in the late 50s and early 60s. However, the old guidebooks from 1962/3 and 1991 leave no mention of anyone climbing Mr. Oret or Kilibi.

©

Some content has been provided under license from: © Matt Battani (Matt Battani)

Routes

Add route(s) Add topo Reorder Bulk edit Convert grades
Grade Route
1 13 10m
2 14 30m
3 10 20m
4 14 30m
5 15 40m
6 17 25m
7 14 40m
8 18 45m
9 14 35m
10 13 45m
11 17 20m
12 13 50m
13 9 100m

Description by E Freudenthal 2015 Update by M Battani Sept ‘17

The route climbs the northeast face of Mt. Oret/Kalongo, starting in the largest gully, then mostly straight up following cracks systems and easier but run out slabs to the top. Overall, it has really good and fairly sustained climbing, the rock is solid and only a few passages require you to battle with vegetation. We took about 8h for the climb and 1h for the descent.

Be warned that the top slabs will be impassable if they are wet and backing off from them will be tricky/expensive. This rock can take days to dry out after heavy rains and this route follows a gulley which is one of the last places to dry. This is the description to the best of our recollection; there might some mistakes and better variations.

From the path in the village behind the hospital fence, spot the large gully with a very tall, straight tree with white bark sticking out of it. Simply thrash your way through the high grass and boulders until you reach the bottom of the gully. The start of the route is about 30m left of the right hand wall of the gully, where a narrow black slab widens out into some bushes.

  1. (10m 13): Climb the delicate slab to the undercut block slightly left, with a short crack splitting it, into a bushy belay stance below a blank wall.

  2. (30m 14): Follow the base of the wall to the right through the brambles until you reach a leaning pillar connecting to the right edge of the gully. Climb the pillar delicately until it joins the right hand wall and follow the crack to some awkward blocks, made more awkward by trees. Round the final boulder onto a small ledge with a slingable boulder for a solid belay and a large tree coming out of the rock behind.

  3. (20m 10): Climb up the tree behind the belay directly upwards and follow the ramp up to the left under some light vegetation. Traverse some small boulders until you reach a large clearing at the bottom of a blank black wall and the base of the white bark, tall, straight tree you can see from the town. Look out for snakes! (Variation pitch: climb to the left of the ledge then up the pillar to the next ledge)

  4. (30m 14): Take the mossy chimney at the very back of the ledge and on the left side of the wall. Round the chockstone, then further up the gully climb the easy slab to a tree belay.

  5. (40m 15): Climb the groove to the right of the tree until you reach the precariously broken top of the pillar. Take a committing step left and traverse across the slab and into the gully. Follow the gully until the wall steepens and the route breaks to the right into a narrow passage enclosed by a flake. Traverse to the moss filled flake and climb up and over the bush to your left into a comfortable ledge with two trees for a belay.

  6. (25m 17): Follow the undercut cracks up to the large tree above, then traverse to the right under the overhang to a sloping ledge with a large groove cut into it. Down-climb 1-2 meters until your feet reach the small edges below and shuffle rightwards until the edges disappear. Then reach a good crack on the right of the slab. Move easily straight up into a small groove with a belay about 6 metres below the dark, vegetated gully above.

  7. (40m 14): Climb the grassy black rocks to the bottom of the gully, and bridge boldly upwards to the first tree. Thrutch and squirm your way between the trees until the gulley splits with a tree and an overhanging block ending the natural passage to the left. From above the tree, rock over to the right onto an exposed grey slab with a deep crack to the right. Either thrutch up the crack or enjoy the face climbing. The large tree at the top makes for a stunning hanging belay. Enjoy the view! Note: this tree was pretty dead when we summited this in June 2017. You will probably need to clean the crack under this tree and set some cams to build and anchor.

  8. (45m 18): Climb above the tree into a large groove with an undercut crack following the left wall. Follow this crack, then climb straight up and right into a crux section with poor holds and worse gear. Grasp for the grass in the groove to your right and breath a sigh of relief. A few metres above, follow the seam to your right (not the crack on your left) and continue up until you reach a fridge-size stuck block on your left that can be slung for a belay.

  9. (35m 14): Follow the crack straight above the belay upwards until it disappears. Then, pad up with no gear for a further 25 metres until you find a large grass tuft with a solid flake above it with space for a couple of cams and a disheartening belay.

  10. (45m 13): Further unprotected climbing on rounded black rock and grass tufts ends with a secure belay point in a deep crack above grass tufts.

  11. (20m 17): Continue up from the crack with good gear until you are faced with a steep black wall with a shallow crack and a small tree above it. There is gear at the bottom right under the flake. Boldly climb the crack and face edges (no gear) before slinging the tree for a welcome belay.

  12. (50m 13): Further easy but poorly protected climbing continues zigzagging and trending leftwards up the slabs with some shallow cracks and grass tufts, to a big block on the left side of a steepening. You should belay here to make the pitch under 50m (there are no good belays above so learn from our experience!).

  13. (100m 9): Climb over the large block to a gentle slope where you can belay on one of the trees or boulders. Then, scramble up through the steep grass and trees until you reach the radio tower. Congrats. You’ve made it!

Descent: Head northwest across the summit to find the road down. You’ll probably meet Bosco, the military man stationed at the summit. Say hi from us and sign his book. He might give you citrus fruit. The descent takes ~1hr.

FFA: Emmanuel F & L Hodgkinson, 30 Nov 2015

1 14 45m
2 16 45m
3 17 45m
4 18 25m
5 18 50m
6 12 30m
7 15 45m
8 17 20m
9 13 50m
10 9 100m

Be warned, the top slabs will be impassable if they are wet and backing off from them will be tricky/expensive. This rock can take days to dry out after heavy rains.

6-8 hours (the last three pitches are shared with Corporate Night) Take a normal rack plus large cams. We used Black Diamond #5 once and regularly used BD sizes 2-4. Some trees can be slung, so take plenty of slings. Take lots of alpine draws. We left micro nuts/cams behind and didn't need them. Take light walking shoes or sandals with you as the hike out takes about an hour.

Hike up to the right of the huge and very prominent detached spire and between two trees towards a rib like feature. We started the climb between the trees going up the rib and over a hump. This entire climb is pretty sun exposed. Corporate night, which is 50-60m right of Zigzag, is a bit more shaded because there are more trees along that route.

  1. NE Face of Oret 45m 14 Start 20-30 meters left of Corporate Night and just right of the prominent spire. Begin between the two trees. Climb straight up and go up the ramp. After mid-pitch, it is a bit sparse on pro with one dodgy nut placement; otherwise the pitch is reasonably well protected. Some rocks are loose, especially at the bottom of the pitch. Rock quality seemed to improve towards the top of the pitch. A comfortable belay is below a medium sized tree on top of some blocks.

  2. 45m 16 The leader should take large cams on this pitch, like the Black Diamond #4 and maybe the #5. Start the pitch going directly over the belay. For nearly the entire pitch, follow the crack trending right, which has good face climbing on its right. The crack is somewhat crystalized and flaring out, so place the cams very carefully and nuts are not useful in this crack. These placements will be on your left as you climb the face. Belay in a small bush, which wasn’t super strong so place cams in the crack near the bush as well as slinging the bush itself.

  3. 45m (17) Follow the flaring crack continuing right then trend left. Get a couple pieces of pro in the crack before it runs out to a sparsely protected section. Then go up an unprotected ramp. Go past a bush and belay from the second tree in a vegetated seem.

  4. 25m 18 There are some bushes and grass on this pitch, which increase the difficulty of the grade. Watch out for the painful cacti on your left. Good cracks are full of dirt. The pitch trends right. Aim for the comfortable belay ledge above a small, old, knotty, thick-trunked tree for a somewhat spacious belay.

  5. crux 50m 18 With no protection, start up from the belay trending slightly right towards a crack on the right suitable for large cams #4 and #5. You’ll see a giant, overhanging, black block on your right. Then, follow the crack up as it trends left and go over the top of the crack and turn right into an open book seam with a few opportunities for pro. Follow that seam. You’ll belay from a grassy tuft, which has room to sit and a couple bushes. The belay has a nice crack suitable for small cam (BD .3/.5) and nut placement.

  6. 30m 12 This pitch trends right going up an open book. Watch out for loose flakes. There are good hand and footholds all the way up but some of the pitch lacks protection. Make your way to a well-protected, grassy ledge with a cactus and setup the belay.

  7. 45m 15 Start up the ramp trending right on the black streak/wall and aim for the large trees above. The end of the pitch requires a traverse and squeeze behind some cacti. There are lots of opportunities to place pro, but the rock is less than bomber. Sit on the grassy ledge to belay. The end of this pitch joins the Corporate Night route, so the descriptions below are copied from E. Freudenthal, L. Hodgkinson (Nov 2016). Note: I adjusted the pitch numbers and added South African grades for uniformity. The route now joins the final three pitches (11-13) of Corporate Night.

  8. 20m 17 Continue up from the crack with good gear until you are faced with a steep black wall with a shallow crack and a small tree above it. There is gear at the bottom right under the flake. Boldly climb the crack and face edges (no gear) before slinging the tree for a welcome belay.

  9. 50m 13 Further easy but poorly protected climbing continues zigzagging and trending leftwards up the slabs with some shallow cracks and grass tufts, to a big block on the left side of a steepening. You should belay here to make the pitch under 50m (there are no good belays above so learn from our experience!).

  10. 100m 9 Climb over the large block to a gentle slope where you can belay on one of the trees or boulders. Then, scramble up through the steep grass and trees until you reach the radio tower. Congrats. You’ve made it!

Descent: Head across to the summit to find the road down. You’ll probably meet UPDF troops at the top. Say hi from us and sign the book. Those solders rotate out frequently and therefore have been surprised each time it has been climbed. They once threatened arrest. Smile and try to relax. Once they knew we were just climbers, they warmed and let us go. The descent takes ~1hr.

FFA: Matt Battani, U Pitsch & W Rutowski, 20 Jun 2017

Walk up through the gully between Mt. Oret and the detached spire on the east side of Mt. Oret. This route is probably 100m west/left of Zigzag.

Move up through the gully as far as you can scramble up to the first pitch. From there, you'll find protected climbing up two short pitches within 5m or so of the top of the spire.

Note, this route is mostly on the southwest side of the spire itself, has good shade and is nearly in between the spire and Mt. Oret.

We turned back about 5m from the summit. The climbing at the top was not very difficult, but would have been unprotected with serious consequences. So, the spire remains unclimbed. We asked people in Kalongo, checked online and went through the MCU archives. No recorded summit of this spire has yet taken place, so go and get this FA if you dare!

We would have added a bolt or two to protect this climb, but unfortunately were without our bolting equipment on this trip. Next time!

The grade and description above only rates how far we went and does not count the summit or lack of protection. The grade would have to go up and include an X for a full climb of this spire.

FFA: Matt Battani & U Pitsch, 21 Jun 2017

Did you know?

Did you know that you can create an account to record, track and share your climbing ascents? Thousands of climbers are already doing this.

Accommodations nearby more Hide

Share this

Photos Browse all photos

Upload a photo of area

Mon 29 May
Check out what is happening in Mt. Oret.

Get a detailed insight with a timeline showing

  • Ticks by climbers like you
  • Discussions of the community
  • Updates to the index by our users
  • and many more things.

Login to see the timeline!

Deutsch English Español Français Italiano 한국어 Português 中文