Help

North Side

Seasonality

J
F
M
A
M
J
J
A
S
O
N
D

Description

People use words like "Yosemite" to describe the North Side, and this is definitely the home of Looking Glass' most serious and difficult climbing. For all but the most advanced climbers, aid is the style of climbing here. Signature North Side routes include The Glass Menagerie and The Womb.

  • routes all listed, need reordering though *

Approach

  • This is in a different area from the Nose Area, South Side area, etc *. Continue past the road fork where you get to the Nose Area for about two miles, passing the Slickrock Falls trailhead and the Sun Wall kiosk/parking lot. After about another quarter-mile, look for a pullout on the right. Hike down from the parking lot to a clearing, then follow an old logging grade to the left a short distance to a footpath that cuts off to the right. Hike through the woods for about 20 minutes to finish at the base of The Glass Menagerie.

Tags

Routes

Add route(s) Add topo Reorder Bulk edit Convert grades
Grade Route
  1. This is a great 5.9 warmup or option for gumbier climbers that you drag over to the North Face. It features a nice tips splitter on a slab. Many folks climb only the first pitch and belay off 2 fixed hexes in the crack above the dying tree.

  2. (5.11b/c, ) It looks fantastic from the ground, and is one of the few true splitters at the Glass...at least that's how it looks. Closer inspection reveals a constricting crack with a lip on it that is awkward and painful to jam with moss and mud in the back of it. Yeehaw! If doing the 2nd pitch, traverse right after the tree (a little spicey) then up the first bulge to belay at a sloping stance with good gear. The crux is liebacking or jamming over a bulge about 20' above the belay. Continue to rap from two bolts about 70' above the belay. The entire route is very well protected. Take two ropes to rap.

Location: On the North Face of Looking Glass. This is located on the face of the pillar between Cornflake Crack and the Womb. Start about 10 feet left of a large tree that has grown into the wall.

Protection

P1: Small nuts or TCU's, then standard rack P2: Extra .5 and .75 camalots, hand sized pieces for the belay

Set: Jeep Gaskin, Don Hunley & Joe Meyers, 1979

Classic and varied 5.9 ish climbing with a very short 5.11b crux.

  1. Climb crack and slab beside vegetated crack, angling right until an obvious gear belay (70 ft, 5.7)

  2. Climb crack trending right with great protection. Undercling crux leads to hand crack and bolted belay. (80ft, 5.9+)

  3. The money pitch, offwidth dihedral that can be protected by an overhead #4/#3 (11b). Above this move is a perfect finger crack with great exposure that is around 5.9 climbing. Gear belay. (100ft, 5.11b)

  4. Slab on up. (100ft, 5.7).

  1. The route takes the beautiful arching crack just around the corner from Cornflake crack on the North Face. The arching crack ranges from 5.9 fingers at the bottom to an offwidth through the top of the arch over to the anchors. The crux is a strenous move or two through the offwidth ending in a lovely thin traverse to the anchors.

  2. Aid ?

  3. Aid ?

  4. Aid ?

Location: North Face of Looking Glass. Obvious arching crack to the right of Cornflake

Protection: Wide range of cams and passive gear. Save a #4 or #5 camalot for the crux. Fixed anchors at the top

FA: Bob Mitchell & Will Fulton, 1969

Is this the best crack climb in the state, or just on the Glass? First freed by Henry Barber on one of his burning-off-the-locals tours in the '70s, this one remains an enduring classic. Whether you, too, will endure remains to be seen.

Also known as a good place to learn to aid climb, in the same way the Louvre is known as a good place to read.

  1. (80', 5.11a) Climb up a couple body lengths to a short undercling roof. Plug some gear, take a deep breath, and scurry across to solid fingerlocks around the corner. Layback up this on more locks to a rest, then surmount a series of well-protected boulder problems until a tricky step right gains a belay stance.

  2. (100', 5.11a) Crane your neck upward and suss out the corner as it leans dramatically rightward overhead. Although the corner itself is disturbingly blank, a finger-sized crack in the left wall saves the day. Crank and stem your way upward with good gear until the corner kicks back and opens up to accept fingers, widening to off-hands under a 1' overlap. A desperate 'rest' stance may remind you of endless trials on unrelenting Valley cracks-- you might be able to crank off that layback, you might fall trying, but you sure as hell can't stay here for long! Dig deep and fire for the hand jams leading to a widening flake and the best belay ledge on the Glass, at least when it's dry. Most people rap from here.

  3. (60', 5.10b) Greenish flakes contiue to the top.

Location: Left end of the steep part of the North Face. Look for a right-facing corner with a short undercling near the bottom. If this is wet, you may want to keep walking.

Protection:Stoppers, 2 each TCUs, and a double set of cams to 3", with a 3.5" as well. 2 ropes. Fixed anchors.

DESCENT: 2 ropes from the top of P2 get you to the ground; if climbing P3, a single-rope rap from a tree will get you back to the ledge.

FFA: Hot Henry Barber, 1976 FA: Art Williams & Mike Holloway, 1972

This is the finest multipitch free-climb of its grade in the Southeast. If you want sustained climbing with big air and on perfect granite, this is the route for you. The Glass Menagerie is the obvious overhanging line up the center of the North Face of Looking Glass. It is equally good as an aid climb, as it is a free climb. Its cruxes are well protected and the rock is almost always stellar. Please be courteous to other parties if you are trying to work out the free moves. This route gets plenty of traffic and you will likely be sharing the route with other climbers if you try it during peak season.

  1. (5.11c or 5.8 C1) Start climbing up the easy face towards the obvious shallow right facing corner. You will eventually be faced with some 5.11 moves on great rock with mostly bolts for pro. You will then encounter a funky steep section that is protected with some pretty rusty bolts and sort of rotten granite. This is short lived and eventually you will traverse out far right on a ledge system (5.8? rotten) that will take you to a bolted belay. Two nice bolts and an angle for the belay. If you are hauling make sure you put your haulbag in the proper location for takeoff on the deck.

  2. (5.12+ or C1) This is one fine pitch of climbing. Start cranking hard moves right off the belay eventually scoring a nice kneebar rest under a shallow roof. Get ready for some thin face. Climb out past the roof and up past several bolts onto the beautiful face and end up finishing by traversing onto the exposed face placing a few cams to gain a nice little ledge belay below a flaring corner with a splitter crack in the back. Two bomber bolts will make your belay.

  3. (5.11a or C1) After a little rest, rack up with some cams and stoppers for this pitch. You will have a hard time with this one if you don't like rattly fingers. Climb a short crack in a left facing corner with great pro to a decent ledge with at least two bomber bolts for your anchor.

  4. (5.13 or C2) This is the money pitch. Get amped right off the bat because you will be loving the climbing here. Make some face moves off the belay. Then break out left through the improbable looking roof. You will encounter jugs, laybacks, and crimps out of this masterpiece. Keep cool for the first thirty feet off the belay. There is big air with bolts for pro and only 5.12 moves till you reach the lip of the roof. It suits the route that the hardest move is at the steepest part of the whole wall. Try and get a breather before you pull the crux. There are good bolts in between the bad ones for the whole roof. Once at the lip, pull a pretty dang hard boulder problem (V6?) and gain a thin lichen covered face. This face is about 5.10+, but it only has two bolts for pro. They are painted black so if you don't see them just keep lookin. Once you've pulled through the face you will find a two bolt belay for your anchor.

  5. (5.10+ PG 13) This pitch is only part of the free route. The aid line went up and left out of the roof, while the free variation goes up straight past the two bolts described in the previous pitch. Down climb down and left off the belay with only one bolt for pro. You may be able to get some small wires or aliens in as well. You will be angling down and left at about 7 o'clock off the belay. There was a fixed runner off the bolt when we were up there. This pitch will be sort of scary for the leader but terrifying for the second, as he will actually be doing the lead climbing. You will encounter a 2-bolt belay about twenty feet above the lip of the roof proper here.

  6. (5.10c or C2) You can link pitch 5 and 6 and save your second from doing the heinous down climb of pitch five with a semi-top rope. Either way you do it you will climb a splitter hand crack up and eventually gain a fixed nut anchor at a little roof. Traverse out left a few feet to regain the crack (crux 11.c?). Climb the hand crack that will turn into a reasonable off width that overhangs slightly and ends with a slabby right leaning finish to gain yet another two bolt anchor.

  7. (5.9+ or 5.8, C1) Climb up off the belay pulling through some thin hands past a bulge and then on to finish the crack up on a slab. You will eventually run out of crack and slab climb up to the top on easy terrain which can be wet if it has rained recently.

Location North Face of Looking Glass. Hike in from the obvious trailhead at the parking area heading south towards the North Face. It will be the first route you come to once at the wall.

It is possible to retreat from any pitch but you may have to leave some biners on the raw bolts. It is best to walk west towards the Nose and rappel it to get off the wall.

This is a great granite slab route with multiple, interesting cruxes. The route links discontinuous features, so requires some good route finding skills if there is no chalk.

  1. Begin with liebacking up some flakes to the first bolt and the first crux; pulling over a short roof (harder for short folks...you can place a TCU up high in the corner to the left before you pull the roof).

  2. Next do some powerful liebacks up to the next bolt (crux 2), place a tcu or nut then use jugs to mantel up onto a large flake below the slab. Chalk up for about 20 minutes while you psyche up, then crank some seriously thin crimpers to the left, gunning for a series of rails that lead to the next bolt (crux 3). You'll have to stand on your feet. Once you reach the 2nd bolt on the slab, you're home free. A couple good rests can be had off to the right in some loose blocks. A single 60m rope will get you down. The start is mossy and needs a wire brush badly. The upper half of the route is much cleaner.

Located: On the North Face of Looking Glass. After arriving at the wall, walk to the right about 100 feet until the forest joins up with the wall again. There is a group of four single-pitch routes in this area. Bombelay is the 3rd route from the left and starts about 5' left of the South Carolina-shaped flake that is about as big as a car's hood. Starting just to the right of the flake is "Witney's Excellent Route".

The 1st pitch is steep and fun with ample pro, and most climbers stop there. This pitch climbs like a sport route with gear and stays dry in the rain.

P1, either start on a small slab ramp or uphill on a ledge system that leads to the flake midway up the climb. From the direct start, pull some thin moves to gain large ledge. Pull a small roof to gain the flake ramp. Follow the flake ramp to a blocky section with a bolt. Watch for loose rock here. Clip the bolt and move to the short finger crack. From the finger crack move back to the steep flake and crank to the anchor. 5.10c

P2, Climb up and left through a blank face clipping two bolts to the base of a thin seam. Follow the seam to an anchor. A3

P3, Climb up to a dirty water groove to the bolted anchor. A2+

P4, Finish by climbing straight up on Diamonds in the Muff or move left to Wranglin' Horses and Hogs.

P2-P4 descriptions from NC Selected Climbs Location From where the North Face trail meets the wall, turn left and head up hill for about 20'. Look for a small slabby apron at the base. Look up for the obvious up and right leaning flake on a steep face. Rappel the route with one 60m for P1 and two ropes for all other pitches.

This stout pitch might make you pucker up. Climb past scant but good pro to gain the right facing crescent feature. Balance up this using as much friction as possible to a bolt. Crank a hard move at the bolt to another bolt to gain a patina 5.11 face. Head up this passing petzl self drives to a two bolt anchor.

Location Up hill past the Guillotine. Near "Off the Wall"

Description Or should it be Extra-Extra Crimpy Chicken? A sustained adventure in technical face climbing nirvana.

Climb past two bolts to reach a gear pod. Now, summon the crimp gods and begin the adventure. Crimp and pimp, up the delicious face past a number of bolts to a great jug. Plug in more small gear and fire out the last few hard moves to reach a welcome and timely double bolt anchor.

Location Starts left of Bombelay about 25 ft.

Protection Bolts, doubles in tcu's to blue.

Description This route has quite varied climbing on it and is worth doing if you're in the area. Don't let the Guillotine Flake freak you out as you creep your way up to it.

Climb a very short corner to a bolt out right (I added this bolt a year or so later). Make slab moves up and right to another bolt in the funky corner features. Climb straight up to 3rd bolt and a thin face above that is protected by a med cam. Clip 4th bolt and make long moves to a good rail and mantel. Clip last bolt and move up face to the giant guillotine flake. Good gear can be placed behind the flake on the right side (Tim S. was gracious enough to test this cam with a 30 footer...). Move out right and through roof (#4 camelot) to the corner above that is protected by 2 KB pins. Lower from 2 bolt anchor at top of corner.

Location Just to the right of The "Glass Eye". Crosses over the diagonaling first pitch of "Chieftains Of Creep" at the Guillotine Flake.

Protection light NC rack including #4 camelot

Great free climbing followed by some classic nailing. The free crux is the thin traverse under the detached block. Careful with your pro here!

Start up the shallow blocky dihedral to the left of "Waste Not Want Not." There is a 5.12a direct start that goes up the obvious dehidral. Traverse right on thin horizontal (crux) to good ledge. Rest, then blast the lay back to a great ledge. Start nailing from here. Location North Face of Looking Glass Rock; starts left of Waste Not Want Not. Protection Single set of cams, extra .5- #1. Nuts. Twin ropes useful. Beaks and Bugaboos for the nailing. A two bolt anchor is fixed at all belays.

The crux is low but protected by a bolt ( stick clip recommended). Press and stem through a dihedral up to a gastone, then make a committing move to a great ledge. Continue up Invisible Airwaves Proper. This is an amazing line that really requires some grit. Location This route is 20 ft left of Waste Not Want Not and 10 ft right of the Invisible Airwaves . Start in a clean dihedral just right of Invisible Airwaves. Rap same as Invisible Airwaves Protection Protected by a single bolt. Stick Clip recommended.

The free version to the first pitch of Howling Kahn. Wonderful and engaging movement culminating in a fantastic gear protected crux. An incredible find, particularly amazing it lay dormant despite being the plumb line one rappels from the anchors of Whitney's! Location The next series of climbable features and corners to the right of Whitney's Excellent Route. Start with some head's up slab to gain your first piece of gear then aim for the bolts protecting the initial sequence of difficult moves. After the 4th bolt follow the hollow flake system up into the right arching corner which leads to a two bolt anchor. Protection 4 bolts plus gear (SR). Anchors.

Start below 25' corner. Make some technical moves to get to the corner. Climb the corner to a small roof. Move out left and over the roof to gain the bolted slab. Climb thin edges to the Seal's anchors. Very exciting route and can be TR'ed after having led the Seal. Location Directly below the Seal's P1 bolted anchor in a large right facing corner. Protection Single rack with small nuts and 2 bolts. Protection is difficult to place in the corner.

Start in a right facing corner. Power lay back up to a bolt on the slab. Climb hard, technical slab out left to a second right facing corner. Finish at two bolt anchor. Location Far right side of Peregrine Roof. Right of the Code. Protection Standard rack to #3, a 4 is helpful but not mandatory.

This is a long and very involved climb. There are many thought provoking moves and a few butt-clenchers for good measure. If you like friction climbing and hard eye-brows this is for you. This is also one of the first climbs to dry on the left side of the North Face.

Start in a flared hand crack in a left facing shallow dihedral. Move up this moderate crack to its top and traverse left to a very short right facing dihedral. Step up and move right for about 25' on a good ledge to the base of a series of bulges (double ropes are great here). Pull through about three bulges using big eyebrows and lots of sloped knobs. At the final ledge before the bolt, move back left almost directly below the first bolt. Get good gear here and make a committing move to a good stance to clip the first bolt. The next section is sustained technical friction. Follow the line of bolts and plug a few pieces in between until you reach the fourth bolt. From the fourth bolt move up and left to a faint gray streak with great edges. Plug a few more pieces and bust into the Sperm's crack right before the anchors on the Sperm's second pitch. Shake those legs out whenever you can! Location Start 20' right of the Sperm at the obvious fist crack in a flared dihedral. Rappel with two 60m ropes to the ground or swing right to Deep Throats first pitch anchors with a single 60m rope and make two rappels. Protection Single rack to #3 Camalot with doubles from purple TCU to red or black metolius. Tri-cams and nuts can also be used in several spots. Many long runners and draws. Double ropes are mandatory.

An obscure classic left of Extra Crimpy Chicken. Climb easy terrain to a bolt and then get charged up for action. Pass a small right facing corner (rps for pro) to weird rock at a stance. Pop in a #3 Camalot and embark on small edges up a bolted face to a unique move at the 4th bolt. Climb small dihedrals to a two bolt anchor. Location 40 feet right of the Glass Menagerie next to Extra Crimpy Chicken. Protection bolts and gear to #3 camalot. RP's for the start

Don't know if this was ever climbed in the past but all evidence indicates that it was not... who knows for sure though? It was cleaned up and climbed recently. It is a fun moderate pitch that is worth climbing and is a great way to extend the crux pitch of "Safari" to the top of the buttress (about 175' long).

Climb the first 2 pitches of either "Safari Jive" or "Cornflake Crack" to the large ledge. If climbing Safari Jive, it is a natural continuation of pitch 2. Just don't stop and belay at the usual anchor, continue to top.

Instead of climbing the 3rd pitch of Cornflake, climb the arete and face just to the left. Start on the flake above the Safari Jive rap anchor and sling the tree for pro. Step left to lieback the arete, then continue up the cool arete and face. Keep your eyes peeled for gear in the 'brows that will require some longs slings to prevent rope drag. Belay at the large dead hemlock tree/2 bolt rap station. Location The arete and face above the Safari Jive P-2 rap anchor. Protection Standard LG rack up to #2 camelot. For pro at the start, sling the tree.

P1: 5.11c Starting in a often dirty right facing dihedral climb the finger crack through a notch and up to a jug. Cut left into an eyebrow and mantle up onto the ledge. Move left to a bomber eyebrow. Climb interesting slab placing small gear before clipping a bolt and entering the crux. Continue climbing through two bulges split by a crack of varying size (fingers - thin hands) and belay at a natural gear anchor.

P2: Climb P2 of Safari jive Location Start on a thorn covered ledge just left of Nuclear Erection, below a shallow right facing dihedral.

Descent: Rappel off P2 Anchors (2 60's) Protection Regular NC rack

This great alternative to the original pitch adds mutiple 5.11 sequences and when combined with the upper pitch makes for a 170 ft pumpfest. Start left of the tree that is leaning against the wall. Move generally up and right over small and medium gear to a bolt. Fire past the bolt and move into the bulge with a crack going through it. The original direct(FA Kris Kline)came in from the right and pulled this same bulge. Crank this crack/bulge to join back into the original line. Belay here or continue to the top for the enduro finish. Location Starts right of the original Safari start and left of the leaning tree. Protection Many long runners, nuts, small tcus to orange or c3s, grey and red aliens, tricams, double 1/4 to 1 inch cams, 2 or 3 inch cam for the very start

This is the obvious left-to-right-angling crack on the slabby left end of the North Face. A cross between classic Looking Glass eyebrow-wandering and the more strenuous crack climbs to the right.

Begin by climbing up to, and then through, the fallopian chimney that marks the start. Thinking that this squeezer is 5.9 will only get you in trouble elsewhere. 5.8, 80'.

P2: 80 feet of right-leaning crack ends at a pair of bolts. This and the first pitch are easily combined; 5.9.

P3: Inobvious moves in the vicinity of a short vertical crack (5.9+) lead to easier ground up and left. Belay from bolts. 100'

P4: Standard 'Fields of Lichen Growing Wild'; eyebrow version. 5.7, 100'.

Protection The usual stuff will suffice. Bring walkoff shoes.

This is an excellent slabby face climb which features thin liebacking, crimping, and just the right amount of protection for it to be cool without being too dangerous. The crux is inches before the ledge and some people do it as a dynamic lunge for the top and others do it statically. The route stays drier in rain than most of the other routes on the north side. Location This climb follows the arching seam 20 feet right of the direct start to first pitch of invisible airwaves. Protection Mostly protected by bolts and a fixed pin. The only cams I remember that could be placed were a .5 camalot in a horizontal below the first bolt and a blue alien in a horizontal above the last bolt, but neither were good enough for me to expect them to hold a fall. Bring a variety of brass offset micro nuts and steel micro stoppers as well as the red ballnut if you want to sew up the crux at the top of the climb. The route can easily be toproped after climbing the first pitch of invisible airwaves.

This is a fantastic face route climbing a clean white face on perfect rock with athletic moves. It follows the natural features, so tends to wander a bit. There is a tough spot in the first two bolts then a good shake where you can place a small tcu before a deceiving move left. Get a real good shake at a circlehead (can place a yellow TCU here as well), then bust straight right campusing on half-pad crimps. The crux may be clipping the last bolt...maybe you should skip it?? Location On the North Face of Looking Glass. This is the next route left of the Menagerie, or the second route on the left after you come up the trail. Look for a line of bolts. Protection Mostly bolts, but you'll need a handful of TCU's to fill in the blanks. There are a number of spots before the first bolt where decking is a real possibility, and a ledge fall is possible between the 1st and 2nd bolts.

Climb the varied right facing corner to a series of tiered overlaps. A technical crux leads to pumpy climbing finishing at a two bolt anchor. Location Next to Bombbelay at the SC shaped flake. Lower from anchors but WATCH YOUR ENDS! This route takes a full 60 to get up and down. Protection Bolts and gear to #2 camalot. Two yellow TCU sized pieces are helpful near the finish.

Hello!

First time here?

theCrag.com is a free guide for rock climbing areas all over the world, collaboratively edited by keen rock climbers, boulderers and other nice folks.

You can log all your routes, connect and chat with other climbers and much more...

» go exploring, » learn more or » ask us a question

Selected Guidebooks more Hide

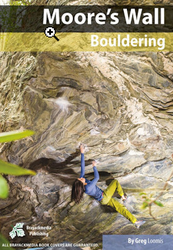
Author(s): Greg Loomis

Date: 2019

ISBN: 9780990782124

For year-round bouldering fun in the Piedmont region of North Carolina, your next exciting challenge awaits in the Moore's Wall Bouldering guide, featuring over 500 fantastic problems.

  • Full-color guide details over 500 problems, with helpful topo overviews to help get you oriented and awesome action photographs to inspire you before lifting off
  • Printed in color

Accommodations nearby more Hide

Share this

Photos Browse all photos

Upload a photo of area

Tue 6 Jun
Check out what is happening in North Side.

Get a detailed insight with a timeline showing

  • Ticks by climbers like you
  • Discussions of the community
  • Updates to the index by our users
  • and many more things.

Login to see the timeline!

Deutsch English Español Français Italiano 한국어 Português 中文