There are plenty of reasons to record your ascents and keep a climbing logbook, you may read about them in the Ticking and logbook article.
theCrag offers you to choose from the greatest selection of tick types on the web, allows you to change the gear style of your ascent and you may even record ascent parameters such as the use of knee pads, pre-clipped protection or an ecopoint journey to your crag to make your records as complete as possible.
Accessing the interfaceBack to contents
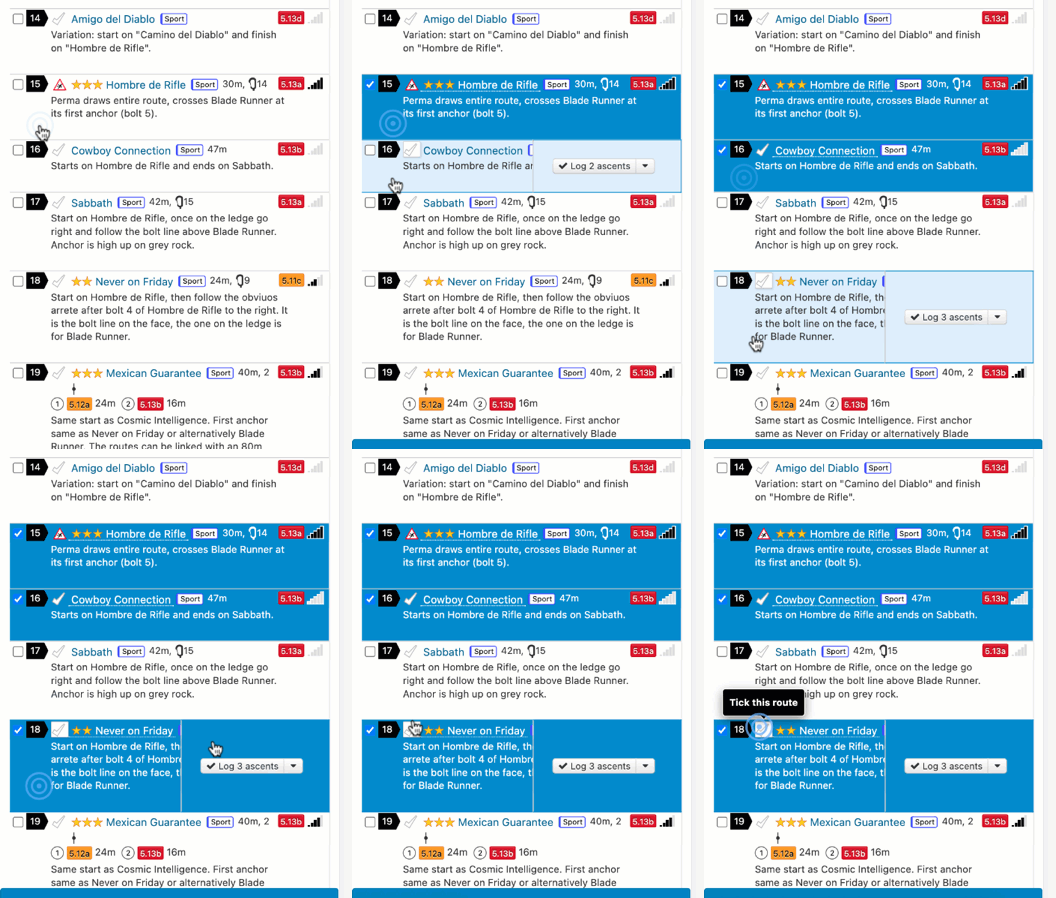
You may start the ticking process from almost any screen showing a route. Typically you may do so from an area page where you may select one or multiple routes but you may also start from a route page, from your dashboard or even from search results.

The ticking interfaceBack to contents
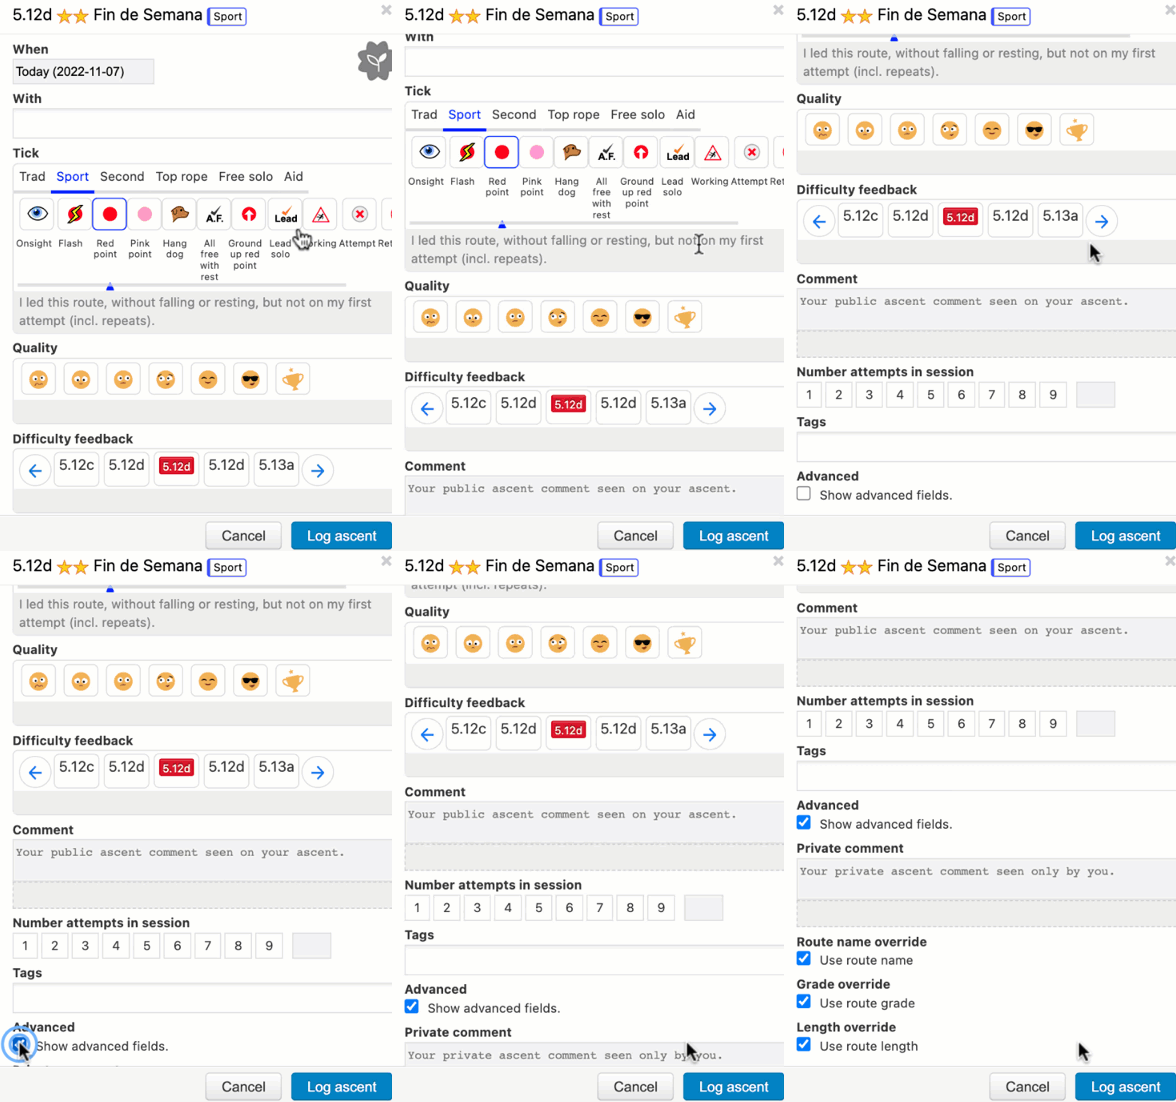
The actual ticking interface consists of several sections.

WhenBack to contents
The date of the ascent. It defaults to today but you may change the date and even use partial dates such as just a year (e.g. 2022) or a year and a month (e.g. 2022-10).The system remembers the date selected in case you tick multiple routes.
EcopointBack to contents
Click the grey icon on top right if you want to mark your climbing session as an ecopoint session - meaning you went to the crag by either public transport, bicycle or hiking.
WithBack to contents
Select your climbing partners from the presented list of users or enter them as plain text. The system remembers the partners selected in case you tick multiple routes.
TickBack to contents
Depending on the route gear style, the system presents you a set of possible ascent gear styles and related tick types.
For example, if you tick a sport route you may climb it as such (default) and just select the tick type. However, if you climbed it in Top Rope, simply select the ascent gear style Tope Rope and then the corresponding tick type. Be aware that the route gear style defines which ascent gear styles and thus tick types are available for a specific route.
QualityBack to contents
Optionally you may select one of seven quality levels for the route by clicking on the icon. This feedback is used amongst others to determine overall route quality. If you previously recorded an ascent for the route, the system shows your previous selection.
Difficulty FeedbackBack to contents
Optionally you may select your feedback on the assigned route grade. Click on the assigned grade if you agree with the grade or select any of the feedback options to the left or right of the assigned grade if you think the route is easier or harder than graded. This feedback is summarised on the corresponding route page.
If the route is graded in an adjectival grading system (e.g. UK grades) you may provide feedback for each grade component individually.
If you previously recorded an ascent for the route, the system shows your previous selection.
CommentBack to contents
Enter your ascent comment here. This is the public ascent comment and can be seen by everyone who can see your ascent. See also Private Comment further down.
Number attempts in sessionBack to contents
This is the number of attempts to ascend the route you want to record for the session. For example if you redpointed a route after 2 failed attempts simply record a redpoint tick and enter 3 as the number of attempts. The system will record 2 failed and one successful attempt in that case. The session is typically defined as being on the same day but you may combine multiple consecutive days into one session by logging them together.
TagsBack to contents
This section allows you to record additional ascent parameters such as the use of knee pads, pre-clipped protection, crack gloves or personal milestones such as first ascent.
AdvancedBack to contents
Check this box to access advanced fields:
- Private comment: an ascent comment that is only visible to you
- Route name override: uncheck “Use route name” if you want to enter a different name for your ascent. This might be useful for example if you linked up pitches of two different routes.
- Grade override: uncheck “Use route grade” if you want to record a different grade for your ascent.
- Length override: uncheck “Use route length” if you want to record a different length for your ascent.
The system will loop you through this interface until all ascents selected for ticking are recorded. Once the process is finished, it presents a summary screen for your recorded session.
Logging multi-pitch ascentsBack to contents
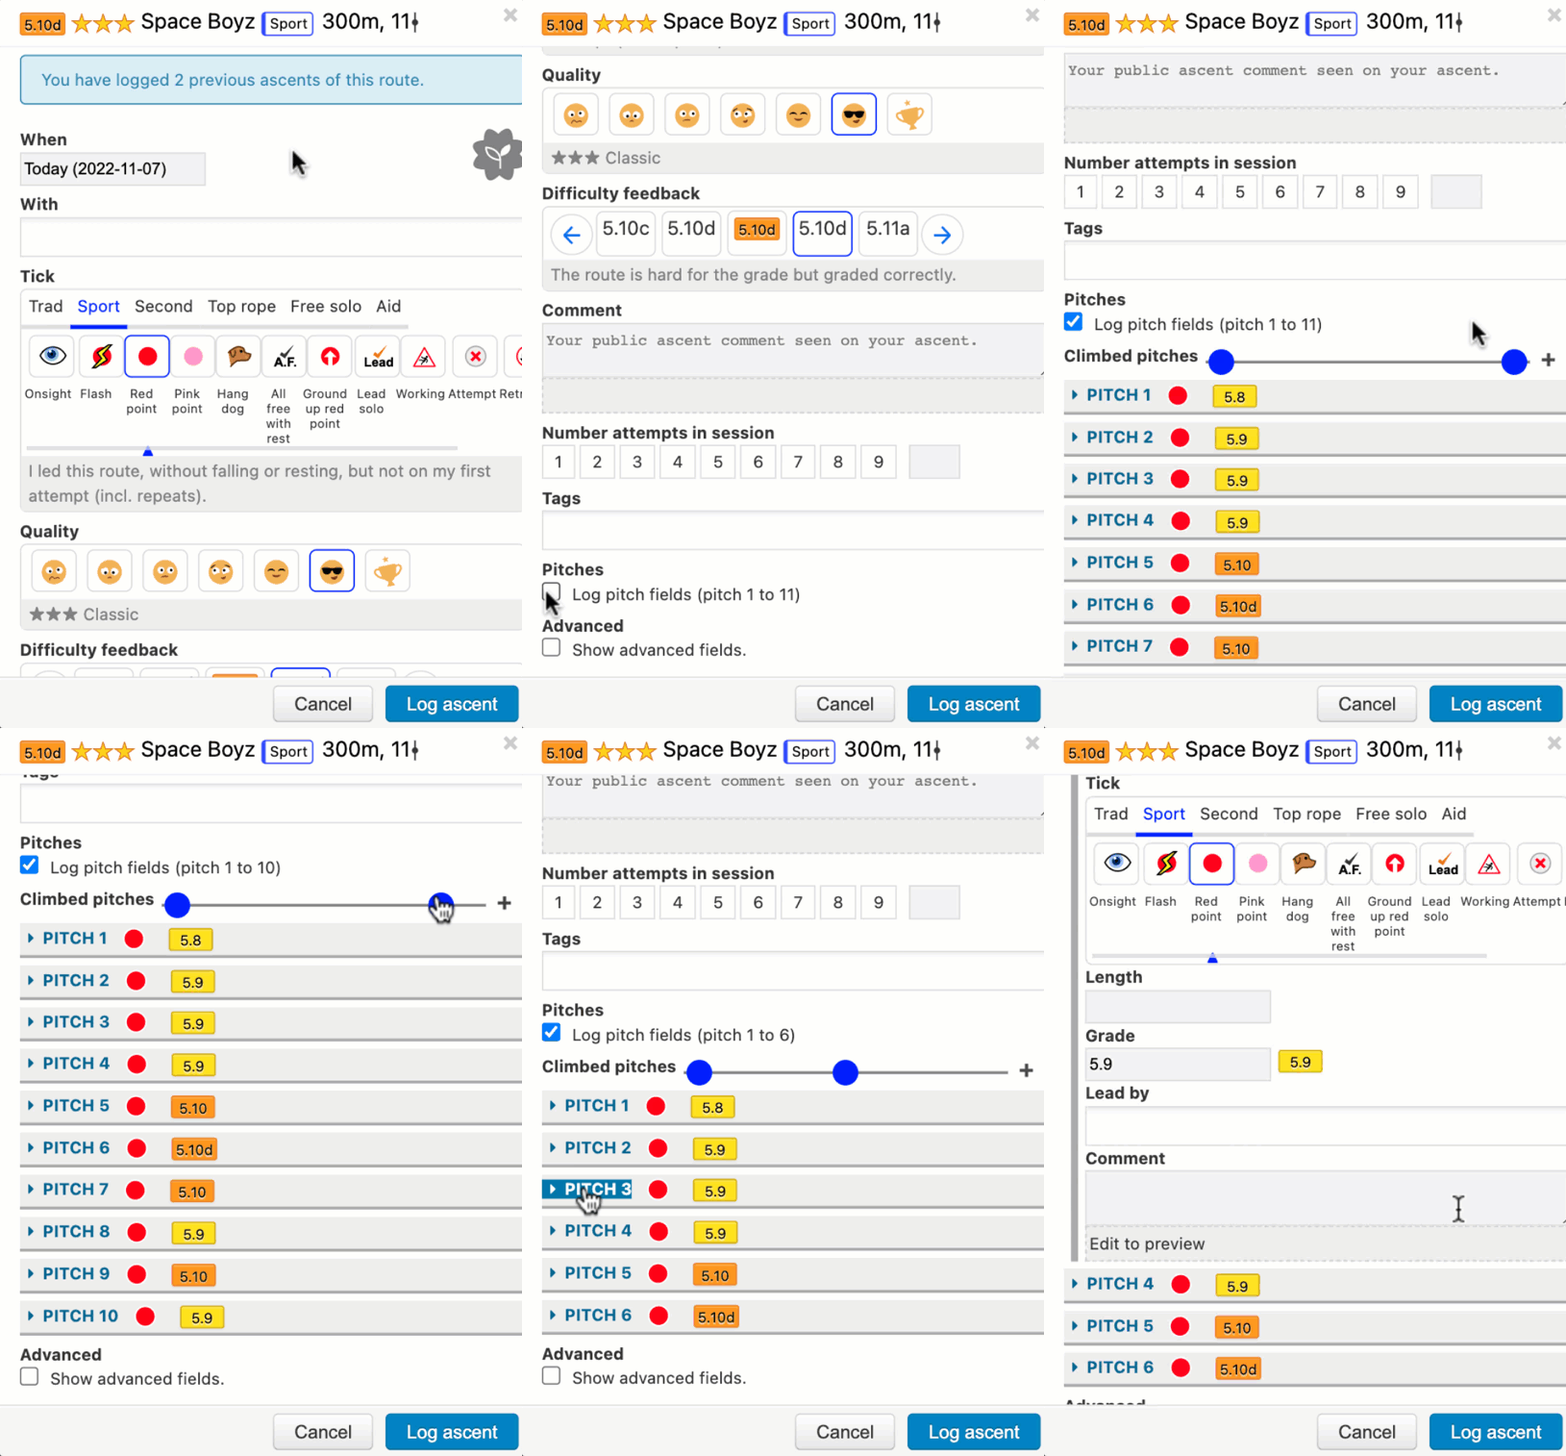
Multi-pitch ascents may be recorded in the same way as single-pitch ascents. However, theCrag allows you to record individual pitch information.
In case that the route you are ticking is a multi pitch route, the system presents you a “Pitches” section just below the Tags section.

In case you haven’t climbed all pitches, use the “Climbed pitches” slider to remove unclimbed pitches.
Expand each pitch to record the ascents gear style, tick type, who lead the pitch (selections are populated from the “Who with” field), comments, grade and length for each individual pitch.
Editing or Deleting AscentsBack to contents
You can edit or delete your own ascents after having recorded them.
- Navigate to the ascent via your logbook, your stream, the search form, or straight from the route page via the ascent counter link.
- Once the specific ascent is located, use the side Menu “Edit ascent”. This will open the Log Ascent form with all fields available when logging the ascent initially.
- Once the necessary fields are modified, click “Log Ascent”, you are done.
- On the same edit page and in the context menus is the “Delete ascent” button. The deletion will require you to confirm again, so you don't lose data by accident.
When editing ascents recorded with the former Log Ascent menu it will open in the old form. If you want to edit them using the current Log Ascent options navigate to the ascents details page (select “View this ascent” from the context menu) and click on “New Edit”.
