
A Crag Guide gives an extensive view of all sub areas and climbs at a point in the index. It shows a snapshot of the index heirachy, up to 300 climbs (or areas) on a single web page. It shows selected comments climbers have made on a recently submitted ascent.
At a minor crag level this should be suitable for printing and taking with you on a climbing trip as an adjunct to your guidebook.
This guide was generated anonymously. Login to show your logged ascents against each route.
Warning
Rock climbing is extremely dangerous and can result in serious injury or death. Users acting on any information directly or indirectly available from this site do so at their own risk.
This guide is compiled from a community of users and is presented without verification that the information is accurate or complete and is subject to system errors. By using this guide you acknowledge that the material described in this document is extremely dangerous, and that the content may be misleading or wrong. In particular there may be misdescriptions of routes, incorrectly drawn topo lines, incorrect difficulty ratings or incorrect or missing protection ratings. This includes both errors from the content and system errors.
Nobody has checked this particlular guide so you cannot rely on it's accuracy like you would a store bought guide.
You should not depend on any information gleaned from this guide for your personal safety.
You must keep this warning with the guide. For more information refer to our:
Usage policy
Contributors
Thanks to the following people who have contributed to this crag guide:
Oliver Story
Adam Rabjohns
Mark Ashmore
Dane Evans
mellor
Kyle Dunsire
Martijn van Eijkelenborg
One Day Hero
Brendan Heywood
lee cossey
The size of a person's name reflects their Crag Karma, which is their level of contribution. You can help contribute to your local crag by adding descriptions, photos, topos and more.
Some content has been provided under license from: © Australian Climbing Association Queensland (Creative Commons, Attribution, Share-Alike 2.5 AU) © Canberra Climbers' Association (CC BY-SA)
Table of contents
- 1.
Bungonia Gorge
326 in Crag
- 1.1. North Wall - Timbuktu 1 in Crag
- 1.2. North Wall - Main 41 in Area
- 1.3. North Wall - Chicken Wall 3 in Area
- 1.4. South Wall - Main 46 in Cliff
- 1.5. South Wall - Nosferatu Wall 2 in Area
- 1.6. South Wall - Phantom Menace Wall 26 in Sector
- 1.7. South Wall - Efflux Crag 2 in Cliff
- 1.8. South Wall - Little Thai Wall / Green Lagoon Wall 6 in Cliff
- 1.9. South Wall - La Rampla 1 in Cliff
- 1.10. South Wall - Cooee Point 12 in Cliff
- 1.11. Reflux Crag 20 in Cliff
- 1.12. SRC Crag / Adams Lookout surrounds 16 in Cliff
-
1.13.
Bungonia Bouldering 143 in Area
- 1.13.1. Gorge Main 55 in Sector
- 1.13.2. North & South Walls 21 in Sector
- 1.13.3. Upper Gorge 67 in Sector
- 1.14. Bungonia Canyoning North 4 in Unknown
- 1.15. Bungonia Canyoning South 3 in Unknown
- 2. Index by grade
1. Bungonia Gorge 326 routes in Crag
- Summary:
-
Bouldering, Sport climbing and other styles
Lat / Long: -34.825203, 150.017957
summary
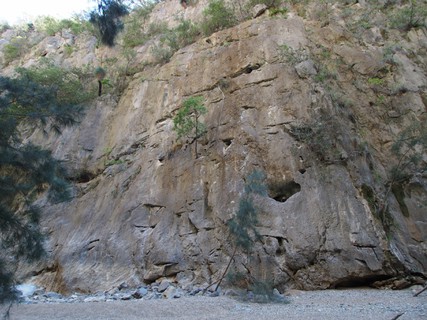
Limestone gorge two hours from Sydney, three from the blue mountains. Need I say more. Only 1.5hrs from Canberra
description
Up to 300m limestone multi-pitch climbing with single pitch sport and bouldering at the base. Some shorter climbs are on scattered crags at the top of the gorge (Reflux Crag, SRC Crag). Rap-in, climb-out area at Cooee Point.
access issues
The park is occasionally closed for feral animal control. Check here: http://www.nationalparks.nsw.gov.au/alert/state-alerts
approach
For the main deal, drive to the end of "The Lookdown road" and park 200m before the lookout at the toilets. Take the walking track called "Red track" around the gate, on the left as you come in. Then 30-40 min steep walk down into the slot canyon. (Check the map at the carpark to make sure your heading the right way down the 5hr "Red track" circuit.)
Cooee Point, Reflux Crag and SRC Crag are a 15 minute walk from the lookout, if you find your way OK.
/12/ea/12eaf2ca2b50a303be8d1a70a0dbd095b570ed5f)
Bungonia Gorge - 20231104_124048.jpg
where to stay
Camping on site. $10 per night plus $7 per car.
https://www.nationalparks.nsw.gov.au/camping-and-accommodation/campgrounds/bungonia-campground
1.1. North Wall - Timbuktu 1 route in Crag
- Summary:
-
All Trad climbing
summary
Many miles from anywhere -with access debacle to match.
| Route | Grade | Style | Selected ascents | |||
|---|---|---|---|---|---|---|
| 1 |
★★★ Rape of the Natural World
Prominent overhanging flake feature, with a hard (bolt protected) boulder problem to gain the crack proper, and a bold finish up high. Access via a short choss corner (2 bolts) and traverse right on a ledge to a single bolt belay below the main line. Bring a double rack 0.3-4. Named for both the nearby eyesore, and the god-tier hyperbole of some local crag police. FA: Paul Frothy Thomson & Tom Collins, 18 May 2023 | 25 | 45m, 2, 5 | |||
1.2. North Wall - Main 41 routes in Area
- Summary:
-
Trad climbing, Sport climbing and Aid climbing
Lat / Long: -34.795278, 150.016861
description
This wall, one of the two main walls of the gorge, has some amazing routes. Unlike the South Wall, though, you have to rap back down whatever you've climbed all the way to the floor of the gorge, then walk out the long grind back uphill to the car. Allow an hour or two for the rap descent and walk-out, and bring a head torch!
approach
The walk-down should take 25-30 minutes to the creekbed, then another few minutes to walk 100-200m down the creek to where the routes are. North Wall is on your left as you walk downstream.
Don't loiter where the descent track meets the creek bed. There are lots of goats high on the opposite hillside and they regularly knock rocks loose, which funnel down a gully to land near where the track emerges. A second gully similarly funnels any goat-loosened rocks down onto the area around Green Peace (left of Strangeness & Charm).
| Route | Grade | Style | Selected ascents | |||||
|---|---|---|---|---|---|---|---|---|
| 1 |
Operation Zucchini
Start at the extreme left hand end of the North Wall below a water polished buttress with a small roof at 10m. This is about 200m downstream of the red track. Climb to the roof and get some threads. Pull over this and up to a tree belay. FA: Tony Barten & Mike Peck, 1986 | 18 | 30m | |||||
  |
||||||||
| Route | Grade | Style | Selected ascents | |||||
| 2 |
★★ She Wolf in the Closet
FA: Chris Warner, Sep 2014 | 21 | 22m | |||||
| 3 |
★ Hips Don't Lie
Start up the water groove to the tree, then crimp up past the hanging roots to chain. FA: Chris Warner, Sep 2014 | 19 | 25m | |||||
| 4 |
★ Arctic Cat
FA: Chris Fitzgerald, Jul 2014 | 21 | 25m | |||||
| 5 |
★ Black Holes
FA: Chris Warner & Kristy Shelley, 2014 | 19 | 25m | |||||
| 6 |
Green Peace
Not often repeated, but would probably be a fun (if somewhat botanical) adventure with a bit of a makeover.
FA: Matt Madin & Andrew Kean, 1986 | 19 | 120m, 3 | |||||
| 7 |
★★★ Right in the Bunghole
A pleasant climb of sensible length, which features perfect belay stances and a spectacular second pitch. Start 5m right of the whitish R-facing corner of Green Peace. Take a single set of wires, a set of cams to #3 camalot, and maybe extra finger-hand cams. The crux pitch is fond of yellow aliens. Millions of threads, so sling up like there's no tomorrow. Two ropes needed to rap off.
Three abseils to the ground (45m, 25m, 50m). FA: Sarah Truscott, Jaime Valdivia, Dane Evans, Carl Godfrey, Damian Jovanovic & Oliver Story, 25 Nov 2018 | 23 | 130m, 4, 13 | |||||
| 8 |
★★ The Bachelor
A superb direct route to the top of the wall, with a mega second pitch. Similar in difficulty and commitment to Strangeness, but with comfortable belay stances the whole way. Take a single rack (maybe double up on red and yellow camalots), heaps of draws and slings, and double ropes.
Rap down Right in The Bunghole (45m, 25m, 50m). FA: Carl Godfrey, Oliver Story, Sarah Truscott, Damian Jovanovic, Dane Evans & Jaime Valdivia, 25 Nov 2018 | 21 | 130m, 3, 13 | |||||
   |
||||||||
| Route | Grade | Style | Selected ascents | |||||
| 9 |
Roger Ramjet
Large sized choss glazed with micro-choss, utterly petrifying.
FA: Matt Madin & Dave Magregor mid 80s, 1986 | 20 | 65m, 2 | |||||
| 10 |
Solar Wind
FA: John Fantini & W Moon, 1987 | 21 | 120m, 4 | |||||
| 11 |
★★ Rum Bum And Gramophones
Classic jug pulling in places, wandering and scary in others. Starts under the right side of a big ledge at 20m, in rather vegetated terrain.
FA: John Smoothy & W Moon, 1984 | 21 | 140m, 4 | |||||
| 12 |
Cosmic Tickler
Take the right side of the steepening buttress and follow it to connect with the final crux on Strangeness and Charm. Belay at the bathtub on the top of pitch 4 of Strangeness. Start from the top of pitch 2 of Rum, Bum and Gramophones. FA: John Fantini & Matt Madin, 1987 | 22 | 45m | |||||
| 13 |
★★ Space Quakes
Takes a line left of Strangeness and Charm all the way.
FA: Mike Law-Smith & John Fantini, 1989 | 24 | 140m, 3 | |||||
| 14 |
★★★ Strangeness and Charm - Direct Start
The left hand line through the overlap. Excellent. More committing than Wailing Cockatoo. 6 FHs in total. Rebolted 2012. FA: Giles Bradbury & Greg Moore, 1984 | 23 | 45m, 6 | |||||
| 15 |
Synchrotron
Direct through the small roof below the 2nd belay on 'Strangeness and Charm'. Rather extreme. Straight up to the roof using side runners. Slot a 1 friend in the roof, clip a bolt and swing over the roof (crux). Continue past three more bolts. FA: Mike Law-Smith & Glenn Tempest, 1989 | 26 | 45m | |||||
| 16 |
★★★ Wailing Cockatoo
Probably the best single pitch that starts from ground level in the Gorge. It's THE way to do 'Strangeness and Charm' direct, a humdingin' pitch completely in keeping with the rest of Strangeness. There is a grade 22 and 24 variant. Start directly under the 2nd belay on Strangeness, where an overlap at 12m decreases in size towards the right. Up the crack to large scoop (wires). A few more moves give way to a bolt. Get the hollow sounding flake above and trend leftwards past a bolt and straight up towards two more bolts which are 3m apart. Either whimp out left to connect with " Strangeness and Charm Direct DS" (grade 22) or directly upwards past a 4th bolt (grade 24). FA: John Fantini & Mike Law-Smith, 1988 FA: Glenn Tempest (grade 24 direct), 1989 | 22 | 45m, 5 | |||||
| 17 |
★★ Wailing Cockatoo Direct Finish
A variant out of the bathtub belay on Strangeness, which makes a good direct finish to Wailing Cockatoo (or if you just want to try something different on your 50th lap of Strangeness). P1 30m (21) Step right out of the bathtub and follow bolts and gear to mantle left into an aesthetically pleasing giant bunghole belay. P2 35m (16) Right out of the hole, duck right under the shrubbery, then straight up the fun cruisy slab. Rap station is off to the left where the angle eases way back. FFA: Nick Brown & Andrew Bull, 19 Oct 2019 | 21 | 65m, 2, 10 | |||||
| 18 |
★★ Critical Mass
Excellent.
FA: Glenn Tempest & Richard Smith, 1989 | 24 | 85m, 3 | |||||
 |
||||||||
| Route | Grade | Style | Selected ascents | |||||
| 19 |
★★ Comet Chaser
Climbed onsight ground up with no pre-inspection. Thus it is scary, sustained and badly bolted. Admirable none the less.
FA: John Fantini & Mike Law-Smith (1 aid), 1986 FFA: S Boyden & M Snell, 1987 | 24 | 150m, 4 | |||||
| 20 |
Microwave
Just right of 'Comet Chaser', a single pitch direct to the 1st belay of 'Strangeness and Charm'. The crux is at the bulge. FA: John Fantini & Mike Law-Smith, 1986 | 21 | 45m | |||||
| 21 |
★★★ Strangeness and Charm
Really good climbing, with atmosphere. All new bolts now. Start: Start below a short wide crack at the left edge of a treed ledge. If you are having problems finding the start and are unfamiliar with the gorge, walk across to the other side of the creek and suss out the route from there, the footpads of the traverse on pitch 2 are fairly obvious.
FA: G Bradbury & G Moore, 1984 | 22 | 150m, 5, 20 | |||||
| 22 |
★ Galactic Wanderer
Good. If only the corner were 10 times as long. Start: Start as for 'Strangeness and Charm'.
FA: Pitches 1, 2: Giles Bradbury, Greg Moore. Pitches 3, 4: John Fantini & Matt Madin, 1985 | 21 AID:A1 | 160m, 4 | |||||
| 23 |
Cosmos
A more direct start to 'Galactic Wanderer'. Looks runout. Start: Start about 5m right of 'Strangeness and Charm'. FA: Mike Law-Smith, 1986 | 22 | 45m | |||||
| 24 |
★★ Big, Dark and Mysterious
1st line of fixed hangers to the right of the start of strangeness
FFA: pitch 3 freed by Jan (czech) FA: Graham Fairbain, 2005 | 30 | 3 | |||||
  |
||||||||
| Route | Grade | Style | Selected ascents | |||||
| 25 |
★★★ Masters of the Universe
An old Andrew Bull/Tony Barton project cleaned up and finished by Graham Fairbain. Climb details to be verified. At least 6 pitches - crux pitch of 26/27. Sport route on fixed hangers. Please note that the description and grades are preliminary only. You'll need two ropes to get down. It is possible to retreat from any of the belays. The rap line, however, does not not follow the route directly (i.e., you can't easily stop at pitches 2 or 3 on the way down because the pitches above them traverse and they are steepish. So best not to leave stuff you want to collect on the way down at these belays (e.g., don't leave your extra clothes etc. in the hole!). Start: Line of hangers to the right of 'Big, Dark and Mysterious'.
FA: Graham Fairbain, 2005 | 26 | 160m, 6 | |||||
| 26 |
Chicken Head Row
The overhanging line.
FFA: Richard Watts FA: John Fantini & Dave Magregor, 1989 | 21 AID:A1 | 45m, 2 | |||||
| 27 |
★ Morgan Mortimer Route
Hard and amazing for its day. Still amazing.
FA: Pete Morgan & Greg Mortimer mid 70s, 1975 | 22 | 75m, 2 | |||||
| 28 |
★★ Coal Sack
FA: John Fantini & Dave Magregor, 1985 | 22 AID:A1 | 200m, 5 | |||||
| 29 |
Red Shift
Connects 'Jewel Box' to 'Coal Sack'.
FA: John Fantini & Matt Madin, 1985 | 23 AID:A1 | 170m, 4 | |||||
      |
||||||||
| Route | Grade | Style | Selected ascents | |||||
| 30 |
★★ Dark Side of a Loon
Starts 5m left of Jewel Box
FA: Chris Warner, 2008 | 25 | 85m, 3 | |||||
| 31 |
★★ Jealous Mistress
Hard and sustained, start a few metres right of the overhang on bolts. Goes up 6 pitches and nicely run out at times. A small rack can lessen run outs. FA: Graham Fairbairn, 2007 | 28 | 4 | |||||
| 32 |
★★★ Jewel Box
Sustained and strenuous, a classic. Protection is hard to place on the first pitch, and friends have been known to pull out of glassy placements. Fantini himself now says he would not lead pitch 1 again due to the extreme danger of the first 18m. Take it easy.
FFA: pitch 1 J Demontjoy FA: John Fantini & Tony Barten, 1984 FFA: pitch 2 Chris Plant & Ton Snelder, 1986 | 23 | 150m, 3 | |||||
| 33 |
Hyperspace
Start: Start 6m right of 'Jewel Box'.
FFA: Zac Vertrees FA: John Fantini (uncertain - pre 1996?), 1990 | 29 AID:A1 | 130m, 4 | |||||
| 34 |
★★★ Teflon
Fantastic rock and sustained. 12 bolts on the white wall. FA: Lee Cossey, 2001 | 31 | 23m | |||||
| 35 |
Teflon Extension
"A fun day out"
FA: zachary vertrees & Wiz Fineron | 31 | 5 | |||||
| 36 |
★★ Kevlar
Between Teflon and Olympus mons. Finish at Teflon anchor. FA: Graham Fairbairn, 2008 | 30 | 25m | |||||
| 37 |
★★ Olympus Mons
Has this had a second ascent? Covers mind boggling terrain. Takes all the orange overhanging corners at the downstream end of the north wall. All belays are on bolts.
FFA: pitch 1, Rolando Archer, pitch 3, 4, Andy Richardson & lee cossey FA: John Fantini & Keith Bell, 1991 | 26 AID:A1 | 220m, 6 | |||||
| 38 |
Crab Nebula
Probably good for sussing out the hard stuff below. Pitch 1 is not great.
FA: John Fantini & Dave Magregor, 1985 | 21 | 220m, 6 | |||||
| 39 |
★★★ Planet Gorgonberg
Great climbing on the wall just right of 'Olympus Mons'. FA: Andrew Bull, 1999 | 27 | 20m | |||||
| 40 |
Premonition
Start 60m right of 'Olympus Mons' at the toe of the wide prominent buttress. No bolts. Scary.
FA: Vera Wong & Andrew McAuley, 1998 | 22 | 170m, 4 | |||||
| 41 | 0 | |||||||
1.3. North Wall - Chicken Wall 3 routes in Area
- Summary:
-
All Sport climbing
Lat / Long: -34.795756, 150.019640
description
Big, steep and mostly undeveloped. Probably the greatest potential for hard routes in the country. Apparently the rock quality improves the higher you get.
Being on the North side of the gorge, you have to allow time to rap off after doing these routes then walk out.
approach
Further downstream of the buttress climbed by 'Olympus Mons' is a yellow wall about 60m uphill. I.e. 'Chicken Wall' is the eye catching yellow wall on the righthand end of the 'North Wall'.
  |
||||||||
| Route | Grade | Style | Selected ascents | |||||
|---|---|---|---|---|---|---|---|---|
| 1 |
Cossey Project
Three pitches of epic hard climbing - bolted ground up. Starts as for Finger Lickn' Good but continues up and left.
| 160m, 3 | ||||||
| 2 |
★ Finger Lickin' Good
The left line. Sustained blocky edges and sidepulls with a rooflet in the middle. A bit dirty but good climbing. Needs more traffic! FA: Andrew Bull, 1999 | 23 | 25m, 9 | |||||
| 3 |
★ Hawaiian Pack
The right line. 11 bolts. FA: Rob LeBreton, 1999 | 24 | 30m, 11 | |||||
1.4. South Wall - Main 46 routes in Cliff
- Summary:
-
Trad climbing, Sport climbing and Aid climbing
Lat / Long: -34.796539, 150.017406
description
Gets the sun all day up high, hence good for winter climbing. However the Siblings headwall gets shade from about 3:30 PM in the warmer months (and even earlier, around 2:30 PM, for Evolution Direct Finish and adjacent pitches), allowing several hours for shady evening climbing if you time your approach accordingly.
approach
Park at William Mitchell carpark. Most people walk down, to do this follow the Red Track into the slot canyon (25-30 minutes). Turn right when you reach the creek bed (don't loiter here; there are lots of goats high on the opposite hillside and they regularly knock rocks loose, which funnel down a gully to land near where the track emerges). Walk downstream for a few minutes; the south wall is on your right.
It is also possible to abseil in. Get to the top of Siblings by walking down the Red Track for 5minutes until the first 10m high outcrop appears about 100m to your left, where you will find a well trodden path which breaks off to the right (at a red star picket) and then traverses across the hillside for about 300m. Once you reach the front of a broad ridge, the top of Siblings is about 100m down the ridge. The rap chains are a few metres from the clifftop, but you still need to approach with caution as the scree is a bit loose. Bring a rope protector for the top edge; and its probably best to fix a rope on the top abseil at least. You can get to the riverbed in 4 abseils (approx 30m, 55m, 55m, 55m). It might even be possible in three long abseils, given that from the clifftop to fifth belay is 60-65m (keep up a swing), fifth belay to third belay is 60-65m, and third belay to ground/bouldertops is about 60-70m(??). The three abseil approach has NOT been tested, but there are plenty of intermediate bolted anchors if you needed to change tactics.
If you're an orange rock snob with an aversion to grey slabs, all of the pitches on the Siblings headwall can be approached by abseil, there are lots of bolted anchors across the top which can be reached from above.
descent notes
Many routes top out. To get back to the car its a pretty easy (15-20 minute) walk uphill. Option 1 is to follow the ridge (above Siblings) all the way to the hilltop (~10 minutes), then turn left and follow the plateau rim left through the scrub for about 300m to reach Bungonia Lookdown. Option 2 is to go up the ridge above Siblings for about 100m then pick up a well-trodden trail which heads R (W) and traverses for about 300m into the gully to join the Red Track. Option 1 is quicker if you have a car at the Lookdown but Option 2 is just as quick to the Red Track carpark and is better graded (less steep bits).
| Route | Grade | Style | Selected ascents | |||||
|---|---|---|---|---|---|---|---|---|
Pulsar SlabThese routes are located at the downstream end of the gorge, on a slick water polished grey slab directly above the boulder choke section. There are a smattering of bolts. | ||||||||
| 2 |
Slope'n Soap'n
This route is the furthest downstream, about 2m left of the Pulsar corner.
FA: Tony Barten, Andrew Bull pitch 1 1990. Andrew Bull, Craig Kentwell & Brogan Bunt pitch 2 1989, 1990 | 24 | 50m, 2, 6 | |||||
| 3 |
★★ Pulsar
Nice low angle trad route with mostly good gear. Should be more popular - possibly the best easy trad route in the gorge?
FA: Phil Georgeff, Bill Begg & Matt Madin, 1985 | 18 | 45m, 2 | |||||
| 4 |
★★ Lithium Ricochet (Closed Multi-Pitch Project)
The route is set up so it can be rapped in from the top with DRBB the whole way, bring 2 x 70m for this. It will provide access to a large section of this wall that has lots of rock. The 1st pitch and pitch12 (rap in).have been sent and are ok to climb, but rest is a closed project. Will be 12 pitches, equaling Red Supergiant one of the longest routes in the Gorge. Pitches 2-11 are currently being cleaned and bolted so stay off please.
Set: Matt Brooks, Neil Monteith & Leith Dawes, Aug 2014 FA: Neil Monteith & Richard Sonnerdale (pitch 1 only), 11 Oct 2014 | 300m, 13 | ||||||
| 5 |
★ Stardust
The next line right with four spaced FHs. Apparently there is no rap anchor so after the last bolt and below the overlap traverse left a long way to rap anchors above Pulsar. FA: Scott Camps, 1985 | 20 | 50m, 4 | |||||
| 6 |
Startrek
The grotty slab next right. | 18 | 50m | |||||
| 7 |
Antique
Up the slab past three bolts to ledge and tree. | 20 | 50m, 3 | |||||
South Wall Main Section50m upstream from the Pulsar Slab, where the jungle vegetation comes right down to the base of the cliff. | ||||||||
| 9 |
★ In The Lap Of The Mountain Gods
Can be used as a variant start to Red Supergiant.
FA: Will Moon & Bruce Cameron, 1985 | 21 | 65m, 2 | |||||
| 10 |
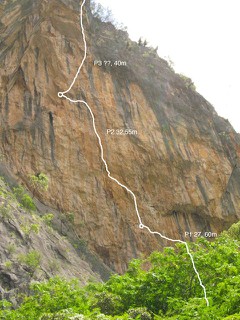
★★★ Red Supergiant
An alpine mega classic. Long loose and natural. Finishes at the highest point on the cliff, the Cooee Lookdown. Take plenty of long slings and big friends. Start: A chipped square marks the start.
FA: John Fantini & Dave Magregor, 1985 | 20 M1 AID:A1 | 370m, 8 | |||||
| 11 |
★★★ Luminous Blue
An awesome excursion taking the line of most resistance up the tallest section of the south wall. The route takes in some wild and physical territory as it journeys up the wall to its final crux just below the rim of the gorge. Starts on the clean section of slab a short distance right of the base of Red Supergiant and just before the base of the wall becomes a jungle. It is easily identified by the stainless steel fixed hangers meandering up the slab and into the steepness beyond.
Set: lee cossey, 21 Nov 2016 FFA: lee cossey & Andrea Hah, 26 Aug 2017 | 29 | 310m, 9, 99 | |||||
| 12 |
Rob LeBreton and Tim Booth's project
Takes a line through the big orange overhang left of its apex.
| 4 | ||||||
| 13 |
Strider
From the ledge up through the rooflet and the wall above. FA: Steve Schnell, 1989 | 16 | 35m | |||||
| 14 |
★★★ Air Malta
Starts left of Nitro Express. From the river bed skirt up and along a ledge to near its end. All bolts and for Bungonia very clean with little loose rock.
Set: Duncan Hunter, Michael Demarco & Johannes Friedl FFA: Duncan Hunter FA: Duncan Hunter & Michael Demarco, 15 Mar 2016 | 25 | 220m, 6, 18 | |||||
| 15 |
★★★ Kia Kaha Direct
Variant to Air Malta overhang. Kia kaha is a Māori phrase used by the people of New Zealand meaning stay strong, used as an affirmation. The phrase has significant meaning for Māori: popularised through its usage by the 28th Māori Battalion during World War II, it is found in titles of books and songs, as well as a motto.
FA: Duncan Hunter FFA: Mark Rewi & Duncan Hunter, 26 Mar 2016 | 27 | 50m | |||||
| 16 |
★★ Nitro Express
Awesome, can be combined with Screaming Tribesmen to make a sustained route to the top. Starts towards the left-hand end of a left-leaning ramp.
FA: John Fantini & Keith Bell, 1991 | 23 | 120m, 4 | |||||
| 17 |
★ Arachnophobia
As slippery as a butcher's dick. Start 5m right of 'Nitro Express'. Up the technical wall past 3 bolts to a good #2 Friend. Step left and pad your way left into the crack. Climb the crack and finish up past several more bolts. Belay on ledge to the left as for 'Nitro Express' P1. FA: Mike Law-Smith, Cath Eadie & Glenn Robbins, 1989 | 19 | 35m | |||||
| 18 |
★★★ Iron Curtain
A great route to start with in the gorge, but it only climbs halfway up the wall. Well protected and not too hard. If you are falling up it with your eyes closed try continuing up 'Screaming Tribesman' to top out.
FA: Pitch 1: Craig Kentwell, Andrew Bull, Brogan Bunt: Pitches 2 to 4: Andrew Bull & Craig Kentwell 1990, 1990 | 22 | 130m, 4 | |||||
| 19 |
★ Bob Yabbie
FA: David (Bobby) Gilbert & Greg Coterill, 1988 | 22 | ||||||
| 20 |
★ Screaming Tribesman
A rarely repeated long involved adventure with very tricky route finding, some choss rock and fiddly gear. Bring a full rack, doubles of everything and lots of tiny cams. Double ropes a must, even if you are just using them for retreat! It's much more consumer friendly, and a classic climb, if you do 'Iron Curtain' then pitches 6-9 of this route.
FA: John Fantini, Phil Georgeff, Dave Magregor worked on it. John Fantini, Ed Garnett made the first complete ascent & early's., 1990 | 25 | 280m, 9, 1 | |||||
| 21 |
★★★ Asteroids
This route starts 5 pitches up the wall! Best accessed by climbing all of Iron Curtain, then pitch six of Screaming Tribesman. Asteroids starts at this belay.
Above this to get back to the car park walk left for 30m to the old Cooee lookout and old fences, then follow the overgrown green track to the car up the hill. I reckon this new route by itself is two stars and combining it with Iron Curtain makes an awesome three star day of cranking! I can't think of many other sustained long routes in mainland Australia at that length? It's gotta be 350+ metres? Way longer than Evolution or Siblings. Bring a helmet and don't expect pristine Euro limestone... FFA: Duncan Hunter, 2011 | 26 | 180m, 6 | |||||
| 22 |
The Misfits
A spectacular pitch tackling a very steep line through the Screaming Tribesmen orange cave. A variant on the best pitch of 'Screaming Tribesman' but even more awesome and harder. Start: Start at a bomber gear belay just down and right of the DBB atop the 5th pitch of Iron Curtain/ Nitro Express/ 'Screaming Tribesman'. FA: Ken Luck & Andrew McAuley, 1999 | 23 M1 | 30m | |||||
| 23 |
★★ Red Heat
Start: Starts just left of 'Evolution'.
FA: John Fantini & Keith Bell, 1990 FFA: First claimed ascent of top pitch, Chris Ling, Damian Jovanovic & May have been freed earlier, Oct 2016 | 22 | 240m, 7, 1 | |||||
| 24 |
Old and Grey
(18M1). "See topo" they said......this route isn't shown on The Crag topo! Details unsure, however a likely situation is that it shares the start of Red Heat before traversing right, sharing the end of the first pitch of Evolution. Keep going past Evolution's belay to to bolted belay 10m right on the same ledge (shared with Jump Master and 'The Bridge to Total Freedom'). Up the next pitch and a half of Reason for Man (passing a couple of bolts), before traversing left back across 'The Bridge' and into Red Heat for a pitch or so to gain the large 'Evolution cave'. 'Old and Grey' then traverses left a pitch to join Scorpion to the top of the wall. Note that Old and Grey predates all the other routes on this wall. A great effort for the time, but unlikely to appeal to anyone sane these days. FA: Ian Brown & Don Fletcher, 1977 | 18 AID:A1 | 300m | |||||
| 25 |
★★ Aurora
As per 'Evolution' to double bolt belay end pitch 3. Start: Start in the rainforest 30m left of the corner crack start to Siblings. The first pitch is grade 15 vegetated thrutch, it's not a taste of what's to come.
FA: M Wilson & J Clark, 2001 | 25 | 240m, 8 | |||||
| 26 |
★★★ Evolution
Gobsmackingly good. Take a light rack of cams (0.3 to 2), a set of wires and about 16 quickdraws (with plenty of long draws). Start: Start in the rainforest 15m left of the corner crack start to Siblings. From the riverbed scramble up the broken blocks to the base of the wall proper. Belay from here. The climbing starts underneath the bush canopy, under a water-run/chimney/hole thing. The first pitch is grade 15 vegetated thrutch, it's not a taste of what's to come.
FA: Andrew McAuley, Vicki O'Malley & Greg James., 1997 | 24 | 220m, 7, 55 | |||||
| 27 |
★★★ Evolution Direct Finish
An aesthetic and fitting finish to Evolution for those seeking a little more action at the end of the day. Originally climbed onsight due to poor route finding with insufficient gear. A subsequent repeat ascentionist of the pitch however found an additional placement making it quite reasonable. Be sure to take a thin spectra/dyneema sling. Climb as for Evolution pitch 7 for the first 3-4 bolts as they head through the initial boulder problem and then leftward. From the short section of grey tufas and cam placements, continue straight up in the direction of a lone bolt 5m above. From this bolt traverse right along a thin break with delicate moves to finish up the low angled terrain and corner (now shared with Pumpmaster). FA: Lee Cossey, 2000 | 25 | 40m, 6 | |||||
| 28 |
★★ Pumpmaster
Between 'Evolution Direct Finish' and 'The Other End of Evolution'. After freeing past the first three bolts on Evolution P7 take a long rest on the ledge, then head straight up past 9 more bolts. FA: Rikard Hedman, 18 Oct 2015 | 27 | 30m, 12 | |||||
| 29 |
★★★ The Other End of Evolution
A harder exit to Evolution, without the bushwhacking. Start with the bolt ladder on the last pitch of Evolution (aid 3 bolts or free at grade 24), then head diagonally right past a bolt into a scoopy recess. From the top of the recess exit left through the overhang, then straight up to pull over onto a slab. Continue straight up and then left to join 'Pumpmaster'. A couple of long draws on the bolts in the recess help reduce rope drag. FA: Rikard Hedman, 15 Aug 2015 | 24 | 30m, 12 | |||||
| 30 |
★★ Flubless
Good, free of charge, training to reach flawlessness. As for 'The Other End of Evolution' to the top of the recess. Exit this to the right into a a narrower vertical scoop. Funky moves straight up more scoops and a flake until you pull over onto the slab. To finish either head straight up past two more bolts to anchor or diagonally right to Jumpmaster belay. FA: Rikard Hedman & Damian Jovanovic, 6 Aug 2015 | 25 | 30m, 11 | |||||
| 31 |
Pump Lust
Do a move or two as for 'Evolution' pitch 6, then trend R following the line of bolts up the left hand side of the big cave, eventually joining 'Jump Master' at the top of its first pitch. Start: Start as for 'Evolution' pitch 6. FA: George Feig late 90s, 2000 | 29 | 25m | |||||
| 32 |
★★★ Jump Master
P1-4 are the most direct and consistent route to the big cave, well protected with bolts and plenty of gear. P6 is another excellent Bungers headwall pitch. Take 14 or so quickdraws, a few slings, a set of nuts and cams from green alien to #3 camalot, double cams from fingers to hands might be helpful on p4. Start 3m right of Evolution, first bolt can be clipped by standing in tree.
FFA: Andrew Bull early 90s & P5-6, 1990 FA: John Fantini early 90s & P5-6, 1990 FA: Damian Jovanovic, Chris Ling, Oliver Story, Daniel Fisher (work experience kid), Sarah Truscott & P1-4, 2015 | 25 | 200m, 6, 60 | |||||
| 33 |
Storm Front
Storm Front basically runs to the right of Evolution. Nasty loose blocks on ledges, very dirty rock, and vegetation filled cracks are the selling points of this gem. The climb either starts up Evolution, or 5m right (up the horrible hole thing), no idea which start is correct. On pitch 1 there is a 10m wide, delicate, rock arch/flake that you actually climb through (about 40m up, can be seen from the creek bed). "The last two pitches are not recommended" (first ascentionists)....a more objective view might be that the last seven pitches are not recommended!
FA: Mark Wilson & Richard Watts late '80s, 2000 | 20 | 270m, 7 | |||||
| 34 |
★★★ The Bridge to Total Freedom
A Bungonia mega-route. Start at the large R-facing flakes in the chasm. 10m right of Evolution, and a few metres left of Andrew's Arete / left and round the corner from Siblings. Gear: single set of nuts; #0.3 Camalot (or green Alien or #1 Mastercam) to #3 Camalot, (optional: doubles to #1 Camalot); 120cm sling; several 60cm slings; 15 or so quickdraws.
FA: Damian Jovanovic, Oliver Story, Chris Ling, Carl Godfrey, Nick Herrald & Sarah Truscott, 2015 | 25 | 190m, 7, 48 | |||||
| 35 |
Scorpion
An old time epic.
FA: John Fantini & Dave Sargent, 1985 | 22 | 220m, 7 | |||||
| 36 |
★ Reason For Man
How brave are you feeling? This old traddy thing shares the first pitch with Siblings, then most of the second to fourth pitches with Old and Grey, before heading a long way right at the base of the red wall to find a scary way through to the top.
FA: John Fantini & Tony Barten, 1985 | 22 | 280m, 7 | |||||
| 37 |
★★ Flaming Galah
Excellent continuous climbing that pushes a direct line up the centre of the South Wall. The first 4 pitches of this route makes for a straight forward sports climb that is easy to get off in 2 raps if climbing with double ropes. Sport bolted over 6 long days.
FFA: Jan (Czech) FA: Chris Warner, 2006 | 30 | 230m, 7 | |||||
| 38 |
★★★ Overture to the Sun
First two pitches as for Siblings of the Sun. Then from the second belay go directly up to join a hand crack (rather than trending right and up from this belay, which is Siblings). From here continue up the soaring line of bolts with increasing difficulty, with the final 2 pitches tackling the orange headwall (5m L of Siblings' last 3 pitches).
FA: John Fantini late 90s, 2000 | 27 | 75m, 7 | |||||
| 39 |
Andrew's Arête
An alternative way to get to the top of the spike and the first belay of Siblings of the Sun. Great climbing and eases off a lot after the first bolt. The route takes the sharp bolted arête 5m left of the corner crack of Siblings pitch 1, starting on its right side then switching to the left. FFA: Steve Monks early 90s, 1990 | 24 | 35m | |||||
| 40 |
★★★ Siblings Of The Sun
An all time classic, the beginning of the new wave at Bungonia. The corner crack start is back down and behind the massive jumble of collapsed boulders that peeled away from the bottom of the 'South Wall' when dinosaurs ruled the Earth. 14 quickdraws, including some extenders. Mostly bolts, but take a single set of cams (#0.4-3 camalot) - doubles of 0.75, 1 and 2 for extra comfort - and wires. A second blue camalot (or a big hex) makes the first pitch more comfortable, but you won't need it higher up.
FA: Tony Barten, Andrew Bull & Craig Kentwell, 1989 | 26 | 260m, 8, 61 | |||||
| 41 |
Siblings Variant pitch 2
(24/25) From the 1st belay at the top of the spike. Instead of heading up and right across the slabs, head straight right following the bolts through the overhang. Continue right on natural gear to the belay. FA: Lee Cossey, 2000 | 24 | 40m | |||||
| 42 |
★★ The Penumbra Variant
An easier alternative to the 3rd pitch of Siblings of the Sun. Start: From the start of the 3rd pitch of Siblings scramble right 20m to belay off the last tree.
FA: Craig Kentwell, Andrew Bull & Tony Barten, 1989 | 19 | 45m, 2 | |||||
| 43 |
Medusa
Takes a line between 'Siblings Of The Sun' and 'Albino'. Start as for Siblings. All bolts, no gear or brackets required. Follow the Penumbra Variant from the top of Pitch 2 of Siblings. 'Medusa' starts from the tree belay between the two climbing pitches of the Penumbra Variant.
FA: Robyn Cleland & Vera Wong, 2000 | 25 | 130m, 5 | |||||
| 44 |
★★ White Noise Direct
Steep jamming up the exposed furrows above Albino pitch 6. Start at the DBB 5m left of the belay at the bottom of Albino pitch 7 and White Noise. Follow the line into the cave, latch onto the holds above the lip then join White Noise at the end of its traverse. FA: Carl Godfrey & Lazar Bodor, 10 Feb 2021 | 23 | 35m, 2 | |||||
| 45 |
★★★ White Noise
A classy alternative to the last pitch of Albino. Clip the bolt directly above the belay at the top of Albino pitch 6, ooze up the gash then follow the technical and airy line to the top. Hand to fist sized cams in the crack then all bolts to a DBB. Exit by traversing right to the DBB at the top of Albino pitch 7. FA: Carl Godfrey, Damian Jovanovic & Duncan Hunter, 5 Sep 2020 | 23 | 35m, 11 | |||||
| 46 |
★★ Albino
An exhilarating and technical adventure. Once the easiest way to the top (!) but tougher and more serious than some of its neighbours (e.g. Evolution). Cleaned and rebolted in 2020, each pitch ends at double rings. New hardware generously donated by climbinganchors.com. Take a set of wires, a set of cams (#0.3 to 3), slings and at least 14 draws. A second #3 cam is nice to have but not essential for the first pitch of Siblings Of The Sun and for finishing up White Noise (highly recommended). DOUBLE ROPES are essential due to zig-zagging long pitches.
FA: Andrew Bull & Craig Kentwell, 1991 | 24 | 270m, 7, 55 | |||||
| 47 |
Gasoline Alley ??
In there somewhere. | |||||||
| 48 |
★★ Solar Flare
This obscure but apparently good route lies upstream of 'Albino' and is accessed by abseil from the top of the gorge. There is no pitch from the ground. Start: The route starts from a cave/recess above the big overhangings at the bottom of the gorge. The top of the rappel is 2 bolts near a tree. 3 long rappels reaches the cave. The raps trend rightwards.
FA: John Fantini, Richard Watts & Keith Bell, 1987 | 22 | 150m, 4 | |||||
/a2/2e/a22e0c8a01484ae925080456d504d1f752cf5350)   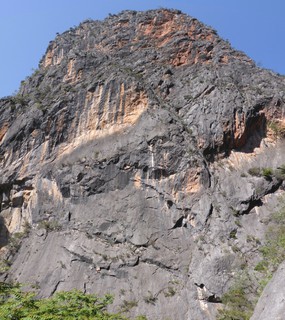 /95/4c/954cc83261d9d9437107ac9e2ac37d0689a1d14e)      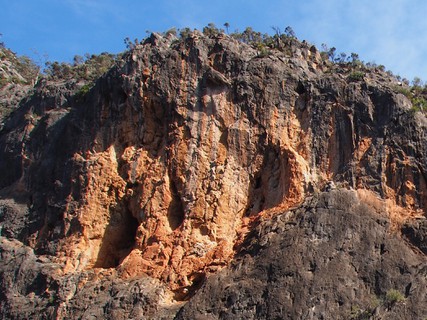  |
||||||||
1.5. South Wall - Nosferatu Wall 2 routes in Area
- Summary:
-
All Trad climbing
Lat / Long: -34.796053, 150.015460
description
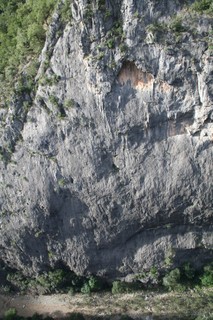
This is the black slabby portion of the 'South Wall' to the right of the Siblings area, and left of the 'Phantom Menace' area. It's a real shame that most of this sector is inaccessible due to blank overhangs down low.
| Route | Grade | Style | Selected ascents | |||
|---|---|---|---|---|---|---|
| 1 |
Nosferatu
FA: Mike Peck & Tony Barten Early 90s, 2000 | 25 | 120m, 3 | |||
| 2 |
Superfluid
FA: Julie Styles, Mike Peck, Ken Luck & Kieran Lawton, 1998 | 24 | 120m, 3 | |||
1.6. South Wall - Phantom Menace Wall 26 routes in Sector
- Summary:
-
Mostly Sport climbing
Lat / Long: -34.795816, 150.014352
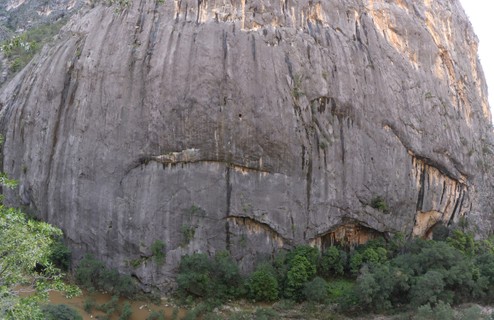
description
This is the overhanging wall with some prominent stalactites first up on your right when you enter the gorge walking downstream. There is a big tree'd (Big Greenie) ledge at 30m height. Celestial Mechanics starts from the left end of this ledge. Phantom Menace, Sith Lord and Evil Empire start above and mid way along it. The easiest way onto Big Greenie is via Polenta Pumper (25) - becomes easier with a long stick and some french freeing. Routes are listed from right to left when facing the cliff.
approach
Surprisingly, the walk in to here is very reasonable, and takes a little under 30 minutes at a moderate pace. Speedsters without knee problems could probably get here in 20 minutes. Walking back up the hill will probably take twice as long!
Don't loiter where the descent track meets the creek bed. There are lots of goats high on the opposite hillside and they regularly knock rocks loose, which funnel down a gully to land near where the track emerges.
descent notes
Most routes have bolted lower-off anchors suitable for a single 70m rope.
| Route | Grade | Style | Selected ascents | |||||
|---|---|---|---|---|---|---|---|---|
Polenta Pumper Wall (Ground Level)A lovely chunk of very water polished rock at ground level - with a sandy base (that can sometimes be flooded). | ||||||||
| 2 |
Auto Arrest
Start about 30m upstream of Polenta Pumper. Scramble up easy flowstone to small ledge covered in vines. Sketchy flowstone choss for 6m to reach crack, then up major corner to belay ledge. Not recommended until bolts added to start. FA: Tony Barten & Mike Peck, 1986 | 20 | 30m | |||||
  |
||||||||
| Route | Grade | Style | Selected ascents | |||||
| 3 |
★★ Planet Earth
Amazing rock architecture. Also a way to get onto Big Greenie. Starts in the corner about 20m upstream of Polenta Pumper.
FA: George Fieg, Mike Peck & John Stone, 1991 | 25 | 65m, 3 | |||||
| 4 |
★★ Sarah Fieg's Route
Just left of the corner. Water washed rock for a few bolts then left and up to anchors. Has been rebolted - new shiny FHs. Some are already loose and required finger tightening (2016, still true in 2019). FA: Sarah Fieg & late 90s | 24 | 17m | |||||
| 5 |
★★ White zombie
Starts half a metre left of Sarah Fieg's Route. Bouldery and direct up little prow. Shares anchor with previous route. There's also a LH finish along the lip of the roof to finish into Polenta Pumper. FA: George Fieg & late 90s | 27 | 17m | |||||
| 6 |
★★ Polenta Pumper
Very good, very pumpy. The original route on this wall. Start beneath the obvious roof at 15m and follow a line of stainless steel fixed hangers up square cut slopers. If climbing on Phantom Menace Wall you need to continue on easy ground for 10m (two bolts) to Big Greenie ledge and bolt belay. It's 30m from this high anchor to the ground. FA: Mike Peck, 1987 FFA: Mike Law-Smith, 1988 | 25 | 25m, 7 | |||||
| 7 |
Open Project
Just left of PP. Bolted by George Fieg in the 90s, now an open project. Attempted by Lee Cossey - so probably quite hard! Set: George Fieg | |||||||
| 8 |
Fluidity
Just left of the open project. The shortest route in the gorge but mega burly. FA: Andy Richardson, 2011 | 29 | 4 | |||||
| 9 |
Nails
The very appealing steep left-trending blunt arete just left of Fluidity. Looks great so we'll open the bidding at 2 stars. Higher or lower bids accepted! 30 the way Phil did it, but some better beta was later found. FA: Phil Sage 2000s | 29 | 20m | |||||
| 10 |
Nails LHF (Open Project)
Link Nails into Ben's RHV Project. | |||||||
| 11 |
Closed Project (Ben)
The RHV of Ben's project. | |||||||
| 12 |
Closed Project (Ben) 1
Start at ground level a few metres right of Lee's project. | |||||||
| 13 |
Closed Project (Lee)
Start at ground level, under the subtle left-facing "flake"-type feature. | |||||||
| 14 |
Unfinished Project (Graham)
This is an unfinished line with 1 or 2 bolts. Start at ground level at the far left end of the steep wall, about 8-10m L of Lee's project. Some more projects were recently added in this vicinity. | |||||||
Big Greenie LedgeThe following routes start from Big Greenie, the vegetated ledge above Polenta Pumper. Climb that route to get to this ledge. | ||||||||
| 16 |
Wicket
Short access pitch to reach Jabba the Slut & Death Starred starting at rap anchors above Polenta Pumper on Big Greenie ledge. Old FH, sling around tufa and new FH through steep bit. An orange fixed line hangs over the lower part and then heads left via the start of The Force. FFA: Neil Monteith, Matt Shultz & Lee Cujes, 2012 | 17 | 10m, 3 | |||||
| 17 |
Access Traverse
A fully bolted rising traverse with a fixed rope starting as for Wicket for one bolt then heading left along a series of ledges and slabby chimneys. This route is used to access the various belay stances for routes in the centre of Phantom Menace Wall. The rope in the upper half (beyond Attack of the Clones) is old - treat with massive caution! | 14 | 30m | |||||
| 18 |
★★ Jabba the Hut
Right line of bolts off the ledge above Wicket. Flowstone corner and face to luscious ceiling and punchy pocketed finish. There is a single rap ring under the roof to aid cleaning the route. FA: Neil Monteith, Lee Cujes & Matt, 2012 | 24 | 22m | |||||
| 19 |
★★ Jabba the Short
Jabba the Slut, stopping at the ringbolt under the roof. A good warm up if you get dragged up here on a 5 degree day. FA: Neil Monteith, 2012 | 20 | 15m, 7 | |||||
| 20 |
★★★ Death Starred
Amazing limestone features. Left line off the ledge climbing the flowstone corner (take care with the stalactite) then climb left onto the prow on mega buckets and then up the steep headwall with spicey finish. Neil managed to drop a large rock on himself whilst bolting this - lucky it hit his body not his head. FA: Neil Monteith & Matt Shultz, 2012 | 23 | 23m | |||||
| 21 |
★★ The Force
Belay from double bolt anchor 8m along the Access Traverse route, below the orange left facing chimney. Up chimney for a move (clip first bolt inside chimney with a long sling) then FHs out right and up crozzley grey slab then amazing overhung tufa groove and flowstone wall to final tricky bulge. FA: Neil Monteith, 2012 | 22 | 26m, 11 | |||||
| 22 |
★★★ Degabar System
Great tufa pulling. Very awkward belay on double bolts on orange slab at right end of fixed rope traverse. Traverse up and right across horizontal break and take the right of the two ring bolted lines. Big tufa feature for most of the way, then tricky orange face to finish. 60m rope WILL NOT reach the belay on lower-off. Its much less uncomfortable to belay 5m lower, as for The Force, if you have a long rope and/or rethread. FA: Andy Richardson, 2001 | 25 | 33m | |||||
| 23 |
★★★ Attack of the Clones
Fantastic sustained climbing on tufa blobs and flowstone - reminiscent of Kalymnos. Shares the crappy awkward belay and first couple of bolts with DS, then take the left of the two ringbolted routes. This is a full 30m pitch, with a 60m rope you will only JUST make it to the belay. Its much less uncomfortable to belay 5m lower, as for The Force, if you have a long rope and/or rethread. *Dodgy clip and go has been removed. There's a string of seized Mallions and an ok looking alloy biner on the anchor. If anyone is heading up to fix it, take WD40,long shifter and screwdriver, stainless mallions and either a short bit of chain or a couple of clip and go's. | 25 | 31m | |||||
| 24 |
Phantom Menace
More incredible limestone. Start as for the previous two routes for one bolt, then traverse left on FHs to groove - then up wall above. 60m rope will NOT reach belay - lower to fixed biners near cave then lower again. FA: Andrew Bull, 1999 | 28 | 35m | |||||
| 25 |
★★★ Sith Lord
Really good. FA: Rob LeBreton, 1999 | 27 | 25m | |||||
| 26 |
★★ Obi goes to Fungonia
Fantastic steep gymnastic climbing out of the initial cave then navigates some more tenuous climbing up several shallow tufas to the crux. Starts in the cave at the left end of the fixed rope and finishes as for the final 2 bolts of Sith Lord. Set: lee cossey, 2001 FFA: lee cossey, 18 Jun 2017 | 31 | 32m | |||||
| 27 |
Evil Empire
The left most line of bolts is a project, probably about 29. FA: George Fieg, 2000 | |||||||
| 28 |
Celestial Mechanics
Start: Start from the left end of Big Greenie. Takes the corner and arête.
FA: Mike Peck, Pete Mills & John Stone (var), 1990 | 24 AID:A1 | 65m, 3 | |||||
1.7. South Wall - Efflux Crag 2 routes in Cliff
- Summary:
-
All Sport climbing
Lat / Long: -34.795693, 150.013278
description
A little wall tucked away near the bottom of the descent track into the gorge.
approach
Park at William Mitchell carpark. Walk down the red track. About 50m before you reach the bottom of the gorge, the track turns right and you scramble down a few metres into the creek bed. (it is easy to mistakenly walk past this turn, continuing along the side of the gully to a good view and a dead end). Cross the creek bed and scramble onto the ledge on the opposite side (RHS as you walk down).
 |
||||||||
| Route | Grade | Style | Selected ascents | |||||
|---|---|---|---|---|---|---|---|---|
| 1 |
Hooey
FA: Chris Warner, 2004 | 16 | 18m | |||||
| 2 |
Brass Razoo
A good face climb on bolts. FA: Chris Warner, 2004 | 23 | 20m | |||||
1.8. South Wall - Little Thai Wall 6 routes in Cliff
- Summary:
-
All Sport climbing
Lat / Long: -34.795449, 150.012632
description
This little wall is about 25m high and about 80m long. A great little warm up wall offering some of the easiest routes in the gorge. A great place to start to get the feel for limestone.
approach
This little wall is immediately on the left when you get to the bottom of the red track into the slot canyon. 30 mins steep walking from the carpark.
descent notes
All the routes have lower offs.
     |
||||||||
| Route | Grade | Style | Selected ascents | |||||
|---|---|---|---|---|---|---|---|---|
| 1 |
Jug-a-licious
The first route on the left just off the red track. Was looking like a nice easy line ground up bolting untill the rock turns to choss. FFA: Ben Jenga., 2011 | 13 | 8m | |||||
| 2 |
★★ A Tufa to Far
A nice tufa route in the middle of the wall. It has some hidden good holds. FFA: Ben Jenga, 2011 | 22 | 25m | |||||
|
The following routes are at the right-hand end of the wall on the lovely flowstone-covered wall with a small cave on the right side. | ||||||||
| 4 |
★ Reservoir Dogs
3 metres left of Gilding lily. A variety of interesting hold types makes this an enjoyable moderate for the gorge. FA: nathanual hebbard & Joel Ovington, 9 Apr 2023 | 22 | 25m, 9 | |||||
| 5 |
★★ Gilding the Lily
A good warm up on bolts with some tufa up high. Start 50m upstream from the intersection of the Red Track and the bottom of the gorge. Depending on the level of water in the lagoon, and the state of the deposited silt and rocks, you might get your feet wet. The expansion bolts and dodgy anchor on this route could do with replacement - treat them with caution. FA: Chris Warner, 2003 | 22 | 25m, 9 | |||||
| 6 |
★ Lame Duck
To the right of Gilding The Lily. Finishes just under the roof at half height. FA: Chris Warner, 2003 | 20 | 15m | |||||
| 7 |
cave route, Closed Project
Closed project, partially rebolted. | 18m | ||||||
1.9. South Wall - La Rampla 1 route in Cliff
- Summary:
-
All Trad climbing
description
The big rock above Little Thai Wall
| Route | Grade | Style | Selected ascents | |||||
|---|---|---|---|---|---|---|---|---|
| 1 |
La Rampla
One for the chossophiles. A new route up a hitherto unclimbed wall. Worthwhile except for the terrible second; "Demon Baby" pitch, which will have you questioning every hold, and your love of climbing. Is the rest of it worth it? To start walk right of Little Thailand wall 50m to find a 10m ramp cutting left across the lower cliff band. All bolts except first pitch.
To walk back to the red track (20 minutes), sidle left, down talus chute 50m then continue sidling left below cliffs, down and across a swampy creek, and onto the track. FFA: & Carl FA: & Gee Rad | 23 | 180m, 5 | |||||
 |
||||||||
1.10. South Wall - Cooee Point 12 routes in Cliff
- Summary:
-
Sport climbing and Trad climbing
Lat / Long: -34.796947, 150.018627
description
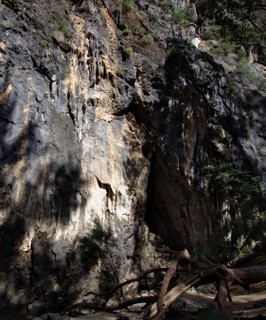
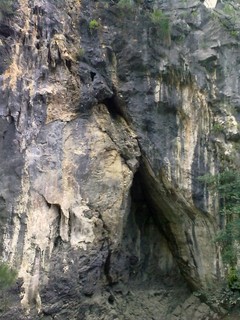
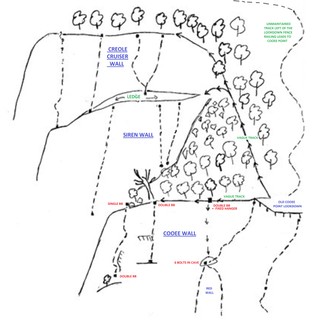
Red Super Giant is currently the only route to start at the bottom of the gorge and finish at this lookout. There are three distinct walls with 1 and 2 pitch rap in routes in this area. The top of the cliff proper is the first, this is Cooee wall. The next wall behind (ie back towards the car park) is Siren wall. The top of Siren wall is the sloping ledge that makes the base of Creole Cruiser wall.
approach
From the lookdown car park walk over to the hanging metal grill lookout. From here hop the fence to the L and follow a faint track into the bush, staying on the rim. After about 80m there is a faint ridge/headland (if you take a detour out onto it you can look back and see the lookout hanging out above a vertical cliff). Walk another 20m away from the lookout and you are at the top of the descent gully. Not far down the gully you will pick up the old zigzagging walking track, which goes steeply downhill for 150m to the awesomely airy Cooee Point lookout, with rusty old steel posts and heavy cable wiring.
 |
||||||||
| Route | Grade | Style | Selected ascents | |||||
|---|---|---|---|---|---|---|---|---|
Cooee WallRoutes are described left to right facing out, which is the order you approach them. Ken Luck's route finishes to your left, looking out. To reach the top of the other climbs from the Cooee Point lookout, head to the right facing out. Be bloody careful scrambling around on the scree amongst the flimsy she-oaks. About 15m from the lookout rail, and a little downhill, there is a cluster of three bolts (2RB + 1FH) on a small exposed patch of rock. A 35m rap from here will get you into the cave at the top of the 1st pitch of Continuum. Bring a rope protector and/or hammer to round off the sharp edges. A further 15m along the cliff edge is a large old dead gum on the edge of the cliff and more rap bolts. These are at the top of In The Realm Of The Senses. For The Fat Controller, use this same anchor but rap over a single directional bolt 5m further along the cliff edge, at the top of a small arete. | ||||||||
| 2 |
Ken Luck's route
Ken Luck's route - three pitches, all natural, finishing at the lookout fence. Need details. FA: Ken Luck et al & date unknown, 2000 | |||||||
| 3 |
The Comfort Zone
Rap into the 'Continuum' cave, and then a further rap down the orange wall to the right-hand belay. Up pumpy orange wall then through bulge to cave.
FA: Lee Cossey (pitch 1) late 90s, 2000 | 26 | 40m, 2, 10 | |||||
| 4 |
★★ Continuum
Rap in from 3-bolt anchor 15m right (facing out from the cliff) of the lookout.
FA: Justin Clarke (pitch 1). Justin Clarke & Lee Cossey (pitch 2) late 90s, 2000 | 25 | 50m, 2, 10 | |||||
| 5 |
★★ In the Realm of the Senses
Up following the bolts. Start: Look for the double ring bolt belay down from a dead eucalypt 30m right (facing out from the cliff) of the lookout. Rap down to a ledge and double ring bolt belay. FA: Brogan Bunt & Tony Barten 90s, 1990 | 22 | 25m | |||||
| 6 |
The Fat Controller
The top is down and right (facing out) of the top of 'In the Realm of the Senses'. Rap in from 'In the Realm of the Senses' anchor, but using a directional bolt on the nearby arete to get to double rings at the base. Up a dirty loose crack on natural gear and then some nice face climbing (ring bolts). FA: Mike Peck 90s, 1990 | 20 | 25m | |||||
  |
||||||||
| Route | Grade | Style | Selected ascents | |||||
Siren WallThe following three climbs are on Siren Wall. This wall is directly behind the top of In the Realm of the Senses. It is possible to scramble around the top of the gully (about 20m) from the top of In the Realm of the Senses to the bottom of Siren. Alternatively rap in, first to the base of the Creole Cruiser Wall, then a further rap down Siren wall. | ||||||||
| 8 |
Siren
Up the face then continue right to the base of the arête. Up the arête to double rings. About 6 bolts. Start: Starts from the top of the gully. Double rings at base. | 23 | 15m | |||||
| 9 |
Unknown
Start as for 'Siren', but up the left-hand line. Ring bolts & FHs to the same DRB as 'Siren'. | 23 | 15m | |||||
| 10 |
Unknown/unfinished 35m 26 plus DEATH
At the time of writing the ring bolts were NOT GLUED IN on this route. Start: The route which starts lower down on the wall about 15m left of 'Siren'. | 26 X | 35m | |||||
Creole Cruiser WallThe following climbs are on Creole Cruiser Wall, which is the left-most, highest wall in the Cooee Point area. From the Cooee Point lookout walk 50m back uphill to a large rock at a zig in the path, then contour across to the top of the wall. Rap in to all the routes - either down your chosen line or down the sloping start ledge. If you want to suss the lines before you rap in to them, you can get a bit of a look at this face from near the rap anchors above Continuum. From those anchors walk 15m uphill and away from Cooee Lookout and you'll see all the bolts on Siren Wall at the same height, with Creole Cruiser Wall partly visible above and beyond that. | ||||||||
| 12 |
★ This is Hip
Rap down to the double bolt belay. Good climbing on pockets and jugs. The furthest right line of bolts (facing the cliff). FA: Mike Peck, Wendy Stevenson & Phil Dunne, 1990 | 22 | 15m | |||||
| 13 |
★ Creole Cruiser
Up left past two bolts to a cave and big thread (120cm sling). Up to a rest in the next cave and then up past two more bolts to a double bolt belay. Start: From the same belay as 'This is Hip'. FA: Mike Peck & Laura Close, 1990 | 22 | 18m, 4 | |||||
| 14 |
Unknown 25
The line with 9 bolts and a hard start. It is possible to avoid the start by traversing in from the right, in which case the route goes at about 23. | 25 | ||||||
| 15 |
Unknown 27 plus unfinished route
The next route down and left. This line of bolts finishes through a blank overhanging grey arête which looks virtually impossible and hasn't been climbed. The bottom 20m is good in its own right. | |||||||
1.11. Reflux Crag 20 routes in Cliff
- Summary:
-
Sport climbing, Trad climbing and Rock climbing
Lat / Long: -34.798074, 150.016953
description
Single-pitch sport climbs, close to the car-park. A few good routes and easier access than most, although a little tricky to find the first time.
approach
Park at Bungonia Lookdown carpark. Walk towards the lookout and hop over the fence to the left just before you get to it. Follow the rim of the gorge for 50m to a spur or headland. (If you walk out on the headland you can look back to the lookout). From the headland head diagonally downhill and left (looking out) until you see a 15m high buttress. The buttress has a cave that goes all the way through and out the other side. The first three routes are left, right and through the cave. For 'top wall' routes, crawl through the cave and follow the contour right for around 50m.
For Reflux Crag proper, skirt under the buttress (past a 5m high sport project on a mini-arete) and follow the contour right from here.
| Route | Grade | Style | Selected ascents | |||||
|---|---|---|---|---|---|---|---|---|
Below the CaveThe lower section of the main buttress that contains The Cave. From either end of the cave area, continue downhill for another 30 m. Take care when setting up for top rope on the project. | ||||||||
| 2 |
Mumbo number 5
2 bolts up the slab and to the base of crack and then up the obvious crack, back right to lower offs. | 17 | 10m, 2 | |||||
| 3 |
★★ To see life as a worthy opponent
A steep arete next to the approach track. FA: nathanual hebbard, 4 Feb 2023 | 25 | 10m, 6 | |||||
| 4 |
★ Blue Rock Party
5m right of the arete project is another punchy little sport route. | 17 | 10m | |||||
| 5 |
Sloth On Up
Start at a sinuous crack immediately left of a vegetated corner, 5 or 10 meters right of Blue Rock Party. Once onto the slab, continue straight up. Final moves are diagonally up to the right, following the left hand side of an arete below the lower offs. Often done as an alternative to walking back up to the cave. Can be done as top rope using the lower offs located on the ledge looking down from the cave, but make sure that the rope runs on the left side of the substantial bushes near to the top. | 16 | 30m | |||||
| 6 |
★ Slaba Daba Doo
Starts 10 meters right of Sloth On Up. Dance your way up the slab to lower offs. Often done as an alternative to walking back up to the cave. Can be done as top rope using the lower offs located on the ledge looking down from the cave. | 16 | 20m | |||||
The CaveThe next 4 routes are on the faces immediately adjacent to and above the cave. | ||||||||
| 8 |
★★ Finger Pockets
Left line on the slabby arete down and left of the cave, sharing the first two bolts with Unknown 1. Stick clip the 1st hanger and a bit run-out on the slab. Single carabiner lower off (second anchor bolt needs a hanger). | 17 | 8m, 4 | |||||
| 9 |
★ Unknown 1
Righthand line up the pumpy arete, sharing the first two bolts with Finger Pockets. The grade is a bit of a guess. Single lower off and requires a careful down climb to clean due to dramatic swing possibility. | 18 | 10m, 5 | |||||
| 10 |
★★ Captain Caveman
Juggy, left-trending line of holds, starting just right of the through-the-cliff cave on its eastern side (climber's left). Difficult start for the grade, even if the tree is 'on-route'... Great variety through the pitch and rewarding views. Good rings at the top. Can be top roped. | 17 | 14m, 7 | |||||
| 11 |
★ Limestone Cowboys
Ascends the western side (climbers right) of the walk-through cave, starting on its right. FA: Simon Vaughan, 2009 | 17 | 12m, 6 | |||||
Top WallThis area can be accessed from The Cave by following the buttress 50 meters up hill (climber's right). Alternatively, it can be directly accessed from the Lookdown carpark by walking over the ridge to waypoint (-34.79888, 150.0171), and heading around the southern end of Top Wall (down to the right as you are facing out). This option is far quicker if you want to start in this area. | ||||||||
| 13 |
A Ranger Deal
Start on the face and right side of the arete, behind a large tree. Very high first bolt - stick clip recommended. Upper third is a bit odd... Nice climbing to be had direct up the bulge, but the third bolt is actually hidden down and right behind a small bush and the route finishes with a traverse across to the rings on Angry Ants. | 20 | 12m, 3 | |||||
| 14 |
★ Angry Ants
Starts at twin cracks. Crux is high above the third bolt as you move up to the rings. | 18 | 10m, 3 | |||||
| 15 |
★ Blackboy Back Flip
Mount a small ledge and move up and left to the first bolt. Follows the crack on the righthand side of the arete for the central third, then nice moves out to the right across the face and up to lower offs. | 14 | 12m, 3 | |||||
| 16 |
★ Tree Huggers Delight
Start with big moves straight up arete. Starting up crack is only grade 15. FFA: Simon Vaughan | 16 | 10m, 4 | |||||
| 17 |
★ Modge / Welcome to the Party
Juggy start, crux last move. FA: Simon Vaughan | 14 | 10m, 3 | |||||
| 18 |
Leaping Lichen *Lost Route*
Description from ROCK Mag #18. Route has not been found yet and may just be lost in time. 2018 About 50m L of Cardinal View Lookout Up slab to small tree, then follow line of six BRs up steep wall. FA: Garth Miller & Glen Macintosh, 1990 | 24 | 15m | |||||
Reflux CragContinue west (climbers right) along the contour from Below the Cave. | ||||||||
| 20 |
Reflux
FA: Simon Vaughan | 15 | 10m | |||||
| 21 |
★ Punchy
FA: Mike Law Smith | 20 | 12m | |||||
| 22 |
★ Who's got the water.
Up arete, into the crack then back out and over bulge. Double ring loweroffs. | 19 | 12m, 5 | |||||
| 23 |
★★ Sticky Fingers
Revamped as a sporty on brackets FA: Mike Law Smith | 24 | 12m | |||||
| 24 |
★★ Solar Fix
Start just below the S shaped gum tree. Be prepared for committing moves all the way to the top. FA: Simon Vaughan | 17 | 12m, 6 | |||||
 /ad/88/ad8893dec89f8096a13e4dd0b571072f2b26260c)    /a4/1b/a41b48c89759a6bf28bbb8bc2e7fa9b4fa2a7611)      /9a/1b/9a1b13674dbc18ed22f35ef16439b2efc6038162) /a2/12/a212968cefb940b51284b92a06353ff7667f0585)  /e1/28/e128ff7b878c8cae6cb398f8b3f444e2d6ddd2fc) |
||||||||
1.12. SRC Crag 16 routes in Cliff
- Summary:
-
Mostly Trad climbing
Lat / Long: -34.799187, 150.010381
description
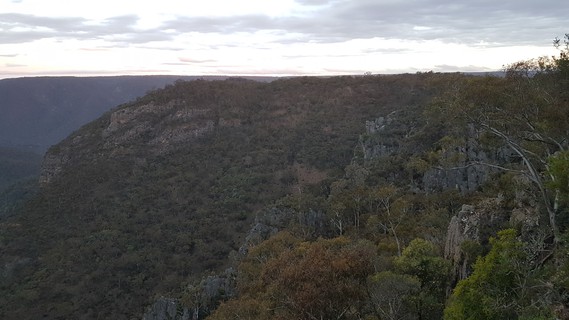
The buttress visible to the east (right, facing out) of Adams Lookout, at the top of the distinctive spine-shaped ridge. Feel The Groove is a great climb and makes the area worth a visit. There are no climbs at Adam's Lookout itself (it is outside the limestone belt, on some kind of loose crumbly "rock").
approach
From the Adams Lookout carpark, take the green track (near entrance to carpark) east towards the Lookdown lookout. After 50m cross a small railway-sleeper wooden bridge, after which the track turns left. Continue uphill for anther 100m to an open area on the top of a small knoll, before the track does a sharp turn to the right.
From top top of this knoll scramble downhill northwards through the scrub (towards the main gorge) for about 100m, sticking on the ridgeline. You should be near the top of this wee crag. To access the climbs scramble down the right side of the ridge facing out (east).
Alternatively, park in the Lookdown lookout carpark and head along the green track towards Adam's Lookout to the open area on a knoll.
history
This area was visited back in the dark ages by the Sydney Rockies. Although not all details are recorded, you will find marked starts for some of these old climbs.
  /9b/3e/9b3ef2adef105202ae2003b1a7d871414df6acf1) /80/9b/809b685ea7ee75ce147d70857bbd3d92716e3034) /5a/4c/5a4c94a6bf6dbbd492206c048b522aa9b974bc7b) |
||||||||
| Route | Grade | Style | Selected ascents | |||||
|---|---|---|---|---|---|---|---|---|
North WallThe first 3 routes as you scramble down to the base of this crag. | ||||||||
| 2 |
★ Unknown 1
The contrived line of bolts furthest left, just left of the arete. Set: jason hayes, 1995 | 20 | 12m | |||||
| 3 |
★★ Unknown 2
Such a great little climb. Slabby start with plenty of smearing and super sharp finger pockets. Next its up the tufa arete and across to gain holds on the hanging flake (rock solid). Once you are standing on top of the flake you can take a well-earned break, before the final push to the top. Back onto the arete and deep inside a hole for a hand jamb, then straight up the face to DDB. Set: jason hayes, 1995 FA: jason hayes, 1995 | 22 | 12m | |||||
| 4 |
★★ Feel the Groove
Step off the flake/ledge into a diagonal line leading to the left (nuts and wires). At the top of this power up through steep stuff past a bolt to the top. FA: Dave Sargent & John Smart, 1985 | 23 | 15m | |||||
Western SlabsThe following easy trad routes are on the longer slabbier part of this cliff further right and round the point. These routes were put up in the dark ages. Some starts are marked, and the following list is not comprehensive. Descent is via abseil off the back of the buttress, off a large bollard above BL or you can scramble down as for North Wall and continue around the base to BL Note: topos are greatly foreshortened. | ||||||||
| 6 |
★ BL
Marked start (pition) at the nice slab at the far left hand end of the buttress. Watch for loose blocks at the small alcove. | 13 | 18m | |||||
| 7 |
★★ BB / Black Boys
Marked start behind two black boys. Up the corner to the top of a block, then the vertical water chute (crux), being careful with gear (#4 camalot is handy). At the top of the chute step delicately right and continue up the slab (runout and ledge fall potential), diagonally right to the chossy corner and a ledge (can setup hanging belay here if rope drag is getting too much) . Short wall above this to top. | 18 | 50m | |||||
| 8 |
BB Double Dogleg Variant
Start at the nice looking arete about 8m right of BB (4m left of CR). Head up the easy arete to the crappy yellow rock. From here traverse 10m left under the smooth bulge, over the grass tree, and across to join BB at the corner. As for BB to the top. This route is exceptionally wandery and not recommended without double ropes and lots of extension of gear. The original intention was to tackle the bulge above the yellow rock directly, but the first ascentionist got scared and bailed left, making for an even scarier ascent notable for stupendous self-inflicted rope drag. FA: Peter Monks, 1998 | 18 | 45m | |||||
/03/79/03791ab56a8af1c10be820c1a4fbeb4d04b00d79) /66/93/6693c0094f763753d38fc94fa47e19dc75881a60) /8c/28/8c2806eb662e1158fa3e6b6145b03fad7a8cb208) |
||||||||
| Route | Grade | Style | Selected ascents | |||||
| 9 |
★★ CR
Marked start. An excellent climb up the face left of the bushy corner, with slightly tricky protection. Take care to extend gear at the sheoak just below the top to reduce rope drag. | 14 | 45m | |||||
| 10 |
★★ RB
Marked start. Good climbing throughout (especially up the arete up high), but with a low crux with tricky protection. | 20 | 40m | |||||
| 11 |
★ Adams Cherry
A nice slabby climb. Follow the cracks up to the top. Top out variants- Straight up over final boulder or traverse left under boulder then back up. FA: Oscar Bell, 2016 | 15 | 30m | |||||
SRC RockLocated just upstream from the SRC crag is a rather vegetated buttress that reaches about 25m in height. While much of the rock looks dirty and unpleasant, it's actually surprisingly clean. This area is pretty over grown as of 2018 | ||||||||
| 13 |
★ Sandy Crack
The obvious line on the downstream side of the buttress. Up the line until it makes sense to step right onto the lovely slab. Walk off the back. | 15 | 25m | |||||
Devils StaircaseThe next 3 routes start a further 200m down the ragged limestone ridge directly below the SRC Crag. The crag is roughly 25m at its tallest & is fantastic Bungonia limestone. Natural protection, fixed rope to belay off at top of The Crack (Installed 2018). | ||||||||
| 15 |
★★ Red in the Shed
Start and finish as for Hollow Flake, connecting the cracks through the obvious weaknesses to the right. There’s good gear to be had, so commit to the slab FA: Michael Houghton, 6 Aug 2023 | 17 | 20m | |||||
 |
||||||||
| Route | Grade | Style | Selected ascents | |||||
| 16 |
Hollow Corner
Starts up the obvious left hand crack. Work your way up the corner until you reach a horizontal break that heads out towards a large black boy. From here its straight up to top out. The large blocks half way up the corner sound hollow. I dont think you could possibly move them, but it does sound a little un-nerving. FA: Mike Law Smith, crew & 1980s-1990's? | 17 | 25m | |||||
| 17 |
★★ The Crack
The obvious crack in the middle of this great little outcrop. Natural protection,fixed rope to belay off (Installed 2018). FA: Mike Law Smith, crew & 1980's-1990's | 17 | 20m | |||||
| 18 |
★★ #2 In The Hole Variant Finish Variant Start
Starts just right of the crack up the slabs. Boldly up to the first break, and continue up right of the grass tree, finishing on the crack. For maximum contrived fun, try stay on the slabs, avoiding the cracks as long as possible. FA: Brendan Coulter, 6 Aug 2023 | 16 | 20m | |||||
| 19 |
★★ #2 In The Hole Variant Finish
Start as for #2 In The Hole, but instead go boldly up the groove on the left. Continue up crack system, going right of the grass tree, and finish as for The Crack. FA: Michael Houghton, 6 Aug 2023 | 16 | 20m | |||||
| 20 |
★★ #2 In The Hole
This routes starts in a water runnel directly below three holes.Climb up and right towards the steel hanger. Then continue up to top out. A #2 Camalot is handy for the crux move below the steel hanger FA: Mike Law Smith, crew & 1980s-1990's? | 20 | 20m | |||||
1.13. Bungonia Bouldering 143 routes in Area
- Summary:
-
All Bouldering
Lat / Long: -34.797812, 150.007373
description
Info coming soon!
1.13.1. Gorge Main 55 routes in Sector
- Summary:
-
Lat / Long: -34.794322, 150.005460
    |
||||||||
| Route | Grade | Style | Selected ascents | |||||
|---|---|---|---|---|---|---|---|---|
| 1 |
Steak & Chips
Sit start and up the left side of the steep wall to finish on high jugs. FA: Tom Farrell | V11 | ||||||
| 2 |
★★ Just Another Day
Sit start and up left to finish as for 'Steak & Chips'. Problem possibly now defunct, large flake came off. FA: Al Pryce | V8 | ||||||
| 3 |
Spina Bifida
Sit start and out the little roof to finish on jugs. | V8 | ||||||
| 4 |
The Hangar
Sit start and up the hanging block. FA: Al Pryce | V8 | ||||||
| 5 |
Umbra
Squat start on sidepull/ undercling features and head straight up scary looking face to top. | V10 | ||||||
| 6 |
Shade
Sit start and out the steep wall to top out. FA: James Scarborough | V8 | ||||||
| 7 |
Layin Down Papers
Squat start just right of chock stone with right hand undercling, left hand sidepull. Up to sloper on lip and right to top out. FA: Tom O'Halloran | V8 | ||||||
| 8 |
Escapism
Squat start compressed, up on slopers compressing rounded arete to top out high slab. FA: Tom O'Halloran | V12 | ||||||
   |
||||||||
| Route | Grade | Style | Selected ascents | |||||
| 9 |
Flash Fest
Sit start and up slightly right to top out. | V6 | ||||||
| 10 |
Treeless
Stand start and up right to gain slab and top out. | V10 | ||||||
| 11 |
Endless Days
Stand start with left hand pocket and right hand side pull and head out and up. Sit start is still a project. | V11 | ||||||
| 12 |
Season Of Mists
Stand start from boulder and lean left to start holds then straight up. | V11 | ||||||
| 13 |
★★ Wee Willem
Sit start and straight up. | V11 | ||||||
| 14 |
★★ Cafe Creme
The original stand start of 'Wee Willem'. | V10 | ||||||
    |
||||||||
| Route | Grade | Style | Selected ascents | |||||
| 15 |
★★ The Sandman
Sit start and out the steep wall heading left to top out through the ‘skylight’ hole up high on the left. FA: James Scarborough | V13 | ||||||
| 16 |
★★★ Three Star Arete
Stand start and up the knife edge arete. | V3 | ||||||
| 17 |
★★★ The Twenty Second Tickle
Stand start and up the high face. FA: Al Pryce | V7 | ||||||
| 18 |
★★ Tickle Me Twice
Stand start and climb the high arete and wall at the far right end of the boulder from 'The Twenty Second Tickle'. | V5 | ||||||
| 19 |
★ Orpheus
Stand start and out to mantle. | V3 | ||||||
| 20 |
The Wake
Stand start under roof between 'Orpheus' and 'Rockbiter' and top out. | V7 | ||||||
| 21 |
Rockbiter
Stand start and out right to mantle. FA: Al Pryce | V10 | ||||||
  |
||||||||
| Route | Grade | Style | Selected ascents | |||||
| 22 |
Brief Lives
Sit start and head up left to top out. | V9 | ||||||
| 23 |
★★ Shaved
Sit start out steep wall to the slab top out. FA: Al Pryce | V13 | ||||||
| 24 |
The Kindly Ones
Sit start and straight up to top out. FA: James Scarborough | V9 | ||||||
| 25 |
Crimper In The Corner
Sit start and up left to top out by stepping onto the boulder on the left when you get to the top of the face. FA: Al Pryce | V8 | ||||||
| 26 |
★★★ Rachel Hunter
Squat start on two horizontal edges at same height and out the steep prow to top out. FA: Al Pryce | V12 | ||||||
| 27 |
★ Rod Stewart
Stand start on the bloc to the right of 'Rachel Hunter' and head up over the bulge to top out. | V7 | ||||||
| 28 | James | V9 | ||||||
| 29 |
Missile Menace
"Slabbing areteness." | V8 | ||||||
| 30 |
Death Slab
FA: lucky chance, 2002 | V3 | 6m | |||||
| 31 |
Sex Bomb
"Classic low ball. At least its a stand start." FA: Sam Healy, 1 Aug 2018 | V8 | ||||||
| 32 | ★ Left 5 | V5 | 3m | |||||
| 33 | ★★ Right 5 | V5 | 3m | |||||
| 34 | Endless Possibilities | V8 | 3m | |||||
| 35 |
Right lowball
Right of Endless Possibilities | |||||||
| 36 |
★★ Roof n Crimp
Sit start on undercling feature, out roof and up headwall. | V7 | 3m | |||||
  |
||||||||
| Route | Grade | Style | Selected ascents | |||||
| 37 |
★★★ Tom's Project
Stand start and squeeze | 5m | ||||||
| 38 |
★★ Shark Fin / Cool Pocket
Sit start on low crimps, up over the bulge. Previously named on theCrag as 'cool pocket'. FA: Tom Farrell | V6 | 3m | |||||
| 39 |
Squeezy
FA: Jack Folkes | V3 | 2m | |||||
| 40 |
★ Roof Proj
Start in undercling, toehook and dyno. | |||||||
| 41 |
Was a Water Landing
Stand start off the block with 2 left facing crimps. Balancy and a weird drive-by to an easy top out. FA: Jack Folkes | V4 | 5m | |||||
| 42 |
Jump start groove
Jump start to the sloper, then up the groove to top. | 4m | ||||||
| 43 |
Left arete
Sit start and up the arete trending right. | 3m | ||||||
| 44 |
★★ Right Wall
Sit start and up. | V4 | 3m | |||||
| 45 |
45
45 wall. Up the seam and then out right to top out. | 5m | ||||||
    |
||||||||
| Route | Grade | Style | Selected ascents | |||||
| 46 |
Dabling Bottom
Sit starting on large block to the right. Traverse left, then up via obvious features. Try not to dab! FA: Adriana, 12 Sep 2020 | V1 | 2m | |||||
| 47 |
★ Rock Over
Sit starting on same block as Dabling Bottom. RH to good crimp, rock up on heel to triangular pocket to top out. FA: Nathan Condon, 12 Sep 2020 | V2 | 2m | |||||
| 48 |
★★ Capillary Action
Sit start matched on block then move right into the crack. Follow crack up and right. FA: Nathan Condon, 12 Sep 2020 | V1 | 2m | |||||
| 49 |
Wet Undies
FA: Nathan Condon, 12 Sep 2020 | V0 | 2m | |||||
| 50 |
★★ The Illuninati
Stand start matching triangular hold. Paste feet on and up. FA: Chase Gatland, 12 Sep 2020 | V4 | 3m | |||||
| 51 |
★ Crescent Goon
Start matched on slopey rail and then up. FA: Nathan Condon, 12 Sep 2020 | V1 | 3m | |||||
| 52 |
Jugo De Naranja
Sit start on arete. And top out FA: Jarred Bof, 12 Sep 2020 | V2 | 3m | |||||
/b0/f0/b0f09791953c78bb2dd5ba3d39badb78627c2b12)  |
||||||||
| Route | Grade | Style | Selected ascents | |||||
| 53 |
★★ Great V4
Sit start on the two obvious holds on the right. Up and left to top out. | V4 | 4m | |||||
| 54 |
Cornflakes on Toast
Sit start in horizontal break, follow crack features up and left. | V5 | ||||||
| 55 |
Helpful Hecklers
Details unknown. | V12 | ||||||
1.13.2. North & South Walls 21 routes in Sector
- Summary:
-
Lat / Long: -34.796182, 150.017659
description
An area with a number of classic moderate and hard blocks. Long overlooked, and with a lot of potential left for development. Landings are generally uneven, a few pads is preferable for most problems.
approach
Follow the red track to the bottom of the gorge and head down stream (right). The first problem you will reach is Tiger Cheese (V8), which sits in a sandy/ rocky area of the river bed. Problems are described in the order you reach them if walking downstream. The next boulders are found as the river constricts, gets steeper and you enter a field of large boulders. The location of Goats Cheese (V10) is unknown.
| Route | Grade | Style | Selected ascents | |||||
|---|---|---|---|---|---|---|---|---|
| 1 |
★★★ Tiger Cheese
The mega classic. Sit start on the good jug low and right and make your way left and up through slopey pockets and crimps. | V8 | ||||||
| 2 |
★★ Cheese N' Kisses
Start about a meter to the right of "Tiger Cheese V8" on a large undercling jug. Bust out right to the lip and mantel over to top out. FA: Natasha Wai, 11 Oct 2020 | V4 | ||||||
| 3 |
★★ Pleasure Machine
A little way downstream from ‘Tiger Cheese’ you will find a tall block with an obvious mono pocket in the middle of it. Sit start and straight up | V10 | ||||||
| 4 |
★★★ Happy Satisfaction
FA: Tom Farrell, 14 Jul 2019 | V4 | ||||||
| 5 |
★★ Unknown Crack Problem
Stand start in left of two cracks, span right to second crack and directly up, avoiding dabbing on the rock behind. | V7 | ||||||
| 6 |
Hard Steep Proj
Sit start a couple of metres right of crack V7. Follow small beautiful edges out steep wall. | |||||||
| 7 |
Slopey Project
Start in cave and head left, following the slopey face up once clear of the roof. | |||||||
| 8 |
★★ Unknown Featured Face
Sit start and up the face on good holds. | V4 | 3m | |||||
| 9 |
Arete Problem
Sit start and up obvious line, may have been done before. This block will likely have a number of lines. | |||||||
| 10 |
Copie Your Homework
Start from break, up to slopers and mantle. | V9 | ||||||
| 11 |
★★★ Unknown Classic V6
Sit start on jug deep in hole. Make a couple of punchy moves left and up, topping out on the level above and slightly right of the V10. | V6 | ||||||
| 12 |
Unknown V10
Start as for Lock Groove (V11), but break right where Lock Groove heads left. Top out via hand jam. | V10 | ||||||
| 13 |
Lock Groove
Sit start. Make a couple of moves up as for the V10 before breaking left, topping into the big water jug hueco/ pot plant. | V11 | ||||||
| 14 |
Castle Hill Dreaming
Sit start and directly up to hard slopey mantle. FA: Tom Farrell | V10 | ||||||
| 15 |
Unknown
Start as for Castle Hill Dreaming (V10) but move left and up instead of direct. | V8 | ||||||
| 16 |
Vegan Tick
Lowball. Sit start and slap up left. | V7 | ||||||
| 17 |
★★ Wam Bam
Sit start from edges and make a long hard move up right. V1 from stand. | V11 | ||||||
| 18 |
★★ Cracking
Start at the crack in the middle of the roof and make your way out following the break to a slopy/juggy mantle. Big boulder under the start is out for the feet. For sure it has been done before, so if anyone have any information about the FA or the real name of the problem I'll update it! | V5 | 4m | |||||
| 19 |
Cracking Project
Start as for cracking, out through roof and up overhung face to high top out. Will be all time. | |||||||
| 20 |
Hard Arete Project
Sit start. | |||||||
| 21 |
Goats Cheese
FA: James Scarborough, 2002 | V10 | ||||||
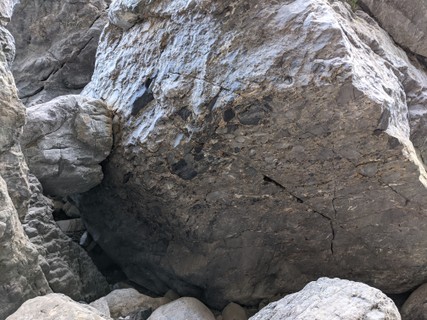 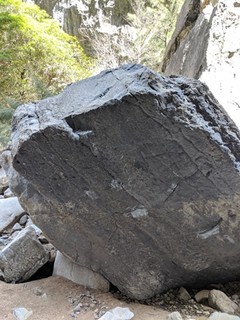  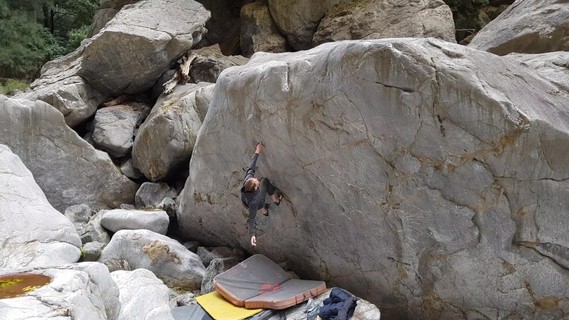   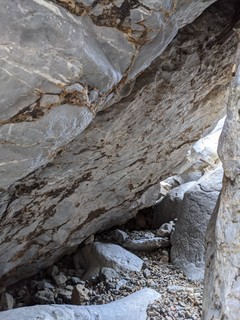 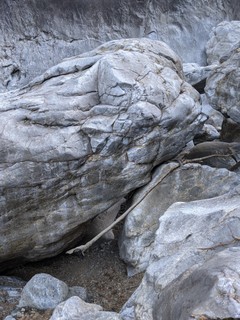 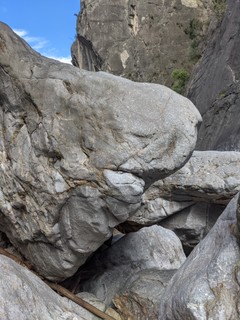 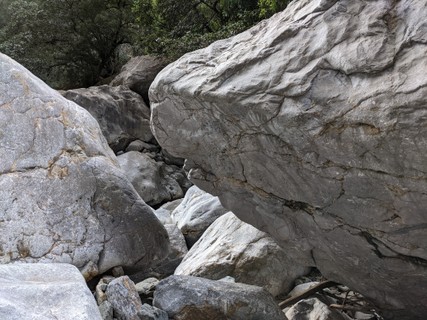 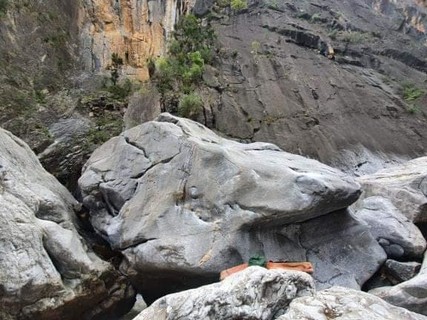 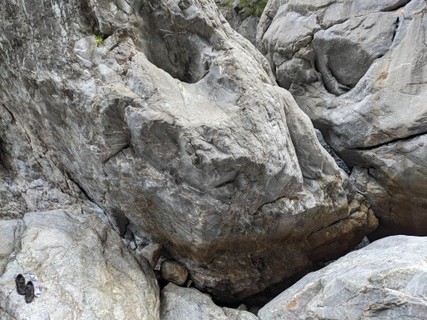 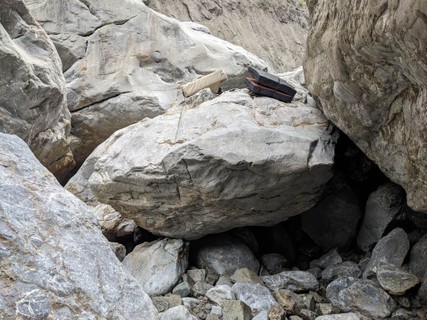 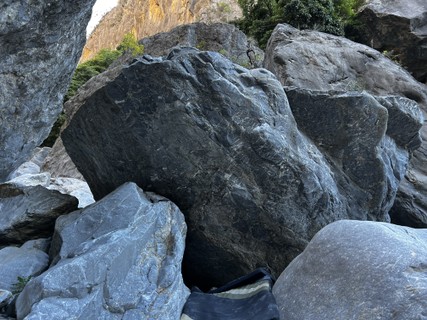 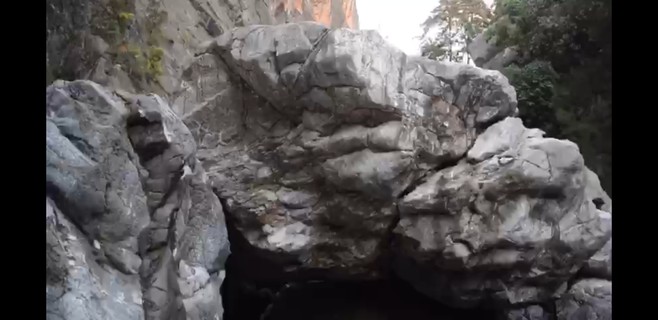 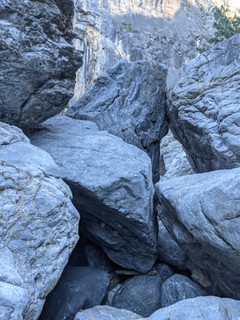 |
||||||||
 Mauricio Chino
1.13.3. Upper Gorge 67 routes in Sector
- Summary:
-
Lat / Long: -34.804752, 149.997165
description
The closest developed area, with a walk time of 7-10 minutes from the campground. It would be perfect in summer with the creek no more than 30m away
approach
From the kitchen, head up the hill beyond the barbecues. Find the start of the Yellow trail, Follow this for ~2min, then turn left following the yellow trail (Green goes right)
The trail drops into the valley and crosses the creek about 7-10 minutes from camp, follow the creek down to find the boulders
1.13.3.1. Sector 1 49 routes in Sector
- Summary:
-
All Bouldering
Lat / Long: -34.806735, 149.997848
description
Walls and freestanding boulders around the creek bed. There are a lot of unclimbed lines still around.
Many of the existing lines have the potential for wet feet and would be particularly appealing in warm weather
approach
From the campground follow the track marked with yellow squares on the trees down to the creek. Turn right just before crossing the creek to find the first boulder amongst the trees. Most of the others boulders are in or at the creek a bit down stream.
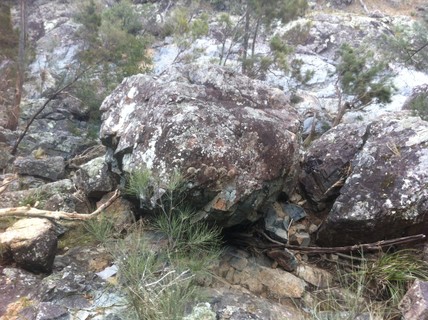  |
||||||||
| Route | Grade | Style | Selected ascents | |||||
|---|---|---|---|---|---|---|---|---|
|
The Gorgeous George boulder is set about 20m above the creek on the right hand side. Either approach it directly, or wander down the creek until you reach the Turkish boulder, then find your way over a few small blocks to the low boulder. You may need to remove some flood debris to reveal the low footers. | ||||||||
| 2 |
★★ Gorgeous George
Sit start traverse right all the way to top out. | V4 | ||||||
| 3 |
★ Pikeys
Sit start and straight up. | V0 | 2m | |||||
| 4 |
★ Caravans
Sit start and straight up. | V2 | 2m | |||||
| 5 |
★★ Dags
Sit start and straight out the steep nose to top out. | V4 | 2m | |||||
| 6 |
★★ Going Down In The Second
Sit start and straight up as for the the finish of 'Gorgeous George'. | V3 | 2m | |||||
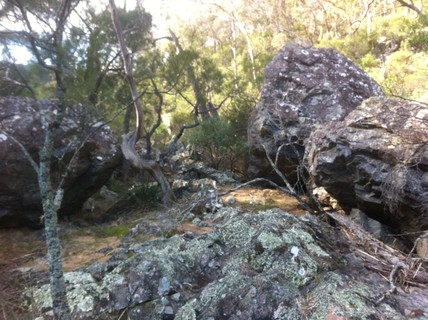     |
||||||||
| Route | Grade | Style | Selected ascents | |||||
| 7 |
★★ Boris The Blade
Sit start on underclings and head straight out the steep little prow to top out. | V4 | 3m | |||||
| 8 |
★ The cool down boulder
Start sit start on the far left and top out right | V0 | 2m | |||||
| 9 |
★ The Warm Up Boulder
Sit start and straight up. | V0 | 2m | |||||
|
The next routes are on a boulder that borders the creek. Several lines start or finish over water | ||||||||
| 11 |
Proper Fucked
Stand start and up the left arete. | V6 | 4m | |||||
| 12 |
Ze Germans
Stand start and straight up to top out. | V6 | ||||||
| 13 |
Bricktop
Stand start and straight up to top out. | V6 | ||||||
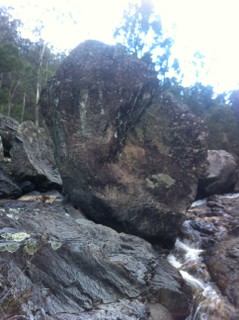 /d5/89/d589367dba94407cefa62a208bc2b6f65a39abd8) |
||||||||
| Route | Grade | Style | Selected ascents | |||||
| 14 |
★★ Turkish
Stand start and up the blunt prow. | V3 | 5m | |||||
| 15 |
★ Sweet Enough
Stand start and up the slab. | V3 | 5m | |||||
| 16 |
★★★ As Greedy As A Pig
Stand start and traverse the slab left to finish up 'Turkish'. | V4 | 4m | |||||
| 17 |
Fight You For It
Stand start and up the arete feature. | V3 | 4m | |||||
| 18 |
★★ Driving past
Stand start as for Fight You For It with left hand on undercling, then traverse right to the jug. FA: Martijn van Eijkelenborg, 13 Nov 2016 | V4 | 4m | |||||
  |
||||||||
| Route | Grade | Style | Selected ascents | |||||
|
A few meters further down the creek a short overhung wall appears on the right | ||||||||
| 20 |
★ The Cut Away
Sit start and straight up. | V2 | 2m | |||||
| 21 |
The Cut Away Angry Chicken
Start up 'The Cut Away' traversing the lip left to finish up 'Angry Chicken'. | V5 | ||||||
| 22 |
Stout
Stand start and mantle the lip. | V3 | 2m | |||||
| 23 |
Angry Chicken
Stand start and out the arete to top out. | V4 | ||||||
| 24 |
★★★ Middle Ground
Stand start and up the middle of the wall. | V4 | ||||||
| 25 |
C-Block
Stand start and up the corner block. | V4 | ||||||
 /db/2b/db2b4bc53893ba1a886c27a8d0650366ddd4b108) /54/d4/54d477c8d23bca43593d3329d7cee2b66699b215) |
||||||||
| Route | Grade | Style | Selected ascents | |||||
| 26 |
★ Bonsai
Sit start and up over the prow. | V3 | 2m | |||||
|
These routes are further around on the same cliff line. Many are overgrown | ||||||||
| 28 |
Make Do
Sit start straight up. | V2 | ||||||
| 29 |
Ah, Push It
Sit start straight up. | V2 | ||||||
| 30 |
Up & Away
Sit start straight up. | V1 | ||||||
| 31 |
Crouching Tiger
Sit start straight up. | V2 | ||||||
| 32 |
Hidden Dragon
Sit start and straight up the face. | V4 | ||||||
  /02/57/0257e7971e9610ba11192bf83c00e1c29dee4a57) |
||||||||
| Route | Grade | Style | Selected ascents | |||||
|
Returning to Stout, cross the creek and find the Reflection pool immediately in front of you | ||||||||
| 34 |
Reflections
Stand start and up the left side of the scoop. | V3 | ||||||
| 35 |
Big Splash
Stand start and up the right side of the scoop. | V4 | ||||||
|
Right side of the creek, a little past Bonsai | ||||||||
| 37 |
★ Make A Stand
Stand start and up the slab. | V2 | ||||||
| 38 |
★ The Dream & The Dreamer
Stand start and up the arete feature. | V3 | ||||||
|
Left of the creek, a little below The Dream & the Dreamer | ||||||||
| 40 |
The Palisade
Sit start and straight up to top out. | V4 | ||||||
/4d/9a/4d9af6b0c61924acc59cdef7339f0e9aaabc4014) /0c/b5/0cb5975c53c8900da46aebb01449d4c95b520c59) /38/85/38854d5351841be27ead2a657f415a08599292eb)  |
||||||||
| Route | Grade | Style | Selected ascents | |||||
| 41 |
Flat panel
Slightly overhanging Flat panel | V3 | 3m | |||||
| 42 |
★ Corporate Box / The Shelves
Sit start on mini shelves, up then right to big shelf and over. Sit start and out the roof to top out. Beware wasps nest (27/4/2024) | V3 | 4m | |||||
| 43 |
Pressed
Crouch start on obvious jug 5m left of trapped (Facing upstream). Then press your way to glory | V0 | 2m | |||||
| 44 |
Trapped
A few metres downstream from The Shelves. sitstart matched on trapped Stone | VB | 3m | |||||
| 45 |
★ Break Left
Sitstart | V3 | 3m | |||||
| 46 |
★ Break
Sitstart | V2 | 3m | |||||
| 47 |
The water slide
Sit start with right hand in slot. | V2 | 3m | |||||
| 48 |
★★ The Water Slide Out
Sit start with left hand in slot and using right arete. | V2 | 3m | |||||
|
The next boulder is a little further from the creek above the shelf containing Stout and Bonsai, best approach from the Warm up, or around the back of Hidden Dragon | ||||||||
| 50 |
Gourmet Offerings
Stand start and top out | V3 | ||||||
| 51 |
Double Brie
Sit start and straight up. | V3 | ||||||
| 52 |
Fruit & Nuts
Sit start and straight up. | V3 | ||||||
| 53 |
Chocolate Fondue
Sit start and straight up blocks to top out. | V2 | ||||||
| 54 |
Underhanded
Sit start through underclings to top out. | V5 | ||||||
| 55 |
Raspberry Reduction
Sit start and out the blocky roof to top out slightly to the right. | V4 | ||||||
| 56 |
★★ Pumpkin Soup
Sit start and straight up the wall. | V2 | ||||||
| 57 |
Tasting Platter
Sit start and straight up the wall. | V3 | ||||||
1.13.3.2. Sector 2 18 routes in Sector
- Summary:
-
All Bouldering
Lat / Long: -34.803376, 149.996585
description
Further down the creek, just after it veers to the right. This area contains some harder and larger lines than Sector 1.
approach
Continue down the creek for a few hundred meters, it's easiest on creek left.
  |
||||||||
| Route | Grade | Style | Selected ascents | |||||
|---|---|---|---|---|---|---|---|---|
|
Just after the creek turns to the right, you'll find several large overhanging boulders on the right of the creek containing Captain Cut Loose and Fly, You Fools | ||||||||
| 2 |
★ Captain Cut Loose
Sit start and dyno out the roof. | V6 | ||||||
| 3 |
★★ The A Team
Sit start far left and traverse right to mantle the nose of the roof. | V4 | 3m | |||||
| 4 |
Stay Right
Stand start and up the right side of the slab | V3 | ||||||
| 5 |
Flipping The Bird
Stand start and up the middle of the slab. | V3 | ||||||
| 6 |
The Left Wing
Stand start and out traverse out the left arete. | V4 | ||||||
| 7 |
Fly, You Fools
Sit start under the roof and out to top out. | V5 | ||||||
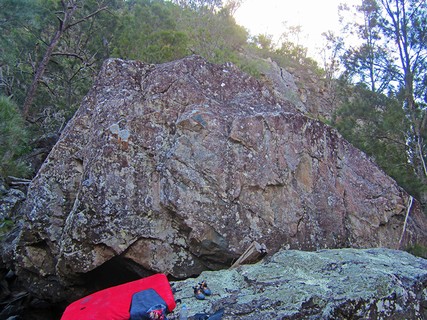 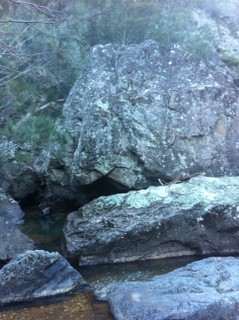 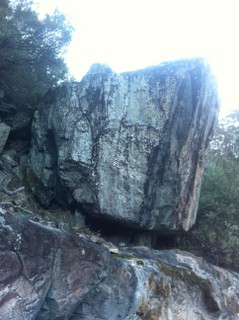 |
||||||||
| Route | Grade | Style | Selected ascents | |||||
|
The next two routes are on a boulder on the left of the creek | ||||||||
| 9 |
★ Fearful
Stand start and up the arete over bad landing. | V4 | 4m | |||||
| 10 |
★ Legal Ramifications
Sit start on the big side pull over the void. Move straight up to top out. FA: Jack Folkes, 28 Sep 2014 | V1 | 3m | |||||
|
The large block on the right of the creek with the striped face contains several good lines | ||||||||
| 12 |
The Dark Tower
Stand start and up the proud arete. | V6 | ||||||
| 13 |
Isengard
Stand start and straight up. | V5 | ||||||
| 14 |
★★ The Iron Fortress
Stand start and straight up. | V3 | 3m | |||||
| 15 |
Osgiliath
Stand start and straight up. | V1 | 2m | |||||
| 16 |
★ Mini Tower
Stand start and straight up. | V1 | 2m | |||||
|
These are on the left of the creek further down, but above the very large pool. See the photo topos in Duncan's guide | ||||||||
| 18 |
Dark To Light
Sit start and out cave to top out up sharp prow. | V4 | ||||||
| 19 |
★ Riverside
Stand start and up the right arete. | V2 | 3m | |||||
| 20 |
From The Deep
Stand start and up the blunt arete to top out. | V3 | ||||||
 |
||||||||
| Route | Grade | Style | Selected ascents | |||||
|
These lines may require a swim | ||||||||
| 22 |
★ Flood Levels
Sit start and straight up the little steep wall. | V3 | ||||||
| 23 |
Depth Charge
On the block behind Flood Levels, Stand start and straight up big block. | V3 | ||||||
1.14. Bungonia Canyoning North 4 routes in Unknown
- Summary:
-
All Rock climbing
Lat / Long: -34.798880, 149.999542
description
Park at the campground for easy access to these canyons.
  |
||||||||
| Route | Grade | Style | Selected ascents | |||||
|---|---|---|---|---|---|---|---|---|
| 1 |
★★ Jerrara Creek Canyon
Tom Brennan from http://ozultimate.com wrote this amazing trip report. http://ozultimate.com/canyoning/track_notes/jerrara_creek.htm | 62m, 3 | ||||||
| 2 |
★★ Jerrara Creek Canyon Extention
Tom Brennan from http://ozultimate.com wrote this amazing trip report http://ozultimate.com/canyoning/track_notes/bungonia_creek.htm | 80m, 3 | ||||||
| 3 |
★★ Bungonia Creek Canyon
Tom Brennan from http://ozultimate.com wrote this amazing trip report. Tom Brennan, 2013, http://ozultimate.com/canyoning/track_notes/bungonia_creek.htm | 110m | ||||||
| 4 |
★★ Bungonia Creek Canyon Extention
Tom Brennan from http://ozultimate.com wrote this amazing trip report. Tom Brennan, 2013, http://ozultimate.com/canyoning/track_notes/bungonia_creek.htm | |||||||
1.15. Bungonia Canyoning South 3 routes in Unknown
- Summary:
-
All Rock climbing
Lat / Long: -34.847259, 150.032037
description
From Bungonia, head out of town on the Lookdown Road for 6.2km, and turn right on to a fire trail which leaves the road between two sections of private property. After 400m you reach a small national park sign and a parking area. From here the road gets rougher and 2wd cars may have some difficulty. You could park here and walk the 2km in. Otherwise, continue through an open gate, along and up a rough and eroded section of fire trail, and through another gate into the national park at MGA263410.
    |
||||||||
| Route | Grade | Style | Selected ascents | |||||
|---|---|---|---|---|---|---|---|---|
| 1 |
Long Gully Canyon
Tom Brennan wrote this amazing trip report for OzUltimate in 2011. | 60m, 10 | ||||||
| 2 |
Spring Creek Canyon
Canyoning at Spring Creek is banned. | |||||||
| 3 |
Fordham Canyon
Tom Brennan covers Fordam Canyon in the later part of this amazing trip report. Tom Brennan wrote this amazing trip report for OzUltimate in 2011. | 60m, 6 | ||||||