Photos
Help

Right Watchtower Face

34

Seasonality

J
F
M
A
M
J
J
A
S
O
N
D

Description

The best rock in this area - and indeed on the mountain.

Emergency Location: Mount Arapiles, The Watchtower Faces Area

© (secretary)

Access issues inherited from Arapiles

Cultural heritage closures now apply to some parts of Arapiles. This advice continues to evolve and may not be fully reflected in this website; refer to Parks Victoria for details applicable at the time of your visit. https://www.parks.vic.gov.au/-/media/project/pv/main/parks/documents/management-plans/mount-arapiles-tooan-state-park/mount-arapiles-tooan-state-park---aboriginal-cultural-heritage-protections---october-2020.pdf

Bird Nesting September-December Raptors usually nest on the following climbs in Spring : Cassandra, Eurydice, Harlequin Cracks, Revelations. Nesting usually finishes mid-December. There may or may not be signs in place at these times. Please keep 50m clear of these climbs if there appears to be nesting activity.

State Park - no dogs. No fires allowed Oct-Apr (inclusive).

Approach

The big streaked and polished face, right of the Watchtower.

© (secretary)

Ethic inherited from Arapiles

Mount Arapiles is first and foremost a trad climbing area. The few sport climbs tend to be in the higher grades where no natural pro is available.

Bolting, particularly retro-bolting, is discouraged and should only be undertaken after extensive consultation with the local climbers, first ascensionists, etc. Inappropriately placed bolts have been chopped.

Do not chip the rock.

Look after the park.

  • Stick to the paths.

  • Don't disturb the wildlife.

  • Routes near peregrine falcon nesting sites are closed in the spring.

  • Minimise the impact of your camping (fuel stoves not fires, take your rubbish with you, etc).

Tags

Some content has been provided under license from: © Australian Climbing Association Queensland (Creative Commons, Attribution, Share-Alike 2.5 AU)

Routes

Add route(s) Add topo Reorder Bulk edit Convert grades
Grade Route

Start up the Watchtower Crack and then take a crack that leads up left to join original finish of Pumping Part 1, a sweeping crack that leads to the large ledge at the first belay of Watchtower Crack.

FA: Hugh Foxcroft, Peter Newman & Nick Reeves., 1978

1 12 25m
2 14 20m
3 16 18m
4 16 32m

Fantastic climb. Much of this climb remains in the shade until mid-afternoon so it can be feasible on a hot day. Running the first two pitches together can keep the belay in the shade until the top. Despite the daunting appearance a mega-rack isn't required, but make sure you have a couple of bolt hangers and a #4 cam.

  1. 25m (12) Climb the slab just right of the corner until you can move left onto a large ledge.

  2. 20m (14) Follow the main corner for a bit, then the left-hand line to a cosy cave.

  3. 18m (16) Up 4 metres into chimney below roof (old bolt). Traverse out right and move up into corner and another old bolt. On up corner to small stance and two pitons. If you want some shade, traverse left to a cave on the arete.

  4. 32m (16) Fairly sustained (FH) until past the overhang. Easily up slab.

FA: John Fahey, Peter Jackson, Ted Batty & Bob Bull, 1966

An obvious link pitch but it doesn't justify the voyage required to do it. Climb Watchtower Crack until level with the Skink traverse, then climb towards the arete and finish up Arachnus.

FA: Glenn Tempest & Mark Morhead, 1980

1 12 25m
2 18 40m
3 17 42m

A technical, exhilarating route. A great contrast to its companion climb. The majority of the route remains in the shade until late morning. Start as for Watchtower Crack.

  1. 25m (12) Pitch 1 of Watchtower Crack.

  2. 40m (18) Pitch 2 of Watchtower Crack to cave, continue up to below the overhang. Traverse out right on fantastic horizontal break. Tricky moves gain sickle shaped line, then move up about 6m to a stance spanning the corner, which has some good wires and is surprisingly comfortable. Don't be tempted by the piton of Gollum a few metres higher, you are much better off where you are.

  3. 42m (17) Follow the flake line, which eases towards the top.

FA: Chris Dewhirst & John Moore, 1966

If anyone suggests doing this climb, make sure they second the dangerous abseil section.

If anyone is even considering extending the climb by girdling the left Watchtower face and linking the two, could you please shoot yourself beforehand and save the rest of us the bother.

FA: Chris Baxter & Chris Dewhirst, 1967

The intimidating second pitch is a long, absorbing lead. A much better and more logical version of the old Mark Moorhead route of the same name. Sections of the two original pitches have been combined, the useless remnants of the copper bashie on the crux have been replaced with a bolt and a new first pitch added. Best to use a 70m+ rope. Starts as for Watchtower Crack.

  1. 40m (17) Up Watchtower Crack for 15m to veer R into the shallow flake line (Smeagol). At the overlaps pull directly through (Smeagol moves R here) and continue on up the brown slab veering very slightly L into the easy corner. Up this to cross Salamander (wide crack) and surmount the short wide flake to a small ledge directly underneath the start of the curving arch of R-leading overlaps. The belay works best with a couple of very large cams, the equivalent of Dragon cam #5 (blue) and #6 (grey).

  2. 55m (22) Step L and up the wall past the bolt (crux). Continue straight up to the end of the Skink traverse. Pull directly through and sail up the wall above to join Gollum at its crux. Continue as for Gollum. The belay is about 6m back from the cliff edge.

Mark Moorhead climbed the crux section of the second pitch (having come in from Watchtower Crack) before traversing back into Watchtower Crack by reversing the Skink traverse (1979). He returned in 1980 to traverse back out along the Skink traverse and then up across the wall to join Gollum. First climbed as described Glenn Tempest, Karen Tempest.

FA: Pitch 1: Mark Moorhead & Kim Carrigan. Pitch 2, 1979

FA: Mark Moorhead & many more., 1980

FA: Glenn Tempest & Karen Tempest, Aug 2023

Two interesting pitches that used to be thought very bold. But times change. Apparently gear can be found on the first pitch and Keith Egerton proved that even hexentrics in the horizontal breaks on the second pitch were adequate for 10 metre falls. The second pitch has cleaned up enormously over the years. Usually started by climbing The Confession as the first pitch. Belay on the ring-bolts at the top of pitch 1 of Auto Da Fe.

  1. 25m (18) up and through the overlaps. Traverse left above second overlap then up wall veering left into Skink.

  2. 30m (20) Go up to a peg on the left arete. Step left and weave your way up the wall until it eases. Continue up and finish direct over the final overlap.

FA: Pitch 1 (Skink Connection) : Peter, Kevin Lindorff. Pitch 2 : Andrew Thomson & Mike Stone, 1976

1 12 25m
2 13 25m
3 14 10m
4 14 25m
5 12 30m

Slabs and awkward cracks provide a good outing. Start as for Watchtower Crack.

  1. 25m (12) Pitch 1 of Watchtower Crack.

  2. 25m (13) Up dark-coloured face heading slightly right to flake sweeping to right. Step right with difficulty onto long ledge leading right. Walk right to ring bolts. An awkward pitch.

  3. 10m (14) Move off right end of ledge and climb poorly protected face to next ledge (bolts and chain).

  4. 25m (14) Long flake on right with tricky finish to ledge.

  5. 30m (12) From right end of ledge, head up wall and finish just right of little gully.

FA: John Fahey, Peter Jackson & Bob Bull, 1964

Great climbing all the way. One of the best and most varied climbs of its grade on the Watchtower Faces. Individual pitch grades were not supplied - the overall grade is 15 but some pitches may be easier. Start as for The Confession.

  1. 45m (15) Start up The Confession for 3-4m then verge left and up to tiny corner. Continue up left edge of the orange streak to a long right-facing flake/corner. Follow this to the big overhang which is turned on its right-hand edge. Once above the overhang, another corner leads direct to the left end of the Salamander ledge. Belay on the ring bolts as for Auto Da Fe.

  2. 15m (15) Up white streaks 2m left of the belay, over overlap, then right to chains. (Noddy first did this pitch around 1975 when putting up The Confession (before Skink Connection, Gollum et al went that way)).

  3. 50m (15) Climb Salamander's 4th pitch for about 4m to a good horizontal slot on the left wall. Traverse 2m left as soon as possible - with the horizontal slot at head level - any higher, and you miss the best climbing. Then climb direct up the black streak all the way to the top. Pull through summit overhang on the left. (Noddy did the upper part of this pitch on the FA of Brolga).

FA: Tim Lockwood, Keith Lockwood. (alts) This climb has been about 30 years in the making & although the above party were first to do it in its entirety., 2004

Very good pitch. Make sure to take some tiny wires for the crux move. Start 10 metres right of Watchtower Crack at a little block.

Note: this route is marked incorrectly in Simey and Glenn's '99 guide. It goes up the curvaceous white streak at 2/3 height, slightly right of where it is marked on page 230.

FA: Ed Neve & Keith Lockwood, 1975

Normally done as part of Gollum and is described as the first pitch of that climb.

Generally moderate slab climbing with good but spaced gear leading to trickier terrain up the final streak providing an alternative first pitch for Gollum. Double ropes and a big rack help to arrange protection.

Climb midway between The Confession and Auto de Fe, mostly 1.5 – 2m left of Auto de Fe. At about 2/3 height cross the small diagonal overlap and follow the brown streak with 2 parallel white stripes (clearly seen in the topo on p278 of Metz/Tempest guide) to the ledge.

This climb description was derived from a Chockstone post by Stuart.

FA: Stuart Holloway & Lachie Currie, 2005

A fantastic climb with three fantastic pitches of very different styles. Start at a hard move to large dish, avoidable.

  1. 40m (21) Up slabs vaguely left, to eventually drift right through a fingery, thin section to a belay ledge and rap station.

  2. 20m (21) Head up from the left side of the belay ledge, through a serious section requiring RP's then through bulge and drift left to meet Skink, belay possible and best to avoid rope drag.

  3. 30m (21) From the belay in Skink traverse out left, heel hook onto the slab then head straight up. Small opposing wires can be used in the horizontals if no micro cams are available.

FA: Robin Miller & Kim Karrigan, 1982

The companion route to Auto Da Fe. The first pitch is contrived but the climbing is enjoyable and quite well protected on its head-wall crux. The second pitch is the technical crux and although it is bolt-protected (and therefore far less serious than Auto Da Fe) it is still an intimidating lead. A single rope can be used but bring plenty of slings. Small tri-cams, RPs and a good range of small- and micro-cams are indispensable.

Starts four metres R of the jump start on Auto Da Fe at the base of the grey concave wall (at the very bottom of the rap line down the wall on the rough stone pavement).

  1. 37m (21) Thin moves to start then up and L-wards to where the grey wall eases. Up the easier slab R-wards to a distinctive L-slanting crack-line (which starts about 12m up the wall). Easily up this until it ends, then step L onto a long narrow ledge. From its widest point climb directly up and over the bulge (sharing holds on Auto Da Fe). On the slab itself, continue directly up the intimidating dark streak (less then 2m R of Auto Da Fe). If you wimp out, step L a couple of moves and climb Auto Da Fe for a body length, then move back R. The final head-wall is protected with RPs and small tri-cams. Belay as for Auto Da Fe.

  2. 48m (22) Step up onto the holds immediately R of the belay rings, then straight up and over the R-side of the small blocky overlap and up the slab above. Continue up the steepening wall, pull past the BR (crux) then up and slightly L onto a vague clean rib. Up the wall until a short run-out gains the large hollow flakes on Skink. A few metres above these you can step out L of the Skink corner and finish directly up the clean slab to the top.

This route has a complex history. The crux section past the bolt on the second pitch was climbed in June 1996 by Tim Day and Wade Stevens (and named Perentie). The upper head-wall on the first pitch is probably Auto Da Fear by Muki Woods. Significant sections of both pitches have been climbed by others in the past. The route was brushed, added to, straightened, rebolted and climbed in its current form by Glenn and Karen Tempest in winter 2018.

FA: Glenn Tempest & Karen Tempest, Jul 2018

Chop route, no gear, 23 slabbing with an X rating.

FA: muki Woods

The superb second pitch has only one drawback, the possibility of being knocked off by an abseil rope from above. This was an extremely bold, mossy lead before the abseil route went in. Nowadays most leaders keep waiting for the scary runout bit and discover that the gear is fine. Start midway between Auto Da Fe and Gecko below the abseil line.

  1. 45m (17) Unprotected to bulge at 6 metres. Continue up to the abseil chains, keeping religiously between the other climbs.

  2. 45m (20) From just left of chains go boldly up clean streak. At horizontal, step right to tricky moves leading to easier ground. Up to overlap, step left, up overhang and to top abseil bolts.

FA: Chris Baxter, Hugh Foxcroft & Peter Megens, 1983

A nice pitch that can be done as a direct start to Salamander or as a climb in its own right.

FA: Chris Dewhirst, Chris Baxter & John Moore, 1965

As for Gecko (14) to the rap chains then follow Salamander to the top.

1 15 35m
2 14 40m
3 12 30m

Starts midway between Gecko and Brolga. Originally finished up Salamander (as described) but stepping left into Smeagol provides a more consistent grade.

  1. 35m (15) Straight up middle of slab on cleanish streak midway between Gecko and Brolga. Belay level with Brolga's first belay.

  2. 40m (14) Up then trend left to meet 4th pitch of Salamander at the flake, followed to its belay on ledge at right.

  3. 30m (12) As for Salamander P5.

FA: Keith Lockwood & Paul Daniels, 1982

The original finish of Brolga and the best way to finish the climb, if the rap route is not in use. Probably grade 18 if the final bulge to the rap anchor is taken direct or about 14 if taken further left. At end of Brolga P2, up and left to join Fly lichen Eagle.

FA: D.Smith, 1994

1 15 30m
2 16 R 30m
3 14 30m

Fantastic slab climbing up immaculate rock. With modern gear it is not nearly the scare fest it used to be. Start at the gorgeous water streak up the middle of the face that commences off the slight ledge just above the path.

  1. 30m (15) Climb to the ledge. Marginal gear.

  2. 30m (16) The best pitch. Amazing climbing on incredible rock. Blast straight up the wall heading for the tree ledge.

  3. 30m (14) A wandering pitch, starting from the left hand end of the ledge, and heading up and left.

FA: Keith Lockwood & Andrew Bowman, 1975

Plugs the gap between Brolga and The Mantle; a void not improved by the filling. Start 3 metres right of Brolga.

  1. 35m (16) Up easily and slightly right. Swing back left to below tree and belay just left of this.

  2. 50m (16) Middle of wall between Brolga and The Mantle, veering slightly left then right over slight bulge to easier ground.

  3. 10m (-) Up.

FA: Chris & Sue Baxter, 1983

More great slabbing. Start 8 metres right of Brolga, directly below a thin crack that doesn't quite reach the ground.

  1. 27m (13) Go up on the left and move right into the weakness. Up weakness then face to ledge, just left of some swordgrass.

  2. 46m (14) Up the wall past a bolt for 30 metres to the bulge. Pass this and find a semi-hanging belay above. People used to belay below the bulge but the anchors were poor.

  3. 17m (6) Easily up.

FA: Chris Dewhirst & John Moore, 1965

FA: Chris Dewhirst & John Moore, 1965

The first of a couple of nondescript routes up the vast moss gardens of the right Watchtower. Start 5 metres right of The Mantle at a clean seam.

  1. 27m (14) Up seam then step right to right-facing flake/overlap. Up on left sde of this to ledge.

  2. 20m (14) Up diagonally right to flake and clump of spear grass at 8 metres. Above left are two horizontal overlaps on bulge in wall. Pass these on the left, then back up right to good anchors. The bulge can be climbed direct at grade 20 with poor protection (Keith Egerton, Jane Wilkinson 1984).

  3. 48m (12) Straight up.

FA: Kieth Lockwood, Geoff Gledhill & Barry Edwards, 1981

Another mossy filler. Start 8 metres right of Lounge Lizard on cleanish rock.

  1. 25m (14) Left past two holes near ground. step right an wander up to the base of a short corner (Chameleon).

  2. 50m (14) Up corner, over bulge and up.

  3. 10m (-) Up

FA: Peter Kraehenbuhl & Darren Crawford, 1990

Another just OK route wandering its way up the moss. Superseded by Chameleon Connection.

FA: Norm Booth & Keith Lockwood, 1983

1 14 27m
2 13 22m
3 13 39m
4 10 18m

This route combines the best bits of Chameleon and Joyride as well as improving the first pitch of Chameleon. Start 25 metres right of Brolga at a short seam through a bulge, a few metres left of the bolted bulge of Omaha Beach.

  1. 27m (14) Up technical seam then straight up mossy, easy ground to left end of good ledge.

  2. 22m (13) Step left and through steepening then straight up to little horizontal break level with terrace on right. Traverse right and belay below small, right-facing corner at left side of terrace.

  3. 39m (13) Corner and wall to big ledge.

  4. 18m (10) Move right and up two short walls then easy scramble off right.

FA: See Chameleon & Joyride, 2000

Another climb superseded by Chameleon Connection.

FA: Peter Watling, Keith Lockwood & Kathy Burman (alt), 1975

Another clean streak that is proving popular. Start 10m left of Panzer.

  1. 30m (18) Climb bulging wall to easier ground. Move back L and straight up through weakness in undercut bulge. Belay as for Panzer.

  2. 30m (16) Up Panzer's corner crack then traverse L following the flake. At the top of the flake go straight up and belay in V corner. The flake section at the beginning of this pitch was first done by Ed Neve, Peter Megens, Garry Wills as a variant to Panzer. 27-04-1980.

  3. 20m (8) Scrabble to the top following crack up and L.

FA: Yosef Murphy & Shaun Kratzer

A fun pitch that tackles the left side of the Panzer pinnacle/turret. A nice finishing pitch to Omaha Beach.

From the belay after the second pitch of Panzer climb directly up into overhanging corner. Mantle up to reach a second overhang protected by a steep vertical crack. Careful of the loose rock at the top. Belay on top of the pinnacle.

FA: Kane Hendy & Geordie Webb, 31 Mar 2016

Start directly below the turret perching high above the right end of the face, just in front of a large boulder.

  1. 40m (12) Up 2 metres to horizontal weakness, traverse delicately left along this for 6 metres, then go up to major overlap. Traverse left to break through left end of overlap to large ledge. Walk right to obvious, left-facing corner. Small gear essential to protect this pitch.

  2. 25m (12) Jam corner to roof and step right around arete. Climb wall past some old pitons to an inset ledge below final tower.

  3. 30m (12) Traverse right to shallow corner. Up corner then steeply up front of turret. Scramble down back.

FA: Bruce Hocking & Mike Stone, 1965

Good climbing. Crux bulge is protected by a bolt. Originally graded 16.

FA: Yosef Murphy & John Fischer, 2007

Start on the terrace of Panzer's first belay, 4 metres right of the Panzer corner.

FA: Darren Crawford & Peter Kaehenbuehl (alt), 1990

A gentle introduction to the joys of slabbing. Take a selection of cams, bent or otherwise. Start right of Panzer at clean streak – Battle of the Bulge.

  1. 45m Up streak for about 20m, move left along ledge and up slab on horizontal slots to prominent horizontal orange bulge. Amble left and climb last few moves of Panzer to terrace.

  2. 45m From left end of terrace climb up to little corner about 3m left of Joyride. At top of corner step left and climb straight up nice black rock, gradually easing, to terrace. (This pitch is midway between the original versions of Chameleon and Joyride.)

  3. 15m Two short walls.

  4. 15m (Optional) Short wall, then steep juggy rib above, finishing up crack on the right.

FA: Steve Findlay & Keith Lockwood, 21 Dec 2016

Hello!

First time here?

theCrag.com is a free guide for rock climbing areas all over the world, collaboratively edited by keen rock climbers, boulderers and other nice folks.

You can log all your routes, connect and chat with other climbers and much more...

» go exploring, » learn more or » ask us a question

Selected Guidebooks more Hide

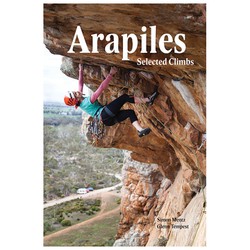
Author(s): Simon Mentz, Glenn Tempest

Date: 2016

ISBN: 9780987526427

This selected yet in depth guide, in its third edition in 2016, is a must for first timers or regulars to the "Pines". By Simon Mentz and Glenn Tempest. It features 1200 routes over 23 different areas as well as bouldering, history info on flora and fauna, plus heaps more.

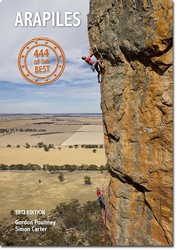
Author(s): Gordon Poultney, Simon Carter

Date: 2013

ISBN: 9780987087461

444 of the best routes on the best stone on earth? Yes Please! Who has time for all those other wondering pitches anyway when Gordon Poultney and Simon Carter have picked out the classics and printed it in a pocket size handy guide with string attachment. You'll take it on the multipitches, you'll take it to read in the toilets, you'll take it everywhere!

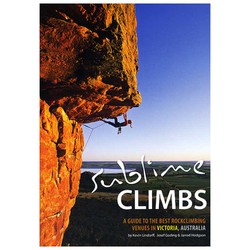
Author(s): Lindorff, Goding & Hodgson

Date: 2011

ISBN: 9780646529387

Get ready to fully experience the rock climbing scene in Victoria with Sublime Climbs, a comprehensive guidebook authored by Kevin Lindorff, Josef Goding, and Jarrod Hodgson. This full-color, 380-page book covers the best climbing locations in the region, including Mt Arapiles, Mt Buffalo, and the Grampians. It features descriptions of over 700 routes, topographic maps, and breathtaking images. Whether you're a seasoned pro or new to the sport, Sublime Climbs has everything you need to make the most of your climbing experience in Victoria and experience all of it's classic routes.

Accommodations nearby more Hide

Share this

Tue 6 Jun
Check out what is happening in Right Watchtower Face.

Get a detailed insight with a timeline showing

  • Ticks by climbers like you
  • Discussions of the community
  • Updates to the index by our users
  • and many more things.

Login to see the timeline!

Deutsch English Español Français Italiano 한국어 Português 中文