
A Crag Guide gives an extensive view of all sub areas and climbs at a point in the index. It shows a snapshot of the index heirachy, up to 300 climbs (or areas) on a single web page. It shows selected comments climbers have made on a recently submitted ascent.
At a minor crag level this should be suitable for printing and taking with you on a climbing trip as an adjunct to your guidebook.
This guide was generated anonymously. Login to show your logged ascents against each route.
Warning
Rock climbing is extremely dangerous and can result in serious injury or death. Users acting on any information directly or indirectly available from this site do so at their own risk.
This guide is compiled from a community of users and is presented without verification that the information is accurate or complete and is subject to system errors. By using this guide you acknowledge that the material described in this document is extremely dangerous, and that the content may be misleading or wrong. In particular there may be misdescriptions of routes, incorrectly drawn topo lines, incorrect difficulty ratings or incorrect or missing protection ratings. This includes both errors from the content and system errors.
Nobody has checked this particlular guide so you cannot rely on it's accuracy like you would a store bought guide.
You should not depend on any information gleaned from this guide for your personal safety.
You must keep this warning with the guide. For more information refer to our:
Usage policy
Contributors
Thanks to the following people who have contributed to this crag guide:
Kieran Loughran
Campbell Gome
Brendan Heywood
Wendy Eden
Douglas Hockly
benwiessner
Robert Mudie
Gareth Llewellin
Dave Scarlett
Hywel Rowlands
The size of a person's name reflects their Crag Karma, which is their level of contribution. You can help contribute to your local crag by adding descriptions, photos, topos and more.
Some content has been provided under license from: © Australian Climbing Association Queensland (Creative Commons, Attribution, Share-Alike 2.5 AU) © Cameron Roy (CC BY-SA 3.0 AU)
Table of contents
- 1.
Arapiles / Djurite
3274 in Crag
- 1.1. Bushranger Bluff 42 in Area
-
1.2.
Declaration Crag Area 49 in Crag
- 1.2.1. Declaration Crag 35 in Crag
- 1.2.2. Brain Death Boulder 14 in Boulder
-
1.3.
Colosseum Wall Area 49 in Crag
- 1.3.1. Comic Strip Wall 14 in Cliff
- 1.3.2. The Thimble 8 in Cliff
- 1.3.3. Colosseum Wall 27 in Cliff
-
1.4.
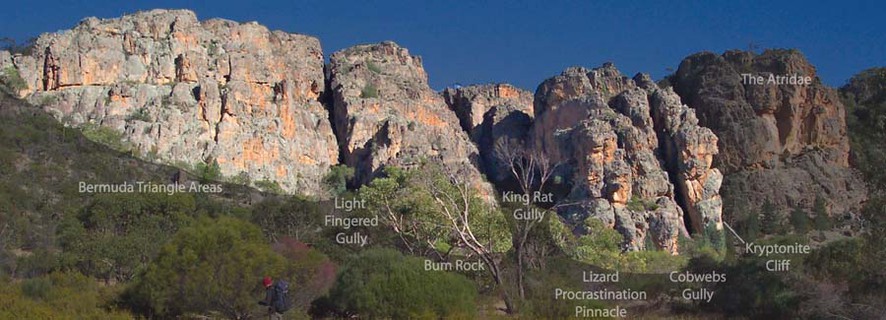
King Rat Area 143 in Crag
- 1.4.1. The Shark fin 4 in Cliff
- 1.4.2. The Pimple 5 in Cliff
- 1.4.3. White Mice Walls 12 in Cliff
-
1.4.4.
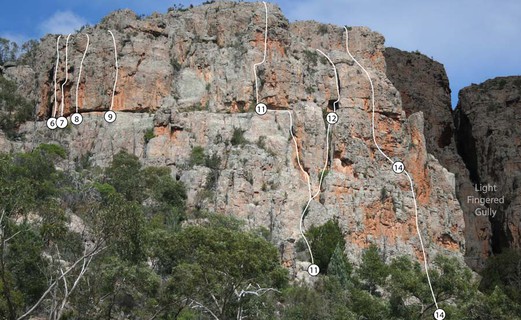
Light Fingered Gully / Hunger Gully 20 in Cliff
- 1.4.4.1. Upper Hunger 11 in Cliff
- 1.4.5. Bum Rocks 11 in Cliff
-
1.4.6.
King Rat Gully 79 in Cliff
- 1.4.6.1. Slander Wall 12 in Cliff
- 1.4.6.2. Left Fork 17 in Cliff
- 1.4.6.3. Right Fork 11 in Cliff
- 1.4.6.4. Rye Wall 4 in Cliff
- 1.4.6.5. Wittgenstein Walls 4 in Cliff
- 1.4.6.6. Serious Young Lizards Wall 5 in Cliff
- 1.4.6.7. Marx Wall 6 in Cliff
- 1.4.6.8. Upper SkyDiver 3 in Cliff
- 1.4.6.9. Skydiver Wall 17 in Cliff
-
1.4.7.
Lizard Procrastination Pinnacle 12 in Cliff
- 1.4.7.1. Baby Buttress 0 in Cliff
-
1.5.
Pilot Error Cliffs 63 in Crag
- 1.5.1. Baby Buttress 12 in Cliff
- 1.5.2. Cobwebs Gully 13 in Cliff
- 1.5.3. Kryptonite Krack Area 7 in Cliff
- 1.5.4. Pilot Error Area 16 in Cliff
- 1.5.5. Lois Lane Wall 15 in Cliff
-
1.6.
Atridae 64 in Crag
- 1.6.1. Cassandra Area 11 in Cliff
- 1.6.2. The Flight Deck 9 in Cliff
- 1.6.3. House of Atreus / Atridae Main Wall 8 in Cliff
- 1.6.4. Muldoon Area 8 in Cliff
- 1.6.5. Agamemnon Area 28 in Cliff
-
1.7.
Organ Pipes Area 145 in Crag
-
1.7.1.
Organ Pipes Gully 56 in Crag
- 1.7.1.1. Steel Delinquency Pinnacle 8 in Cliff
- 1.7.1.2. Organ Pipes Gully Left Side 37 in Crag
- 1.7.1.3. Organ Pipes Gully Right Side 11 in Cliff
-
1.7.2.
Organ Pipes 80 in Crag
- 1.7.2.1. D Minor Pinnacle 14 in Cliff
- 1.7.2.2. Central Organ Pipes / Didgeridoo Pipe / Piccolo Pipe / D Major Pipe / Diapason Pipe 28 in Cliff
- 1.7.2.3. The Red Wall & Toccata Wall / The Red Wall / Toccata Wall 38 in Cliff
- 1.7.3. Rabbit Boulder 9 in Boulder
-
1.7.1.
Organ Pipes Gully 56 in Crag
-
1.8.
Central Gully 487 in Crag
-
1.8.1.
Central Gully Left 192 in Crag
- 1.8.1.1. Leafy Quoit Lump 8 in Cliff
- 1.8.1.2. What You Like 1 in Sector
- 1.8.1.3. Operation Leo Area / Golden Triangle Wall 20 in Cliff
- 1.8.1.4. Brick Wall / Squeakeasy Wall 11 in Cliff
- 1.8.1.5. Golden Fleece Wall 21 in Cliff
- 1.8.1.6. Moby Dick Pinnacle 6 in Cliff
- 1.8.1.7. Stoat Wall 6 in Cliff
- 1.8.1.8. Dino Pillar 2 in Cliff
- 1.8.1.9. Pebbles and Bam Bam 6 in Cliff
- 1.8.1.10. Coyote Wall 5 in Cliff
- 1.8.1.11. Wuss Wall 5 in Cliff
- 1.8.1.12. Wailing Wall 22 in Cliff
- 1.8.1.13. Pritikin Wall 3 in Cliff
- 1.8.1.14. Dog Face / Dog Wall 28 in Cliff
- 1.8.1.15. Hellspite Wall / Lemming Wall 7 in Cliff
- 1.8.1.16. Shattered Buttress 9 in Cliff
- 1.8.1.17. Past Present Buttress 3 in Unknown
- 1.8.1.18. Charity Buttress 29 in Cliff
-
1.8.2.
Upper Central Gully 141 in Crag
- 1.8.2.1. Deep Freeze Wall 8 in Cliff
- 1.8.2.2. Mari Buttress 27 in Cliff
- 1.8.2.3. Cecilia Wall 30 in Cliff
- 1.8.2.4. Skyline Walls 37 in Cliff
- 1.8.2.5. Garden Wall 21 in Cliff
- 1.8.2.6. Everyfin, Everyfin, Like That & Everyfin 8 in Boulder
- 1.8.2.7. The Torture Chamber 10 in Boulder
-
1.8.3.
Central Gully Right 154 in Crag
- 1.8.3.1. Reaper Buttress 33 in Cliff
- 1.8.3.2. Preludes Wall 26 in Cliff
- 1.8.3.3. Minstrel Pinnacle 10 in Cliff
- 1.8.3.4. Starless Buttress 23 in Cliff
- 1.8.3.5. Dreadnought Gully 25 in Cliff
- 1.8.3.6. Dunes Buttress 37 in Cliff
-
1.8.1.
Central Gully Left 192 in Crag
-
1.9.
Fang Buttress and Surrounds 196 in Crag
-
1.9.1.
Major Mitchell Gully 50 in Crag
- 1.9.1.1. Morfydd Wall 38 in Cliff
- 1.9.1.2. Ali's Area 12 in Cliff
- 1.9.2. Fang Buttress 35 in Cliff
- 1.9.3. Plaque 21 in Cliff
-
1.9.4.
Golden Streak Area Boulders 38 in Crag
- 1.9.4.1. Golden Streak Boulder 17 in Boulder
- 1.9.4.2. Molar Boulder 1 in Boulder
- 1.9.4.3. Grey Boulder 2 in Boulder
- 1.9.4.4. No Hands Boulders 2 in Boulder
- 1.9.4.5. Swing Wing Boulder 4 in Boulder
- 1.9.4.6. Big Pointy Boulder 5 in Boulder
- 1.9.4.7. Animal Acts 4 in Boulder
- 1.9.4.8. Unkown Boulder Golden Streak area 1 in Boulder
- 1.9.4.9. Perfect jam boulder 2 in Boulder
-
1.9.5.
Krondorf Area Boulders 52 in Crag
- 1.9.5.1. Pinch Arete and Pebble Wall 18 in Boulder
- 1.9.5.2. Oops boulder 8 in Boulder
- 1.9.5.3. Krondorff Boulder 15 in Boulder
- 1.9.5.4. Trackside/Hammer Boulder 4 in Boulder
- 1.9.5.5. The Playground 7 in Boulder
-
1.9.1.
Major Mitchell Gully 50 in Crag
- 1.10. Bard Buttress 25 in Cliff
-
1.11.
Bluffs 115 in Crag
- 1.11.1. John's Pinnacle 14 in Cliff
- 1.11.2. Denim Wall 9 in Cliff
- 1.11.3. Bluff Minor 7 in Cliff
- 1.11.4. Flinders Lane Area 25 in Cliff
- 1.11.5. Dead Eye Dick Wall 2 in Cliff
-
1.11.6.
Bluff Major 58 in Crag
- 1.11.6.1. Blockbuster Ledge / Bluff Major East Face 14 in Cliff
- 1.11.6.2. Bluff Major North Face 15 in Cliff
- 1.11.6.3. Bluff Major West Face 29 in Cliff
-
1.12.
Tiger Wall Area 180 in Crag
-
1.12.1.
Tiger Wall 128 in Cliff
- 1.12.1.1. Seneca Wall 7 in Sector
- 1.12.1.2. Under Flinders Lane Wall 81 in Sector
- 1.12.1.3. Syrinx Area 30 in Sector
- 1.12.1.4. Senior Citizens Wall 10 in Sector
-
1.12.2.
Tiger Wall Boulders 52 in Field
- 1.12.2.1. Roadside Crag / The Squeeze Test 7 in Boulder
- 1.12.2.2. Crankshaft Boulder 23 in Boulder
- 1.12.2.3. Gonzo Boulder 9 in Boulder
- 1.12.2.4. The Chicken Boulder 7 in Boulder
- 1.12.2.5. Good Morning Arapiles 2 in Boulder
- 1.12.2.6. The Woody 4 in Boulder
-
1.12.1.
Tiger Wall 128 in Cliff
- 1.13. Castle Crag 35 in Cliff
-
1.14.
Grotto Wall Area 48 in Area
- 1.14.1. Pan Grove 9 in Cliff
- 1.14.2. Grotto Wall 35 in Cliff
- 1.14.3. The Bat Cave 4 in Cliff
-
1.15.
Voodoo Area 127 in Crag
- 1.15.1. Argyle St Clump 7 in Unknown
- 1.15.2. New Image Wall 16 in Cliff
- 1.15.3. Rats Alley 13 in Cliff
- 1.15.4. Voodoo Buttress 34 in Cliff
- 1.15.5. Waste of Space Gully 5 in Cliff
- 1.15.6. Dork Wall 5 in Cliff
- 1.15.7. Dead-point Wall 20 in Cliff
- 1.15.8. Looking Glass Wall 14 in Cliff
- 1.15.9. Ministry Wall 13 in Cliff
-
1.16.
The Pharos and Surrounds 465 in Crag
-
1.16.1.
The Pharos 153 in Crag
- 1.16.1.1. Death Row Pinnacle 23 in Cliff
- 1.16.1.2. The Never Boulder 1 in Boulder
- 1.16.1.3. Uncle Charlie 37 in Cliff
- 1.16.1.4. Front Wall and West Face 40 in Cliff
- 1.16.1.5. Back Wall 30 in Cliff
- 1.16.1.6. South Face 13 in Cliff
- 1.16.1.7. The French Crack Area 9 in Cliff
-
1.16.2.
Pharos Gully 169 in Crag
- 1.16.2.1. Vanoise Area 41 in Cliff
- 1.16.2.2. Duck Crag 8 in Cliff
- 1.16.2.3. Baker's Wall 15 in Cliff
- 1.16.2.4. Heckle and Jeckle Area 24 in Cliff
- 1.16.2.5. Voidoid Pinnacle 9 in Cliff
- 1.16.2.6. Huey and Satellites 29 in Cliff
- 1.16.2.7. Spellbinder Area 17 in Cliff
- 1.16.2.8. Cheops Buttress 15 in Cliff
- 1.16.2.9. Ethereal Buttress 9 in Cliff
- 1.16.2.10. Pharos Gully Bouldering 2 in Boulder
-
1.16.3.
Yesterday Gully 106 in Crag
- 1.16.3.1. Lower Gully 54 in Cliff
- 1.16.3.2. Upper Gully 52 in Cliff
-
1.16.4.
Pharos Boulders 37 in Crag
- 1.16.4.1. Superman Boulder 7 in Boulder
- 1.16.4.2. Around the World Boulder 9 in Boulder
- 1.16.4.3. Monkey Puzzle Boulder 13 in Boulder
- 1.16.4.4. Finalgon Boulder 6 in Boulder
- 1.16.4.5. Uphill from Finalgon 2 in Boulder
-
1.16.1.
The Pharos 153 in Crag
-
1.17.
The Watchtower Faces 259 in Crag
-
1.17.1.
Pinnacle Face 51 in Crag
- 1.17.1.1. Wedding Tackle Area 14 in Cliff
- 1.17.1.2. Tiptoe Ridge Area 11 in Cliff
- 1.17.1.3. Area Below Tiptoe Ridge 19 in Cliff
- 1.17.1.4. Siren Area 7 in Cliff
- 1.17.2. Left Watchtower Face 40 in Cliff
- 1.17.3. The Watchtower 11 in Cliff
- 1.17.4. Right Watchtower Face 34 in Cliff
- 1.17.5. Amok Wall 17 in Cliff
-
1.17.6.
Kitten Wall Area 89 in Crag
- 1.17.6.1. Kitten Wall 40 in Cliff
- 1.17.6.2. Tjuringa Wall 35 in Cliff
- 1.17.6.3. Bolero Wall 8 in Cliff
- 1.17.6.4. Hyperbole Buttress 6 in Cliff
-
1.17.7.
Watchtower Area Boulders 17 in Crag
- 1.17.7.1. Richochet Rock 3 in Boulder
- 1.17.7.2. The Gumnut 10 in Boulder
- 1.17.7.3. Moody Blues Boulder 4 in Boulder
-
1.17.1.
Pinnacle Face 51 in Crag
-
1.18.
Northern Group 242 in Crag
- 1.18.1. Henry Bolte Wall 36 in Cliff
- 1.18.2. Harlequin Cracks Area 30 in Cliff
- 1.18.3. Mysteries Wall 31 in Cliff
- 1.18.4. Shiralee Wall 17 in Cliff
- 1.18.5. Heath Row Buttress 6 in Area
- 1.18.6. Echo Crag 22 in Cliff
- 1.18.7. Kachoong Area 34 in Cliff
- 1.18.8. High Dive Gully 18 in Cliff
- 1.18.9. Evelyn and Lou Area 21 in Area
- 1.18.10. Nameless Gully / Dessert Wall 11 in Cliff
- 1.18.11. Mermaid Avenue 16 in Crag
-
1.19.
Far North 213 in Crag
- 1.19.1. PB Gully 19 in Cliff
- 1.19.2. Vandal Area 14 in Cliff
- 1.19.3. Intrepid Gully 13 in Cliff
- 1.19.4. Leasehold Wall 18 in Cliff
- 1.19.5. Hum Terrace 31 in Cliff
- 1.19.6. Lower Curtain Wall 20 in Cliff
- 1.19.7. Upper Curtain Wall 13 in Cliff
- 1.19.8. Echidna Wall / Right Curtain Wall 15 in Cliff
- 1.19.9. Intermission Wall 3 in Cliff
- 1.19.10. Windy Buttress 4 in Cliff
- 1.19.11. Cliche Wall 16 in Area
- 1.19.12. Werewolf Area 20 in Cliff
- 1.19.13. Bonsai Buttress 5 in Cliff
- 1.19.14. Winterset Wall 9 in Cliff
-
1.19.15.
Far North Bouldering 13 in Boulder
- 1.19.15.1. Caving Boulder 11 in Boulder
- 1.19.15.2. Boulder near caving boulder / Screaming boulder 2 in Boulder
-
1.20.
Mitre Rock 127 in Crag
- 1.20.1. South Mitre 55 in Cliff
- 1.20.2. Hells Bells Area 11 in Cliff
- 1.20.3. Deacon Area 8 in Cliff
- 1.20.4. North Mitre 53 in Cliff
-
1.21.
Western Side 199 in Crag
- 1.21.1. Mean Green Wall 3 in Cliff
- 1.21.2. Zareba Wall 7 in Cliff
- 1.21.3. Cyclop's Eye Area 9 in Cliff
- 1.21.4. Twin Rocks 1 in Area
- 1.21.5. Possum Rocks 28 in Cliff
- 1.21.6. Fox Rocks 19 in Cliff
- 1.21.7. The Menagerie 1 in Area
- 1.21.8. Christmas Walls 15 in Area
-
1.21.9.
Campbell's Kingdom 78 in Cliff
- 1.21.9.1. Sutherland Shire 4 in Cliff
- 1.21.10. Deep South 20 in Cliff
- 1.21.11. Pop Wall 12 in Cliff
- 1.21.12. Western Creek Valley 6 in Area
-
1.22.
Playground/Golf Links 1 in Field
- 1.22.1. Shawldale Boulder 1 in Boulder
- 1.22.2. Willoughby 0 in Boulder
- 2. Index by grade
1. Arapiles 3,274 routes in Crag
- Summary:
-
Mostly Trad climbing
Lat / Long: -36.756550, 141.831000
Stick to the paths.
Don't disturb the wildlife.
Routes near peregrine falcon nesting sites are closed in the spring.
Minimise the impact of your camping (fuel stoves not fires, take your rubbish with you, etc).
summary
The most loved and known, easily accessible quality crag in the land.
description
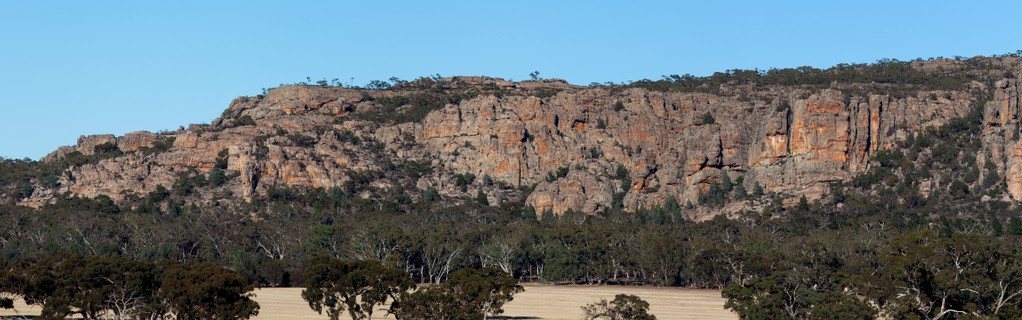
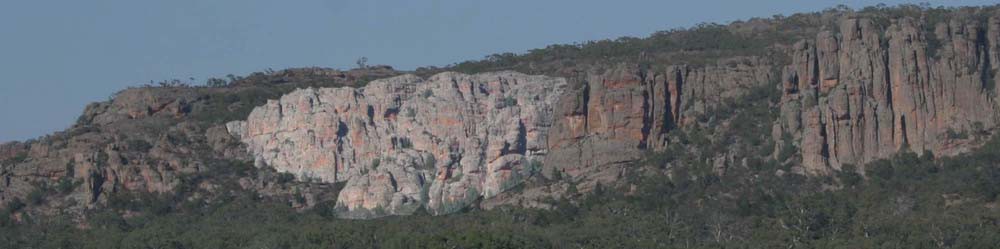
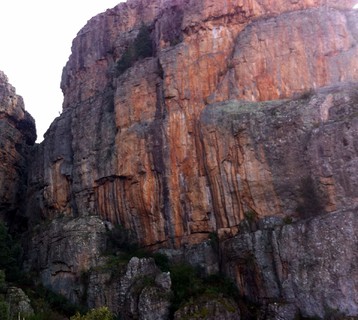
Heading towards Arapiles for some legendary climbing and starting to see it clearly for the first time, you will not have been alone if you feel a little disappointed. For taken from a distance Arapiles looks like a pile of choss.
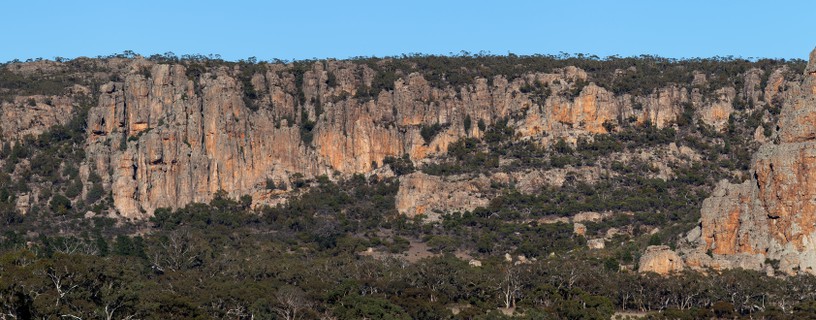
It is the closer inspection that yields a glimpse of the true magic of Arapiles. For this is when Arapiles reveals itself. The beautiful rich golden and gray sandstone, hard and solid. The labyrinth of small gullies and hidden faces, the technical and varied climbing.
Added to this is that the true heart of Australian climbing resides at Arapiles and in particular the campground we call The Pines.
One of the greatest qualities Arapiles has, is its appeal to climbers of all abilities. It must be one of the few crags in the world which offers incredible quality routes at all grades.
The rock quality is such that even the easiest routes involve good rock and beautifully formed holds, a rarity at most crags. In the 'Experienced' range (approx grades 19-24) Arapiles is particularly blessed. It is only from grade 25 upwards that bolts start to kick in. Again the routes that are 25+ are incredibly good.
Climbing at Arapiles is a mixture of superb rock and technical moves on often steep and spectacular ground. Arapiles is the ideal place to become a more proficient trad climber. Arapiles is also very accessible, there are over 2000 routes all within easy walking distance.
One of the greatest things about Arapiles, which draw so many people to it apart from climbing, is the social scene. At popular times of the year the Pines campground can be very crowded, which some people may not like, but it is a good thing, because the atmosphere it creates is very social and friendly. You can turn up without a climbing partner, and be almost guaranteed to meet someone to climb with. It is great for meeting fantastic people from all over the globe.
There is so much more to say on this crag, Australia's premier crag, but that waits for you to discover it.
Emergency Locations : A large number of Arapiles locations are registered with Emergency services and have been entered in TheCrag. If you need Emergency Services, dial 000 (triple-zero). You will first be asked "Police, Fire or Ambulance?". After responding you will be connected to the required service. The next question will ask for your location. Give the Emergency Location listed in TheCrag for your cliff. This is the minimum information Emergency Services require to get going. Then you can give more details of the accident, climb etc.
access issues
Cultural heritage closures now apply to some parts of Arapiles. This advice continues to evolve and may not be fully reflected in this website; refer to Parks Victoria for details applicable at the time of your visit. https://www.parks.vic.gov.au/-/media/project/pv/main/parks/documents/management-plans/mount-arapiles-tooan-state-park/mount-arapiles-tooan-state-park---aboriginal-cultural-heritage-protections---october-2020.pdf
Bird Nesting September-December Raptors usually nest on the following climbs in Spring : Cassandra, Eurydice, Harlequin Cracks, Revelations. Nesting usually finishes mid-December. There may or may not be signs in place at these times. Please keep 50m clear of these climbs if there appears to be nesting activity.
State Park - no dogs. No fires allowed Oct-Apr (inclusive).
approach
300km west of Melbourne.
Driving is your best bet. Public Transport is available- catch the train to Ballarat, bus to Horsham. From Horsham it is easy to hitch a lift or take a feeder bus that runs daily out to Arapiles.
where to stay
The Pines Campground is situated at the base of Arapiles, with water and toilets. Suitable for long and short term camping. Campsites must be booked online at http://www.parkstay.vic.gov.au/mount-arapiles-tooan-state-park or phone 13 1963.
More luxurious accommodation can be found in Natimuk i.e. Backpackers or Bed and Breakfast establishments. There is a campground at Lake Natimuk which has showers. Showers are also available at the Natimuk Pub for $5.
ethic
Mount Arapiles is first and foremost a trad climbing area. The few sport climbs tend to be in the higher grades where no natural pro is available.
Bolting, particularly retro-bolting, is discouraged and should only be undertaken after extensive consultation with the local climbers, first ascensionists, etc. Inappropriately placed bolts have been chopped.
Do not chip the rock.
Look after the park.
     |
1.1. Bushranger Bluff 42 routes in Area
- Summary:
-
Mostly Trad climbing
Lat / Long: -36.766989, 141.845943
summary
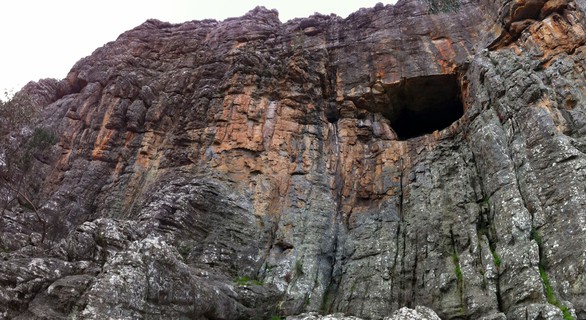
The big cave right of Ghost of Melville is the Nick Cave
description
The outcrop at Arapiles' far south-eastern end. A popular area for beginners.
Emergency Location : Mount Arapiles, Bushranger Bluff Area
approach
Drive along the summit road and the park on the right where the sign points to 'Melville's Cave'. From there it's a short, easy walk to the crag.
1.1.1. Main Wall 28 routes in Area
- Summary:
-
Mostly Trad climbing
Lat / Long: -36.766955, 141.845992
description
Main Wall is the first wall you reach as you come in on the walking track.
Emergency Location : Mount Arapiles, Bushranger Bluff Area
 |
||||||||
| Route | Grade | Style | Selected ascents | |||||
|---|---|---|---|---|---|---|---|---|
| 1 |
★ Bullet Buttress
A pleasant, low-angled buttress. Start: Start 20m L of Melville's Cave. FA: Keith & Maurice Leslie, 1967 | 3 | 20m | |||||
| 2 |
★ Holdup Line
Very nice. Start: Immediately right of 'Bullet Buttress'. A steep wall leads to a baby chimney, then up easily and step left into BB. FA: Maurice & Keith Leslie, 1967 | 9 | 20m | |||||
| 3 | ★ Holdup Line Direct Finish | 14 | 20m | |||||
| 4 |
★ Stage Coach
Up via the offwidth slot then finish as for 'Long Bow'. Start: Start just R of 'Holdup Line'. FA: Ceri Law & Geraldine Thompson, 1981 | 11 | 20m | |||||
| 5 |
★ Working Class Hero
Short chimney then finish as for 'Stage Coach'. Start: Just right of SC. FA: Bill Andrews, Ceri Law & Ian Wilson, 1980 | 11 | 20m | |||||
| 6 |
★ Long Bow
The groove with snap-o-licious flakes and a tricky finish. Start: 1m R of 'Working Class Hero'. FA: Ed Briner & Norm Osborne, 1970 | 10 | 20m | |||||
| 7 |
Ckup
Line immediately right of Long Bow. FA: Adrian Ridgley, 1994 | 11 | 20m | |||||
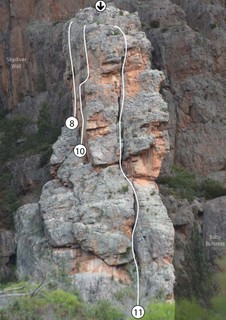
| 8 |
★ Kerfuffle
Start at crack two metres left of Ckinell but climb up grey slab on left to an easy stance directly below large thread. Straight up to middle of the two steep roofs. There's an undercling with a rattling tooth like block that is not going anywhere. Tricky gear and pumpy to place but regular gear can be found. Once over the roof follow the same line as Fracas to the top or head right to rap anchors. FA: Freya Hik & Hywel Rowlands, Dec 2017 | 17 | 28m | |||||
| 9 |
Fracas
Start at crack line two metres left of Ckinell, up crack, gradually veering left into second crack, then through large guano filled pocket and jug hall through the easier section of roof above pocket. Easy climbing to top or head right to rap anchors. FA: Hywel Rowlands & Freya Hik, Dec 2017 | 16 | 28m | |||||
| 10 |
Lost Gold
The overhung arete 1.5m left of Ckinell. Limited gear at roof and pumpy to place. | 18 | 28m | |||||
| 11 |
★ Ckinell
The slightly overhung corner. Beware snapping holds especially on the poorly protected start. Start: Just L of Melville's Cave. FA: Paul Gillis & Norm Osborne, 1970 | 14 | 28m | |||||
| 12 |
Ckinothe
Long traverse. Start: As for 'Ckinell' to gain Melville's Cave. Step right and traverse under the overhangs all the way to 'The Ghost Of Melville'. Meander right just above second cave, then up. FA: Paul Gillis & Norm Osborne, 1970 | 12 | 52m | |||||
| 13 |
★ Repo Man
Out through big roof in the main cave. Downgraded to 24 in recent guide. Start: Beneath L side of Melville's Cave. Then the thin wall above. FA: Geoff Little, Maureen Gallagher & Jon Muir, 1988 | 24 | 25m | |||||
| 14 |
★★ Climber-Model Denialists
Mosey up to the cave via the L crack, launch out onto the lip jugs of 'Repo Man', then veer R and up on good but spaced holds past two FH's into the finish of 'Cricket Bats In A Box'. FA: Douglas Hockly, 2017 | 26 | 20m, 2 | |||||
| 15 |
★ Cricket Bats in a Box
Poor pro. The right side of the cave to a sickle flake, then left. Start: Below the R side of Melville's Cave. FA: Jon Muir & Geoff Little, 1988 | 22 | 25m | |||||
| 16 |
★ Cave Climb
Step R from cave to ledge. Then up corner or nose, both with poor pro. Start: Start as for 'Cricket Bats in a Box'. FA: Maurice & Keith Leslie, 1967 | 9 | 30m | |||||
| 17 |
Horse Drawn
Start 5m right of Melville's Cave. Up wall and through cruxy overhang. FA: Peter Martin & Ian Howe, 1980 | 12 | 20m | |||||
 |
||||||||
| Route | Grade | Style | Selected ascents | |||||
| 18 |
★ Sexless Sue
Start 10m right of Melville's Cave. Climb the rotten crack and go through the overhang at the top. FA: Norm Osborne & Ed Briner, 1970 | 13 | 20m | |||||
| 19 |
Sue's Crutchless Knickers
Cracks, then finish up gully or up crack to the left. Start: 8m right of 'Sexless Sue'. FA: Andrew Corlass, James Falla, Teddy Bear Thompson & Sue Magoo, 1983 | 13 | 20m | |||||
| 20 |
★ Little Revolver Crack
Discontinuous cracks. Start: Start just L of 'Revolver Crack'. | 7 | 20m | |||||
| 21 |
★ Revolver Crack
The deep crack. Start 20m right of Melville's Cave. FA: Maurice & Keith Leslie, 1967 | 6 | 20m | |||||
| 22 |
★ Hangman
Lovely rock to start, and a dramatic exit to finish. Start: As for 'Revolver Crack' then head R up thin crack. FA: Bill Andrews & Julie Tulloch, 1975 | 14 | 25m | |||||
| 23 |
★ The Ghost of Melville
ATTENTION: There can be a Bee Hive on this route, take care. The major corner, facing the second cave. Start: 3m R of 'Revolver Crack' up major corner facing second cave. Step left to finish. FA: Bill Andrews & Julie Tulloch, 1975 | 15 | 25m | |||||
| 24 |
Big Dog's Cock
Presumably this climbs just R of the corner taken by 'The Ghost Of Melville'... but the write-up doesn't say. Start: R of 'Hangman'. Up slab, keeping right of corner to big pockets, over tricky bulge then directly up and through roof to top. FA: Mark Witham, Steve Reynolds, Merilyn Reynolds, Michael Hartman, Rhonda & Emil, 1996 | 12 | 28m | |||||
| 25 |
★ Red Right Hand
Bring some painkillers. Starts in the second cave (Nick Cave) through the obvious weakness in the roof with one bolt. | 22 | 10m, 1 | |||||
| 26 |
★★ 15 Feet Of Pure Steep, Bro
Fun roof climbing, past a slightly spooky block. Starts in Nick Cave, on the right hand side past two bolts and finishes up headwall at a sling anchor. | 22 | 14m, 2 | |||||
| 27 |
Six Wet Troopers
The least mossy line. Start: About 3m right of 'Big Dog's Cock' FA: Michael Hartman, Mark Witham, Steve Reynolds, Rhonda & Emil, 1996 | 10 | 28m | |||||
| 28 |
Climb, sleep, repeat
The crack 6m right of 'The Ghost of Melville', through overhang and up gulch. FA: Wendy Eden & Lassi, 1 Nov 2018 | 10 | ||||||
1.1.2. Back Wall 14 routes in Cliff
- Summary:
-
All Trad climbing
Lat / Long: -36.766569, 141.846350
description
From Main Wall follow the track around to the right.
Emergency Location : Mount Arapiles, Bushranger Bluff Area
approach
Approach as for 'Front Wall' and walk R around the end of the buttress past the Second Cave. 'Back Wall' is the small cliffline around the descent gully.
descent notes
The easy gully splitting the 'Trooper' area, and the 'Cobb & Co' area is the way down.
   |
||||||||
| Route | Grade | Style | Selected ascents | |||||
|---|---|---|---|---|---|---|---|---|
| 1 |
★ Trooper
FA: Peter Martin, 1981 | 3 | 10m | |||||
| 2 |
★ Trooper One
Warning Flora and Fauna: Skeleton Fork Fern Crack to horizontal break, then go 2m right and up crack. Start: 1m left of small cave on the grey wall just left of the descent gully. FA: Peter Martin, 1981 | 7 | 10m | |||||
| 3 |
★ Trooper Two
Start just right of the cave, heading up until level with the top of it, then head diagonally up left until above the centre of the cave and continue straight up from there. FA: Peter Martin, 1981 | 13 | 10m | |||||
| 4 |
★ Trooper Three
The crack with a hard start. Start at the right side of the grey wall. FA: Peter Martin, 1981 | 6 | 10m | |||||
| 5 |
★ Cartridge Arete
A pleasant jug-haul arete. Start: The arete right of the walk-down gully. | 2 | 10m | |||||
| 6 |
★ Cartridge Wall
The wall between 'Cartridge Arete' and 'Cartridge Chimney'. | 6 | 10m | |||||
| 7 |
★ Cartridge Chimney
The chimney. Start: Just R of 'Cartridge Arete'. FA: Bill Andrews & Julie Tulloch, 1975 | 6 | 10m | |||||
| 8 |
★ Dead Ned
A nice little line. Start up the left edge of the orange wall, then step right and proceed up the weakness on good holds. FA: Unknown, 2000 | 7 | 10m | |||||
| 9 |
★ Kelly Watch The Stars
The fun starting move up to the vertical finger slot directly up the wall between the grooves of Dead Ned and OC. Well protected. | 14 | 10m | |||||
| 10 |
★ Orange Crush
The crack. Start: 3.5m right of CC. FA: Tod Truscott & Oscar Poll, 1990 | 15 | 10m | |||||
| 11 |
★ Cobb & Co. / Cobb and Co.
The steep orange corner facing L. Start 0.5m R of OC. FA: Bill Andrews & Julie Tulloch, 1975 | 6 | 12m | |||||
| 12 |
★ Tullah's Pleased
Start 3m left of Tullah's Tease and up the bouldery start. Straight up through the middle of the orange face on ripper incut jugs. Stay in the middle of the face the whole way up. Protection is great all the way. | 10 | 12m | |||||
| 13 |
★ Tullah's Tease
Layback for 5m then step right into crack. Start: Start 5m right of 'Cobb & Co'. FA: John Fisher, 1983 | 7 | 12m | |||||
| 14 |
★ Rubbery Under Arms
Up the pockets through the overhanging wall, about 4m right of 'Tullah's Tease', then continue easily up the line above. FA: Michael Creek, 1986 | 16 | 12m | |||||
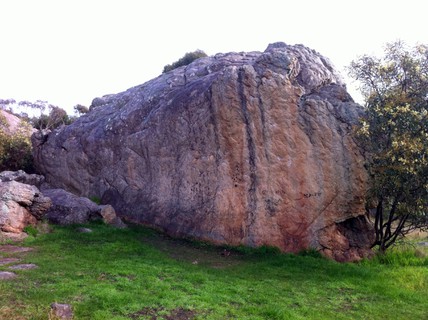
1.2. Declaration Crag Area 49 routes in Crag
- Summary:
-
Trad climbing, Bouldering and Sport climbing
Lat / Long: -36.766784, 141.851664
description
The prominent outcrop by the side of the road about 600m south of the camping ground.
A good area for beginners.
Emergency Location : Mount Arapiles, Declaration Crag Area
access issues
On Tuesday (3/12/19), Barengi Gadjin Land Council (BGLC) informed The Rockclimbing Roundtable (just in advance of public release) that rock art has been rediscovered at Declaration Crag (also known as Taylor’s rock), at Mt Arapiles.
Temporary Restricitons are in place from December 4th while the “Traditional Owners decide what they would like to do with this discovery and how to manage the site”.
approach
Either drive 600m down the road from the campsite and park close to the base of the crag or walk along the path that starts near the toilet block.
 |
1.2.1. Declaration Crag 35 routes in Crag
- Summary:
-
Mostly Trad climbing
Lat / Long: -36.766836, 141.851825
summary
One of the most convenient crags in the country, being about 15m from the road.
Emergency Location: Mount Arapiles, Declaration Crag Area
description
The routes are described clockwise, starting at 'The Ferrets are Coming' which is on the far left, facing South.
There is a nasty weed on the R near the bouldering - please try not to spread the seeds.
    |
||||||||
| Route | Grade | Style | Selected ascents | |||||
|---|---|---|---|---|---|---|---|---|
| 1 |
Pot Boiler
Start 8m left of 'The Ferrets Are Coming', below a rock step. R up vague ramp then up. FA: Bruce Sutherland & Keith Lockwood, 1984 | 16 | 12m | |||||
| 2 |
Tonic
Start as for 'Pot Boiler' but continue up to the horizontal break at 8m, then head right and up. FA: Keith Lockwood & Bruce Sutherland, 1984 | 17 | 12m | |||||
| 3 |
Pot Boiler Right Hand Variant
Incorrectly labelled as 'Tonic' when first put on The Crag. FA details on this alternate finish for 'Pot Boiler' are unknown. Start as for 'Pot Boiler' but continue heading right then up gross looking crack. | 17 | 12m | |||||
| 4 |
★ The Ferrets Are Coming
Once graded 17! 21 for tall people and/or topropers. Fiddly to protect. Start 7m left of 'Craddock Crack' and head up left leaning crack before moving back right. FA: Peter Watson & Mike Law, 1976 | 21 R | 12m | |||||
| 5 |
★ Craddock Crack
This baby offwidth was possibly first climbed by Bob Craddock. The left-most deep crack on the roadside face. | 9 | 13m | |||||
| 6 |
★ Raiders of the Lost Crack
Up 3m, left across 'Craddock Crack' to freaky block on arete, then up crack 3m left of arete. The RH Variant goes up the crack on the arete at grade 18. Start: 1m right of 'CC'. FA: Auston Rotheram & Tom Greenwood, 1984 | 18 | 15m | |||||
| 7 |
Kristies Finger
Think this is the front of the little buttress immediately right of 'Craddock Crack', starting as for 'Raiders of The Lost Crack'. FA: Mark Thomas & Kristie O'Brien, 2005 | 10 | 12m | |||||
| 8 |
★ Sunny Gully
Hard start, then easy climbing to the ledge. A direct finish continues up the crack above this ledge at about grade 18. | 2 | 12m | |||||
| 9 |
★ Marshmallow Sea DS
The undercut direct start to 'Marshmallow Sea' is definitely a little harder than the original. | 8 | 14m | |||||
| 10 |
Marshmallow Sea
Move left to the sparsely protected smooth wall facing the road. Start: As for 'Deck Gully' but move left and up, finishing past the small overhang. FA: Kevin Lindorff & Ken Taylor, 1975 | 7 | 14m | |||||
| 11 |
Deck Gully
The rightmost deep gully facing the road. | 2 | 12m | |||||
| 12 |
★ Brit Milah
High traverse that circumscribes the wall above 'Deck Games'. The original purpose of the 'mystery' bolt. Start at the top of 'Deck Gully' at the obvious traverse line. There is gear that protects the step out to clip the bolt. Scamper along the traverse line clipping a bolt on Gordy's route till you get to the front of the block. up and belay. FA: Mark Wood, Ben Storey & Steve Wilson, 2011 | 20 | 12m, 2 | |||||
| 13 |
★ All Decked Out
This is the 2 FHs up the nice little face trending L from 'Deck Games'. Start: As for 'Deck Games'. FA: Gordon Poultney, 2000 | 27 | 12m, 2 | |||||
| 14 |
★ Deck Games
Very appealing rock. Start: Under the nice bulgy orange buttress closest to the road and start up the left leaning crack only to break right almost immediately. FA: Kim Carrigan, 1984 | 25 | 13m, 1 | |||||
| 15 |
New Wave Winos
Start as for Saggitarian, head left under bulge and dyno up left through it past a carrot bolt hammered into a break like a piton. Yes, you read that correctly, and that's why I've attributed the route to Mike Law as surely noone else would have thought this was a great idea. I just TR'd it. FA: Mike Law, 1983 | 26 | 15m | |||||
  |
||||||||
| Route | Grade | Style | Selected ascents | |||||
| 16 |
★ Scorpio
Left-hand finish to Sagittarian (Grade could be suspect FA: Ingvar Lidman, 1998 | 24 | ||||||
| 17 |
★★ Sagittarian
Steep crack 6m left of 'Sickle' to break, then move R and up past a bolt, onto easier ground. FA: Peter Millington & Adrian Jones, 1969 FFA: Kim Carrigan, 1978 | 23 | 12m, 1 | |||||
| 18 |
★ Sagittarian Variant Start
Start as for Slip Knot and head up left to the bolt on Sagittarian. Easier and better than the original. FA: 2014 | 21 | 15m, 1 | |||||
| 19 |
★ New Wave Wanks
Start up 'Slip Knot', then left across 'Sagittarian' to the arete, and a hard move up R to jugs. FA: Phil Bigg & Chris Shepherd, 1983 | 22 | 15m | |||||
| 20 |
★ Slip Knot
Start 1m right of 'Sagittarian' and up poorly protected wall just right of the bolts. FA: Kevin Lindorff, Mike Law & Mike Stone, 1977 | 19 R | 12m | |||||
| 21 |
Taya
Good beginner's lead. Start just left of the plaque and right of the small overhang. Climb the wall between 'Hammer' and 'Slip Knot'. FA: Taya Cross & Glenn Mostert, 1997 | 7 | 12m | |||||
| 22 |
★ Hammer
Great beginner's route. Start as for 'Sickle' and go up this a little way then step left to short ramp then up shallow corner. Climbing it direct is around grade 8, but has no protection. FA: Doug Hatt, 1964 | 4 | 12m | |||||
| 23 |
★ Sickle
Impossible to get lost on. Starts above the plaque on the north-west side of the crag. It's the obvious wide chimney, that narrows to a crack near the top. FA: Garry Kerkin & Co, 1965 | 9 | 13m | |||||
| 24 |
★★ Marmot's Mall
The nice face between 'Sickle' and 'Little Thor' gets classed as "serious" as it has seen plenty of groundfalls and a death. However, the pro is fine if you know how to put it in. Treat it as an exercise to see how much you can place. Start 3m L of 'Little Thor', immediately right of 'Sickle'. The nice glassy face with small cracks for wires and hardest moves at top. Note the arete just to the R has been done at 18. FA: Rowan Webb, Dave Parkhurst & Kevin Sheehy, 1966 | 16 R | 12m | |||||
| 25 |
★★★ Little Thor
The lovely right-facing flake corner bordering the left side of the great blankish north-west wall. It's a pity that it gets heavily top-roped. Climb the right-facing corner with hard moves past the little roof then keep cranking up slightly left to the top. Gear has a habit of unzipping on people; consider placing a directional at the start and being generous with the draws. FA: Ian Guild & Peter Smith, 1965 FFA: Ian Lewis & Joe Friend, 1974 | 20 | 12m | |||||
| 26 |
★★ Little Thor Direct Finish
After the crux on 'Little Thor', continue straight up instead of scuttling off left. Take a bolt bracket. FA: Toshihiko Hijakata, 1988 | 23 | 5m, 1 | |||||
| 27 |
★★★ Steps Ahead
Sustained crimpiness up microscopic edges. Fixed hangers up beautiful wall 3m R of Little Thor. Tara Sutherland's Jan '98 ascent was the first Aussie female ascent of a grade 29, followed shortly after by Megan Osborne. FA: Jean-Marc Troussier, 1984 | 29 | 18m, 4 | |||||
  |
||||||||
| Route | Grade | Style | Selected ascents | |||||
| 28 |
★★ Hit the Deck
Originally climbed by Claw with a rest and named "Wild Drugs and Crazy Sex". As for 'Look Sharp' to first bolt, then move left and up the wall past more bolts. FA: Mike Law FFA: Roland Foster, Philby & Eric Eastern Brown, 1984 | 26 | 18m, 4 | |||||
| 29 |
★ Look Sharp
Up weakness 8m right of 'Steps Ahead' to first bolt. Go slightly right to second bolt and hard moves lead to pin. Finish up right. FA: Kim Carrigan & Tony Dignan, 1979 | 24 | 15m, 2 | |||||
| 30 |
★ A New Toy
Bouldery crux. Up crack 2m left of 'Problematic' to bulge and bolt. Onwards. FA: Stuart Hickson & Allan Wilkie, 1982 | 22 | 15m, 1 | |||||
| 31 |
★ Remembrance Day
From the finish of 'Problematic', traverse L across the top of the wall under small roof-line with a piton, 2 BRs (take brackets), then over rooflet and left past a slung knob for pro. Start: as for 'Problematic'. FA: Chris Shepherd & Kim Carrigan, 1982 | 24 | 20m, 2 | |||||
| 32 |
★ Problematic
The short bulging crack on the right-hand side of the north-west-facing sheer orange wall. FA: Kim Carrigan & Chris Baxter, 1979 | 22 | 10m | |||||
| 33 |
Hog Jowls
Start left of 'The Pleb'. Up to ledge, traverse L to corner. FA: Paul Hoskins & Phil Wilkins, 1996 | 17 | 20m | |||||
| 34 |
Sir George
Start left of 'The Pleb'. Nice crack to ledge then bulge. FA: John Fisher, 1984 | 13 | 20m | |||||
| 35 |
★ The Pleb
The chimney on the south-west side of the outcrop. FA: Chris Baxter & Andrew Smith, 1966 | 5 | 27m | |||||
") ).
).1.2.2. Brain Death Boulder 14 routes in Boulder
- Summary:
-
All Bouldering
Lat / Long: -36.766490, 141.851686
description
Emergency Location: Mount Arapiles, Declaration Crag Area
 |
||||||||
| Route | Grade | Style | Selected ascents | |||||
|---|---|---|---|---|---|---|---|---|
| 1 |
V0 problem on left
Sit start | V0 | 2m | |||||
| 2 | V1 Problem (a) | V1 | 3m | |||||
| 3 | ★ Traverse | V3 | 10m | |||||
| 4 | ★ V4 Problem | V4 | 5m | |||||
| 5 | ★★ V3 pocket problem | V3 | 5m | |||||
| 6 | ★ V1 Problem (b) | V1 | 4m | |||||
| 7 | ★ V0 Juggy Arete | V0 | 4m | |||||
 |
||||||||
| Route | Grade | Style | Selected ascents | |||||
| 8 | V0 Problem | V0- | 4m | |||||
| 9 |
★★★ Brain Death
Follow the wide crack the whole way up. FA: Henry Barber | 23 | 5m | |||||
| 10 | ★ Brain Death - Piker's Variant | V3 | ||||||
| 11 | ★★ L | V3 | 6m | |||||
| 12 | ★★ S | V2 | 6m | |||||
| 13 | ★★ D | V3 | 6m | |||||
| 14 | ★★ The Big E | V5 | 5m | |||||
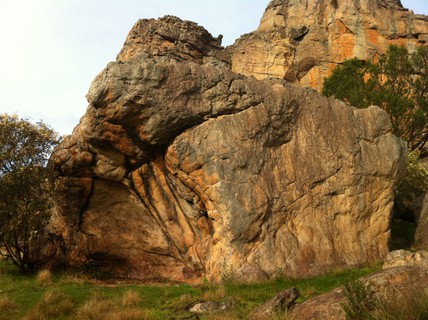
1.3. Colosseum Wall Area 49 routes in Crag
- Summary:
-
All Trad climbing
Lat / Long: -36.764754, 141.847881
description
Colosseum Wall is the last significant outcrop as you head South (L along the cliff line).
Emergency Location : Mount Arapiles, Colosseum Wall Area
approach
10 minute walk from pines campground. Stay on the low track until you can see the walls then head up.
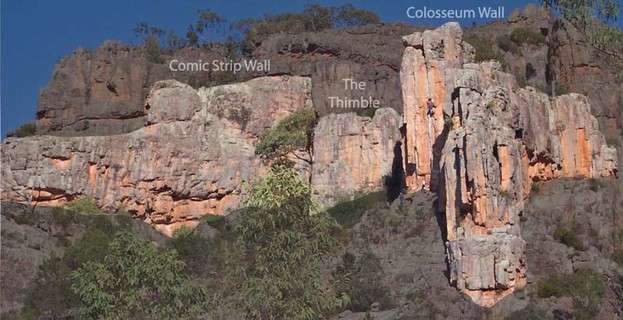 |
1.3.1. Comic Strip Wall 14 routes in Cliff
- Summary:
-
Lat / Long: -36.765043, 141.848037
description
The wall about 60m south of Colosseum Wall.
Emergency Location : Mount Arapiles, Colosseum Wall Area
approach
10 minutes walk from the camping ground.
descent notes
Rap anchor in the middle of the wall or scramble off L for the routes from Sausage of the Century - Popeye.
Scramble off R for Asteroids and the routes to its right.
 |
||||||||
| Route | Grade | Style | Selected ascents | |||||
|---|---|---|---|---|---|---|---|---|
| 1 |
★ Sausage Of The Century
Bouldery start then move rightwards into the line. Start at the vague line towards the L end of the wall. FA: Jon Muir, Rod Young, Mike Law-Smith & Glenn Tempest, 1981 | 19 | 12m | |||||
| 2 |
★ Oogie Boogie
A pair of weaknesses lead to a bulge, which succumbs to a layback/mantle. Start just R of Sausage Of The Century. FA: Mark Barnett & Rod Young, 1981 | 21 | 10m | |||||
| 3 |
Boogie Boogie
A miniscule direct middle to Oogie Boogie. Straight under the DRB anchor. FA: Douglas Hockly & Wendy Eden, 2 Nov 2015 | 22 | 10m | |||||
| 4 |
★ Limp
In the same vein as Je Suis Un Legend, links all the easiest bits of the existing routes to create a conceptual megaclassic. Unfortunately the climbing is only one star. Start up Oogie Boogie, go diagonally right to join the top of Asteroids and finish up it. Up the slab (a touch runout) and right up the corner to finish. Its possible to keep traversing from the final corner/groove to the chains of Hyperspace Bypass (below top of cliff). FA: Douglas Hockly & Wendy Eden, 7 Oct 2015 | 18 | 20m | |||||
| 5 |
★ The Wizard of Id
Warning Flora and Fauna: Skeleton Fork Fern Steep jugs, crack, face. Start R of OB, just L of overhangs, beneath small flake on bulge. FA: Rod Young & Mark Barnett, 1981 | 20 | 10m | |||||
 |
||||||||
| Route | Grade | Style | Selected ascents | |||||
| 6 |
★ Popeye
Warning Flora and Fauna: Skeleton Fork Fern Start in V corner, soon moving left until under large jammed blocks. Pull through the bulge, then up vertical seam, then step up and left. Soon after, traverse left to the ledge with rap station. FA: Rod Young & Mark Barnett, 1981 | 20 | 20m | |||||
| 7 |
★ Asteroids
Warning Flora and Fauna: Skeleton Fork Fern Starts at the same corner as for Popeye, then steps up and right to a higher V-corner. Pass the bulge using the big pockets, then higher to where the angle eases. From here you can either traverse far left (to 'The Wizard of Id' abseil station), or veer right up the dirty weakness (to 'Vogon Destructor Fleet' abseil station). FA: Rod Young & Chris Shepherd, 1981 | 22 | 20m | |||||
| 8 |
★ Vogon Destructor Fleet
Warning Flora and Fauna: Skeleton Fork Fern Start right of Asteroids, head up to small V in overhang below bolts. Follow bolts through bulges, then 2 bolts trending right through head wall to shared anchor with 'Hyperspace Bypass'. FA: Wendy Eden & Douglas Hockly, 17 Oct 2015 | 23 | 20m, 4 | |||||
| 9 |
★ Hyperspace Bypass
Warning Flora and Fauna: Skeleton Fork Fern Up short corner 2m right of 'Vogon Destructor Fleet' to bolts, then up right line of bolts in head wall, finishing left to shared anchor with VDF. FA: Wendy Eden & Douglas Hockly, 2015 | 22 | 20m, 4 | |||||
| 10 |
★ Hyperspace
Shallow corner then R through bulges. Start at bushes R of 'Asteroids'. FA: Chris Shepherd & Rod Young, 1981 | 22 | 20m | |||||
/dd/1b/dd1be505c09880a17eb1cff08c7d5a44423e983f) /1f/c6/1fc63afbd228d6054e775045251a33b495d3570a) |
||||||||
| Route | Grade | Style | Selected ascents | |||||
| 11 |
Letting Go (variant)
The orange flake start, bolted by peter stebbins. Doubtful it's been done. | 20m, 1 | ||||||
| 12 |
★★ Letting Go
The others noodled around for a few days cleaning up the easy stuff, then Moorhead produced this! Sustained, with a strenuous bouldery crux. In fact, two bouldery strenuous cruxes. Start at short black flake 10m R of 'Hyperspace'. Flake to grey coloured RB, L to pockets (#4 friend), then R up flake to tough finish. FA: Mark Moorhead & Jon Muir, 1981 | 26 | 15m, 1 | |||||
| 13 |
★ Failing New Romantic
The original start climbed a tree, which has since fallen down. Following this you needed to batman to a the bolt and start at the flake. An independent right hand start which goes free from the ground was later bolted and climbed. Start at the next flake R of 'Letting Go'. Climb the edges up the face to the R, then layback with difficulty up weakness past another bolt. Originally given 24 with a rumour it was hard for the grade. FA: Steve Howden, Chris Shepherd & Kim Carrigan, 1982 FFA: Kevin Lindorff & Hywel Rowlands, 2018 | 25 | 15m, 2 | |||||
| 14 |
★ Slime Time
Originally 26 in the best of Law sandbagging tradition. Quite good, and not particularly slimy. Reachy though, looks way harder below about 6' reach. Start R of 'Failing New Romantic'. 2 bolts up the seam, step L, then finish past a couple of fixed wires. FA: Mike Law & Paul Hoskins, 1982 | 28 | 15m, 2 | |||||
1.3.2. The Thimble 8 routes in Cliff
- Summary:
-
Lat / Long: -36.764657, 141.847597
description
15m back up L from Colosseum Wall is this little outcrop. The front face is quite attractive but its a bit short.
  |
||||||||
| Route | Grade | Style | Selected ascents | |||||
|---|---|---|---|---|---|---|---|---|
| 1 |
★★ Yakshini
The line just L of the arete. Start on the black back wall of The 'Thimble' which faces 'Comic Strip Wall', 1m L of the arete. FA: Hanut Singh-Dodd, Kasia Kazimierczak & Martin Lama, 1992 | 16 | 11m | |||||
| 2 |
The Last In Line
The arete. Start just R of 'Yakshini'. FA: Martin Lama & Hanut Singh-Dodd, 1992 | 19 | 11m | |||||
| 3 |
Nothing Too Serious
Short corner then R and up. Start 1m R of 'The Last In Line'. FA: Martin Lama & Hanut Singh-Dodd, 1992 | 16 | 10m | |||||
| 4 |
Stabbur
Beware loose block. Adequacy of pro is unknown. Join 'Nothing Too Serious' at the top. Start 3m R of NTS, just L of tree. FA: Patrik Alsebv, 1995 | 24 R | 12m | |||||
| 5 |
★ Thimble
The crack. Start beneath the R side of the front face. FA: Kevin Lindorff & Peter Lindorff, 1977 | 18 | 9m | |||||
| 6 |
★ Pinpricks Of Blood
Long moves between good holds. Start direct. Size 3 Camalot handy. Finish right onto the arete. FA: Douglas Hockly & Paul Deacon, 2009 | 22 | 10m | |||||
| 7 |
★ Wingspan
Start on arête up and left past bolt up to break 3cam then straight up to top of head wall small wires, then finishing out right on arête and up to high anchor | 23 | 10m, 1 | |||||
| 8 |
★ Drowsy Drivers Die
The arete. Start 2m R of 'Thimble'. FA: Roland Foster & James Anderson, 1989 | 24 | 9m, 2 | |||||
1.3.3. Colosseum Wall 27 routes in Cliff
- Summary:
-
Lat / Long: -36.764411, 141.847721
description
Colosseum Wall is the last significant outcrop as you head South (L along the cliff line).
Emergency Location : Mount Arapiles, Colosseum Wall Area
approach
descent notes
Descend via the rap anchor at the top of Spasticus.
   |
||||||||
| Route | Grade | Style | Selected ascents | |||||
|---|---|---|---|---|---|---|---|---|
| 1 |
Fitzroy Street
Wall 5 metres left of 'Crucifixion'. Hopelessly contrived. You can sort of make an OK 21 out of it by zigzagging left and right. FA: Martin Grullich, 1986 | 26 | 12m, 4 | |||||
| 2 |
★ Crucifixion
Grunt your way up the offwidth crack on the wall around left from 'The Rack'. FA: Chris Dewhirst, Alec Campbell & Bruce Osborne, 1966 | 16 | 12m | |||||
| 3 |
★ Blasphemy
Start at the arete just L of 'Christian Crack'. Up the corner on the arete, trend right past FH, before landing on the ledge. From here you work your way back right, and the theory is that you finish up the arete, but inevitably the holds lead you further right, such that it feels contrived to avoid finishing up 'Christian Crack'. FA: Kim Carrigan & Louise Shepherd, 1979 | 22 | 15m, 1 | |||||
| 4 |
★★ Christian Crack
Excellent sustained climbing up the line with great pro. A borderline classic. There are two striking cracks on the wall on the left side of Colosseum Wall - this is the left one. Ann Pauligk's 1977 ascent was the first Aussie female ascent at this grade. FA: Chris Baxter & Andrew Smith, 1966 FFA: Joe Friend, 1974 | 20 | 13m | |||||
| 5 |
★★ The Rack
People rave about this being a brilliant jamming testpiece, when in fact its a one move wonder ... so ticking it doesn't prove you're a jamming maestro. It's a very nice little climb though. The crack 3m R of 'Christian Crack'. FA: John Ewbank, 1968 | 18 | 13m | |||||
| 6 |
The Bolt
Start just R of 'The Rack' and go up past the BR. FA: Russell Chudleigh, 1984 | 21 | 13m, 1 | |||||
| 7 |
Spasticus
The scrubby corner. | 5 | 10m | |||||
| 8 |
★ No Wall At All
A low bolt then try not to die above that. Start: Start between 'Spasticus' & 'Nero'. FA: Mike Law-Smith, 1981 | 22 X | 12m, 1 | |||||
| 9 |
★ Nero
The crack requires a bit of jamming. Start 3-4m R of the 'Spasticus'. FA: Philip Stranger & Andrew Smith, 1966 | 14 | 13m | |||||
| 10 |
★ Petronius
Warning Flora and Fauna: Skeleton Fork Fern The steep corner. Start 6m R of Nero. FA: Fred Langenhorst & Bruno Zielke, 1969 FFA: Andrew Thomson, 1977 | 21 | 15m | |||||
| 11 |
★ Petro-Fy
Arete with poor pro. Start 3m R of 'Petronius' FA: Peter Martin & Mark Savage, 1990 | 24 R | 15m | |||||
| 12 |
★ Tom Thumb
The layback corner. Start 1m R of 'Petro-Fy'. FA: Bruno Zielke & Fred Langenhorst, 1969 | 14 | 15m | |||||
| 13 |
Brutus
The corner then finish R. Start 1m R of 'Tom Thumb'. FA: Peter Martin, Rob Tymms & Mark Savage, 1990 | 19 | 20m | |||||
  |
||||||||
| Route | Grade | Style | Selected ascents | |||||
| 14 |
★ Castration
LH crack in narrow buttress, then R to a pair of thin cracks. Start beneath the roadside-face of the buttress. FA: Paul Gillis & John Bowen, 1970 | 16 | 15m | |||||
| 15 |
What Have the Romans Done for Us?
The provided description is as follows: "Offwidth crack on left side of main nose of 'Colosseum Wall'. Not necessarily that new!" This sounds like it should be near 'Castration'. But how an 8m route could be in this vicinity is a bit baffling. Also it sounds like it might be left of 'Castration', but that area is already pretty packed with routes and they're well harder than grade 12. So, an improved description of this would be nice. FA: FRA Biggus Dickus, 1996 | 12 | 8m | |||||
| 16 |
Toga
The line. Start around R from 'Castration', on the wall facing The Pines, at the initial. FA: Paul Gillis, John Bowen & Peter Lindorff, 1970 | 6 | 12m | |||||
| 17 |
★ Flavius Maximus
Try to stay out of the chimney, then finish up the crack on the R. The direct finish has also been done by Peter Lindorff. Start just R of the descent chimney. FA: Peter Lindorff, Colin Lindorff & Paul Gillis, 1970 | 15 | 14m | |||||
| 18 |
Roman Ite Domum
The wall right of 'Flavius Maximus'. This was also written up as 'Tribute To God' in the April 2009 Argus. Over block to undercling, then straight up wall to top. Protection in crack on left of wall. FA: Richard Smith & Greg Pritchard, 1996 | 19 | 10m | |||||
| 19 |
I've Got A Big Honker
The usual claim of those who don't... Start 8m R of FM. To break (wire on left), then right to bulge. FA: Sam Blainey & Andrew White, 1991 | 20 | 12m | |||||
| 20 |
The Martyr
The bottomless corner. Start 2m R of 'I've Got A Big Honker'. FA: Julie Tulloch & Bill Andrews, 1975 | 16 | 11m | |||||
| 21 |
Welease Wodger
I assume its the grey wall between The Martyr wall and the Welease Witchard wall. FA: Graeme "Chapman" Jones & Eric "Idle" Jones, 1996 | 12 | 15m | |||||
| 22 |
Welease Witchard
5m right of 'Welease Wodger' is a small buttress. This takes scrappy line up left. FA: Smith & Paul Hoskins, 1996 | 12 | 15m | |||||
| 23 |
Welease Bwian
The right line. FA: Hoskins & Smith, 1996 | 17 | 15m | |||||
| 24 |
People Called Romans, They Go The 'Ouse
Up the wall 1m right of corner 10m right of 'Welease Bwian'. Continue up crack from ledge at 3/4 height. FA: Hoskins, G. Jones & Smith, 1996 | 21 | 15m | |||||
| 25 |
Incontinentia Buttocks
The jam crack 10m right of 'People Called Romans, They Go The 'Ouse'. FA: Biggus Dickus, 1996 | 12 | 8m | |||||
| 26 |
Roaming Knows
The nose on the buttress 8m right of 'Incontinentia Buttocks'. Start on the right side of arete, then up and over nose. FA: Smith, Hoskins, G. Jones & Ed Irvine, 1996 | 14 | 8m | |||||
| 27 |
Hail Spagnum
The rightward leaning crack around right of 'Roaming Knows'. FA: G. Jones & Irvine, 1996 | 11 | 8m | |||||
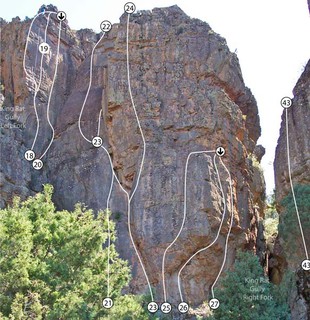
1.4. King Rat Area 143 routes in Crag
- Summary:
-
Mostly Trad climbing
Lat / Long: -36.763645, 141.845812
description
A bit of a labyrinth, but worth exploring. Good on a hot day.
Emergency Location: Mount Arapiles, King Rat Gully Area
approach
10 minutes from the camping ground.
  |
1.4.1. The Shark fin 4 routes in Cliff
- Summary:
-
Trad climbing and Bouldering
description
"It was some 11 years ago that I was out there so my memory isn't all that clear on the actual location... From memory it was a small fin of rock somewhere between King Rat Cliffs and Bushrangers Bluff...", James Kassay
Emergency Location: Mount Arapiles, King Rat Gully Area
| Route | Grade | Style | Selected ascents | |||
|---|---|---|---|---|---|---|
| 1 |
★★ tool bender
first accent | 16 | 6m | |||
| 2 | ★ dont chuck your shoes till it is over | 18 | 7m | |||
| 3 | milking the dorsal fin | 5 | 7m | |||
| 4 | ★ spiderman savior | 23 | 7m | |||
1.4.2. The Pimple 5 routes in Cliff
- Summary:
-
Trad climbing and Sport climbing
description
Emergency Location: Mount Arapiles, King Rat Gully Area
| Route | Grade | Style | Selected ascents | |||
|---|---|---|---|---|---|---|
| 1 |
Master Chalk
Rotten crack. Start: Start off the ledge on the E side of the pinnacle. FA: Chris Baxter, Tim Hancock & Peter McKeand, 1977 | 15 | 10m | |||
| 2 |
I've Been a Bunny
Lean R and clip the BR on the unknown bolted line. Then go straight up. Start: Start R of MC at jugs. FA: Mark Colyvan & Greg Pritchard, 1986 | 19 | 12m, 1 | |||
| 3 |
Unknown bolted line
Bolted pre-86, and even then the 2nd bolt was poxy and the 3rd bolt hadn't been put in. Unsurprisingly this seems to have been completely ignored ever since. | 2 | ||||
| 4 |
★ Squeeze Me Gently
The arete, veering L. Start: Start where the E face meets the N face. FA: Ian Anger & James Falla, 1986 | 21 | 10m | |||
| 5 |
Gadoong, Gadoong
Try and find this one, I dare you. Start: South of the 'Pimple', across the vegetated gully is a short grotesquely overhung wall and right of this a small wall behind a large boulder. On this wall is a big detached flake, forming a ledge. Start at the lowest point of the ledge. FA: Smith, Bride & Pritchard, 1996 | 21 | 10m | |||
1.4.3. White Mice Walls 12 routes in Cliff
- Summary:
-
All Trad climbing
Lat / Long: -36.764130, 141.846324
description
The cliff high up between Colosseum Wall and King Rat Gully.
Emergency Location: Mount Arapiles, King Rat Gully Area
approach
The last part gets steep.
   |
||||||||
| Route | Grade | Style | Selected ascents | |||||
|---|---|---|---|---|---|---|---|---|
| 1 |
★ Controlled Burn
Starts on left side of the wall immediately left of 'Bermuda Triangle'. Up to where a series of wedged blocks in a horizontal break leads right. Follow this rightwards until you are nearly at the BT roof then climb strenuously straight up to top using a series of pockets. - Fun! FA: Richard Curtis & Phil Armstrong, 1978 | 21 | 20m | |||||
| 2 |
★ Bermuda Triangle
The corner, then R around the roof. Start: Start beneath the distinctive orange triangular roof towards the L end of the crag. FA: Roland Pauligk & Barry Edwards, 1977 | 20 | 12m | |||||
| 3 |
Thighs and Quivers
The weakness up the thin face. Start: Start 6m R of BT. FA: Nick Neagle, Tony Barker & Paul Francis, 1989 | 18 | 20m | |||||
| 4 |
Bridge of Thighs
Very contrived as it's much easier to use jugs just L. Start: Start 5m R of T&Q. FA: Keith Egerton, Kieran Loughran, Peter Watson & Rob Thompson, 1982 | 19 | 20m | |||||
| 5 |
Left Hand Variant
Big L-facing corner with an attractive flake-crack in excellent orange rock. At a length of only 24m, the original probably finished at the ledge at the top of the left-facing corner/flake, and walked off left past the base of 'Bermuda Triangle'. However, it seems fairly obvious to do a second pitch up the short corner just left, then step right and up the orange crack above (this is shown in the topo). Start: Start ~50m R of BT. FA: Bill Andrews & Peter Watling, 1977 | 12 | 24m | |||||
| 6 |
Right Hand Variant
The corner on the R to ledge, then interesting curving corner. Start: Start as for LHV. FA: Bill Andrews, Julie Tulloch & Dave Simpson, 1975 | 11 | 40m | |||||
| 7 |
Uncle Bob’s Folly
If you can find this you're doing better than us. May be a repeat of final crack of 'Right Hand Variant' Start: High on the broken cliffs right of Bermuda triangle is a curving offwidth crack which is almost impossible to see from anywhere. Find your way to the base of this. FA: Glenn Marsden & Greg Pritchard, 2006 | 10 | 10m | |||||
| 8 |
Dud Day Afternoon
The topo for this route and the next few is pretty much a guess. Left of the start of 'Ddark Ddigit' is a broken orange wall with an arete on the right hand side. Pitch one follows this arete.
FA: Jon Bassindale, Greg Pritchard (alts) & James Falla., 2000 | 14 | 50m, 2 | |||||
| 9 |
Ddark Ddigit
Easy wall, orange rock, then L under overhangs to arete. Up it. Start: Start 30m L of 'Light Fingered' (which is described on a separate page). FA: Rod Young & Tim Chapman, 1981 | 20 | 40m | |||||
| 10 |
A Sore Thumb
Easily to pillar then flake up R. L below bulge and up seam. Start: Start at obvious slender buttress between DD and 'Light Fingered'. FA: Jon Muir, Geoff Little & Maureen Gallagher, 1988 | 20 | 40m | |||||
| 11 |
A Sore Finger
Steep direct line with some brittle rock. The vertical seam/crack on the right side of the pinnacle of A Sore Thumb, finishing up steep crack. FA: Keith Lockwood & Pete Canning, 2008 | 14 | 25m | |||||
| 12 |
The Shaker
An obscure choice for this era when almost all the other classics of 'Arapiles' were still unclimbed! For over thirty years guidebooks placed this climb in the wrong gully. The good news is that no-one has missed it. Some awful rock. Start a few metres right of A Sore Finger. There's a wonky letter S painted somewhere.
FA: Daryl Carr & Jerry Grandage, 1966 | 7 R | 66m, 3 | |||||
1.4.4. Light Fingered Gully 20 routes in Cliff
- Summary:
-
All Trad climbing
Lat / Long: -36.763826, 141.845277
description
The gully around to the L of King Rat Gully and Bum Rock.
Emergency Location: Mount Arapiles, King Rat Gully Area
approach
10 minutes from the camping ground.
descent notes
Rap chains above Light Fingered.
 |
||||||||
| Route | Grade | Style | Selected ascents | |||||
|---|---|---|---|---|---|---|---|---|
| 1 |
What's My Motivation
Up to cracks and up to the ledge below 'Urban Sprawl'. Start: Start: On the left of the entrance to 'Hunger' 'Gully' is twin cracks through a shallow prow. FA: Richard Smith, Greg Pritchard & Paul Hoskins., 1995 | 12 | 25m | |||||
| 3 |
Urban Sprawl
The crack at the L end of the short overhung orange wall. Start: Start at the top of a steep gully L of 'Light Fingered'. FA: Rod Young, 1980 | 21 | 15m | |||||
| 4 |
Valley of the Deformed Pork Salesman
Caveat emptor! Start: Start in the cramped gully, up L of 'Hunger'. FA: Mike Law & Mark Colyvan, 1983 | 23 | 20m, 1 | |||||
| 5 |
★★ Hunger
Bridge, then into seam with 1 bolt and 1 piton. Double rings on ledge. Start: Start on the R wall of the gully L of 'Light Fingered'. FA: Chris Shepherd & Mark Moorhead, 1981 | 24 | 20m, 1 | |||||
| 6 |
★ Motivated by Food
The seam. Start: Start just R of 'Hunger'. FA: Jon Muir & Geoff Little, 1989 | 26 | 25m, 1 | |||||
| 7 |
★ Shagadelic
sling anchor is death | 28 | 25m, 3 | |||||
| 8 |
★★ Light Fingered
Struggle up the good line. Start: Start below the obvious grey wall just before the gully narrows below crack that widens. FA: Mike Law, 1977 | 22 | 25m | |||||
| 9 |
Wub Wub Direct
Scary face with stacked blocks, then wall and arete. Start: Start 2m R of LF. FA: Mike Law & Ian ANger, 1983 | 23 R | 30m | |||||
| 10 |
★★ The Match
Head R then up the chossy front-side of the prow. Start: Start at the teetering stack on the R side of the gully, at the initials. FA: Chris Baxter & Andrew Smith, 1966 | 8 R | 25m | |||||
1.4.4.1. Upper Hunger 11 routes in Cliff
- Summary:
-
Lat / Long: -36.763861, 141.844940
description
Above the initial narrow part of Hunger Gully the gully widens above a large ledge. Urban Sprawl takes the obvious crack line through the roof 2m right of the left arete on the wall that faces camp. Opposite Urban Sprawl is a large wall that forms the continuation of the Hunger Gully wall. This is also know as Buttress Buttress Gully
Emergency Location: Mount Arapiles, King Rat Gully Area
approach
Approach up one of the routes on Hunger Wall or left of the gully, or from above. (**As you enter from above the first two lines you reach are Uncle Fistula and Dance of the Flaming Anus).
1.4.5. Bum Rocks 11 routes in Cliff
- Summary:
-
All Trad climbing
Lat / Long: -36.763329, 141.846528
description
The bulgy buttress 30m L of King Rat Gully.
Emergency Location: Mount Arapiles, King Rat Gully Area
| Route | Grade | Style | Selected ascents | |||||
|---|---|---|---|---|---|---|---|---|
| 1 |
Fireman Don't Got Convictions
Traverse both cheeks via the orange weakness at half height. Start: Start up the L side of Bum Rock. FA: R. Sonist (ha ha), 1989 | 11 | 45m | |||||
  |
||||||||
| Route | Grade | Style | Selected ascents | |||||
| 2 |
★ Glutimus Maximus
Mantle, bulge, and groove past oval shaped roof. Start: Start 3m L of the bumcrack, er, central chimney. FA: Hanut Dodd & M Abbott, 1989 | 18 | 14m | |||||
| 3 |
★ High School Antics
Up L leaning flake, R to orange weakness through bulge, then L to seam. Start: Start 1m R of GM. FA: M Abbott & Newt Singh-Dodd, 1989 | 16 | 14m | |||||
| 4 |
Cling On
Start 3 metres right High School Antics on left side of chimney. Stay on left side of chimney avoiding the temptation to bridge at any stage. Climb up to horizontal crack and into corner. Up to overhang and obvious thread through. Blast through juggy overhang and spare a size 3 cam for pocket in upper head wall. FA: Hywel Rowlands & Ben Wright, 1 Dec 2016 | 16 | 15m | |||||
| 5 |
Fingersmith
Slab just L of small overlap then L to arete. Start: Start 3m R of the bumcrack. FA: Wayne Jensen & Gavin Jensen, 1989 | 22 | 16m, 2 | |||||
| 6 |
Of Moss and Men
Loose flake then lichen. Reachy. Start: Start 1m R of F. FA: Wayne Jensen, Gavin Jensen, Martin Bride & Greg Incoll, 1989 | 15 | 15m | |||||
 |
||||||||
| Route | Grade | Style | Selected ascents | |||||
| 7 |
Side Saddle Sally
Start 3 metres left of Pulling the Yorkshire Pudding follow first of two shallow right facing corners, step right to block and directly up to top of pedestal. Climb through small juggy rooflet above pedestal. Small good gear. FA: Hywel Rowlands & Ben Wright, Dec 2016 | 13 | 15m | |||||
| 8 |
★ Pulling the Yorkshire Pudding
Up the hanging block just L of the hole, then L leaning groove. Start: Start on the R side of the crag. FA: Fran Holland & Al Proudfoot, 1989 | 12 | 14m | |||||
| 9 |
★★ Bottoms Up
Straight up the slab and clean wall about 3m right of Pulling the Yorkshire Pudding. FA: Keith Lockwood & Norm Booth, 30 Jan 2016 | 11 | 14m | |||||
| 10 |
★ Wash Your Hands
Start as for Bottoms Up, moving diagonally right and up short grey wall to alcove. Straight up nice wall above, steeply at first. Juggy steep wall to the summit (originally done as a separate, 6m, pitch). FA: Keith Lockwood & Steve Findlay, 28 Jul 2016 | 11 | 20m | |||||
| 11 |
Back Passage
The central groove on the grey cliff directly behind Bum Rock. FA: Steve Findlay & Keith Lockwood, 28 Jul 2016 | 13 | 14m | |||||
1.4.6. King Rat Gully 79 routes in Cliff
- Summary:
-
Mostly Trad climbing
Lat / Long: -36.763133, 141.845682
description
A shady area with quality climbing. Good on a hot day.
Emergency Location: Mount Arapiles, King Rat Gully Area
approach
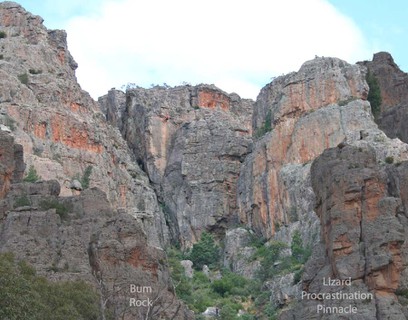
Walk past the Atridae and Lizard Procrastination Pinnacle. The narrow entrance to King Rat Gully is about 100m L of the Atridae.
 |
1.4.6.1. Slander Wall 12 routes in Cliff
- Summary:
-
All Trad climbing
description
The small cliff on the L of the gully.
Emergency Location: Mount Arapiles, King Rat Gully Area
 |
1.4.6.2. Left Fork 17 routes in Cliff
- Summary:
-
Mostly Trad climbing
Lat / Long: -36.763270, 141.845429
description
Emergency Location: Mount Arapiles, King Rat Gully Area
  |
1.4.6.3. Right Fork 11 routes in Cliff
- Summary:
-
All Trad climbing
Lat / Long: -36.763115, 141.845310
description
Emergency Location: Mount Arapiles, King Rat Gully Area
  |
1.4.6.4. Rye Wall 4 routes in Cliff
- Summary:
-
All Trad climbing
description
The steep orange wall at the top of the gully.
Emergency Location: Mount Arapiles, King Rat Gully Area
1.4.6.5. Wittgenstein Walls 4 routes in Cliff
- Summary:
-
All Trad climbing
description
Finding this will be left as an exercise for the serious explorer; not that it's existence is in doubt.
Emergency Location: Mount Arapiles, King Rat Gully Area
approach
Locate Serious Young Lizards and then walk right and behind this buttress you will find a short red wall.
1.4.6.6. Serious Young Lizards Wall 5 routes in Cliff
- Summary:
-
All Trad climbing
description
100m R of Rye Wall
Emergency Location: Mount Arapiles, King Rat Gully Area
1.4.6.7. Marx Wall 6 routes in Cliff
- Summary:
-
All Trad climbing
description
Small, clean yellowish-grey wall with mostly well-protected lines in the easier grades.
approach
On the L side of the main gully 60m past Serious Young Lizards. 100m as the crow flies from the top of Cruxless Knickers.
descent notes
Easy on the L (looking at the cliff).
history
Surely has been climbed before, happy for my work to be corrected.
1.4.6.8. Upper SkyDiver 3 routes in Cliff
- Summary:
-
All Trad climbing
description
A small wall just just above the left end of 'Skydiver' wall. Could be worth visiting for the shade. Two climbs by Bert Levy are included here as the approach notes say : "Going up King Rat Gully it splits near Catcher follow the right fork. The following routes are on the left wall." However the climbs have not been positively identified.
Emergency Location: Mount Arapiles, King Rat Gully Area
approach
After scrambling up the chimney just right of 'Purple Denotes Bruising', but before getting to 'Catcher', head up chimney/gully on the right.
1.4.6.9. Skydiver Wall 17 routes in Cliff
- Summary:
-
All Trad climbing
Lat / Long: -36.763089, 141.845828
description
The Face on the R as you enter the gully.
Emergency Location: Mount Arapiles, King Rat Gully Area
   |
1.4.7. Lizard Procrastination Pinnacle 12 routes in Cliff
- Summary:
-
All Trad climbing
Lat / Long: -36.763011, 141.846325
description
The gnarly pinnacle guarding the front of King Rat Gully.
Emergency Location: Mount Arapiles, King Rat Gully Area
approach
The order in which the routes are described is potentially confusing, because when you approach from camp you actually get to them in the opposite order. On the other hand if you're approaching from the base of 'Skydiver' Wall this ordering makes more sense.
Emergency Location: King Rat Gully Area
    |
||||||||
| Route | Grade | Style | Selected ascents | |||||
|---|---|---|---|---|---|---|---|---|
| 1 |
Cool Shades
Overhanging flake on L edge of cave, then short groove. Start: Start L of CC. FA: Nick White (solo), 1990 | 19 | 15m | |||||
| 2 |
★ Use Me and Abuse Me
Louise's description is worth repeating in full! "Why pay a shrink to talk about your problems when you can do a new route and tell the whole world for free?" Start: Start in the cave L of CC. The bolts flex alarmingly and need to be replaced. FA: Simon Mentz, Simon Carter & Richard Henderson, 1991 | 24 | 15m, 2 | |||||
| 3 |
Wrap-around Sunglasses
Traverse L along break to BR. Presumably you go up at some point too. Start: Start 2m L of CC (the original contrived start was further L in the cave). FA: Lionel Clay & John Pawson, 1986 | 21 | 15m, 1 | |||||
| 4 |
★★ Cruel Consistency
The steep thin crack and direct through the overhang. Start: Start on the back face of the Pinnacle (near the R end of 'Skydiver' Wall, described in 'King Rat' Gully). FA: Glenn Tempest & Rod Young (with illogical finish). DF by Mike Law, 1982 | 21 | 15m | |||||
| 5 |
★★ English Ethics
More like a RHV than a separate route... Start: Start as for CC. FA: Mike Law & Robin Miller., 1982 | 21 | 15m, 1 | |||||
| 6 |
English Ethics LHF
As for EE but span L to the jug on the prow and up the prow to finish. Start: Start as for CC. FA: Jon Muir, Geoff Little & Maureen Gallagher, 1989 | 23 | 15m, 1 | |||||
| 7 |
★ Riddled
The arete, on the R at first then on the L, with suss rock. Start: Start R of EE. FA: Mike Law & Yoshio Mishima, 1982 | 18 | 18m | |||||
 |
||||||||
| Route | Grade | Style | Selected ascents | |||||
| 8 |
Don't Fret
The face - take care with delicate rock. Start: Start 1.5m R of R. FA: Mike Law & friends, 1982 | 17 | 18m | |||||
| 9 |
Bing Crozzley
The next line of holds up the face. Start: Start 1.5m R of DF. FA: Robin Miller & Dave Gairns, 1982 | 18 | 18m | |||||
| 10 |
★ Shakin' Stevens
Up to the top of the flake, R, up. Start: Start 2m R of BC. FA: Mike Law, Dave Gairns & Chris Baxter, 1982 | 20 | 18m | |||||
| 11 |
★ Lizard Procrastination
One of Araps' earliest routes. Start: Start beneath the front face (the one facing Dec Crag).
FA: Mike Stone & Ian Guild, 1964 | 11 | 40m, 2 | |||||
| 12 |
★ Easy Lizard
Follow Lizard Procrastination to the ledge below the final overhang. Head up and right on juggy wall to ledge on right arete. Step back left and up steep juggy crack to top. | 7 | 50m | |||||
1.4.7.1. Baby Buttress 0 routes in Cliff
description
Emergency Location: Mount Arapiles, King Rat Gully Area
1.5. Pilot Error Cliffs 63 routes in Crag
- Summary:
-
Mostly Trad climbing
Lat / Long: -36.762711, 141.845831
description
The gullies and walls in between the Atridae and King Rat Gully.
Emergency Location: Mount Arapiles, Pilot Error Area
approach
5 minute walk from the campground.
1.5.1. Baby Buttress 12 routes in Cliff
- Summary:
-
All Trad climbing
description
The small wall between Cobwebs Gully and Lizard Procrastination Pinnacle.
Emergency Location: Mount Arapiles, Pilot Error Area
approach
Left of 'Cobwebs Gully', right of 'Lizard Procrastination'.
descent notes
Rap chains at the top of the cliff. Or scramble off L.
| Route | Grade | Style | Selected ascents | |||||
|---|---|---|---|---|---|---|---|---|
| 1 |
A Cappella
Take horizontal weakness opposite 'Falsetto', then up. Start: Start at the far left hand end of baby buttress at the back of the gully. FA: unknown | 19 | 15m | |||||
| 2 |
Falsetto
Climb the face left of 'Tendrils' to a short black flake and up. Start: start left of 'Tendrils' FA: Rod Young, 1980 | 18 | 15m | |||||
| 3 |
Tendrils
Start: Climb up just left of the nose of 'Baby Buttress'. FA: Mark Moorhead, 1980 | 18 | 15m | |||||
 |
||||||||
| Route | Grade | Style | Selected ascents | |||||
| 4 |
★ Metronome
A hard start leads right to a juggy overhang, then head left and up. Start: On the nose of 'Baby Buttress' FA: Rod Young, 1980 | 21 | 15m | |||||
| 5 |
★ Mexican Madness
Wall left of Scarlet Sage, via an orange overhang and Black flake. FA: Lindorff | 17 | 10m | |||||
| 6 |
★ ScarIet Sage / Scarlet Sage
Climbs the tricky crack in the middle of the wall past two bulges and a small cave. Start: Start at tiny crack in middle of wall under a cave higher up. FA: Lindorff, 1977 | 15 | 10m | |||||
| 7 |
★ Wascal
Up the diagonal crack two meters right of Scarlet Sage, then left and up. Start: Start two metres right of Scarlet Sage. FA: Mike Law | 18 | 10m | |||||
| 8 |
★ Pwocol Hawum
Take the same starting diagonal crack as 'Wascal', but continue another two meters before going up. Start: Start as for 'Wascal'. FA: Mike Law | 22 | 10m | |||||
| 9 |
★ Cry Hawum
An enjoyable combo with just a couple of metres of new climbing. Has been top-roped before. Up 'Cry Baby' to above its first bolt. Thin moves across L (good wires) to surmount the crux bulge on 'Pwocol Hawum'. FA: Glenn Tempest, 18 Apr 2015 | 22 | 12m, 1 | |||||
| 10 |
★ Cry Baby
Up face via three bolts to anchor crux passing second bolt FA: Muki Woods, 2006 | 26 | 10m, 3 | |||||
| 11 | Nati Dwed | 25 | 10m | |||||
| 12 |
Chunder at 30
solo FA: John Muir, 1985 | 21 | 10m | |||||
1.5.2. Cobwebs Gully 13 routes in Cliff
- Summary:
-
Mostly Trad climbing
Lat / Long: -36.762813, 141.846091
description
A dark, narrow gully with some great routes.
Directly behind Pilot Error and R of Baby Buttress.
Emergency Location: Mount Arapiles, Pilot Error Area
approach
Some of the routes in the upper gully are most easily accessed by scrambling through the chimney/gap left of Mesa and dropping into the gully.
descent notes
Through a hole that brings you out on Pilot Error Terrace.
| Route | Grade | Style | Selected ascents | |||||
|---|---|---|---|---|---|---|---|---|
| 1 |
Pain Club
Bouldery start then up face to the spectators' gallery. Start: Start opposite 'Cobwebs' and about 2m downhill. FA: Mike Law & solo, 1981 | 20 | 10m | |||||
| 2 |
Huldra
Takes the south-west arete of Tarzan pinnacle. From the gully, follow crackline up to grey bulging arete, which is climbed to a little summit. Belay and abseil off bolts at the top of Togrul Khan. FA: Keith Lockwood, Maureen Little & Norm Booth, 11 Mar 2015 | 14 | 15m | |||||
| 3 |
Boo
The grey wall. Start: Start at the top of the gully on the R side, 30m L of 'Entangled'. FA: Chris Shepherd & Paul Hoskins, 1982 | 20 | 15m | |||||
| 4 |
Golden Delicious
Start right of Boo. Up wall to jugs. Continue up until wall blanks out, then take line of holds right across orange face to the arete. Up and right to Mesa chains. FA: Keith Lockwood, Maureen Little, Ray Lassman, Norm Booth & Geoff Little, 19 Mar 2015 | 16 | 25m | |||||
| 5 |
Shades Of Grey
Takes nice grey wall left of Boo. Chimney and bridge until jugs appear on the right (north) wall. Swing onto these, and direct up wall above. FA: Keith Lockwood, Maureen Little, Ray Lassman, Geoff Little & Norm Booth, 19 Mar 2015 | 16 | 20m | |||||
| 6 |
Ferrari in a Chevrolet World
Up the seam, joining the last 3m of 'Entangled'. Start: Start 8m L of 'Entangled'. FA: Roland Foster & Dave Vass, 1989 | 23 | 12m | |||||
 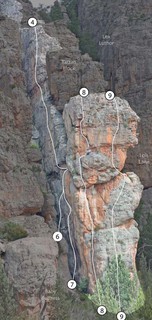 |
||||||||
| Route | Grade | Style | Selected ascents | |||||
| 7 |
★ Entangled
Great second pitch for 'Astral Plane' or just approach from the hole leading to the ledge of 'Pilot Error'. Start: Start atop 'Astral Plane'. FA: Mark Moorhead, Geoff Robertson & Mike Law, 1981 | 24 | 25m, 1 | |||||
| 8 |
Ingvars Project
Left of Astral plane | |||||||
| 9 |
★★ Astral Plane
Bridge to gain short crack, bolt, then right and up, bolt and finish on a larger crack at top. Has had a rap anchor added. Start: Start high in the gully on the right hand or main wall looking into the gully, at a stone step towards the back. FA: Chris Shepherd & Ian Anger, 1981 | 24 | 15m, 2 | |||||
| 10 |
★★★ Cobwebs
Follow the overhung seam up the middle of the wall with a piton, from the diagonal follow up final crack then finish as for 'Astral Plane'. Start: On middle of right hand wall looking in. FA: Mark Moorhead, 1981 | 28 | 20m | |||||
| 11 |
Open Project
Crack and bolt up wall right of Cobwebs. Moves have been done at about 34. | 2 | ||||||
| 12 |
★★ Gilt Edged
Start: Start 10m R of 'Cobwebs', at the smooth crack in the right wall at the mouth of the gully.
FA: Kevin Lindorff, Philip Armstrong & Dave McLean, 1977 | 18 | 40m, 2 | |||||
| 13 |
Scatterbrain
If he wasn't then, he certainly is by now! Start: Start at the base of the 'Gilt Edged' buttress. FA: Kevin Lindorff, Philip Armstrong & Dave McLean, 1977 | 14 | 45m | |||||
1.5.3. Kryptonite Krack Area 7 routes in Cliff
- Summary:
-
All Trad climbing
description
The wall below Pilot Error Terrace.
Emergency Location: Mount Arapiles, Pilot Error Area
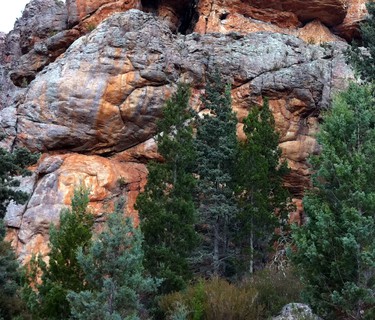 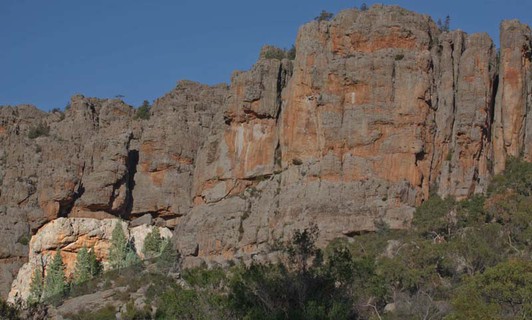 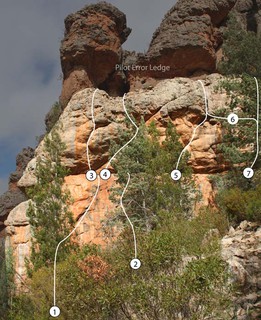 |
||||||||
| Route | Grade | Style | Selected ascents | |||||
|---|---|---|---|---|---|---|---|---|
| 1 |
★ Thanksgiving Sunday
The thin dogleg crack behind dead conifer. Start: Start on the wall below 'Kryptonite Krack'. FA: Chris Peisker, 1977 | 23 | 12m | |||||
| 2 |
So Help Me God
Short flake, orange wall, tend L then back R. Very poorly protected and not the best rock. Start: Start 5m R of TS. FA: Mark Moorhead & Dave Fearnley, 1982 | 20 | 10m | |||||
| 3 |
DC 10
The obvious bottomless crack. Originally put up by 'building a scaffolding' of rocks to stand on and reach the first jug. Went unrepeated until 2001 when Chris Jones onsighted it without the aided start and called it 'It's A Bird It's a Plane'. Now given 27 in the latest guide, however has been climbed by a simple dyno off the deck, reducing the grade to probably around 23. Start: Start left of 'Kryptonite Krack'. FA: Chris Shepherd & Mark Moorhead (22M1 with batman start), 1981 FFA: Chris Jones., 2001 | 22 | 10m | |||||
| 4 |
★★ Kryptonite Krack
Prance up the inverted trench, exit L. Start: Start beneath the main diagonal crack through the steep bulge. FA: Greg Child, 1978 | 23 | 14m | |||||
| 5 |
Superman
Previously a long standing open project that was speculated for years prior to its first ascent. Literally a 5m (hard) boulder problem. Start: Start between KK and AF. FA: Stuart Wyithe & Dave Jones, 1995 | 28 | 15m | |||||
| 6 |
★ Auntie Florrie
Short thin crack with very tough start. L along break to exciting juggy finish. Start: Start R of S. FA: Rod Young & Chris Shepherd, 1980 | 23 | 15m | |||||
| 7 |
Clark Kent
Finish direct. Start: Start as for AF. FA: Kevin Lindorff & Tony Marian, 1979 | 23 | 10m | |||||
1.5.4. Pilot Error Area 16 routes in Cliff
- Summary:
-
Mostly Trad climbing
Lat / Long: -36.762948, 141.846173
description
The terrace above Kryptonite Krack.
Emergency Location: Mount Arapiles, Pilot Error Area
approach
Go up the gully R of Kryptonite Krack, then L onto the terrace.
descent notes
Down the short chimney at the back.
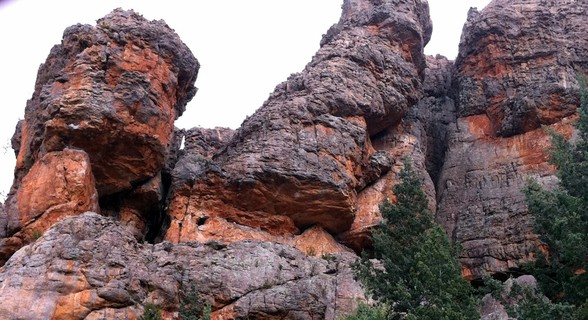 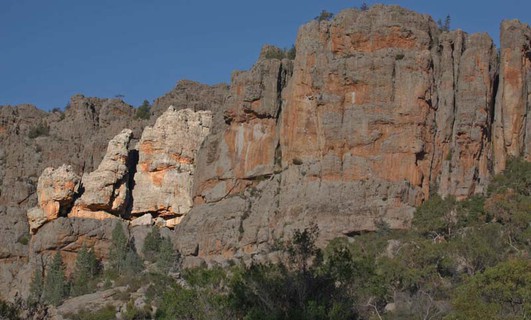 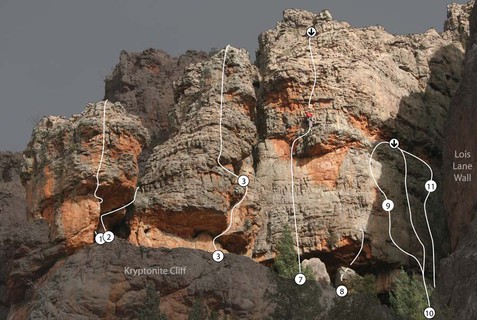 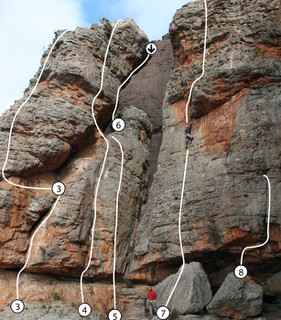 |
||||||||
| Route | Grade | Style | Selected ascents | |||||
|---|---|---|---|---|---|---|---|---|
| 1 |
★★ Pilot Error
More than popular Pilot Error is graded as 20 in the Mentz & Tempest Arapiles Guide Book. FA: Ian Anger, 1980 | 20 | 12m, 1 | |||||
| 2 |
★ Cul-De-Sac
Crack over roof of cave between Pilot Error and Tarzan, then chimney. FA: Nick Reeves, Hugh Foxcroft, Peter Martin, Ed Neve & Rod Young, 1979 | 20 | 10m | |||||
| 3 |
★ Tarzan
Was 12 in previous guides! Given that the start move is outrageously hard for 13 that might have been from the time when 12 was the hardest route at the crag. Easily done in one pitch with extenders. Start: Start at next break through overhang R of C-D-S.
FA: Clive Parker & Chris Baxter, 1968 | 14 | 33m, 2 | |||||
| 4 |
★★ Togrul Khan
Pull through overhanging corner to bomber locks in corner crack and continue up ramp to pedestal and juggy wall on left. Start: Start just right of 'Tarzan'. FA: Rod Young & Jeremy Boreham, 1977 | 19 | 15m | |||||
| 5 |
★ Strombeante / Strombeante Direct
Roof above 'Togrul Khan' past two BR. Inadvertently retrobolted after the FA. It's a bit necky getting to the first bolt. The direct start from the bottom of the wall has been done (Smith Hoskins, 4/5/96), as has the sit start (!!) (Hoskins, 14/5/96). Start: Start above 'Togrul Khan'. FA: Geoff Weigand & Peter Croft (both solo), 1986 | 22 | 10m, 2 | |||||
| 6 |
★ Fixed Smile
Short variant to 'Togrul Khan'. Climb right arete, either from left or right past fixed sling (which was originally fencing wire!). Start: Start just R of TK. FA: Mike Law, 1982 | 22 | 12m | |||||
| 7 |
★ Neta
Companion route to Mesa. Start in chimney left of that route and follow the arete. Exit R to rap chain above Mesa. FA: Unkonwn, 2000 | 10 | 25m | |||||
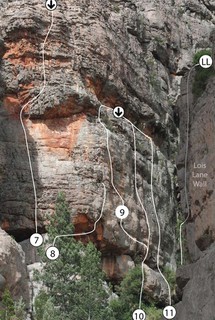 |
||||||||
| Route | Grade | Style | Selected ascents | |||||
| 8 |
★★ Mesa
Originally graded 6 via the ordinary chimney, and not highly rated. Now that the loose bits are gone, the start has been straightened out up the face off the boulder, and a lower-off has been added, this is one of the best easy grade routes in this part of Araps, with a wide variety of climbing. Start: Start off the top of the big boulder on the ledge. FA: Graham Squire & Clive Parker, 1966 | 10 | 33m | |||||
| 9 |
★ Butte
Completes the trilogy of nice easy climbs in this area. Think of it as an indirect start to 'Predator'. Step off the 'Mesa' boulder and head up right to the airy arete. Continue steeply over the right side of the roof and up juggy groove to ledge. The 'Mesa' rap anchor is just to the left. FA: Keith Lockwood & Tim Lockwood, 2011 | 9 | 28m | |||||
| 10 |
★ Predator
Bouldery. Start: Start off boulder underneath roof. FA: Kevin Lindorff, 1977 | 23 | 15m | |||||
| 11 |
★★ I Dunno Direct Finish
I Dunno to level with the traverse back right into Daily Planet, arrange a nest of good gear then continue straight up via a reachy and exciting sequence (RP possible mid crux). FA: 2014 | 25 | ||||||
| 12 | I Dunno Direct Start | 24 | 10m | |||||
| 13 |
★★ I Dunno
Start as for 'Daily Planet' then traverse L along break. Up past pocket to horizontal break. Stand up and move back R to finish up last moves on 'Daily Planet'. Lower off as for 'Daily Planet'. FA: Chris Shepherd, Jeff Lamb, Paul Daniels & Mark Moorhead, 1981 FA: LH start from back of cave (24) was soloed (!) by Mike Law, 1982 FA: Tough direct start (24) by Jon Muir, 1982 FA: Direct Finish (25) by Kevin Lindorff., Dec 2014 | 21 | 20m | |||||
| 14 |
★★ Daily Planet
Superman is lurking! Start: Start at the R end of the 'Pilot Error' Ledge, R of the caves. FA: Mark Moorhead & Rod Young, 1980 FA: (RHV by Michael Woodrow, David Karla & Anthony Bishop), 1992 | 18 | 20m | |||||
| 15 |
★ Daily Planet RHV
From the top of the curving flake step right to cracks and up. FA: Michael Woodrow, David Karla & Anthony Bishop, 1992 | 19 | 20m | |||||
| 16 |
Perry White
The badly protected seam right of 'Daily Planet'. Start: Start 2m R of 'Daily Planet'. FA: Kim Carrigan, 1985 | 22 R | 20m | |||||
1.5.5. Lois Lane Wall 15 routes in Cliff
- Summary:
-
All Trad climbing
Lat / Long: -36.762589, 141.845775
description
The wall facing Pilot Error and Kryptonite Krack.
Emergency Location: Mount Arapiles, Pilot Error Area
approach
Reaching the routes R of Debutantes requires a scramble along an exposed terrace. One life has been lost on this traverse.
descent notes
Rap anchors above Debutantes and Lex Luthor. The rap from Lex Luthor is 30 metres: the rope falls clear of snagging on the big chockstone so if you have at least 60m of rope there is no need to do a 2 pitch abseil via the Debutantes anchor.
| Route | Grade | Style | Selected ascents | |||||
|---|---|---|---|---|---|---|---|---|
| 1 |
★★ Lex Luthor
Start at the base of the slim pillar at the back of the gully between Pilot Error Ledge and Lois Lane Wall.
FA: Simon Mentz & Louise Shepherd, 1991 | 20 | 40m, 2 | |||||
| 2 |
Across the Andes by Frog
The small arete with a bolt. Start R of LL. FA: Simon Mentz & Nick White, 1992 | 21 | 20m, 1 | |||||
| 3 |
★ Eurylochus
Start at the righthand chimney in the back of the gully.
FA: Rod Young & Jeremy Boreham, 1977 | 14 | 33m, 2 | |||||
| 4 |
★★ Excuse me Lex
Link up of Excuse me While I Belch into 2nd pitch of Lex Luthor. No stepping onto the massive chockstone. Do as one big pitch to get grade 20. Can lower off with 60m rope. | 20 | 32m | |||||
| 5 |
★ Excuse Me While I Belch
Start as for E. Bridge chimney for 8m then tricky face moves to join a wide L-facing flake/crack. FA: Louise Shepherd & Nicky Sunderland, 1991 | 19 | 17m | |||||
| 6 |
★ Magenweh
As for Heimweh, then veer L where Heimweh goes R into DaC. up past a few intermittent seams, then R into DaC up high. FFA: Christopher Glastonbury, 30 Jan 2022 | 26 R | 15m, 2 | |||||
| 7 |
★ Heimweh
Start as for Debutantes. Runout up L and traverse back R on layaways in horizontal weakness to join DaC. Finish up this. FA: Wolfgang Güllich †, 1985 | 26 R | 15m, 2 | |||||
| 8 |
★★★ Debutantes and Centipedes
Start L of the blunt arete. Trend R to arete past 3 RBs. Crux to break then tend leftwards past good trad to loweroff. FA: Mike Law & Mike Law-Smith, 1981 | 25 | 15m, 3 | |||||
| 9 |
★ Cambodia
The face with 2 bolts, involving two distinct boulder problems. Reachy start off two sidepulls then into slopers to a brief respite, then a cute micro crimp problem to the ledge. Easily up from there. Harder than some 26s. Start R of D&C. FA: Mark Moorhead & Jon Muir, 1982 | 25 | 20m, 2 | |||||
| 10 |
★ Lois Lane
Amazing how many people commandeer the blunt end on a bold route! Start R of C roughly in the middle of the wall. FA: Kevin Lindorff, Tony Dignan, Matt Dunstan & Peter Lindorff, 1979 | 24 X | 20m | |||||
| 11 |
Extension
The reachy face with a bolt. Start just R of Lois Lane. FA: Mike Law & Mike Law-Smith, 1981 | 25 | 25m, 1 | |||||
| 12 |
★ Reunion
From such beginnings at age 18, 10 years later he was in on Australia's first ascent of Everest. Quite nice anyway. Start a few m R of Lois Lane beneath the only significant crackline. FA: Lincoln Hall & Norm Booth, 1974 | 17 | 25m | |||||
| 13 |
Calypso
Worth roping up for the traverse to the base, and for the traverse off L at the top to the rap anchor. Start 6m R of Reunion, R of orange cave. FA: Rod Young & Simon Kenny, 1977 | 15 | 20m | |||||
| 14 |
Contraction
Start up the ramp of BS, then the flake. Tricky up small corner on the L. Start as for B. FA: Kim Carrigan & Robin Miller, 1982 | 22 | 20m | |||||
| 15 |
Beasley St / Beasley Street
Start just R of C. Boldly up face to bolt. FA: Guy Cotter & Steve Howden, 1981 | 23 R | 20m, 1 | |||||
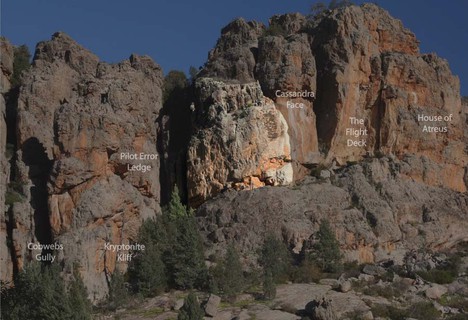 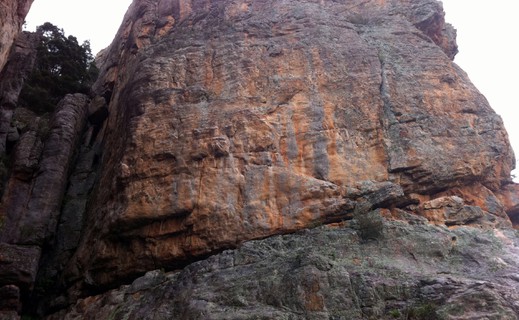 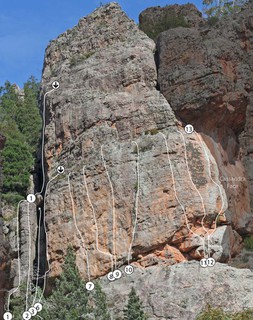 |
||||||||
1.6. Atridae 64 routes in Crag
- Summary:
-
Mostly Trad climbing
Lat / Long: -36.762180, 141.845921
description
The big, prominent block up and left behind the camp ground.
Emergency Location: Mount Arapiles, The Atridae Area
approach
5 minutes from the camp ground.
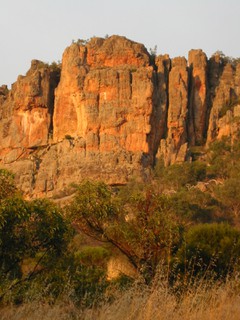  |
1.6.1. Cassandra Area 11 routes in Cliff
- Summary:
-
Trad climbing and Sport climbing
Lat / Long: -36.762485, 141.845839
description
The slabby wall to the L of the Flight Deck with a roof above.
Emergency Location: Mount Arapiles,The Atridae Area
approach
Steep scramble up the slabs below.
descent notes
There is a rap station at the top of Cassandra. Also one L of the base of Cassandra so you don't have to scramble down the slabs below.
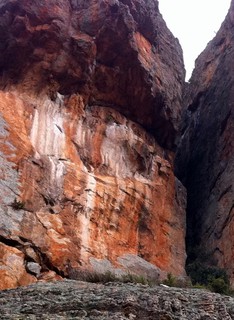  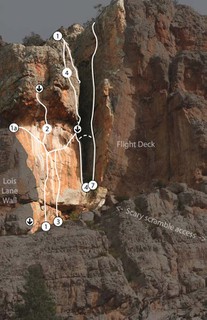 |
||||||||
| Route | Grade | Style | Selected ascents | |||||
|---|---|---|---|---|---|---|---|---|
| 1 |
Limbo (Baby Limbo)
It may be a grade-17 sport route but the runout above the last bolt (although easy) should not be taken lightly. As for 'The Last Disco Dancer' to its third bolt. Head up L (crux) to a stance on the arête. Continue up the slab to the ledge and lower-off anchors. FA: Glenn Tempest & Karen Tempest, 29 Jun 2015 | 17 | 18m, 3 | |||||
| 2 |
★ The Last Disco Dancer
Technically interesting climbing up the wall L of 'Cassandra'. Clip the first bolt on 'Cassandra' then veer L and up past three more bolts. The crux moves are pulling past the final bolt into a bottomless crack/pocket. A few slabby moves off L gains the ledge and the lower-off anchors. FA: Glenn Tempest & Karen Tempest, 29 Jun 2015 | 19 | 18m, 4 | |||||
| 3 |
★ The Lap Dancer
Beautiful slab into super steep roofing - great moves. Almost a sport route (take some small cams and there is a fixed wire) Start as for the The Last Disco Dancer and follow this to the roof (cam in slot here) head diagonally R through the roof past 2 UBS, crossing Pain Street (fixed wire and small cam) and continue R out the prow past 2 more UBs and some powerful moves to a lower off! FA: Matt Brooks, 10 Jul 2022 | 25 | 28m, 8 | |||||
| 4 |
★ Cassandra
This attractive face has an unfortunate history of ugly bolting efforts. Originally festooned with hangerless machine bolts, a recent rebolting effort turned it into a highly unfortunate example of what ringbolts look like when they're not properly recessed. Start: Start beneath the appealing orange face, only a few metres R of the arbitrary end of 'Lois Lane Wall'.
FA: Mike Stone & Peter Watling, 1975 FA: (LHV Kevin Lindorff & Keith Egerton), 1977 | 18 | 40m, 2, 5 | |||||
| 5 |
★ Cassandra Direct
Slippery and technical. The pikers variant to 'Pain Street'. Start: Start up 'Cassandra'. FA: C Peisker, 1978 | 22 | 23m, 6 | |||||
| 6 |
★★ Pain Street
While this is very nearly a sport route, it's important to place gear past the last bolt to avoid a nasty swing into the slab if you fall off the crux. Start: Start as for 'Cassandra Direct'. | 23 | 15m, 7 | |||||
| 7 |
Warts and All
Through bulge, BR, tend a bit L but don't join 'Cassandra' until the diagonal ramp. Start: Start 3m R of C. FA: Louise Shepherd & Heinz Zak, 1985 | 22 | 18m, 1 | |||||
| 8 |
Permanent Wave
Start: Start in the gully at the base of the arete R of 'Cassandra'.
FA: Rod Young & Chris Shepherd, 1980 | 20 R | 40m, 2 | |||||
| 9 |
Ckinarde
Start: Start in the gully R of PW.
FA: Norm Osborne & Paul Gillis, 1970 | 15 | 40m, 2 | |||||
| 10 |
The Tin Crucifix
COntinue up gully for 12m, climb to ledge, L and up crack. Start: Start at the bolt belay of 'Ckinarde' (the location of which is not provided...). FA: Norm Osborne & Paul Gillis, 1970 | 10 | 42m | |||||
| 11 |
Unguarded Moments
Up the middle of the face - no pro. Stay L of the arete (which is taken by the upper part of It'll Never Fly). It is 19 but probably no easier (!!) to take a flying leap across the chasm from Cassandra's 1st belay to the halfway break! Start: Start on the R wall of the gully, opposite PW. FA: Chris Shepherd & Malcolm Matheson, 1982 | 23 X | 40m | |||||
1.6.2. The Flight Deck 9 routes in Cliff
- Summary:
-
Trad climbing and Sport climbing
Lat / Long: -36.762371, 141.845815
description
The open corner. Lots of chalk on the L wall
Emergency Location: Mount Arapiles,The Flight Deck Area
approach
Steep scramble up the slabs below.
descent notes
There is a rap station at the top of It'll Never Fly and one at the top of Orestes.
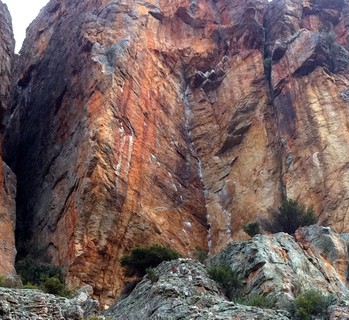 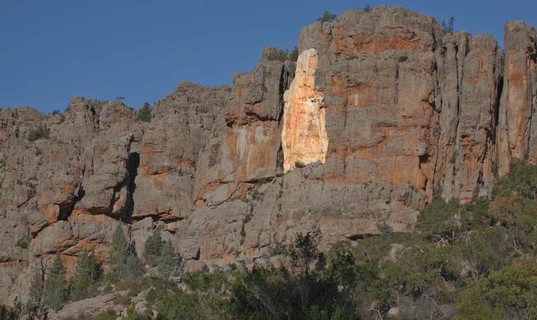 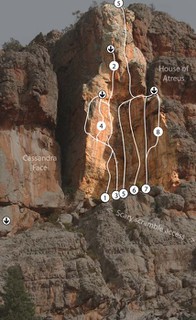 |
||||||||
| Route | Grade | Style | Selected ascents | |||||
|---|---|---|---|---|---|---|---|---|
| 1 |
★★ Have a Good Flight Direct Start
Start as for Jetlag, 2m Left of the original but finish up HaGF instead. Still great climbing even though the Jetlag finish has been added. FA: Kim Carigan, 1984 | 27 | 20m | |||||
| 2 |
★ Afterburner
Climb all of 'Jet Lag' (via the original direct start) then launch onwards into a final boulder problem above the chains. Start: Start as for JL. FA: Ingvar Lidman | 30 | 25m, 7 | |||||
| 3 |
★★ Jet Lag
Start: Start left of the big corner of "Orestes", about 4m Left of It'll Never Fly. FA: Geoff Weigand (Kim Carrigan climbed the first 8m (grade ~27) as the direct start to Have a Good Flight), 1984 | 29 | 18m, 8 | |||||
| 4 |
★ It'll Never Fly
Thin steep face then traverse left to arete. Up arete (#2 BD cam) to lower-off. Start: Just left of 'Orestes'. FA: Mike Law, 1982 | 24 | 20m, 4 | |||||
| 5 |
★★★ Have A Good Flight
Warning Fixed Gear: Both anchor bolts are loose Climb It'll Never Fly almost to arete, then cut back diagonally right and up to another bolt (exciting) then up to anchor. Start: As for It'll Never Fly. FA: Chris Shepherd, 1982 | 25 | 18m, 5 | |||||
| 6 |
★★★ Orestes
You can climb all of pitch 1 and the good bit of pitch 2 in a single mega pitch, then step left to the anchor of 'Afterburner'. It's a great shame that this new anchor wasn't placed 2m to the R on the front of the arete, as this would have allowed the leader to clean their own gear, but as it is someone will need to second if you do this extended version. Start: Start at the big corner on the Flight Deck.
FA: Jim Newlands & John Bennett, 1966 FFA: Kim Carrigan (1st pitchand LHV 13/3/84), Glenn Tempest (2nd pitch & 8/76), 1979 | 23 | 40m, 2 | |||||
| 7 |
★ Detestes / Triathletes are Better
Start between 'Orestes' & 'Plimsoll Line'. FA: Kim Carrigan, 1986 | 27 | 15m, 6 | |||||
| 8 |
★★ Plimsoll Line
Straight up to Orestes' first anchor. Beware, this route is often slimy, and the pro down low is fiddly mediocre RPs. Originally had pitons, they were eventually replaced with bolts but those were ripped out by the ethics police, so good luck... Start: Start at the thin left-facing corner 4m right of 'Orestes'. FA: Clive Parker, Chris Baxter & John Moore, 1968 FFA: Kim Carrigan, 1978 | 22 R | 15m | |||||
| 9 |
★ Celine and Julie Go Bolting
There is good small gear and a peg at the start of Plimsoll to get going. Traverses right past a bolt to a rest then up past a second to a runout section. Airy. FA: Louise & Lincoln Shepherd, 1984 | 26 R | 15m, 2 | |||||
1.6.3. House of Atreus 8 routes in Cliff
- Summary:
-
All Trad climbing
Lat / Long: -36.762238, 141.845663
description
approach
Approach the base of the cliff from the L.
descent notes
Walk off R and come down the gully. Or rap down from the rap station above Muldoon (35m abseil).
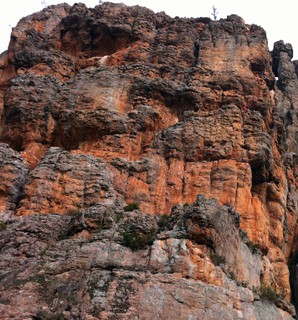 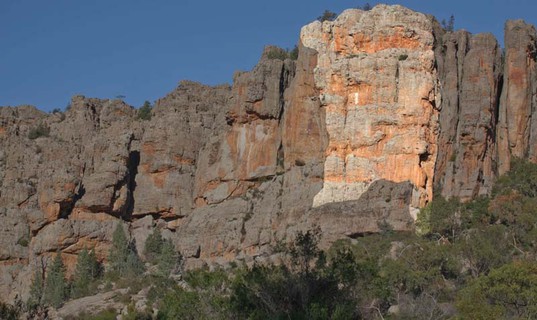 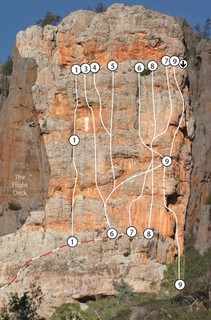 |
||||||||
| Route | Grade | Style | Selected ascents | |||||
|---|---|---|---|---|---|---|---|---|
| 1 |
Tiresias
Start: Start beneath L side of the face at short slabby chimney.
FA: Mike Law & Mike Stone, 1977 | 20 | 38m, 2 | |||||
| 2 |
★ Blind Profit
Climbing about three metres right of 'Tiresias' is really good fun and should have been only 18 but for one short hard section. Start: Start as for 'Tantalus'. FA: Kieran Loughran & Simon Mentz., 2007 | 21 | 30m, 2 | |||||
| 3 |
★ Cauldron
Completely redundant by today's standards...but then again it was another era back then, even pre-metric. Start: Start just R of T. FA: John Fahey & Peter Jackson, 1965 | 7 | 60m | |||||
| 4 |
★★ Bat Out Of Hell
A variant finish to 'Hell For Leather' which is more sustained and improves the original. Start: Start as for Hell for Leather. FA: Loughran + ? & late 80s. FA: Kieran, 2000 | 16 | 30m | |||||
| 5 |
★★ Hell For Leather
As for 'Tantalus' for 4m, then move L and go straight up, ending in shallow groove. Start: Start 10m R of T. FA: Chris & Sue Baxter, 1986 | 13 | 30m | |||||
| 6 |
★★ Tantalus
Start: Start 10m R of 'Tiresias'.
FA: Dick Salt, Jim Newlands & Alan Marsland, 1965 | 8 | 35m, 2 | |||||
| 7 |
★★ Surface To Air
Tricky start then R through bulges, finishing just L of Muldoon's final arete. It's good to do in two pitches to reduce rope drag and to better protect the second from a groundfall off the bouldery start. Rather than the long scramble approach, you can also approach up the short tough finger crack a few metres L of the start of Muldoon. Start: Start 2m R of Tantalus. Descend from DRRB at the top of Muldoon FA: Chris & Sue Baxter, 1986 | 17 | 30m | |||||
| 8 |
Evading Infra-Red
Very unbalanced in grade with a hard start. The top wall could be a nice direct finish for 'Surface To Air'. Was a bit controversial in its day for no good reason other than who put it up.
FA: Matthew Brooks & Julian Oldmeadow, 1991 | 24 | 35m, 2, 1 | |||||
1.6.4. Muldoon Area 8 routes in Cliff
- Summary:
-
All Trad climbing
Lat / Long: -36.762133, 141.845503
description
Muldoon, Curved Air and Fail Safe start at the base of the Atridae and climb the Main Wall.
The other routes are on the neighbouring buttresses- Iphigenia and Clytemnaestra.
Emergency Location: Mount Arapiles,The Atridae Area
descent notes
Abseil descent : 35m from above Muldoon. Some people use a single 60m rope and scramble the last few metres but be careful, there have been slips on this.
Otherwise walk off to right and down the gully between Atridae and Organ Pipes.
 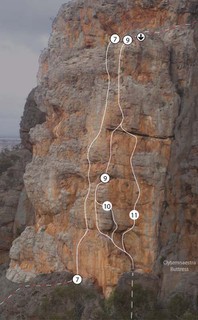 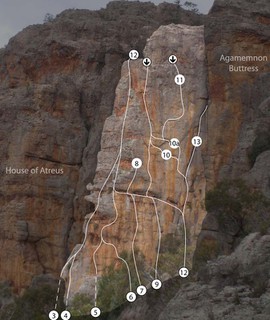 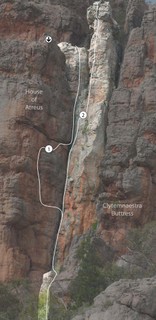 |
||||||||
| Route | Grade | Style | Selected ascents | |||||
|---|---|---|---|---|---|---|---|---|
| 1 |
★★★ Muldoon
Can be climbed in one pitch if you have a 70m rope. In that case minimize protection on the first pitch and extend as much as possible (sensible) to reduce rope drag.
34m rap from double ring bolts above the climb - 70m rope or doubles required. Can be done in two raps using a 60 and the mid-station, or walk right and down the gully. FA: Peter Jackson & Reg Williams, 1965 | 13 | 42m, 2 | |||||
| 2 |
Curved Air
As for Muldoon for 10m to the cave, then steeply out to slot, and up L into crack. Best descent is to use the Fail Safe DRB, otherwise continue up Muldoon to its rap anchors. FA: Kevin Lindorff & Dave Moss, 1979 | 23 | 10m | |||||
| 3 |
★★ Fail Safe
Used to be desperate and dangerous with only a manky fixed sling for protection, and first you had to get to it. Recently retroed by the FA so it’s now popular. As for Muldoon for 10m, then climb R arete of cave past 3 RB to lower-off. FA: Kevin Lindorff & Geoff Little, 1979 | 25 | 18m, 3 | |||||
| 4 |
★ The Iliad Connection
Warning Flora and Fauna: Active bee have on route Oct 2023 Mostly not new climbing, but its another great outing on this great buttress. Much of the climb may have been climbed on the first ascent of Fail Safe.
FA: Kieran Loughran, Keith Lockwood, Meg Sleeman (Pitch 1). As described :Simon Mentz & Louise Shepherd, 1998 | 18 | 40m, 2 | |||||
| 5 |
★★ lphigenia
Lots of good stuff on this route. The final tower is intimidating and bold on poor rock, but you can avoid this by stepping left and up to chains. Start as for Clytemnaestra.
FA: Reg Williams & Peter Jackson, 2000 | 17 | 45m, 2 | |||||
| 6 |
★ Clytemnaestra
The slick chimney between the Iphigenia Buttress and the Clytemnaestra Buttress. FA: Ian Speedie & Mike Stone, 1964 | 12 | 45m | |||||
| 7 |
Hermione
Overhang is a bit brutal but arete is nice. OK in one pitch with care with rope mgt on first, easy section. Start as for Clytemnaestra
FA: Kieran Loughran & Keith Lockwood, 1998 | 16 | 40m, 2 | |||||
| 8 |
★ Clytemnaestra Buttress
Start as for C.
FA: Garry Kerkin, Ian Speedie & Mike Stone, 1965 | 10 | 45m, 2 | |||||
1.6.5. Agamemnon Area 28 routes in Cliff
- Summary:
-
All Trad climbing
Lat / Long: -36.762051, 141.845412
description
descent notes
There are rap stations above many routes, but if you are trying to get to one from above your best bet is Agamemnon (30m) or walk L to the rap anchors above Muldoon (35m). Or walk off R along the cliff top and down the gully.
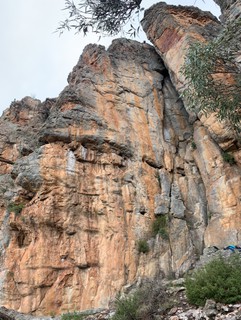 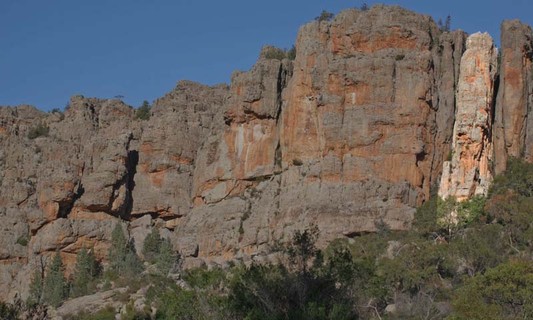 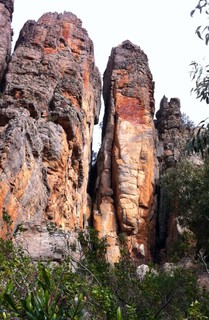 |
||||||||
| Route | Grade | Style | Selected ascents | |||||
|---|---|---|---|---|---|---|---|---|
| 1 |
Nanga Parbat Solo
Start R of Clytemnestra at a little gully heading towards Agamemnon. Take the thin crack on the L arete. Scramble off. FA: Mike Law & solo, 1982 | 20 | 10m | |||||
| 2 |
Raven
Start between NPS and CitS at the base of the V-slot the trail goes up. No bridging onto the opposite wall! Bad old FH, and then the crack. You can add to the fun by finishing up Crows in the Snow. FA: George Fieg & Dave Gray, 1992 | 26 | 12m, 1 | |||||
| 3 |
Crows in the Snow
Start on the L side of Collision Course Wall, at the top of the V-slot the trail takes, beneath a short L curving flake. Up flake for 12m to cave, then R and blindly through bulge to another cave. Finish up any other route to get off. Poor rock and gear. FA: Paul Tattersall & Chris Shepherd, 1982 FA: (described finish added by Kim Carrigan & Malcolm Matheson), 1982 | 23 | 20m | |||||
| 4 |
★ Gay Olympics
Start just right of the U bolts - use the stick clip! Thin face climbing and a dyno, nice! Originally given 26 with fewer bolts and no stick-clip. FA: Mike Law & Ian Anger, 1983 | 25 | 20m, 3 | |||||
| 5 |
★★ Golden Gaytime
Direct finish to Gay Olympics through the roof past another FH on the lip, to loweroffs. FA: Ingvar Lidman, 2006 | 25 | 30m, 3 | |||||
| 6 |
★★ Collision Course
Start 5m L of Agamemnon. L-facing orange flakes 1m L of shrub, to striking large holes under roof. Move 1m left to breach roof at obvious under clings, then up face past old peg on the right, drift left and up till the arete is reached, then back right up face to rap anchors (30m). FA: Kevin Lindorff & Geoff Little, 1979 | 22 | 30m | |||||
| 7 |
★★ No Country for Old Men
An excellent birthday present from Glenn to Kevin; the best route on Collision Course wall. Climbs the wall between Collision Course and Female Friends. Take off a star if the bees return. Three bolts and some trad gear. Either climb the pillar immediately right of Collision Course, or climb the start of Collision Course itself (better) to the horizontal ledge at about 10m. From the right edge of the ‘holes’ recessed there, reach up to clip the first ring bolt. Straight up past this and the second ring bolt above. Continue up until able to reach right to clip the third bolt (on Female Friends). Up to the anchors (double rings) above Collision Course. FA: Kevin Lindorff, Glenn Tempest & Glenn Tempest, Sep 2016 | 25 | 25m, 3 | |||||
| 8 |
Guessing Game
Reachy. An old route that starts as for FF to the 2nd FH then keeps traversing across to CC. Superseded by FF. FA: Chris Shepherd & Mark Moorhead (variant by Mike Law), 1981 | 23 | 40m, 3 | |||||
| 9 |
★★ Female Friends
An exciting face climb that is very sustained. Start as for WoI, and move left at the FH. Up past 2nd FH then back R to a 3rd FH then loweroffs (30m). FA: Mike Law & Mark Moorhead, 1981 | 24 | 27m, 3 | |||||
| 10 |
★ Smooth Journey
If it weren't for the scrappy finish and the intermittent bee problems, this excellent traverse would get 2 stars. Start as for WoI then traverse the funky holes across the entire wall to the arete. Best to belay here due to drag. Finish easily up the front of buttress beside (or on) Clytemnestra Buttress, or move back R to the GG anchor. FA: Joe Friend, John Chapman & Glenn Tempest, 1976 | 15 | 44m | |||||
| 11 |
★★★ Wizard of lce
Possibly the best crack at Arapiles. The diagonal elephant's butt crack is a classic of the genre. Start just left of Agamemnon and finish where that route does. Belaying off the rings is not ideal but there are some excellent features to sling. FA: Kim Carrigan & Mike Law, 1975 | 20 | 35m | |||||
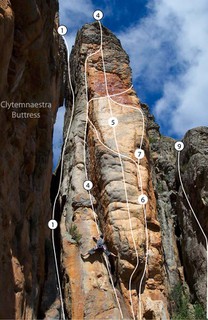 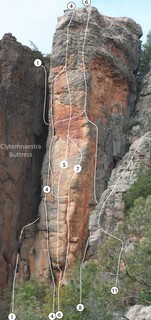 |
||||||||
| Route | Grade | Style | Selected ascents | |||||
| 12 |
★★★ Agamemnon
A lovely cool chasm with a thrilling finish - a dramatic bridging sequence that is both run-out and exposed.
FA: Michael Stone & Ian Speedie, 1964 | 11 | 40m, 2 | |||||
| 13 |
★★ Men in Tights
Start as per Agamemnon, finish last 5m up Electra pinnacle staying on the Northern chimney face. Small pro. Descent off the back or Rap down Agamemnon bolts as Electra chain is an awkward downclimb. FA: unknown | 16 | 45m, 2 | |||||
| 14 |
Madness
Start up inside the Agamemnon chimney, 1m L of a thin crack on the R (NW) wall. Tough move at BR then up L to short crack. FA: Chris Shepherd & Stuart Hickson, 1982 | 24 | 15m, 1 | |||||
| 15 |
Height of Fashion
Start just R of M. Up the thin crack to PR, with difficulty to good flake, then another hard move up L. Move R to easier climbing. FA: Kim Carrigan, 1982 | 28 | 20m | |||||
| 16 |
★★ Electra
Originally 18 - it's still solid at 19! The Pauligks' aid wasn't actually at the crux - theirs was an awesome effort for 1966. The appealing crack on the L side of the beautiful orange front face of the buttress. Follow crack till it finishes then step R and up Careful of the rock up higher. FA: Roland Pauligk & Ann Pauligk, 1966 FFA: Bryden Allen †, 1973 | 19 | 40m | |||||
| 17 |
Mixed Blessing
Not as good as it looks unfortunately, and the bolts are hard to clip. Start a few metres R of E, and 1m L of T. FA: Hugh Widdowson, 1992 | 24 | 50m, 4 | |||||
| 18 |
★★ Telemachus
Great sustained climbing with great protection the whole way. Start a few metres right of Electra. Can lower off with 65m rope. FA: Kevin Lindorff & Glenn Tempest, 1977 | 19 | 35m | |||||
| 19 |
★★ Telemachus Direct
Up Telemachus's crack then straight up the arete above to stance. Step L below red patch and straight up the middle of the buttress to the top. Good gear at crux then run-out on easier ground. FA: Kim Carrigan & Eddy Ozols, 1981 | 24 R | 30m | |||||
| 20 |
Love That Pain
Start around R from T. Rightwards crack to rest, L into hanging groove (BR), orange wall then L arete. FA: Kim Carrigan & Steve Monks, 1985 | 27 | 40m, 1 | |||||
| 21 |
Love that comfort
The start of Love That Pain, escaping up Necrophiliac. The rock is a bit dodgy at the start and the gear is fiddly but the climbing is OK. FA: Douglas Hockly, 2014 | 22 | 24m | |||||
| 22 |
One Man's Choss
...is another man's FA! Step across the block from the Necrophiliac anchor. Follow the dodgy rock across then up and over the overhang. Can belay using the Telemachus backup anchor bolt then rap from the Telemachus anchor. FA: Rhys Boyar & Ben Wright, 27 Jun 2021 | 15 | 27m | |||||
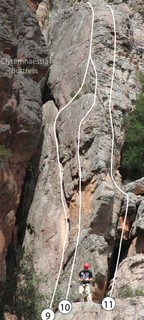 |
||||||||
| Route | Grade | Style | Selected ascents | |||||
| 23 |
★★ Necrophilliac
Left curving crack with a few nice jams. Lower-offs (25m). FA: Phillip Stranger, 1967 | 15 | 25m | |||||
| 24 |
★ Cruxless Knickers
Start 1m R of Necrophiliac. The thin crack, careful of the loose block. FA: Dave Gairns & Chris Baxter, 1978 | 17 | 25m | |||||
| 25 |
Almost Completely Worthless
What's in a name? Right of 'Cruxless Knickers' is a box corner. FA: Richard Smith & Greg Pritchard, 1998 | 18 | 10m | |||||
| 26 |
Running From the Martian
Start 15m R of Necrophiliac. The crack R of a bush. FA: S. Madoc & Sam Blainey, 1990 | 16 | 15m | |||||
| 27 |
Suck Got Sick
Up RftM then juggy traverse R around arete. FA: Sam Blainey & S Madoc, 1990 | 17 | 15m | |||||
| 28 |
What Is and What Should Never Be
Great song, but the name is wasted on this route. Walk up the gully R of the Atridae then back over the top to find a gully behind the Atridae. You are looking for the middle of a bulging orange wall on the "lefthand side" (whatever direction that may be!) of the gully, 30m up from a detached pillar. FA: Andrew White, Sam Blainey & Jacquie Snow, 1991 | 18 | 12m | |||||
1.7. Organ Pipes Area 145 routes in Crag
- Summary:
-
Mostly Trad climbing
Lat / Long: -36.761146, 141.845237
description
Probably the most popular multi-pitch area at Arapiles and, more importantly, close to camp.
Emergency Location: Mount Arapiles,The Organ Pipes Area
approach
Short walk from the camping ground.
1.7.1. Organ Pipes Gully 56 routes in Crag
- Summary:
-
Mostly Trad climbing
Lat / Long: -36.761508, 141.845409
description
The pinnacles above and behind the Organ Pipes. The gully is the descent for climbs in the Organ Pipes.
Emergency Location: Mount Arapiles,The Organ Pipes Area
approach
Approach via the track at the back of D Minor Pinnacle.
1.7.1.1. Steel Delinquency Pinnacle 8 routes in Cliff
- Summary:
-
All Trad climbing
description
The SE most pinnacle of the Organ Pipes. The main wall faces S towards the Atridae.
Emergency Location: Mount Arapiles,The Organ Pipes Area
approach
From the big gully R of the Atridae.
descent notes
The descent from the pinnacle is not intuitive! Walk along the top of the pinnacle in the direction of the campground. You are soon able to turn right (ie towards The Atridae) to find an easy (but exposed) traverse. This traverse takes you back left to a big hole in the wall, through which you can scramble (now turn left to scramble your way out, or turn right to find the chains above Trench Rawfare).
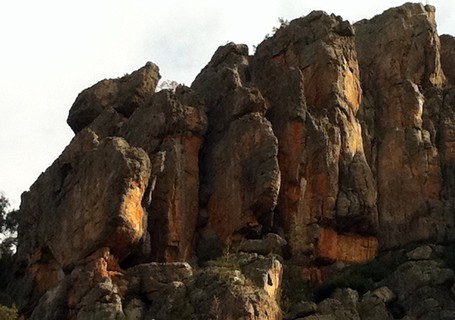 /1e/dd/1edd48a3941b204d09231cc0909e4595aa7d26a4) |
1.7.1.2. Organ Pipes Gully Left Side 37 routes in Crag
- Summary:
-
Mostly Trad climbing
Lat / Long: -36.761519, 141.844801
description
Emergency Location: Mount Arapiles,The Organ Pipes Area
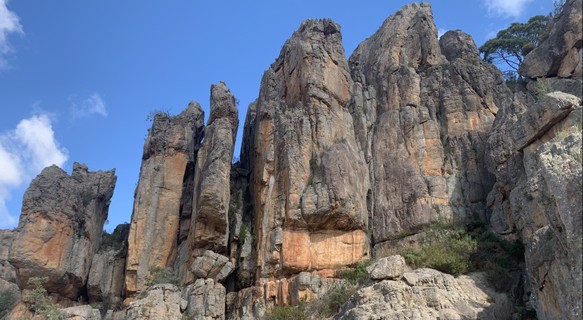 |
1.7.1.3. Organ Pipes Gully Right Side 11 routes in Cliff
- Summary:
-
All Trad climbing
Lat / Long: -36.761318, 141.845003
description
Emergency Location: Mount Arapiles,The Organ Pipes Area
/02/dc/02dc62455d98757a2b1e53c8fe936ce203e1fb40) 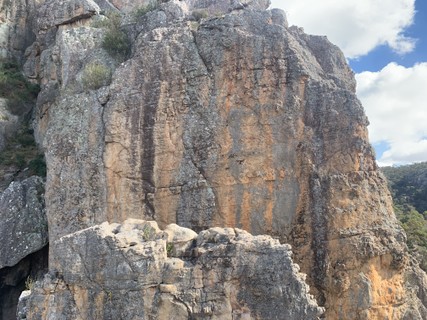 /ad/32/ad32f6ceef433e24b6044425566dcb80f02d19ec) 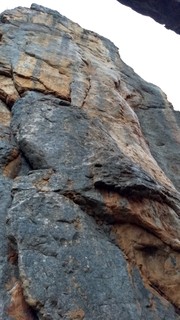 |
1.7.2. Organ Pipes 80 routes in Crag
- Summary:
-
All Trad climbing
Lat / Long: -36.760869, 141.844740
description
Lots of popular beginner's climbs close to camp.
Emergency Location: Mount Arapiles,The Organ Pipes Area
approach
Short walk uphill from the camping ground.
1.7.2.1. D Minor Pinnacle 14 routes in Cliff
- Summary:
-
Lat / Long: -36.761236, 141.845178
description
The completely separate pinnacle at the L end of the Organ Pipes.
Emergency Location: Mount Arapiles,The Organ Pipes Area
descent notes
/15/62/15629d63247cd61916689daac553ffa5b3591db9) 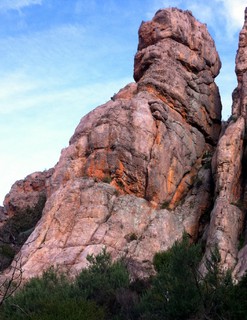 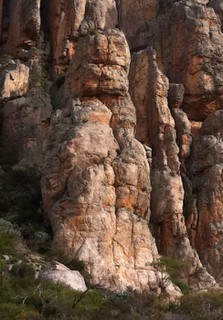 |
1.7.2.2. Central Organ Pipes 28 routes in Cliff
- Summary:
-
description
Emergency Location: Mount Arapiles,The Organ Pipes Area
Previously had been chopped up into way too many tiny sub-pages but it didn't really work so has now been reconsolidated.
 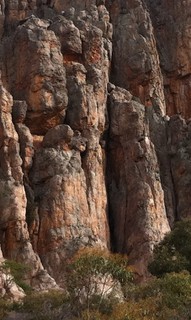 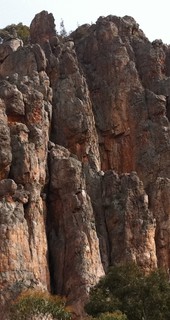 /ea/26/ea2630bae682a428b92b49404a6624a156932419) 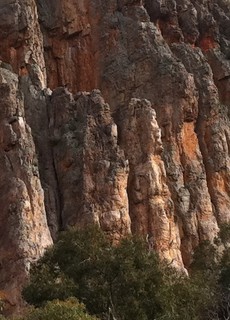 |
1.7.2.3. The Red Wall & Toccata Wall 38 routes in Cliff
- Summary:
-
description
Emergency Location: Mount Arapiles,The Organ Pipes Area
descent notes
Rap stations at top of many routes, otherwise top out then scramble up and L then down Organ Pipes Gully.
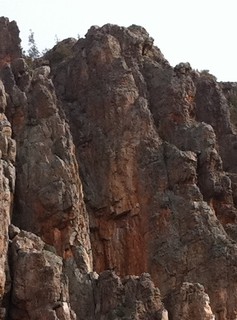 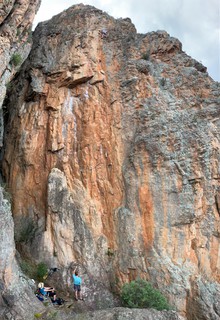 /85/77/85775b1243072f465bf837e829c0e5db05c59b31)  /3b/87/3b87faee734850bd122acdde5082fe291eae7e19) /a1/c7/a1c72d325bf7f4f53bff8251043008c494bfe37a) |
1.7.3. Rabbit Boulder 9 routes in Boulder
- Summary:
-
Mostly Bouldering
Lat / Long: -36.761113, 141.846509
description
Emergency Location: Mount Arapiles,Rabbit Boulder
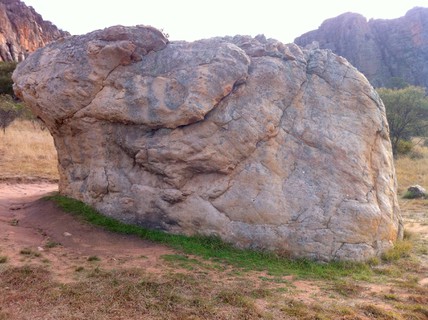 |
||||||||
| Route | Grade | Style | Selected ascents | |||||
|---|---|---|---|---|---|---|---|---|
| 1 |
★ Eye of the bunny
Left to right over nose. Sit start. | V2 | 2m | |||||
| 2 | ★ Over the eye | V1 | 2m | |||||
| 3 | ★ Ear of the Bunny | V0 | 3m | |||||
| 4 | ★ Face and scoop | V0 | 3m | |||||
| 5 | ★ Crack | V0 | 3m | |||||
| 6 |
Bunny Blowjob
Over the nose | 16 | 3m | |||||
| 7 | ★ Obvious Problem on Back Left | V2 | 3m | |||||
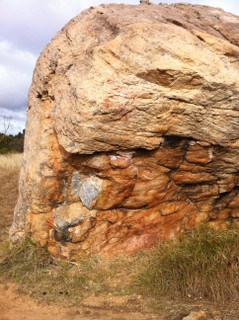 |
||||||||
| Route | Grade | Style | Selected ascents | |||||
| 8 |
★ Over the Nose of the Bunny
Sit start. | V3 | 2m | |||||
| 9 | ★ Traverse the whole Bunny | V5 | 15m | |||||
1.8. Central Gully 487 routes in Crag
- Summary:
-
Mostly Trad climbing
Lat / Long: -36.758867, 141.842541
description
The broad gully slightly W (Right) of the camping ground.
Emergency Locations : Central Gully Left Side Area, Central Gully Right Side Area
approach
5-15 minutes walk from the camping ground.
1.8.1. Central Gully Left 192 routes in Crag
- Summary:
-
All Trad climbing
Lat / Long: -36.759873, 141.842796
description
The continuation of the cliffline up the hill from the 'Organ Pipes'. Accessed from a branch in the track to the 'Organ Pipes' - please stick to the existing track.
Emergency Location : Mount Arapiles, Central Gully Left Side Area
approach
The areas are ordered in rising progression up the gully (i.e. L to R).
 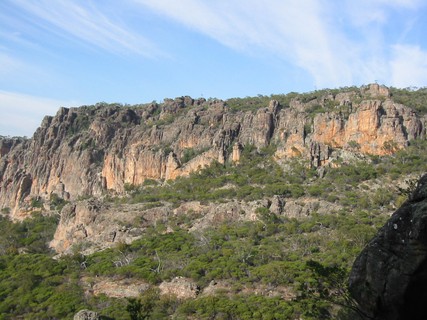  |
1.8.1.1. Leafy Quoit Lump 8 routes in Cliff
- Summary:
-
Lat / Long: -36.760030, 141.844390
description
The rock on the right hand side of the Central Gully Left track, while walking towards the Moby Dick/Golden Fleece area.
Emergency Location : Mount Arapiles,Central Gully Left Side Area
descent notes
Trivially easy walk-off from the western side.
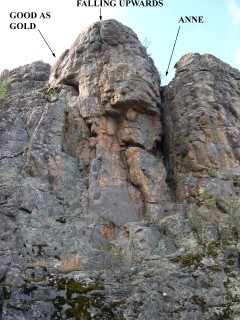 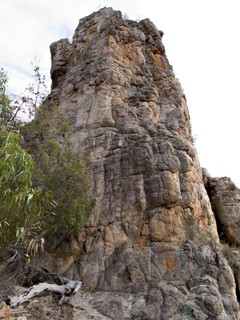 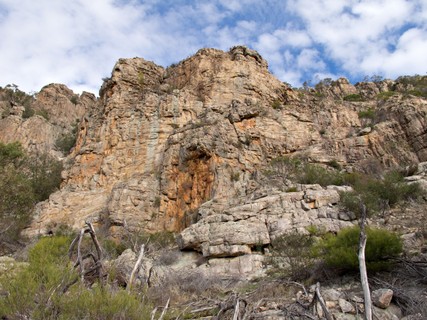 |
1.8.1.2. What You Like 1 route in Sector
- Summary:
-
description
A very large bouldering buttress. 9m in height, just out of the creek bed approx. 100m up from the pines
1.8.1.3. Operation Leo Area 20 routes in Cliff
- Summary:
-
Lat / Long: -36.760963, 141.844014
description
The gully between the Organ Pipes and Central Gully Left. More specifically, it's between Alchyne Wall and 'Brick Wall'.
Emergency Location : Mount Arapiles,Central Gully Left Side Area
approach
Scramble up the gully left of Brick Wall until the gully divides. There are climbs up both forks.
descent notes
Carefully descend the gully or walk around the top to the Atridae descent.
history
For the record...4 new routes were claimed in this area but were repeats. All were either in Lou's guide or the Addendum to the second printing. "High in Marrowbone" was already Keeping the Tailend off Strike, "Feeling da Dog" is the Day Bryn's Dad got Scared and "7463-6" is Diet of Worms ... done in 1982. The route they called "Graedog" and put the nice shiny bolt in is actually Little Aesthetics, which was done before on trad.
  |
1.8.1.4. Brick Wall 11 routes in Cliff
- Summary:
-
Lat / Long: -36.760639, 141.844550
description
The orange wall to the R of the gully between the Organ Pipes and Central Gully Left.
Emergency Location : Mount Arapiles,Central Gully Left Side Area
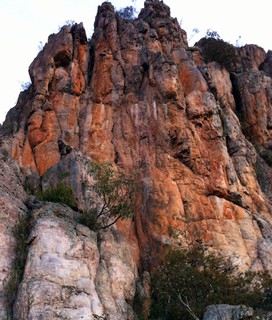 |
1.8.1.5. Golden Fleece Wall 21 routes in Cliff
- Summary:
-
Lat / Long: -36.760367, 141.843910
description
The cliff between Brick Wall and Moby Dick Pinnacle.
Emergency Location : Mount Arapiles,Central Gully Left Side Area
approach
Descent is by way of a rap anchor at the right end of the wall, just L of the top of the 'Dylan' chimney. When walking from the top of the leftmost few routes, be careful of the exposed section above Jason.
descent notes
Rap anchor at the R end of the wall, L of the top of Dylan's chimney. Also possible to scramble up and down the gully beside Moby Dick but this needs care.
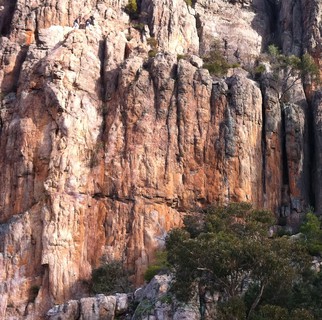 |
1.8.1.6. Moby Dick Pinnacle 6 routes in Cliff
- Summary:
-
Lat / Long: -36.760158, 141.843436
description
A pinnacle with a couple of gnarly crack classics and Arapiles' first grade 24.
Emergency Location : Mount Arapiles,Central Gully Left Side Area
approach
The obvious pinnacle, immediately right of Golden Fleece Wall.
descent notes
Best descent is abseil from rings above Horrorscope.
Alternative is to scramble carefully down the gap between the Moby Dick Pinnacle and Golden Fleece Wall, mostly on the wall on the Golden Fleece side. Not hard but don't fall and don't do it when wet. This doesn't get used much these days for good reason.
 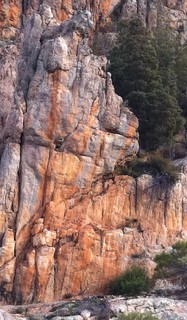 |
1.8.1.7. Stoat Wall 6 routes in Cliff
- Summary:
-
Lat / Long: -36.760219, 141.843733
description
The broad orange wall R of Moby Dick Pinnacle.
Emergency Location : Mount Arapiles,Central Gully Left Side Area
 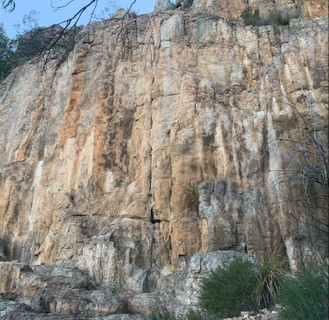 |
1.8.1.8. Dino Pillar 2 routes in Cliff
- Summary:
-
description
The first slim pillar R of Stoat Wall.
Emergency Location : Mount Arapiles,Central Gully Left Side Area
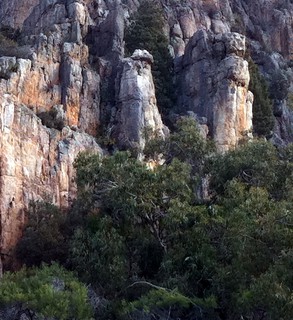 |
1.8.1.9. Pebbles and Bam Bam 6 routes in Cliff
- Summary:
-
Lat / Long: -36.760139, 141.843520
description
The orange pinnacle 20m R of Stoat Wall. The two chalky cracks that split the front are Pebbles and Bam Bam.
Emergency Location : Mount Arapiles,Central Gully Left Side Area
 |
1.8.1.10. Coyote Wall 5 routes in Cliff
- Summary:
-
description
The recessed wall past Bam Bam.
Emergency Location : Mount Arapiles,Central Gully Left Side Area
1.8.1.11. Wuss Wall 5 routes in Cliff
- Summary:
-
description
The small orange wall on the L side of the gully R of Dhole and behind Wailing Wall.
Emergency Location : Mount Arapiles,Central Gully Left Side Area
1.8.1.12. Wailing Wall 22 routes in Cliff
- Summary:
-
Lat / Long: -36.759686, 141.842697
description
The large bluff up the gully from Wuss Wall.
Emergency Location : Mount Arapiles,Central Gully Left Side Area
 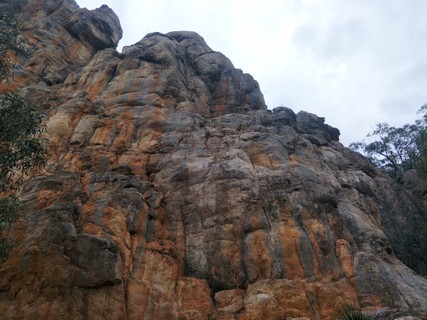 |
1.8.1.13. Pritikin Wall 3 routes in Cliff
- Summary:
-
description
The orange buttress above Wailing Wall.
Emergency Location : Mount Arapiles,Central Gully Left Side Area
1.8.1.14. Dog Face 28 routes in Cliff
- Summary:
-
Lat / Long: -36.759578, 141.842370
description
50m R of Wailing Wall.
Emergency Location : Mount Arapiles,Central Gully Left Side Area
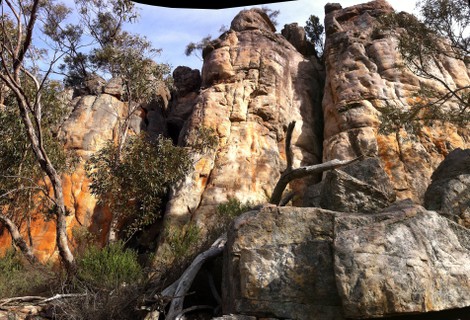 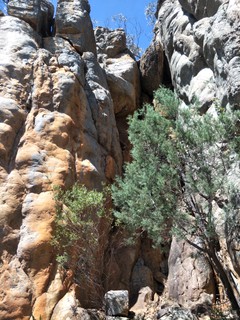 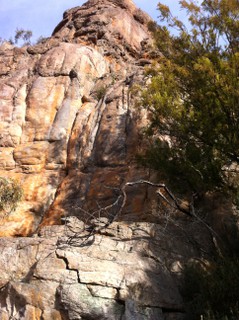 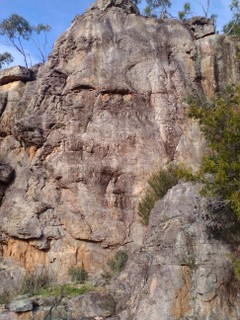 |
1.8.1.15. Hellspite Wall 7 routes in Cliff
- Summary:
-
Lat / Long: -36.759407, 141.841996
description
The small wall just up from Dog Face.
Emergency Location : Mount Arapiles, Charity Buttress Area
 |
1.8.1.16. Shattered Buttress 9 routes in Cliff
- Summary:
-
Lat / Long: -36.759223, 141.841605
description
The red wall up and R of Hellspite Wall.
Emergency Location : Mount Arapiles, Charity Buttress Area
approach
Up R of Lemming Wall, and almost at the top of the ridge, is this red wall. It might be quicker to approach from one of the summit carparks.
1.8.1.17. Past Present Buttress 3 routes in Unknown
- Summary:
-
description
A small stand-alone buttress approximately 120m right of Shattered Buttress, about 50m right of "Century Box”.
The oroginal suggestion for the name was "Echo Buttress" but Echo Crag already exists at Arapiles.
1.8.1.18. Charity Buttress 29 routes in Cliff
- Summary:
-
Lat / Long: -36.758807, 141.841344
description
The low-angled wall downhill and R of Wailing Wall.
Emergency Location : Mount Arapiles, Charity Buttress Area
/3c/4e/3c4e67e9d94bf977c701d6b7465089d528babb99) 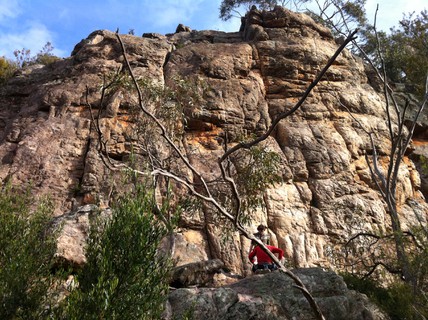 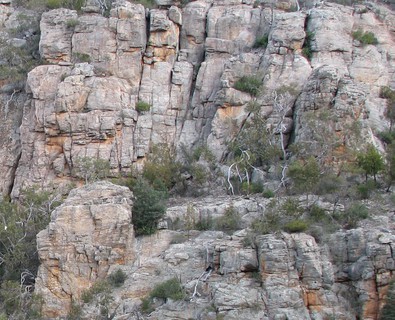 |
1.8.2. Upper Central Gully 141 routes in Crag
- Summary:
-
Mostly Trad climbing
Lat / Long: -36.757715, 141.841589
description
Emergency Location : Mount Arapiles, Central Gully Right Side Area, Mari Area, Skyline Walls Area
1.8.2.1. Deep Freeze Wall 8 routes in Cliff
- Summary:
-
All Trad climbing
Lat / Long: -36.758174, 141.840846
description
Although being located on the right side of the 'Central Gully' watercourse, this wall is left of the 'Central Gully' track and far closer to the left side crags than the right side crags. So, in a break with tradition, it has been put under 'Central Gully Left' side.
approach
Follow the Central Gully walking track and continue straight ahead where the track turns to the R.
Emergency Location: Mount Arapiles, Mari Area
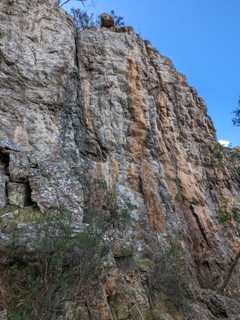 |
1.8.2.2. Mari Buttress 27 routes in Cliff
- Summary:
-
All Trad climbing
Lat / Long: -36.757951, 141.842223
description
Good summer crag with solid shade until late afternoon. The climbs starting up left of Megalomaniac should be avoided as they aren't all that good and accessing them could cause erosion damage to the new Central Gully track.
Emergency Location: Mount Arapiles, Mari Area
approach
Go up the Central Gully track, take the fork to the R just past where the track gets steep. If you're really lazy it's a much shorter walk down the Central Gully Track from the road at the top.
descent notes
Rap stations above Megalomaniac and above Electric Warrior. Or you can walk down either side of the buttress.
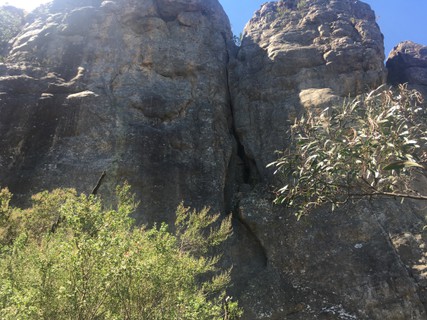 /d3/ce/d3ce3c498dc0bda8d659ed7e546e2fe12460698f) 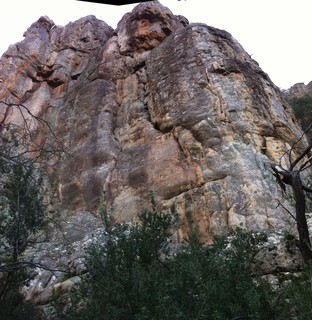 /79/95/79951858f4fbb862e76edef8a35d6d7e7e39deb0) |
1.8.2.3. Cecilia Wall 30 routes in Cliff
- Summary:
-
All Trad climbing
Lat / Long: -36.757254, 141.842003
description
Emergency Location: Mount Arapiles, Skyline Walls Area
approach
From Mari Buttress go up the gully past Dyslexia. Perhaps a more well-trod track is to walk to the base of Preludes Wall then follow the base of the cliffs uphill past Reaper and Garden Walls. If you're really lazy you can also come down from the summit road in which case its a very short walk.
descent notes
Rap anchors above some routes, otherwise scramble down on the L.
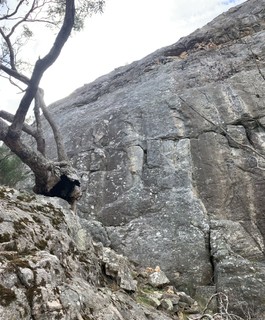 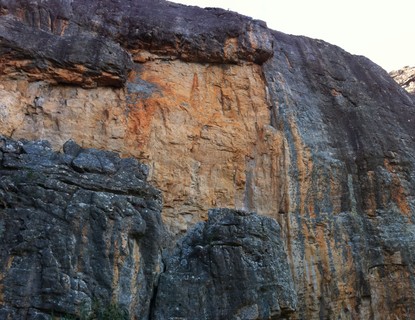 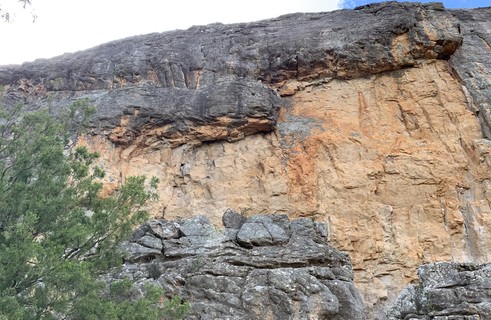 /f5/d2/f5d262bdb748378c23ca576184a815547b3fb1e3) |
1.8.2.4. Skyline Walls 37 routes in Cliff
- Summary:
-
Mostly Trad climbing
Lat / Long: -36.757421, 141.842601
description
Emergency Location: Mount Arapiles, Skyline Walls Area
approach
Scramble up from the bottom of Cecilia Wall; note this is exposed, mossy and insecure in places, take care or rope up. Or approach from camp via Dreadnought Gully, continuing up past Starless Buttress. Also possible to walk from the top carpark to the top of the crag and then rap in or do the tricky scramble descent.
descent notes
Rap station above Copyright. Or scramble down to the R.
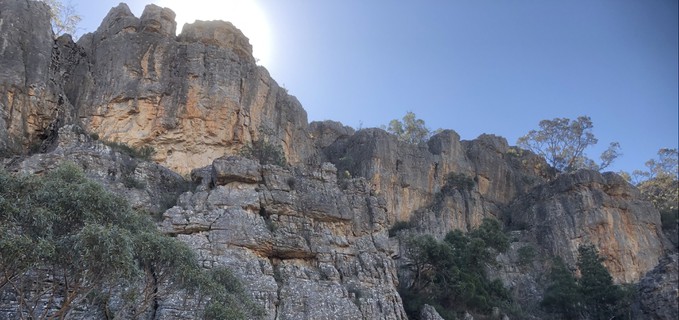 /73/a4/73a4b16f3961daebd6960372d1987d617f59b262) /87/05/870558d36994a7f30242c868d39cf21bce349624) 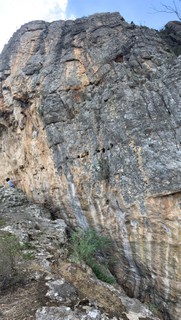  /12/ae/12ae9ad4ed88414055eb29f08cc677d954aa2594) 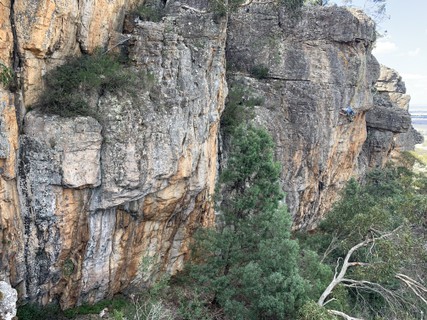   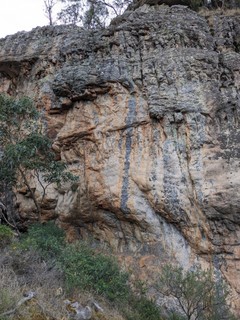  |
1.8.2.5. Garden Wall 21 routes in Cliff
- Summary:
-
Mostly Trad climbing
Lat / Long: -36.757497, 141.842384
description
The black cliff behind Mari and beneath Copyright Wall. Has shade in summer until about 2pm.
Emergency Location: Mount Arapiles, Skyline Walls Area
approach
Approach by walking down from the top past Cecilia Wall (be careful of some loose boulders on the track), or by walking up Central Gully and continue on past Reaper or walk right from Mari and then left around the corner of Mari Buttress and up towards the cliffs behind it.
descent notes
30m rap above WMT accessible (with care) from top, or downclimb the ramp and gully at the L of the cliff, traverse L on exposed, mossy narrow ledge, around arete and down groove. This is the Cecilia-to-Skyline scramble and is exposed, mossy and insecure in places, take care or rope up.
   |
1.8.2.6. Everyfin, Everyfin, Like That & Everyfin 8 routes in Boulder
- Summary:
-
Bouldering and Trad climbing
description
The small wall just L of the walking track (as you head uphill), a bit further up from Mari. This nice little wall is getting a bit mossy and could do with some love.
Emergency Location: Mount Arapiles, Mari Area
1.8.2.7. The Torture Chamber 10 routes in Boulder
- Summary:
-
All Bouldering
Lat / Long: -36.757461, 141.841145
description
Steep and pumpy with roof problems and a long traverse. Good in the wet.
Emergency Location: Mount Arapiles, Skyline Walls Area
approach
Follow the track uphill another 50m from Everyfin, Everyfin and take a faint path off to the R. After another 50m you'll find the boulder.
Coming down from the road, the turnoff for the track is about 100m down where the track turns sharply L.
 |
1.8.3. Central Gully Right 154 routes in Crag
- Summary:
-
All Trad climbing
Lat / Long: -36.757591, 141.843541
description
Emergency Location: Mount Arapiles, Central Gully Right Side Area
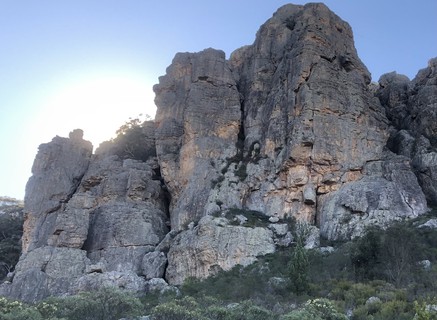 |
1.8.3.1. Reaper Buttress 33 routes in Cliff
- Summary:
-
Lat / Long: -36.757727, 141.842857
description
The orange and grey tower with the scythe shaped slash across the main face (Reaper).
Emergency Location: Mount Arapiles, Preludes Area
approach
Approach as for Preludes Wall then simply follow the base of the cliff for a further 50-60m up left.
descent notes
Rap stations above Reaper (DRB), Berserk (DRB) and Taste Sensation (chains). It is surprisingly easy to walk to (or from) the DRB above Berserk if you want to preplace gear (or walk down). From the base of the wall simply walk 50m further up left to the start of Garden Wall, then head back up to the right on quite easy ledges.
/24/ae/24aed203d5c47955ed74eb693c9820abe9b3f89d) 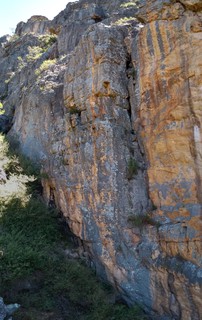 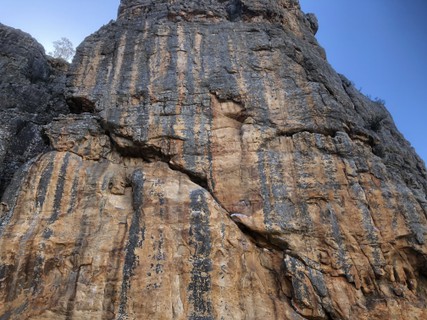 /46/12/46129ffb63fb2a69a8c5d395b241eddb4816d4d7) 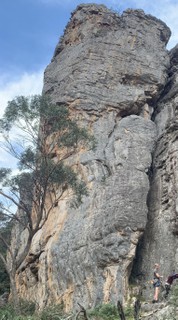 |
1.8.3.2. Preludes Wall 26 routes in Cliff
- Summary:
-
Lat / Long: -36.757903, 141.843439
description
The grey wall R of Reaper Buttress. Easy access, full-time shade, some nice easy routes and intriguing pillars at the belay ledge all guarantee the popularity of this wall. However, beware the patches of spooky fragile rock.
Emergency Location: Mount Arapiles, Preludes Area
descent notes
There is a rap station at the L end of the belay ledge - please don't rap off the pillars which are already too charred by rope burn. It's also possible to descend by walking R and then going down Dreadnought Gully - but timid folk will want to abseil this way so the new rap station at the L end of the ledge is the way to go.
  /b9/32/b93288b5e567bb0b39262e1acc3158ba7285a964)  |
1.8.3.3. Minstrel Pinnacle 10 routes in Cliff
- Summary:
-
Lat / Long: -36.758027, 141.843407
description
The detached outcrop in front of Preludes Wall.
Emergency Location: Mount Arapiles, Preludes Area
descent notes
Rap from slings.
 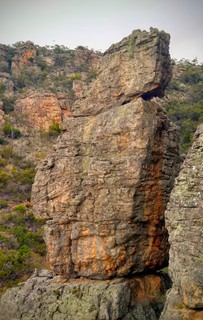  |
1.8.3.4. Starless Buttress 23 routes in Cliff
- Summary:
-
Lat / Long: -36.757571, 141.843570
description
The prominent buttress above Preludes Wall, between Skyline Wall and Dreadnought Gully. Wind Wall is the western side.
Emergency Location: Mount Arapiles, Skyline Walls Area
approach
Scramble of the L wall of Dreadnought Gully then under a big chockstone.
descent notes
Down the gully L of Wind Wall.
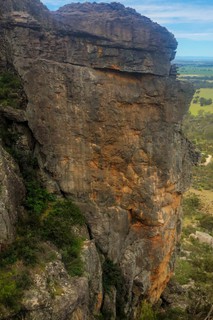 |
1.8.3.5. Dreadnought Gully 25 routes in Cliff
- Summary:
-
Lat / Long: -36.757851, 141.843795
description
A narrow chasm, cool in summer and sheltered from rain. Please take care of the nice ferns.
Emergency Location: Mount Arapiles, Preludes Area
approach
From the Central Gully track, take one of the first tracks off to the R through boulders and then L along the base of the buttress.
descent notes
Rap stations at the top of the first and second pitches of Dreadnought, and the first pitch of No Exit. Try to catch your ropes so they don't damage the fernery.
/25/b9/25b9fec5d696ea5fb635aa7434e46b6a6b19ce7e) /22/a6/22a66ccc744cc77e03369660068d7fcf0d04d73d)  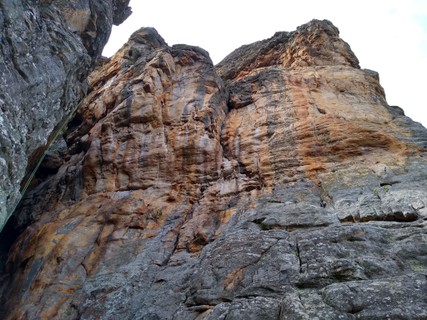 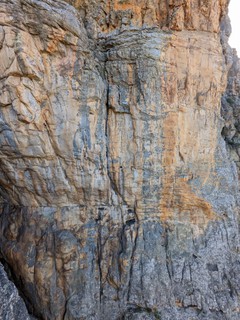 /e7/a6/e7a6694234dd0162169163c633bc7e1be86a8197) /07/75/0775c6f7d371a00da990d5fed0014e828d12f133) |
1.8.3.6. Dunes Buttress 37 routes in Cliff
- Summary:
-
Lat / Long: -36.757593, 141.844014
description
The prominent buttress immediately L of Major Mitchell Gully. The shadiest option for multipitching at Araps.
Emergency Location: Mount Arapiles, Eskimo Nell Area
approach
Approach by walking left of 'Fang Buttress' and then up along the base of 'Morfydd' Wall.
descent notes
Head back along the ridge line over the summit for a couple of hundred metres (mostly easy walking with a couple of short easy scrambles) until you hit the road. Head L along the road for about 50m then turn L down the sign-posted Central Gully track.
It is also possible to gain the next ridge to the northeast, and downclimb to Missing Link then descend via Ali's.
The walk-offs are both very scenic and enjoyable, but if you want to rap off there is now a properly equipped rap route. Double rings a few metres right of the topout of Eskimo Nell, then another set on the northeast end of the Oasis ledge, and chains atop Drifting Sand. Exact rap lengths not known to this writer, perhaps someone else can fill this in.
DO NOT attempt the rap down Major Mitchell Gully. The pin is old and dodgy.
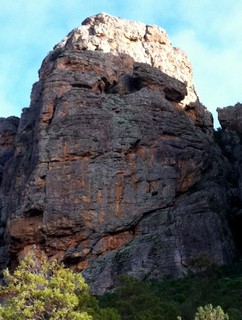 /7c/6e/7c6ee231d973cc76aee82bc5ac4423461e809f77) /28/f4/28f4af51b606a4a447c3acaef2a1d620ebe90c40) |
1.9. Fang Buttress and Surrounds 196 routes in Crag
- Summary:
-
Trad climbing, Bouldering and Sport climbing
Lat / Long: -36.758366, 141.845215
description
Emergency Location: Mount Arapiles, Fang Buttress Area
approach
A short walk from the camping ground. Head towards the big bluff.
1.9.1. Major Mitchell Gully 50 routes in Crag
- Summary:
-
All Trad climbing
Lat / Long: -36.757612, 141.844818
description
Emergency Location : Mount Arapiles, Morfydd Wall Area
 |
1.9.1.1. Morfydd Wall 38 routes in Cliff
- Summary:
-
Lat / Long: -36.757634, 141.844823
description
The long grey wall running along Major Mitchell Gully.
Emergency Location : Mount Arapiles, Morfydd Wall Area
descent notes
Rap anchors above Feral Chicken, Morfydd and a couple of others. Or scramble down Ali's.
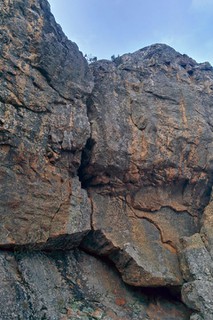 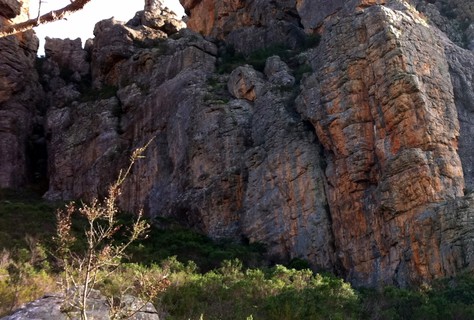 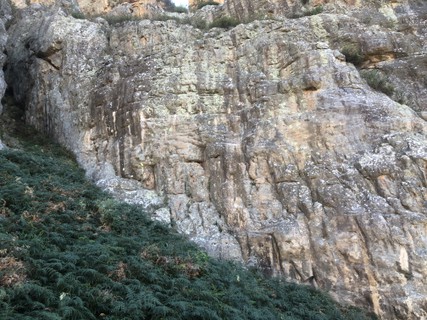 /92/e8/92e80597df7db3b260e60f060a37f1987d54a44e)  /f4/e8/f4e899c6474528801fed4991d5afa1ecb7db41e3) /9b/49/9b490c698fd48bc67eaec5f6b061925cc0eefc05)  |
1.9.1.2. Ali's Area 12 routes in Cliff
- Summary:
-
Lat / Long: -36.757697, 141.845255
description
The wall directly behind Fang Buttress. Mostly trafficked simply to ascend to & descend from greater things above.
Emergency Location : Mount Arapiles, Morfydd Wall Area
descent notes
Downclimb Ali's - follow the chains into the gully. Consider using a suitable running tether to the chains rather than soloing, given the fall potential and very polished rock. Or rap from the station on the ledge behind and below John's Pinnacle (45m; 2 ropes), or the newer quick clips a little lower (32m; single 60m rope is fine with a short scramble down at the base).
  |
1.9.2. Fang Buttress 35 routes in Cliff
- Summary:
-
Mostly Trad climbing
Lat / Long: -36.757643, 141.845495
description
The large outcrop behind the Plaque and in front of Ali's.
Emergency Location : Mount Arapiles,Fang Buttress Area
Reason for closure: Numerous important cultural heritage sites are evidence of the significance of Dyurrite for Wotjobaluk Peoples and the use of the area for thousands of years.
descent notes
Crawl through the hole at the top of the buttress (opposite Ali's) then walk down.
| Route | Grade | Style | Selected ascents | |||||
|---|---|---|---|---|---|---|---|---|
| 1 |
★ Cosmos
Straight up with terrible pro. Toproping recommended. This looks like it has 2 or 3 bolts now? Start: In the middle of the grey wall L of O-W. FA: Chris Shepherd & Mark Moorhead, 1981 | 24 X | 10m | |||||
| 2 |
Hot Finger
Follow the BRs. Start: Start just L of O-W. FA: Martin Grulich, 1986 | 26 | 10m, 3 | |||||
| 3 |
Orc-Wood
A tricky start, then it's easier to the halfway ledge (at which point you still have no pro). Follow the weakness just L of the R arete of the wall. Start: Start around the back of 'Fang Buttress', just across the gap from Ali's. FA: Kevin Lindorff, 1975 | 15 R | 12m | |||||
| 4 |
Vaunted
This length is surely overstated. Anyway, up the unprotected start of O-W to the ledge. Now go R and up arete to a ledge then do the top overhang. Start: Start as for O-W. FA: Keith Egerton, Phil Wilkins & Jane Wilkinson, 1983 | 20 R | 25m | |||||
| 5 |
★ Suicide Fly
The arete right of Orc-Wood with 2 bolts FA: Paul Deacon, 2009 | 23 | 12m, 2 | |||||
| 6 |
The Bitter End
Take the middle of the face between 'Vaunted' and 'Kamikaze', with one bolt. Start: Start just L of K. FA: Jim Thomas & Chris Shepherd, 1983 | 23 | 18m, 1 | |||||
| 7 |
★ Kamikaze
Worth doing? Yes. Worth a star? hmm... Start: Start in the middle of the slim S face of 'Fang Buttress'. FA: Keith Lockwood & Murray Taylor, 1968 | 16 | 20m | |||||
| 8 |
Towelled Off
Up the middle of the face between K and DA. Start: Start just R of K. FA: Kim Carrigan, 1985 | 24 | 20m, 1 | |||||
| 9 |
Dead Ahead
Trend up R almost to the arete, then up past a piton to an interesting finish. Start: Start as for TO. FA: Kim Carrigan, Barry Young & Simon Parsons, 1978 | 23 | 20m | |||||
 |
||||||||
| Route | Grade | Style | Selected ascents | |||||
| 10 |
★ Ferrets and Berts
Climb the arete with one bolt and not much else pro. Deviating into XI briefly at half height to avoid the widow maker loose flake is sensible (but if you're leading this you're probably a bit short on sense). Start: Start under the SE arete of 'Fang Buttress', between DA and XI. FA: Mark Moorhead, 1981 | 23 R | 30m, 1 | |||||
| 11 |
★★ XI
The gear is good from the crack up, but below that... Start: Start 5m L of Fang, just R of the SE arete of 'Fang Buttress'. FA: Mike Law & Peter Watson, 1976 | 18 R | 30m | |||||
| 12 |
★★ Counting the Days
Originally given 24 and one bolt - would have been very bold getting to the bolt. There are two ways to do it, some people find it easier to climb left of the bolts. Retrobolted by the first ascentionist. Start: Start as for 'Placements'. FA: Roland Foster, 1982 | 24 | 20m, 3 | |||||
| 13 |
★★ Placements
Climb easy corner to ledge, then step right and ascend right-trending crack line/weakness via a series of sidepulls and gastons. Powerfully sustained at the grade and bombproof gear. Finish easily up right arete of the XI face (left of Fang). Alternative opinion: the gear is not bombproof! Small, fiddly gear through crux with decking potential if you can't place it. Good gear exists at the start and in the top diagonal. A block came off the start of the hard section, not sure if this has changed the route. Start: Start 1.5m L of F at the corner in the small alcove. FA: Chris Shepherd, 1980 | 25 | 25m | |||||
| 14 |
★ Fang
A favourite among those who like chest-beating about whether you can hand jam. To the rest of us it's a poxy one move wonder. Start: Start under the dominant chimney on the L side of the E (main) face of 'Fang Buttress'. FA: Peter Jackson & Chris Baxter, 1965 | 18 | 25m | |||||
| 15 |
★ Strolling Direct Start
Obvious direct start (2 FHs) into 'Strolling', joining that route at its crux. Start: 5m R of Fang and 5m L of 'Strolling'. FA: Gordon Poulteney | 26 | 20m, 3 | |||||
| 16 |
★★ Hyperlink
Up SDS then head R past a new FH on the bulge (which nearly retrobolts Strolling) and finish up 'Ergonomics'. Start: As for SDS. FFA: Gordon Poultney, 2005 | 27 | 25m, 6 | |||||
| 17 |
★★ Strolling
Up the steep flake, traverse 5m L under the bulge to a bolt, then over the bulge and up. Pro is ok but quite tricky to get in on lead. Start: Start 8m R of Fang. FA: Mark Moorhead, 1981 | 23 | 25m, 1 | |||||
| 18 |
★★ Strolling Right Hand Variant
Original climbed bolt free but now it is possible to clip 2 of the bolts of Ergonomics. Start as for Strolling then up and right from loose block past the broken remnants of an old PR (there's a good sneaky wire instead or clip bolt). Now pull over the bulge (again try to ignore the bolt) and trend L up the face to join the finish of Strolling. Protection is adequate even without the bolts. Be very careful of the massive every-so-slightly-loose block down low - you'll need to pull on it, but do not put gear behind it. FA: Chris Shepherd | 24 | 25m | |||||
| 19 |
★★★ Ergonomics
Recently re-bolted. Excellent long-overlooked addition that incorporates a direct finish to Strolling RHV. Direct line up the centre right of the buttress that would have been completely uncontroversial had it pre-dated Strolling RHV. Sustained climbing leads up and slightly left through a bulge to a technical crux. After the 4th bolt, continue straight up on blowable slopey pockets. Do not traverse off R here if you want to bathe in the social recognition of a legitimate ascent. Start: 3m R of Strolling. FA: Dave Jones 2005; Dave Jones | 26 | 20m, 5 | |||||
| 20 |
★★ Wagalak
There's 1 or 2 old bolt holes 1 to 2m to the right dating from an unknown attempt on this great nose of rock. Start 4m L of 'Mantis'. It's almost a sport route but you need a few med. cams before the bolts. FA: Dave Jones, 2005 | 29 | 17m, 3 | |||||
| 21 |
★ Mandible
Wagalak's chains unfortunately were a retrobolt of this route. But on the upside, if you lower off the chains this is possibly the best wet weather 19 at 'Arapiles'. Start as for 'Mantis' and climb it until 2m below the roof. Now traverse left along the break for 8m to the arête (where you will now find Wagalak's chains). Finish straight up the nice cracked arête. Unless you like ropedrag, use double ropes or split it into two pitches at the chains. FA: Will Monks & Andrew Duckworth, 2004 | 19 | 41m | |||||
| 22 |
★ Victarctica
Climbable even in the eponymous weather...one of the driest routes at Araps! Start as for 'Mantis' and climb it for about 6m. Now step L onto the steep orange left wall and up this over the bulge (grade 23 climbing with dicky gear) to the break (the traverse on Mandible). Continue up Mandible or Preying. FA: Will Monks & Peter Monks, 2009 | 24 R | 25m | |||||
| 23 |
★ Preying
Up Mantis to roof, start traverse L as for Mandible, but halfway to arete blast straight up orange wall and through steepest part of juggy top bulge FA: Will Monks & Andrew Duckworth, 2004 | 18 | 37m | |||||
| 24 |
Mantis Variant Finish
As for 'Mantis' to the recess under the roof, now take the left end of the overhang and up the corner above, rejoining 'Mantis' near the top. There is a piton somewhere on this. Start: Start as for 'Mantis'. FA: Phillip McMillan & Rod Young, 1979 | 16 | 33m | |||||
| 25 |
★★ Mantis
Up the slightly slabby face into the recess under the roof, then move R where it steepens to find the juggiest part of the overhang. Continue up wall above to ledge on left. Start: At the pockety rock under the recess 12m R of Fang. FA: Peter Jackson, Ted Batty & Bob Bull, 1965 | 14 | 33m | |||||
| 26 |
★★ Downward Bound
Up to overhang at 4m, go L under it, then up. Has been done direct through the overhang at 21, by Col Reece, Greg Moore, 1979. Start: Start 4m R of 'Mantis'. FA: Mike Law & Glenn Tempest, 1976 | 15 | 25m | |||||
| 27 |
Fear of Praying
Up slots to overhang, step L, then up wall trending R to gain arete. Skip the top overhang by traversing off left. Start: Start 1m R of DB. FA: Bill Andrews, Julie Tulloch & Roger Murphy, 1976 | 11 | 33m | |||||
| 28 |
Petard
Instead of going L at small roof, step R around it and climb the R side of arete. (Belay on ledge to avoid rope drag.) The arete soon breaks out above the gully between 'Fang Buttress' and 'Bard Buttress'. Continue to summit of 'Fang Buttress'. Start: Start as for Fear Of Praying. FA: Cameron Millsom, Simon White, Hillary Little & Patrick Over, 1997 | 13 | 40m | |||||
| 29 |
Liver Little
Traverse left towards arete and then swing back right and up till arete can be reached again. Start: Start left of 'Pulpy Kidney' FA: Hoskins, Bride & Wilkins, 1995 | 19 | 15m | |||||
| 30 |
★ Pulpy Kidney
Stick clip bolt then up flake to jugs. At 2nd BR you can go straight up bulges or go L to flake and arete. Start: Start by walking around the R (north) end of 'Fang Buttress' and going 20m up the gully behind. FA: Mike Law & Steve Howden, 1982 | 23 | 15m, 2 | |||||
| 31 |
The Wizard
Layback a pin-scarred flake with poor pro, then directly up wall above. Start: Start 5m R of PK. FA: Chris Dewhirst & John Moore, 1965 | 16 R | 20m | |||||
| 32 |
Thibenzol
Up crack following big holds to ledge then take headwall. Start: Start 5 metres up right of Wizard below short crack thingy. FA: Smith, Pritchard & Hoskins, 1995 | 15 | 15m | |||||
| 33 |
A Bit on the Side
Not much pro. Start: Start below left arete of Orc-Wood Wall. FA: Hoskins, Smith & Pritchard, 1995 | 20 R | 10m | |||||
| 34 |
I'd give Both My Ankles to do a route this close to camp
The full description provided is "Right of Mantle". Hmmm. Maybe a repeat of Downward Bound? Maybe somewhere else entirely? Who knows. FA: Richard Smith, 2006 | 16 | 25m | |||||
| 35 |
Skybax Rider
Not clear whether this is L or R of 'Thibenzol'. Start: Takes the next pinnacle uphill (R) of Wizard. FA: Keith & Tim Lockwood, 1995 | 10 | 20m | |||||
1.9.3. Plaque 21 routes in Cliff
- Summary:
-
All Trad climbing
Lat / Long: -36.757748, 141.845932
description
The large block in front of Fang and Bard buttresses. Named for the large commemorative plaque attached to the face.
Emergency Location : Mount Arapiles, Plaque Rock area
Reason for closure, Numerous important cultural heritage sites are evidence of the significance of Dyurrite for Wotjobaluk Peoples and the use of the area for thousands of years.
approach
2 minute easy walk from the campsite.
descent notes
Walk off the back.
| Route | Grade | Style | Selected ascents | |||||
|---|---|---|---|---|---|---|---|---|
| 1 |
They Shoot Horses Don't They
A girdle of the 'Plaque' outcrop...good luck at getting past the topropers. Start: Start on the far L. FA: Matt Taylor, Peter Megens & Peter Cyganowski, 1977 | 20 | 30m | |||||
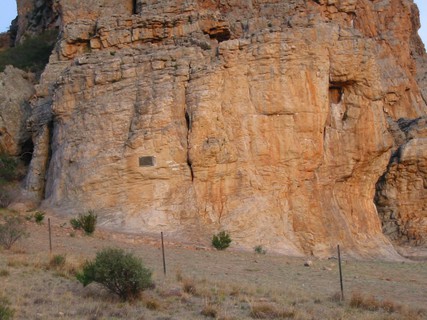 |
||||||||
| Route | Grade | Style | Selected ascents | |||||
| 2 |
★ Tis-sa-ack
Start 2m right of the crack at the far left and straight up. FA: Mike Law | 18 | 10m | |||||
| 3 |
★ The Nose of El Capitan
Start 2m right of the crack at the far left. Veer right and up the face. FA: Mike Law | 18 R | 10m | |||||
| 4 |
★ Jump Club
Start left of the plaque. Smooth start then into the groove. FA: Mike Law | 23 R | 10m | |||||
| 5 |
★ Age of Raisins / Age of Reason
Actually 18M1 because you use the corner of the plaque. Then up. FA: Mark Moorhead, Chris Shepherd & Jon Muir | 18 | 11m | |||||
| 6 |
★ Minimus
The bulging crack just right of the plaque. FA: Bob Bull & John Fahey | 14 | 12m | |||||
| 7 |
Loop
The line between Minimus and Camelot. FA: Mike Law | 19 | 12m | |||||
| 8 |
★ Camelot
Slabby start right of Minimus then the corner-crack to the top. FA: Phillip Stranger | 10 | 13m | |||||
| 9 |
★ Maximus
The thin wall 2m right of Camelot. FA: Peter Watson & Peter Megens | 17 | 13m | |||||
| 10 |
★ Cumelittle
Start left of the cave (as for Dramp). Up the face. FA: Nick White & Dave Mudie FA: Kim Carrigan & Greg Child | 25 | 15m, 2 | |||||
| 11 |
★ Everest Without Oxygen
Start left of cave (as for Dramp). Left from the bottom of the cave an up a thin seam. FA: Col Reece | 23 R | 15m | |||||
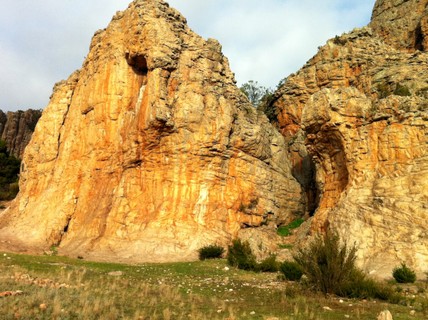 |
||||||||
| Route | Grade | Style | Selected ascents | |||||
| 12 |
★★ Dramp
Start left of cave. Follow the chalk into and out of the cave. FA: John Fahey & Peter Jackson, 1964 FFA: Henry Barber, 1975 | 21 R | 15m | |||||
| 13 |
★ Sonic Boom
A more compact little orange overhang you will not find. The steep section offers great moves on surprisingly good holds and is soft at the grade ... if you don't plug gear in the key holds. Start: Start 5m R of 'Dramp'. FA: Mark Moorhead, 1981 | 25 | 12m, 1 | |||||
| 14 |
Chili Digits
Up to crappy old FH then trend L into SB. Start: Start 2m R of SB. FA: Tom Greenwood & Terry Tremble, 1989 | 24 | 10m, 1 | |||||
| 15 |
Wilma Holds Her Own
As for FoF to piton, then L to seam. Start: Start as for FoF. FA: Kim Carrigan, 1984 | 26 | 12m | |||||
| 16 |
★ Fear of Flying
Downgraded to 21 by Simey, so you can probably expect it to be reachy. Start: Start 5m R of SB. FA: Nic Taylor & Kevin Lindorff, 1975 | 22 | 12m | |||||
| 17 |
Dodgy Brothers
Start: Start 2m R of FoF. FA: Martin Lama & Graeme Smith, 1991 | 8 | 10m | |||||
| 18 |
★ Doobie
Worthless pro! FA: Andrew Thompson, 1975 | 20 R | 8m | |||||
| 19 |
★ Angry Little Man
Short steep face, finish L as for Loboff. Start: Start just R of D. FA: Graham Jones & James Falla, 1986 | 23 | 8m | |||||
| 20 |
Lobbail
Up Loboff till the start of the traverse, then up left through funky bulge. FA: Someone, 2014 | 8 | ||||||
| 21 |
★ Lobboff
Up then traverse L across lip. Start: Start 4m R of ALM. FA: Kevin Lindorff & Nic Taylor, 1975 | 16 | 10m | |||||
1.9.4. Golden Streak Area Boulders 38 routes in Crag
- Summary:
-
All Bouldering
Lat / Long: -36.758649, 141.845771
summary
Emergency Location : Mount Arapiles, Golden Streak / Central Gully Boulders
1.9.4.1. Golden Streak Boulder 17 routes in Boulder
- Summary:
-
Lat / Long: -36.758733, 141.846063
description
Emergency Location : Mount Arapiles, Golden Streak / Central Gully Boulders
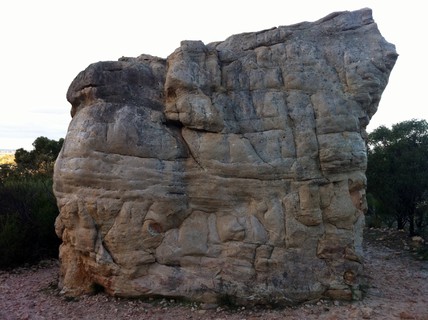 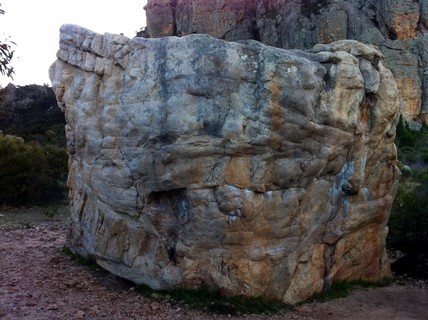 |
1.9.4.2. Molar Boulder 1 route in Boulder
- Summary:
-
Lat / Long: -36.758452, 141.846112
description
Emergency Location : Mount Arapiles, Golden Streak / Central Gully Boulders
 |
1.9.4.3. Grey Boulder 2 routes in Boulder
- Summary:
-
Lat / Long: -36.758406, 141.846493
  |
1.9.4.4. No Hands Boulders 2 routes in Boulder
- Summary:
-
Lat / Long: -36.758646, 141.845748
description
As in Selected Climbs
Emergency Location : Mount Arapiles, Golden Streak / Central Gully Boulders
 |
1.9.4.5. Swing Wing Boulder 4 routes in Boulder
- Summary:
-
Lat / Long: -36.758779, 141.845540
description
Emergency Location : Mount Arapiles, Pinch Arete / Swing Wing Boulders
 |
1.9.4.6. Big Pointy Boulder 5 routes in Boulder
- Summary:
-
Lat / Long: -36.758820, 141.845540
description
Emergency Location : Mount Arapiles, Golden Streak / Central Gully Boulders
  |
1.9.4.7. Animal Acts 4 routes in Boulder
- Summary:
-
Lat / Long: -36.758983, 141.845127
description
Emergency Location : Mount Arapiles, Animal Acts Boulder
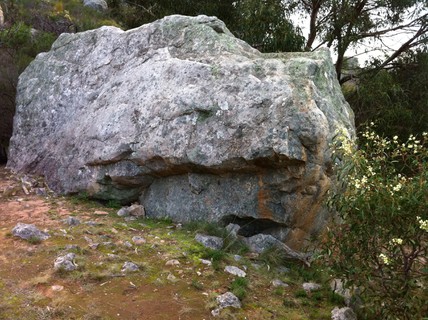 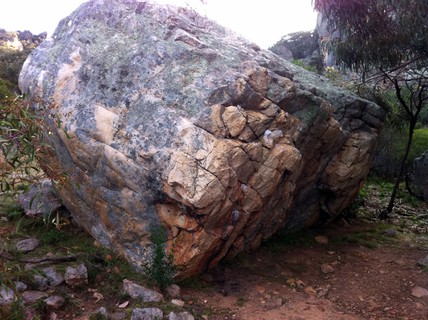 |
1.9.4.8. Unkown Boulder Golden Streak area 1 route in Boulder
- Summary:
-
description
Emergency Location : Mount Arapiles, Golden Streak / Central Gully Boulders
1.9.4.9. Perfect jam boulder 2 routes in Boulder
- Summary:
-
Lat / Long: -36.758016, 141.845774
approach
Another 50m past Golden Streak and just at the back of Plaque is a large boulder. On the downhill side as you approach is a perfect vertical hand jam slot.
1.9.5. Krondorf Area Boulders 52 routes in Crag
- Summary:
-
Mostly Bouldering
Lat / Long: -36.758548, 141.844352
summary
Emergency Location : Mount Arapiles, Golden Streak / Central Gully Boulders
1.9.5.1. Pinch Arete and Pebble Wall 18 routes in Boulder
- Summary:
-
All Bouldering
Lat / Long: -36.758688, 141.844903
description
Emergency Location : Mount Arapiles, Pinch Arete / Swing Wing Boulders
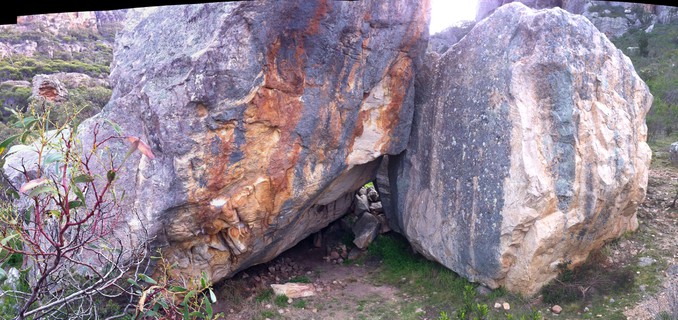  |
1.9.5.2. Oops boulder 8 routes in Boulder
- Summary:
-
Mostly Bouldering
Lat / Long: -36.758692, 141.844725
description
A high boulder holding a number of worthwhile problems.
Emergency Location : Mount Arapiles, Pinch Arete / Swing Wing Boulders
/25/64/25648d207735cc77716f4fe2e6edc8881ef2416d) |
1.9.5.3. Krondorff Boulder 15 routes in Boulder
- Summary:
-
All Bouldering
Lat / Long: -36.758799, 141.844532
description
Emergency Location : Mount Arapiles, Pinch Arete / Swing Wing Boulders
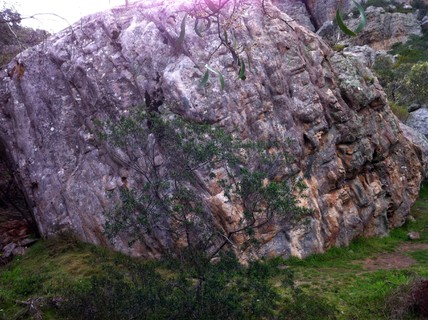  |
1.9.5.4. Trackside/Hammer Boulder 4 routes in Boulder
- Summary:
-
All Bouldering
Lat / Long: -36.758577, 141.843940
description
Emergency Location : Mount Arapiles, Golden Streak / Central Gully Boulders
 |
1.9.5.5. The Playground 7 routes in Boulder
- Summary:
-
All Bouldering
Lat / Long: -36.758308, 141.843891
description
Emergency Location : Mount Arapiles, Golden Streak / Central Gully Boulders
 |
1.10. Bard Buttress 25 routes in Cliff
- Summary:
-
All Trad climbing
Lat / Long: -36.757280, 141.845393
description
Emergency Location information:Mt Arapiles, Bard Buttress Area Reason for closure, Numerous important cultural heritage sites are evidence of the significance Dyurrite for Wotjobaluk Peoples and the use of the area for thousands of years.
approach
Note that a number of routes which actually climb the SE part of 'Bard Buttress' are not described here, but are instead under the Ali's area (found in the "Fang Buttress and Surrounds" section). They are put in that section because they start as for Ali's, at the top of the gully which divides 'Fang Buttress' from the 'Bard Buttress', and then head a bit right from there. As a result, this page describes all routes which are accessed from the gully itself or further right. The gully is fairly simple to scramble up and down, but there's several spots where you really don't want to fall off due to very nasty fall potential.
Several routes finish on the Bard Terrace, which is about 30m below the top of the buttress. To get off the Terrace you can do the final pitch of one of the other routes, but it's quickest to do an easy but very exposed walk/traverse off the left end of the ledge, which leads you into Ali's after about 40m. This traverse is often soloed but roping up for it isn't a bad idea.
To descend from the routes which go right to the top, you need to do a short little downclimb off the back of the buttress, which deposits you very close to Ali's cave. Then go through the cave, R around John's Pinnacle and down Ali's.
descent notes
From the top of the buttress there's a short down-climb off the back of the buttress to Ali's cave. Go through the cave and come out at John's Pinnacle. Go R and down Ali's. There are chains to rap down (45m). Or it's a fairly easy, but in places exposed, scramble down Ali's.
For routes that finish at the Bard terrace you can either climb Bard's 5th pitch or traverse L off the end of the terrace (roping up recommended) and scramble down to Ali's.
| Route | Grade | Style | Selected ascents | |||||
|---|---|---|---|---|---|---|---|---|
| 1 |
Disguise the Limit
Reachy over the L side of the roof past a piton, then easily up a groove to a rap station. Start: Start in a cave up near the top of the gully. FA: Mike Law & Steve Howden, 1982 | 20 | 20m | |||||
 |
||||||||
| Route | Grade | Style | Selected ascents | |||||
| 2 |
★★ Redd Tracy
From the R side of the cave follow jugs out to the lip then a hard move to a break and straight up to rap anchor. There is good gear where you need it if you can stop to place it. Note: The Rap Anchor in basically no existent and needs a new one! Start: Start just R of DtL. FA: Rod Young (traversed off R after the crux)(Mike Law added the direct finish to the rap station onwith Steve Howden), 1982 | 24 | 20m | |||||
| 3 |
Malfunction Man
Committing roof then up to a ledge shared with 'Orpheus'. Now traverse R to a rap anchor (which may or may not exist or be useable). Start: Start R of RT. FA: Chris Shepherd & Mark Colyvan, 1983 | 23 R | 30m | |||||
| 4 |
A Group of Thrutching (Thracian) Women
Individual pitch grades were not supplied - overall grade is 18 but some pitches may be easier. Start: Start: As for 'Orpheus'.
FA: Richard Smith, Greg Pritchard, Debra Sweet (1st pitch), Deb Sweet, Jon Bassindale (2nd & 3rd pitches)., 1999 | 18 | 50m, 3 | |||||
| 5 |
★★ The Desired / Tony's Route
Later became Tony's Route (the present direct line), though 90% of it had been climbed in the 1960's as 'The Desired'. Start: Start below the pitch 1 corner of 'Orpheus'.
FA: Peter Jackson, Chris Baxter in climbing Orpheus solved the initial crux. Chris Dewhirst, Phillip Stranger established The Desired by climbing in from Orpheus, June 1967. The direct line as it now is, Tony Dignan, Guy Cotter & Mike Law, 1981 | 19 | 60m, 2 | |||||
| 6 |
★★ Orpheus
Start: Start 15m up the gully, at an orange ledge.
FA: Peter Jackson & Chris Baxter, 1965 | 19 | 110m, 4 | |||||
| 7 |
Eurydice LHF
Left of Poppies' roof on the arete above Bard Terrace there are two options. This is the left one. The hard bit is the first roof, obviously, then doddle to the top. Start: Start on the Bard Terrace above 'Eurydice' p2. | 19 | 30m | |||||
| 8 |
★★★ Eurydice
A fine old classic that has just about everything in its two pitches. A great line with a fiery first pitch in an excellent position. On the E face of the Bard Buttress there's a guano-stained recess about 25m off the ground, with a crack leading down R to the ground. Start under this crack.
Ann Pauligk's mid 1970s ascent, first go, was the first Aussie female ascent at this grade. FA: Bob Bull, Peter Jackson & Ted Batty, 1965 NA: Ann Pauligk, 1975 | 18 | 65m, 2, 2 | |||||
| 9 |
Eurydice RHF
Left of Poppies' roof on the arete above Bard Terrace there are two options. This is the right one. The hard bit is the first roof, obviously, then doddle to the top. Start: Start on Bard Terrace above 'Eurydice' p2. | 19 | 35m | |||||
| 10 |
Bbruce
Up E until you have a roof on your right. Traverse R here, then up over bulge past BR and straight up to the nice ledge atop 'Eurydice' p1. Start: Start as for E. FA: Mike Law & Greg Garnham, 1981 | 23 | 35m, 1 | |||||
| 11 |
OPM
The steep sickle crack is a great alternative start for 'Poppies'. Finish up it. Start: Start 2m R of E. FA: Mike Law, Chris Baxter & Greg Garnham, 1981 | 20 | 15m | |||||
| 12 |
Noseburger Direct
Overall grade is 23, but it's not clear how hard each pitch is. Start: Start 2m L of P.
FA: Mike Law, Mike Law-Smith & Geoff Robertson, 1981 | 23 | 80m, 3 | |||||
| 13 |
Poppies Original Start
Described separately so that 'Poppies' gets more notice as a great 19. Start a few metres L of The Bard and climb direct up the slick blank slab to join 'Poppies'. | 21 | 30m | |||||
| 14 |
★ Poppies
Start as for The Bard, or by traversing easily R from near the base of Eurydice.
FA: Mike Law & Kevin Lindorff, 1977 | 19 | 70m, 2 | |||||
| 15 |
Poppies pitch 3
Described separately so that 'Poppies' pitches 1 and 2 get noticed as a great 19. This pitch is all over after the start so it's not worth doing ... unless it's your best option to impress a hottie bumbly hanging around on Bard Terrace. Start: Start on the Bard Terrace, a few metres L of the final pitch of Bard. FA: Mike Law or Kevin Lindorff, 1977 | 23 | 30m | |||||
| 16 |
Lubricant
The middle of the face, kinking R at one point. Start: Start on the back of the boulder at the base of the 'Bard Buttress'. FA: Stephen Hamilton & Nick Tapp, 1990 | 18 | 10m | |||||
| 17 |
★★ Checkmate
Borderline whether it deserves the "serious" tag, but the crux is quite tricky, with spaced pro. Then again, you've got plenty of clean air up there, and it's still a great route. Start: Start as for The Bard.
FA: John Moore & Chris Dewhirst, 1967 | 17 R | 85m, 4 | |||||
| 18 |
★★★ Bard
Start at the R end of the base of the buttress.
FA: Jim Newlands & Bruce Hocking, 1965 | 12 | 120m, 5 | |||||
| 19 |
The Comedy of Errors
Start: Start as for The Bard.
FA: Kieran Loughran, Bill Andrews & Richard Morris, 1985 | 20 | 73m, 3 | |||||
| 20 | ★★ Wall Street | 22 | 25m | |||||
| 21 | Turning Point | 22 | 10m | |||||
| 22 | ★ Heavy Dudes | 22 | 35m | |||||
| 23 |
Shepherds in Love
Take a line just L of 'Eurydice' p2, with a steep flake down low then a loose wall above. Start: Start at the first belay of 'Eurydice'. FA: Mike Law, Chris Baxter & Dennis Kemp, 1981 | 18 | 32m | |||||
| 24 |
The Desired Variant Start
Move up then follow the underclings R across 'Orpheus' to join the upper part of p1 of TD. Start: Start up L from the start of 'Orpheus'. FA: Robin Miller & Louise Shepherd, 1982 | 18 | 25m | |||||
| 25 |
Wall Turning Dudes
Each pitch was established independently, and you can repeat them that way if you wish. Linking them into one route is the way to go, however. Start: Start R of The Bard.
FA: p1 Rod Young & Mark Moorhead, 1980 FA: p2 Mark Moorhead, Tony Dignan & Geoff Little, 1980 FA: p3 Mike Law, Chris Baxter & Greg Garnham, 1981 | 22 | 75m, 3 | |||||
1.11. Bluffs 115 routes in Crag
- Summary:
-
Mostly Trad climbing
Lat / Long: -36.757197, 141.844762
description
Bluff Major and Bluff Minor are the two huge blocks perched above Tiger Wall.
Emergency Location: Mount Arapiles, Bluffs Area
approach
Via Ali's or a route on Bard Buttress or Tiger Wall.
1.11.1. John's Pinnacle 14 routes in Cliff
- Summary:
-
All Trad climbing
Lat / Long: -36.757186, 141.845099
description
Emergency Location: Mount Arapiles, Bluffs Area
approach
Easiest approach is to climb Ali's, but you could also do any of the routes on Morfydd Wall.
descent notes
Abseil from ring bolts on N side.
 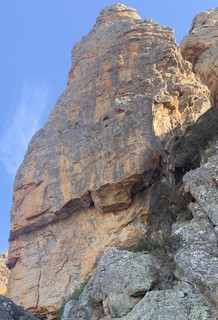 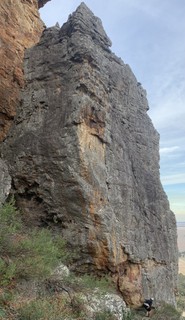 |
||||||||
| Route | Grade | Style | Selected ascents | |||||
|---|---|---|---|---|---|---|---|---|
| 1 |
★★ Allez
Start in the middle of the east face of the pinnacle (which looks over Ali's and Fang Buttress). Tough crack R of arete to small roof at 4m. There's a RB on the lip and another up higher, it's wise to stick-clip the first. FA: Mark Moorhead & Dave Fearnley, 1982 | 24 | 25m, 3 | |||||
| 2 |
Atomic Fusion
As for H to BR then trend L to roof, BR on lip, then up middle of face with high BR. FA: Martin Grulich, 1986 | 26 | 25m, 3 | |||||
| 3 |
Homegrown
Start at the arete just R of Allez. Up to BR then into crack which takes you R around the corner. FA: Mark Moorhead & Ian Anger, 1980 | 23 | 25m, 1 | |||||
| 4 |
Flappers' Delight
Up the juggy wall on the north face of John's pinnacle, close to Denim Wall. Bad pro and rock but if that doesn't put you off at this grade then it's a nice summit to bag. FA: John Fahey, Ted Batty, Chris Baxter, Bob Bull & Peter Jackson, 1965 | 4 | 16m | |||||
| 5 |
Nostalgia
Start on the west face of the pinnacle. Stick clip bolt, veer R, then back L. Apparently has a fragile undercling. FA: Mark Moorhead, 1981 | 23 | 20m, 1 | |||||
| 6 |
I'll Nail You
Arete 2m R of Nostalgia. Straight up to the overhang's highest point. From ledge finish up juggy wall. No pro. FA: Patrick Alseby. Summer, 1998 | 25 X | 17m | |||||
| 7 |
Piggy in the Middle
Up Shoadee for 4m, then traverse L to brief ramp (BR). Up middle of black wall. FA: Ant Prehn & Rod Young, 1986 | 23 | 27m, 1 | |||||
| 8 |
★ Shoadee
Start just left of the SW arete of the pinnacle. Hand traverse R to shallow corner on R side of arete, and up it to slopy finish. FA: Chris Dewhirst & Phillip Stranger, 1967 | 14 | 24m | |||||
| 9 |
Let Me Cry
Start down R of Shoadee. Small roof to stance then L and up a grey streak just R of Shoadee. FA: Jon Muir & solo, 1985 | 25 X | 30m | |||||
| 10 |
Shalimar Direct Start
Start at the large flake topped with sharp, broken rock, a few metres down from the start of Shoadee. The difficulties ease soon after pulling through the steepness, then trend slightly right to join the corner of Shalimar. It seems unlikely that this route wasn't done earlier, but the only route written up in the vicinity that I can find is "Let Me Cry" (graded 25X). FA: benwiessner & John Mader, 8 Apr 2018 | 20 | ||||||
| 11 |
★ Shalimar
Start 1.5m L of the SE arete (i.e., start 3.5m L of Allez). Tough start then veer L into a short groove which is just L of the centre of the face. Finish R. FA: Phillip Stranger & Chris Dewhirst, 1967 | 18 | 31m | |||||
| 12 |
★ Shanghai
Start and finish as for Shalimar, but climb the R arete of the face (just L of Allez). | 18 | 30m | |||||
| 13 |
The Invisible Hand
Start 4m L of Let Me Cry. From the ground climb up to thin R leaning and L facing flake and continue up to ledge. from this join groove which is shared with Shalimar and finish up left. Spaced wires. FA: Patrick Alseby. Summer, 1998 | 24 R | 26m | |||||
| 14 |
Handle with Care
"Start variant 2m right left of Let Me Cry" - whatever that means! FA: Patrick Alseby. Summer, 1998 | 23 R | 8m | |||||
1.11.2. Denim Wall 9 routes in Cliff
- Summary:
-
Mostly Trad climbing
Lat / Long: -36.757403, 141.844920
description
In the cave behind John's Pinnacle. Stays cool in the summer.
Emergency Location: Mount Arapiles, Bluffs Area
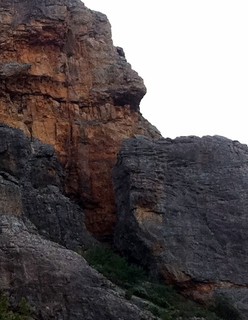   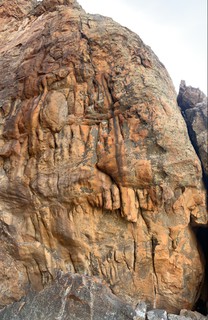 |
||||||||
| Route | Grade | Style | Selected ascents | |||||
|---|---|---|---|---|---|---|---|---|
| 1 |
Vixen
Start at the L end of Denim Wall.
FA: Andrew Thomson & Greg Child, 1976 | 22 | 45m, 2 | |||||
| 2 |
★★ Concise Exercise
Sustained. Start 12m up L from the start of Denim, part way up Vixen but access via ledge. Traverse the wall to finish up See You Round. FA: Scott Camps & Paul Johnston, 1988 | 26 | 35m, 5 | |||||
| 3 |
★★★ Denim
"It will laugh at attempts to free it" - Keith Lockwood, Arapiles guidebook 1978. Freed by Kim in 1979 it didn't laugh for long but it still has plenty of chuckles at aspirants. Louise Shepherd made a particularly impressive ascent in 1984 - she fell off the initial roof, lowered off then did it second shot, onsighting most of the route and placing the gear. Possibly the first female ascent at this grade in AU (she'd previously onsighted 26 (!) in Yosemite in 1981). Start on the L side of the wall.
FA: Chris Baxter, John Moore & Clive Parker (aid), 1968 FFA: Kim Carrigan & Eddy Ozols, 1979 | 26 | 45m, 2, 2 | |||||
| 4 |
★★ London Calling
Start 1.5m R of Denim. Up thin seam to traverse line, R and up to RB, diagonally R to 2nd RB, then trend L to 3rd RB (despite the unfortunate chipped hold, this is still the crux). Berlin Calling (29*) is a linkup of Balance of Power into London Calling (Nathan Hoette Nov '04). FA: Mark Moorhead, 1981 | 27 | 23m, 3 | |||||
| 5 |
Berlin Calling
FFA: Nathan Hoette, 2004 | 29 | 20m | |||||
 |
||||||||
| Route | Grade | Style | Selected ascents | |||||
| 6 |
★ Balance of Power
Bolts are mostly rusty (still the case as at Apr 2023) and should not be trusted. Start 6-8m R of LC. Very bouldery past the first FH then continuous past 4 more FHs, then finish off to the right where Concise Exercise finishes. Lower off. FA: "Fat Nick" Sutter, 1993 | 29 | 18m, 5 | |||||
| 7 |
★★ Balance of Power Direct Finish
Given 31, but it's not that much harder then the original. FA: Nathan Hoette | 31 | 30m, 7 | |||||
| 8 |
★ See You Round
A very tough crux down low. Start just L of the south entrance to Ali Baba's Cave. Bulge then crack. FA: Mark Moorhead & Jon Muir, 1981 | 26 | 20m | |||||
| 9 |
★ L7s
Avoids the desperate crux of See You Round by starting to the right at the hole. Bridge up 5m and clip the bolt on the L. Swing L around the arete (wire and tiny cams) to a mega jug and then up and R, move back L to crack through bulge, and then R again to finish at chains. Big holds and very steep. Not really sure of the grade, just a guess. The rock and the moss on this are not of the best quality, be cautious on it! FA: Douglas Hockly, 13 Dec 2015 | 23 | 15m, 1 | |||||
1.11.3. Bluff Minor 7 routes in Cliff
- Summary:
-
All Trad climbing
Lat / Long: -36.757294, 141.844963
description
The eastern half of the bluffs.
Emergency Location: Mount Arapiles, Bluffs Area
approach
Approach up Ali's to the S face. For the E or N face scramble through Ali Baba's cave (right of Denim Wall) and up.
descent notes
Down climb the short wall facing the gap and around R.
 |
||||||||
| Route | Grade | Style | Selected ascents | |||||
|---|---|---|---|---|---|---|---|---|
| 1 |
Bluff Minor
From Ali Baba's Cave, scramble up to a ledge between Bard Buttress and Bluff Minor. You ascend the southeast face of Bluff Minor, overlooking the Pines. Epic summit vibes.
FA: Rob Taylor & Reg Williams, 1965 | 11 | 55m, 3 | |||||
| 2 |
Violent Crumble
Start 2m R of the north arete of Bluff Minor (this is just opposite TKO on Bluff Major). Climb up the vague weakness on crap rock with no pro. FA: Kevin Lindorff & Glenn Tempest, 1977 | 21 X | 15m | |||||
| 3 |
★★★ Boston's Climb
Start on top of Bluff Minor. Take a massive leap across the chasm onto the east face of Bluff Major, with only a small sloping foothold to aim for. Now climb the arete. FA: Peter Jackson & 1960s, 2000 | R | 30m | |||||
| 4 |
Mouse
Start at the top of TK, at the south side of the slot. Chimney out above the Keyhole towards Central Gully, then move around arete onto the south face of Bluff Minor, which is easy but exposed, to bag the summit. FA: Chris Baxter & Andrew Smith, 1966 | 7 | 45m | |||||
| 5 |
Locksmith
Start 5m R of Bulger DS.
FA: Rod Young & Ant Prehn (alt), 1980 FA: Rod Young & Ant Prehn (alt), 1980 | 22 | 42m, 3 | |||||
| 6 |
★ Raison d'Etrier
Start on the ledge R of Locksmith (which is also the start of pitch 2 of Vixen). FA: Kim Carrigan & Chris Baxter, 1979 FA: Kim Carrigan & Chris Baxter, 1979 | 22 | 30m, 2 | |||||
| 7 |
Dead and Buried
Start just R of Rd'E, as for Vixen pitch 2.
FA: Mark Moorhead, Glenn Tempest & Jeff Lamb, 1981 FA: Mark Moorhead, Glenn Tempest & Jeff Lamb (pitch 1 only), 1981 FFA: Kim Carrigan & Chris SHepherd, 1982 | 22 | 30m, 2 | |||||
1.11.4. Flinders Lane Area 25 routes in Cliff
- Summary:
-
Mostly Trad climbing
description
This is actually the lower tier of Bluff Minor & Major east faces, but is commonly known as the Flinders Lane Area as the routes begin on Flinders Lane, which runs along the top of Tiger Wall.
Emergency Location: Mount Arapiles, Bluffs Area
approach
Via Ali Baba's cave (R of Denim Wall), or scramble/rap down from Missing Link.
descent notes
Traverse off R to rap anchor above Scorpion Corner.
| Route | Grade | Style | Selected ascents | |||||
|---|---|---|---|---|---|---|---|---|
| 1 |
Sneaky Feelings
Start above the north end of Ali Baba's cave, at the east arete of Bluff Minor. A corner and small roof, with fiddly pro. FA: Ant Prehn & Rod Young, 1980 | 21 R | 12m | |||||
| 2 |
Modern Lovers
Thin corner with a bolt 1.5m R of SF. FA: Chris Shepherd & Glenn Tempest, 1981 | 25 | 15m, 1 | |||||
| 3 |
Dancing Days
1m R of ML.
FA: Rod Young & Jeremy Boreham (Young later added p3 on), 1979 | 23 | 45m, 3 | |||||
| 4 |
★ Tahini
Start 3m R of DD. Short crack, pocket, go left, up. FA: Chris Shepherd, 1981 | 24 | 10m | |||||
| 5 |
Inquisition
Start above Tahini, 6m L of Aristocrat (which is described in the Bluff Major section). The big roof goes on rurps and a bolt, and is the last unfreed aid climb at Arapiles. Dave Jones has spent some time on it and says it will go at about 32, so help yourself to the FFA. FA: Dave Lia, 1978 | M3 | 20m, 1 | |||||
| 6 |
Crazy Diamond
Start at the anchor above Inquisition. Over the bulge on funny spike holds and onwards. FA: Mark Moorhead, Jim van Gelder & Rod Young, 1979 | 20 | 15m | |||||
| 7 |
Being There
Start as for CD. Step R to the next crack, through the roof, then stay L of the arete above. FA: Mark Moorhead & Jon Muir, 1981 | 21 | 15m | |||||
| 8 |
Welcome Home
Start as for CD. Go R for 6m from the belay, up a crack then the wall R of the arete, trending R then L. FA: Mark Moorhead & Chris Shepherd, 1981 | 21 | 15m | |||||
| 9 |
★★★ Light Weight Baby / Sean Myles Project
This route was previously known as The Sean Myles Project and bolted in around '92 by its English namesake. Like a woody problem on classic Arapilisian bums through a steep wall to finish up crimpy headwall. Start at base of roof left of Aristocrat (clip the 3 dynas with single biners for ease of climbing, and to keep rope away from holds). Slappy compression leads to base of seam. Clip bolt at lip and head straight up via pulls between edges and last bolt to easy finish and single bolt lower-off. FA: Ben Cossey | 34 | 10m, 5 | |||||
 |
||||||||
| Route | Grade | Style | Selected ascents | |||||
| 10 |
★★ Aristocrat
Start on Flinders Lane, directly beneath the gap which separates Bluff Minor and Bluff Major. Climb the chimney/corner. FA: John Moore & Phillip Stranger, 1966 | 18 | 25m | |||||
| 11 | Aristocracy | 29 | 20m, 6 | |||||
| 12 |
The Last Laugh
Start 4m R of Aristocrat. Easily up corner to a ledge, then step L and pull through roof to boldly clip a BR. Now a bulge. FA: Mark Moorhead & Chris Shepherd, 1981 | 22 R | 25m, 1 | |||||
| 13 |
Bureaucrat
FA: Malcolm Matheson | 24 | ||||||
| 14 |
Abdul
Chimney that can be bridged without any grim climbing. Start at the far L end of the ledge. | 15 | 12m | |||||
| 15 |
★ Ivan
The R-curving crack just R of Abdul. Awkward - but you've got to get up to Blockbuster Ledge somehow and this is the best easy option. Requires a few techniques from your bag of tricks to succeed. FA: Unknown, 2000 | 13 | 14m | |||||
| 16 |
Heart of a Dog
Start 2m R of I. The face, leading into I near the top. FA: Kieran Loughran & Meg Sleeman, 1992 | 18 | 12m | |||||
 |
||||||||
| Route | Grade | Style | Selected ascents | |||||
| 17 |
★ Scorpion Direct Start
The name is quite misleading as it is not a "direct start" to Scorpion but is actually quite a way left and is climbed completely independently. It is a good way to get to the Blockbuster Ledge though. Considered by some to be a bit of a sandbag, but I guess it is just an old fashioned grade 17. Start 10m R of I. FA: Roland & Anne Pauligk, 1966 | 17 | 14m | |||||
| 18 |
★ Moving Pictures
From the start of SDS do a committing traverse out R then up to fixed wire. Now R and up arete. FA: Mark Moorhead & Jon Muir, 1981 | 24 R | 15m | |||||
| 19 |
★ Stop-Motion
Direct start to Moving Pictures past a rusty bolt or two. FA: Dave Jones | 30 | 20m | |||||
| 20 |
★★★ Scorpion Corner
A low roof then into the beautiful corner. The gear is adequate but it's critical that you get certain pieces just right as they are a little spaced at times. FA: Chris Dewhirst & Ed Neve, 1974 | 22 | 25m | |||||
| 21 |
★★★ Scorpion Super Direct
Links Scorpion Corner into Scorpion, possibly the way Hot Henry Barber did it. For full value and the full tick don't step onto the ledge at the top of Scorpion Corner but instead go through the steep roof crack on good jams to enter Scorpion after the step across. | 22 | 50m | |||||
| 22 |
★ Imagination LHF
Start as for I then the unprotected face L of Imagination's finishing crack. FA: Chris Peisker | 25 R | 10m | |||||
| 23 |
★ Imagination
Up SC for 3m then head R to bridging stance, and R again to the crack which is just L of the arete. Traverse L to the anchor above SC. FA: Mark Moorhead & Jon Muir, 1981 | 25 | 20m | |||||
| 24 |
Imagination DS
Start just R of SC. Fixed wire and BR to join the original. FA: Kim Carrigan FA: Kim Carrigan, 1984 | 26 | 8m, 1 | |||||
| 25 |
Open Sesame
A pleasant link from Flinders Lane to below Missing Link. Climb the steepish seam up the wall across right from Scorpion Corner, 3-4m right of the slimy access corner. FA: Keith Lockwood, Matisse, Amy & PLC girls, 23 Nov 2016 | 11 | 16m | |||||
1.11.5. Dead Eye Dick Wall 2 routes in Cliff
- Summary:
-
All Trad climbing
Lat / Long: -36.756950, 141.844379
description
The wall opposite Bluff Major North Face, to the right of the scramble track to the summit. Some loose bits and great swathes of lichen lock this impenetrable fortress away from hungry climbers.
approach
Same as for Bluff Major.
history
Like all easy stuff near camp this was first ascended decades ago but, for obvious reasons, has generally been ignored since. But then some enterprising pioneers established a new, cutting-edge, moderate ramble in the early 2020's.
| Route | Grade | Style | Selected ascents | |||||
|---|---|---|---|---|---|---|---|---|
| 1 |
Dead Eye Dick
Climb the RH line, descend the LH line! Start on the slabby wall opposite Missing Link. FA: John Moore & Chris Dewhirst, 1965 | 10 | 12m | |||||
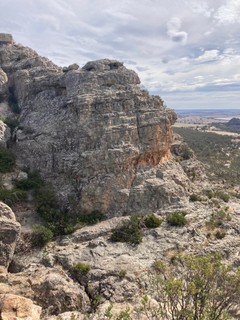 |
||||||||
| Route | Grade | Style | Selected ascents | |||||
| 2 |
Xindi
A pleasant ramble, although likely very close to or a repeat of the upper portion of Bong Tree (on Seneca Wall). From the base of Missing Link, the first pitch starts approximately 20 metres down towards the top of Tiger Wall, not far R of DED. There is a small crack at ground level to protect the belayer from plummeting off Tiger Wall.
FFA: Aaron & tgbuckley482, Apr 2022 | 12 | 50m, 2 | |||||
1.11.6. Bluff Major 58 routes in Crag
- Summary:
-
Mostly Trad climbing
Lat / Long: -36.757151, 141.844619
description
From ground level, just watching climbers high up on Scorpion or Quo Vadis will make your pulse quicken dramatically. Bluff Major has three main areas: the north-facing Blockbuster Wall, parallel to Tiger Wall below it; the west-facing Missing Link Wall, facing inwards to the ridge; and the south-facing Thunder Crack Wall, high above Morfydd Wall.
Emergency Location: Mount Arapiles, Bluffs Area
approach
You can access routes on the West and North face (e.g. Thunder Crack and Missing Link) by climbing Ali's (or by climbing any route on Morfydd Wall) and then continuing to scramble up Ali's beneath the steep south face of the Bluffs. On the other hand, everything on the East face is best accessed by going through Ali's cave then walking along Flinders Lane. Bluff Major East face (e.g. Blockbuster and Scorpion) start from Blockbuster Ledge, this ledge can be accessed via any of the lower routes on Flinders Lane.
1.11.6.1. Blockbuster Ledge 14 routes in Cliff
- Summary:
-
All Trad climbing
Lat / Long: -36.757086, 141.844710
description
The face visible above Tiger Wall.
Emergency Location: Mount Arapiles, Bluffs Area
approach
Climb Ivan or one of the other routes on Flinders Lane.
descent notes
25m abseil from the rap station above Missing Link.
|
|
1.11.6.2. Bluff Major North Face 15 routes in Cliff
- Summary:
-
Trad climbing and Sport climbing
Lat / Long: -36.757072, 141.844466
description
Emergency Location: Mount Arapiles, Bluffs Area
approach
From the top of Ali's go L around John's Pinnacle then up the ramp beneath the West face.
descent notes
Many routes have their own lower-offs, otherwise use the rap station above Missing Link (25m).
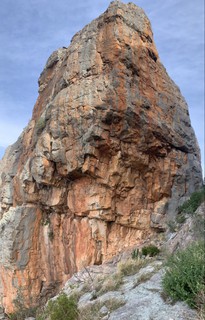 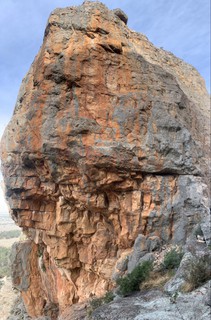 /e3/5d/e35d028898f7f6f61b344e9e3eff66f195ad25f8) |
1.11.6.3. Bluff Major West Face 29 routes in Cliff
- Summary:
-
Mostly Trad climbing
Lat / Long: -36.757227, 141.844601
description
The wall that overlooks Central Gully. It faces a lot more south than it does west, making it one of the best hot day options at Arapiles, but the confusing convention of calling it the west face just won't die.
Emergency Location: Mount Arapiles, Bluffs Area
descent notes
25m abseil from the rap station above Missing Link. Please don't toprope directly through the anchors as they see a lot of traffic.
/3f/8d/3f8dbcdc4fdb1cf8e2a7f6f566a04c560a80b74d) /1a/a7/1aa7ab36b7fe02d54e4d1b3c370984d39096f3cb) 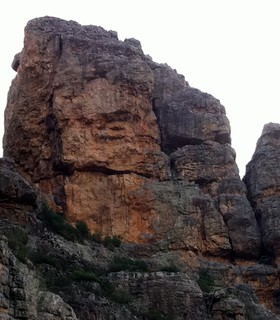   |
1.12. Tiger Wall Area 180 routes in Crag
- Summary:
-
Trad climbing, Bouldering and Aid climbing
Lat / Long: -36.755769, 141.845107
summary
Emergency Location: Mount Arapiles, Tiger Wall Area
1.12.1. Tiger Wall 128 routes in Cliff
- Summary:
-
All Trad climbing
Lat / Long: -36.756486, 141.844238
description
Emergency Location: Mount Arapiles, Tiger Wall Area
1.12.1.1. Seneca Wall 7 routes in Sector
- Summary:
-
description
The wall high up at the top of Tiger Wall, R of Bluff Major.
Emergency Location: Mount Arapiles, Tiger Wall Area Climbing not advised. SPA Area
approach
Via Flinders Lane.
descent notes
Downclimb the wall opposite Missing Link.
 |
1.12.1.2. Under Flinders Lane Wall 81 routes in Sector
- Summary:
-
description
The section of the wall underneath Flinders Lane. (ie The L end of Tiger Wall).
Emergency Location: Mount Arapiles, Tiger Wall Area
approach
5 minute walk from the campground.
descent notes
Walk L along Flinders Lane. Go down into Ali Baba's cave then down and up through a tunnel that brings you out at the top of Ali's. Downclimb or rap down Ali's.
Alternatively take the rap route down Ab Fab. 3x30m abseils (or only 1x30 and 1x55m if you have two 60m ropes). Be aware of people climbing below, they have precedence. The bolts are just over the edge on a clear area of Flinders Lane immediately below Bong Tree on Seneca Wall. The bolts are not visible until you poke your head over the edge (if you are contemplating a scary approach through scrub down onto a slab you are looking at the wrong anchors), . Place a cam to protect the step down.
There are currently additional old anchors on the Ab Fab descent catering for parties with a single 50m rope but don't rely on them being there.
      |
1.12.1.3. Syrinx Area 30 routes in Sector
- Summary:
-
description
These routes are in the area near Syrinx which is the big orange corner with the balconies high above.
Emergency Location: Mount Arapiles, Tiger Wall Area
approach
10 minute walk from the campground.
descent notes
Walk away from the cliff to the dirt road, turn L and follow the road. Then take he Central Gully tourist track (signposted) back down.
  |
1.12.1.4. Senior Citizens Wall 10 routes in Sector
- Summary:
-
description
The very R end of Tiger Wall.
Emergency Location: Mount Arapiles, Tiger Wall Area
approach
Sramble 40m up Pan gully (between Tiger Wall and Grotto Wall) then to a terrace on the L.
descent notes
40m abseil from rap station above Senior Citizens.
1.12.2. Tiger Wall Boulders 52 routes in Field
- Summary:
-
Mostly Bouldering
Lat / Long: -36.755803, 141.845203
summary
Emergency Location: Mount Arapiles, Tiger Wall Area
access issues
Chicken Boulder is closed all others still open
1.12.2.1. Roadside Crag 7 routes in Boulder
- Summary:
-
All Bouldering
Lat / Long: -36.755970, 141.846103
description
Emergency Location: Mount Arapiles, Squeeze Test Boulder
  |
1.12.2.2. Crankshaft Boulder 23 routes in Boulder
- Summary:
-
Mostly Bouldering
Lat / Long: -36.756412, 141.845531
description
Emergency Location: Mount Arapiles, Gonzo / Crank Start Boulders
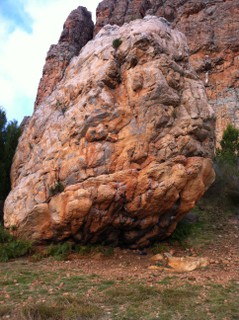  |
1.12.2.3. Gonzo Boulder 9 routes in Boulder
- Summary:
-
All Bouldering
Lat / Long: -36.756049, 141.845222
description
Emergency Location: Mount Arapiles, Gonzo / Crank Start Boulders
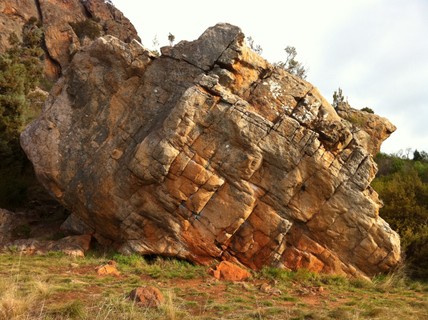  |
1.12.2.4. The Chicken Boulder 7 routes in Boulder
- Summary:
-
All Bouldering
Lat / Long: -36.755681, 141.844987
description
Emergency Location: Mount Arapiles, The Chicken Boulder
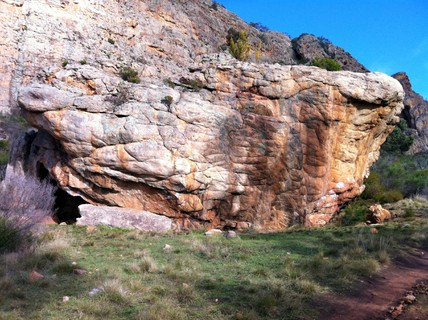 |
1.12.2.5. Good Morning Arapiles 2 routes in Boulder
- Summary:
-
All Bouldering
Lat / Long: -36.754621, 141.844350
description
Straight down from Castle Crag.
Emergency Location: Mount Arapiles, Good Morning Arapiles Boulder
 |
1.12.2.6. The Woody 4 routes in Boulder
- Summary:
-
All Bouldering
Lat / Long: -36.756680, 141.847258
description
A fallen tree
Emergency Location: Mount Arapiles, Squeeze Test Boulder
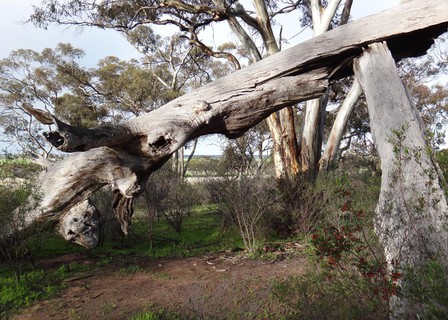 /fb/80/fb80a2d26f1ff141620aec4776498c92d3844881) |
1.13. Castle Crag 35 routes in Cliff
- Summary:
-
Mostly Trad climbing
Lat / Long: -36.755185, 141.843951
description
Emergency Location information:Mount Arapiles, Castle Crag Area Reason for closure, Numerous important cultural heritage sites are evidence of the significance of Dyurrite for Wotjobaluk Peoples and the use of the area for thousands of years.
approach
10 min walk from campground, heading N.
descent notes
20m abseil from rap station above Trapeze.
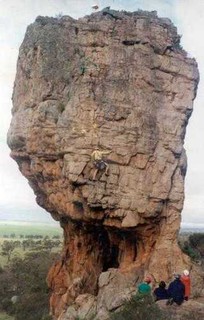 |
||||||||
| Route | Grade | Style | Selected ascents | |||||
|---|---|---|---|---|---|---|---|---|
| 1 |
★★ The Low Down
Sensational jug hauling traverse Start: Start as for 'Trapeze' & 'Swinging' FA: Kim Carrigan & Steve Monks, 1984 | 25 | 25m, 2 | |||||
| 2 |
★ A Cut Above
As for 'Trapeze' until the end of the traverse, then head diagonally up and L to ledge on arete. Keep moving L (above the roof) into Procul. FA: Kieran Loughran, Terry Tremble & Jane Wilkinson, 1984 | 19 | 30m | |||||
| 3 |
Think Positive
As for 'The Low Down' until 1st bolt, then go up R to another bolt and into 'A Cut Above'. Step R into mossy seam and head up to ledge with rap anchors. FA: Kim Carrigan, 1984 | 26 | 22m | |||||
| 4 |
Acrobat
Latch onto the hanging flake just L of Trapeze's start, then finish up the wall R of 'Trapeze'. FA: Kim Carrigan & Tony Marian, 1978 | 22 | 20m | |||||
| 5 |
★★ Trapeze
Up the steep pillar to a bolt, then traverse left (crux), and finish up the easier climbing above. Start: At the pillar on the right side of the north face. FA: Russell Judge & Don Bennett, 1964 | 11 | 20m | |||||
| 6 |
★ Swinging LHV
Fun! Climb Swinging to second bolt then step left and follow weakness to top. Good wires protect the crux. FA: Andrew, Andy Schmutter & Geordie Webb, 27 Jan 2019 | 22 | 15m, 2 | |||||
| 7 |
★★ Swinging
As for 'Trapeze' to the bolt (where 'Trapeze' breaks left), and continue up the arete past another bolt to a new lower-off. Start: As for 'Trapeze'. FA: Andrew Thomson & Dave Mudie, 1976 | 17 | 20m, 2 | |||||
| 8 |
★ Siva
An interesting, albeit short route managing to squeeze in hand jamming, finger locking, an undercling, sidepulls, a mantle (of sorts) and a delicate traverse in its first 6 metres. Clip the first bolt and traverse off L to Swinging, then up. Start: Up the pillar 2m R of Swinging. FA: Roger Caffin, John Zmood & Margaret James, 1966 FFA: Greg Child., 1978 | 22 | 12m, 1 | |||||
| 9 |
★ Siva Eva Mor Direk
Crimp straight up from where Siva Direct spans left. A better finish. FA: Gordon Poultney | 26 | 15m, 1 | |||||
| 10 |
★ Siva Direct
As for Siva, then move slightly right and up past carrot bolt, then fixed hanger. A span to holds on the arete allows passage into the top of Swinging thereafter. Originally graded 24 in Carrigan's '83 guide. Incorrectly drawn up in the Mentz/Tempest Select Guide as a LH finish to The Overtaker. FA: Mark Moorhead., 1983 | 26 | 20m, 2 | |||||
| 11 |
★★ The Overtaker
Originally climbed at 31, but subsequent ascents have used the larger holds just L of the old crux. Start: Boulder start through underclings left of The Undertaker to jug, then out to crimps out left and up, briefly into Siva Direct. Trend right up to a hard boulder problem finish (direct via the pinch). A left hand sequence is also possible. FA: Nick Sutter, 2002 | 29 | 18m | |||||
| 12 |
The Caretaker
Up Undertaker to about 6m, then left and up past bolts. Dave has bolted and been working on an independent start. FA: Dave Jones, 2013 | 28 | ||||||
| 13 |
★★ The Undertaker
The first grade 25 in the country. FA: Chris Dewhirst & Chris Baxter, 1965 FFA: Mike Law & Greg Child., 1978 | 25 | 18m | |||||
| 14 |
Me and My Hamster
As for 'The Butterfly', but continue traversing across 'The Undertaker' and finish up 'Swinging'. FA: John Muir & Geoff Little., 1985 | 25 | 24m | |||||
| 15 |
The Butterfly
Follow 'Elusive Butterfly' to 2nd piton, then traverse L, almost into 'The Undertaker', then climb up R into groove. FA: Jon Muir & Geoff Little., 1985 | 25 | 18m | |||||
| 16 |
Elusive Butterfly
Possibly the best of this trio of hard routes just R of The Undertaker. Start 2m R of The Undertaker and head up past a piton and a bolt to finish on the R. FA: Chris Dewhirst & Chris Baxter, 1968 FFA: Kim Carrigan., 1978 | 24 | 18m | |||||
| 17 |
★ Cunrack
The first route up 'Castle Crag' looks like a doodle, but is not quite that simple. FA: Andrew Smith & Glen Devereaux., 1964 | 13 | 16m | |||||
| 18 |
Blow Up
Tries to free an ugly bolt ladder, but bails when the going gets too hard. FA: Tim Hancock & Andrew Thomson, 1969 FFA: Mark Moorhead., 1980 | 25 | 12m | |||||
| 19 |
Apocalypse Now!
Up the the seam past a fixed peg. Start: Below the wall with 'Red Baron' is a tiny seam. If you can't find it you might need a microscope. FA: Mark Moorhead, Mick Colyvan & Marty Beare., 1983 | 22 | 5m | |||||
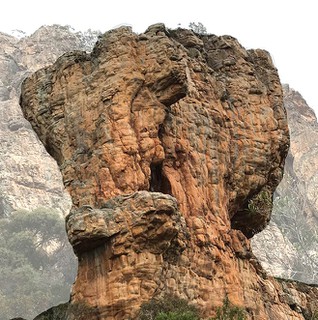 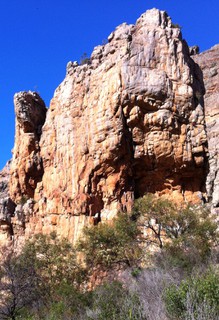 |
||||||||
| Route | Grade | Style | Selected ascents | |||||
| 20 |
Red Baron
Climb the face just R of the arete. Start: Traverse in the the base from under Procul Harem (easy but exposed). Start at the far L of ledge. FA: Chris Dewhirst & Chris Baxter FFA: Henry Barber., 1975 | 23 | 18m | |||||
| 21 |
Red Baron Direct Start
Probably one of the first routes at the grade in the country? These days it rarely gets repeated. Start: To the R of 'Blow Up' is a poorly protected groove. FA: Chris Dewhirst & Chris Baxter, 1968 FFA: Henry Barber., 1975 | 23 | 18m | |||||
| 22 |
The Hun
Reachy moves up the R side of the wall facing the campsite, past a piton and not much else for gear. Start: Traverse in from the start of Procul Harem (easy but exposed - you might want to rope up). FA: John Fahey & Peter Jackson, 1965 | 16 | 13m | |||||
| 23 |
★ Iron Cross
Originally freed with the aid of a fixed peg placed on abseil. It's gone now thanks to the Law of Ethical Entropy, but small cams will do fine. FA: Chris Dewhirst & Chris Baxter, 1968 FFA: Chris Peisker., 1978 | 24 | 14m | |||||
| 24 |
★ Mickey Finn
Trickier than it looks (take some big gear for the start). Start: The wide crack at the left end of the east face. FA: Peter Jackson & Chris Baxter., 1965 | 15 | 16m | |||||
| 25 |
★ Kor
Climb the slimey, curving crack, past a few old pitons, to the ledge. Start: At far L end of lower wall (below 'Iron Cross' and Mickey Finn). FA: Andrew Smith & Chris Baxter, 1967 FFA: John Smart., 1978 | 24 | 10m | |||||
| 26 |
needsaname
1m left of Dynamic. | 25 | ||||||
| 27 |
★ Dynamic
Originally done with a fixed wire, this is now a popular top rope problem. Start: About 10m R of Kor is a thin seam. FA: Kim Carrigan, 1978 | 24 | 10m | |||||
| 28 |
★ Cheap Chills
Right-slanting dog-leg crack just right of 'Dynamic' FA: Martin Lama & Graeme Smith | 17 | 10m | |||||
| 29 |
★ Saturation Point
Climb the wall R of 'Mickey Finn' past the unnerving rattly block. FA: Peter McKeand & Gordon Talbett, 1969 FFA: Glenn Tempest & Kevin Lindorff.., 1976 | 21 | 15m | |||||
| 30 |
Sausagemonger
Up the wall 1m R of SP (contrived at the beginning), until able to move R past tricky moves to jugs. FA: Jon Muir & Geoff Little., 1985 | 24 | 15m | |||||
| 31 |
★ Warmonger
In the centre of the E face is a thin seam. Climb the thin, attractive seam past a desperate crux. Louise Shepherd's 1981ish onsight was the first Aussie female ascent at this grade. FA: Gornon Talbett & Peter McKeand, 1968 FFA: Kim Carrigan., 1978 | 24 | 18m | |||||
| 32 |
★★ L'inconscience Tranquil
After a few metres, break diagonally R and then power up past bolts to the lower-off L of Procol. Start: As for 'Warmonger'. FA: Jean-Minh Trinh-Thieu, 1994 | 29 | 12m, 3 | |||||
| 33 |
★★★ Procol Harum
The country's first 26. Start: At the back L corner of the cave a line leads up to the prominent roof crack. FA: Chris Baxter & Andrew Smith, 1966 FFA: Kim Carrigan, 1978 | 26 | 25m | |||||
| 34 |
★★ Nati Dread
Power through the roof to the lip. The section after the roof was originally done by deviating R into the Low Down, then doing it's crux before continuing straight up. Has since been straightened out. Start: R of Procol is a line of bolts through the ceiling. FA: Andy Pollit, 1990 | 30 | 30m, 5 | |||||
| 35 |
Nati Dread Direct
As for 'Nati Dread', but power straight up after the lip past a new crux to rejoin the original route (finishing as for that). FA: Nathan Hoette, 2007 | 31 | 25m | |||||
1.14. Grotto Wall Area 48 routes in Area
- Summary:
-
Mostly Trad climbing
Lat / Long: -36.755717, 141.843232
description
The buttress directly behind Castle Crag.
Emergency Location: Mount Arapiles, Grotto Wall Area
1.14.1. Pan Grove 9 routes in Cliff
- Summary:
-
All Trad climbing
description
Climbs that either start from Pan Grove or from the great diagonal terrace above, but not on Tiger Wall.
Emergency Location: Mount Arapiles, Grotto Wall Area
descent notes
Scramble down the gully to 25 metre abseil from chains.
| Route | Grade | Style | Selected ascents | |||||
|---|---|---|---|---|---|---|---|---|
| 1 |
Fox Tales
Amble up the crappy rock, finishing up the arête overhanging the gully to the L. Start: At foot of L end of buttress at the top of Pan Grove - about 15m R of 'Rat on Roller Skates' (on Tiger Wall). FA: Chris, Sue Baxter & Mike Stone., 1986 | 15 | 30m | |||||
| 2 |
Golden Oldies
It's scary to think they called the route this way back then! Start: 5m R of 'Fox Tales'. FA: Dave Gairns, Chris Baxter & Jack Lewis, 1986 | 12 | 30m | |||||
| 3 |
Boys Keep Swinging
Climb the wall to a ledge, then move L to line up the overhanging arête. Steeply to another ledge and finish to the R. Start: A fair way R of 'Golden Oldies' is a narrow buttress. FA: Chris Baxter & Eric Jones., 1986 | 21 | 20m | |||||
| 4 |
Rock and Roll Suicide
Up the wall to a ledge and then climb R edge of way to loose blocks (scary) and another ledge. Traverse L past loose blocks (scary) for 2m to a small corner and then up this. Start: 1m R of Boys is a mossy wall. FA: Pritchard, Hoskins & Muir., 1993 | 18 | 20m | |||||
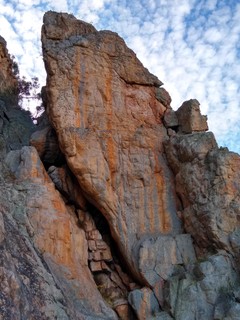 |
||||||||
| Route | Grade | Style | Selected ascents | |||||
| 5 |
Unknown
Steep. Ring bolts. | 25m, 5 | ||||||
| 6 |
Stepping Out Direct Finish
Start up the thin seam as for 'Stepping Out', to the halfway ledge. Then, where 'Stepping Out' traverses R, continue straight up (just right of the arete). If it feels like the route is solid for the grade, just wait until you get to the final moves... FA: Roland Foster & Phil Bigg., 1984 | 25 | 30m, 2 | |||||
| 7 |
? Another World
Starts up Stepping Out, then steps right into an independent seam before reaching the halfway ledge. From here the route continues past two bolts between Stepping Out and Stepping Out Direct Finish. | 2 | ||||||
| 8 |
★ Stepping Out
Start up thin diagonal line to a ledge. Traverse right past a BR, then move up the wall (cruxy, but about 4 grades easier than the Direct Finish). Move R and then over the bulge to the top. FA: Mark Moorhead & Chris Shepherd., 1981 | 25 | 30m, 1 | |||||
| 9 |
★ Celeste
In the shade for most of the day, so a good one to do when's it's hot. Oh, and the good bit may be short but it's feisty. Originally graded 12! Below the L-facing grey corner at the R end of the wall. Wander up to the corner, and jam it until it eases, then continue up to the arete. Rap anchor (30m) on finishing ledge (to the R). FA: Rein Kamar & Bill Andrews., 1969 | 16 | 25m | |||||
1.14.2. Grotto Wall 35 routes in Cliff
- Summary:
-
Mostly Trad climbing
| Route | Grade | Style | Selected ascents | |||||
|---|---|---|---|---|---|---|---|---|
| 1 |
Llareggub Variant
The line, moving L then up at half height. Rap off Llareggub's DRB anchor. A hold's broken off this, making it more like 24 than 22 Start: Start 2m L of 'Llareggub'. FA: David Shelton, Tim Day & Erik Lock, 1996 | 24 | 15m | |||||
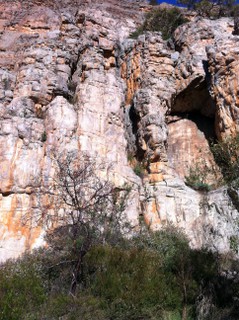 |
||||||||
| Route | Grade | Style | Selected ascents | |||||
| 2 |
★★ Llareggub
Originally graded 12... things were different back then! Start: At a little painted "L" about 10m R of the L edge of 'Grotto Wall'. FA: Dave Neilson & Rod Harris., 1967 | 18 | 15m | |||||
| 3 |
Interstitial
Face L of Factoids, with a crux 3rp that is best placed on abseil. I'm going to put a bolt in. Traverse L after crux to finish up crack, rap off Llareggub chains. FA: Douglas Hockly & Paul Deacon, 2009 | 23 | 15m | |||||
| 4 |
★ Factoids
Climb the wall L of The Flue; either directly (reachy to hidden fingerlock), or by stepping in L from a few metres up Hot August Night (thin and poorly protected). Chains rappel. A bolt appeared at some point but it has now gone. FA: Robin Miller, Mike Collie & Craig Nottle., 1983 | 21 | 15m | |||||
| 5 |
★ Hot August Night
Up 'Factoids' until rooflet, then step R and up blunt arete (pro a bit iffy). There is also a loose block up high, so don't go pulling it onto your belayer. Rap off as for 'Factoids'. Start: As for 'Factoids'. FA: Simon Mentz, Andrew Eastaugh & Louise Shepherd., 1992 | 21 | 15m | |||||
| 6 |
★★ Boundary Rider
A hybrid route between Llareggub and The Flue.
FA: | 8 | 45m, 3 | |||||
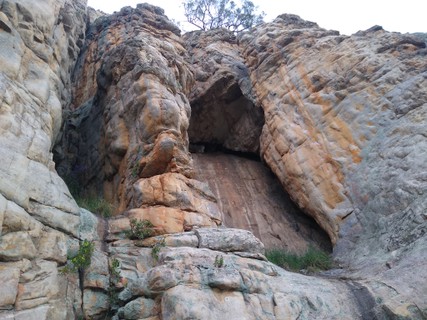 |
||||||||
| Route | Grade | Style | Selected ascents | |||||
| 7 |
★ The Flue
The prominent gash at the L end of 'Grotto Wall'. FA: Keith Lockwood & Garry Sudholz., 1967 | 12 | 30m | |||||
| 8 |
★★ Bastress
The arching grey buttress between The Flue and the grotto is an enjoyable easy route. Start: Below the grey buttress at a tricky run-out slab. Up the slab (poor pro) to the L edge of the grotto, then continue up the line above. FA: Rod Harris & Dave Neilson., 1967 | 11 | 36m | |||||
| 9 |
Nothing
Pretty contrived. Start: Just R of 'Bastress'.
FA: Mike Law-Smith (pitch 1), Mike Law & Steve Howden (pitch 2)., 1982 | 23 | 25m, 2 | |||||
| 10 |
★★ Body Recession
Climb past 3 bolts (and sometimes a fixed wire) to a lower-off. Start: Bounding the L end of the grotto is an overhanging orange wall. FA: Martin Scheel, 1989 | 27 | 15m, 3 | |||||
| 11 |
★ Heart of Stone
One of the Mount's best waterfalls after an extended period of rain. Start: Deep in the back of the grotto beside a pile of skeleton bones. FA: Bruno Zielke & Gordon Talbett, 1969 | 14 | 27m | |||||
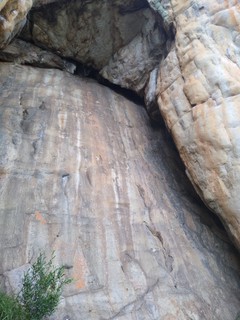 |
||||||||
| Route | Grade | Style | Selected ascents | |||||
| 12 |
★ Toad in the Hole
Climb the slab past 2 bolts to the chains. Start: The back wall of the grotto is a short slab. FA: Steve Howden & Mike Law, 1982 | 20 | 12m, 2 | |||||
| 13 |
Twenty-nine at the Quarry
Climb the slab R of TITH, clipping that route's 2nd bolt. Probably best to top-rope it from the chains after leading TITH. Start: R of 'Toad in the Hole'. FA: Charlie Creese & Robin Miller, 1985 | 21 | 12m | |||||
| 14 |
★ Catch 22
Up chimney then traverse R (pin) to corner. Up this then move R (crux) to finish. Start: At the chimney at the R end of the grotto. FA: Rod Harris & Dave Neilson, 1967 FFA: Nic Taylor., 1976 | 19 | 15m | |||||
| 15 |
★ Catch 22 Variant Finish
Keeps going straight up to access Toad's chains. Would've been done a 100 times before. FA: Michael Hillan & Paul Badenoch | 18 | 12m | |||||
| 16 |
★ Catch This
Up Catch 22 intil bolt on R can be clipped. Dive R for the catch, then layback the desperate flake to the arete and finish in the chimney. Start: As for Catch 22. FA: Mike Law & Ian Anger, 1982 | 23 | 15m, 1 | |||||
| 17 |
★★ Hot Coq
Up the orange wall past 5 inconspicuous carrots. Apparently, finishing directly past the last one is the most 'enjoyable' way to do the route. Start: At the R edge of the grotto, 2m R of Catch 22/This. FA: Nick White, 1992 | 27 | 15m, 5 | |||||
| 18 |
Soft Cock
Position yourself at the base of the coq. slide up and right passing a bolt, then when things start to ease off, jump back on the coq and take it to the top. | 26 | 17m, 3 | |||||
| 19 |
Aussie Drivers
Head straight up. Maybe move L to rap off Hot Coq's anchor at the top? Start: 4m R of 'Catch This' FA: Michael Collie & Michael Totterdell, 1983 | 20 | 12m | |||||
| 20 |
Ghostdrivers
Climb Bastress into the giant scoop. Traverse R about 8m till you get to some gear and go up the wall, then L up the arete to the chains of Hot Coq (which are over the edge). FA: Douglas Hockly & Oz, 2015 | 17 | 25m | |||||
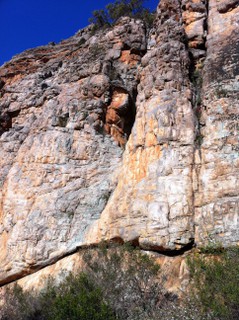 |
||||||||
| Route | Grade | Style | Selected ascents | |||||
| 21 |
Passion
Use pocket to get past the arch and then continue up to bulge (bolt). Pull through this (crux) and then ramble on to the top of the crag. This is a complete sandbag - much harder than 22 and the bolt is rusted and looks rubbish. Start: About 8m L of 'Boomer'. FA: Mark Moorhead & Lincoln Shepherd, 1983 | 22 | 25m, 1 | |||||
| 22 |
A Lusty Sequel
Climb the face L of 'Boomer' to the top of the crag. Wander off L to Pan Grove or 'Celeste' rap station. Start: Just L of 'Boomer'. FA: Craig Nottle & Michael Collie, 1983 | 18 | 45m | |||||
| 23 |
Valm
Start as for 'Boomer' and head into the gulch. Trash up this to the top. Start: About 10m R of the grotto is a deep chimney/gully. FA: Colin Lindorff & Bill van Muirs, 1970 | 15 | 30m | |||||
| 24 |
★ Boomer
An ancient route with complicated FA details... if you want the full story then look in Noddy's guide. Chris and Sue Baxter climbed the wide crack option on pitch 1 on 8/5/1983. Start: Below the gaping chimney/gully starting halfway up the cliff.
Start: Original description says: "half-way up Boomer's 1st pitch, direct variant leaves gully for the wide crack on R wall." hmmm...
FA: Col Abbott & Jenny McMahon, 1965 FA: Chris & Sue Baxter, 1983 | 15 | 42m, 2 | |||||
| 25 |
★ John and Betty
A popular sport route (but you may wish to take some gear for the finish). Stepping left into Boomer for the first half is quite unavoidable. Start below the orange wall near the highest point of the arch, and follow the line of fixed hangers. FA: Kieran Loughran, 1992 | 23 | 23m, 5 | |||||
| 26 |
Amazing Lace Direct Start
Thin and poorly protected climbing leads to the original route. Finish up that. Start: Just L of the original route. FA: Chris Shepherd & Steve Moore, 1980 | 21 | 23m | |||||
| 27 |
★ Amazing Lace
Starts just left of squeaker on thin gear. Tricky left moves into line at about 8m. Go up to John and Betty's rap station. Start: R of 'John and Betty', and just L of 'Squeaker'. FA: Steve Moore & Chris Shepherd, 1980 | 19 R | 23m | |||||
| 28 |
★ Squeaker
Another early climb. This one is supposedly better than it looks. Start: About 7m R of 'Boomer'.
FA: Possibly John Moore & Chris Dewhirst, 1965 | 14 | 41m, 2 | |||||
| 29 |
Thingummyjig or Something Similar
Up black face to little overhang (crux, small cams) at 3/4 height. Start: A few metres R of Square FA: Dennis Kemp & Dave Mudie, 1987 | 18 | 38m | |||||
| 30 |
★ Tich
Up wall, passing roof on the L to big ledge at 30m. Walk off here, or take optional finish up V-chimney. Start: 5m R of 'Squeaker', below prominent ceiling/nose up higher. FA: Digby & Alison Gotts, 1971 | 17 | 40m | |||||
| 31 |
Rites of Passage
Can be used to access 'Golden Oldies' Wall, if you're into that sort of thing. Start: 5m R of 'Tich' at foot of slab. FA: Chris Baxter, Dave Gairns & Jack Lewis, 1986 | 19 | 25m | |||||
| 32 |
Captain Vomit
The LH diagonal. FA: Craig Nottle & Michael Collie, 1983 | 18 | 20m | |||||
| 33 |
Lord of the Ring-Holes
The RH diagonal. After the corner, move R through bulge and up to overhang above. FA: Craig Nottle & Michael Collie, 1983 | 20 | 25m | |||||
| 34 |
Sir Francis Goose
Up groove to bulge. Take the line L of the overhanging nose on massive jugs. Start: 3m R of LOTRH is a groove. FA: Craig Nottle & Michael Collie, 1983 | 19 | 25m | |||||
| 35 |
Chairman Meow
Climb the wall 2m R of SFG, trending slightly R. Take the line R of bulge. FA: Craig Nottle & Michael Collie, 1983 | 18 | 25m | |||||
1.14.3. The Bat Cave 4 routes in Cliff
- Summary:
-
Trad climbing and Sport climbing
Lat / Long: -36.755721, 141.842726
description
The home of 'Living With A Hernia'
Emergency Location: Mount Arapiles, Tiger Wall Area
approach
Located at the very top of Pan Grove this area is easiest approached from above. From the Disabled lookout, tracking right, facing out (south-east), along the cliff edge. Just downhill from the bouldering area Islamabad. There is an easy descent to the left of the block (facing out).
| Route | Grade | Style | Selected ascents | |||
|---|---|---|---|---|---|---|
| 1 |
Roughing Minors
Not that nice. Start: The crackline left of 'Living With a Hernia'. FA: Paul Hoskins, 1995 | 25 | 10m | |||
| 2 |
★★ Living With a Hernia
Awesome power route taking the main line through the cave. "The best power route in Australia" (Nathan Hoette). FA: Douglas Hockly, 2003 | 30 | 10m, 3 | |||
| 3 |
★ The Hunchback of Natimuk
Takes the overhanging crack just R of 'Living With a Hernia'. Good kneebars on the crux, or, like Nathan Hoette you can do it without at about 28. FA: 'Strong' Wally, 2000 | 24 | 10m | |||
| 4 |
Eponymous
Up the face R of Hunchback of Natimuk. Not that great. FA: Paul Hoskins, 2002 | 21 | 15m | |||
1.15. Voodoo Area 127 routes in Crag
- Summary:
-
Mostly Trad climbing
Lat / Long: -36.754836, 141.842156
description
Emergency Location: Mount Arapiles, Voodoo Area
1.15.1. Argyle St Clump 7 routes in Unknown
- Summary:
-
All Trad climbing
description
The lump in front of the left side of New Image Wall.
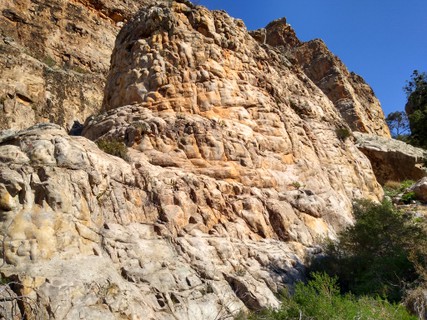 |
||||||||
| Route | Grade | Style | Selected ascents | |||||
|---|---|---|---|---|---|---|---|---|
| 1 |
No More Gaps
Follow cracks up R-wards to a bold finish up the R arete of the gully face. Start: Start in the gully around L of 'Argyle Street' at a grassy patch. FA: Kieran Loughran & Meg Sleeman, 1998 | 16 | 12m | |||||
| 2 |
A New Fridge
The beautiful, but "all too short" thin crack starting well up the face. Start: Start just L of 'No More Gaps'. FA: Kieran Loughran & Meg Sleeman, 1998 | 17 | 10m | |||||
| 3 |
Deer Park Revisited
A short hard layback to L arete (rest). Move back R and up seam. Start: From L end of ledge at half-height, near orange patch. FA: Kieran Loughran & Terry Tremble, 1984 | 20 | 15m | |||||
| 4 |
★ Argyle Street
Climb straight up the orange wall. Start: Below middle of orange patch. FA: Terry Tremble, Kieran Loughran & Jane Wilkinson, 1984 | 19 | 15m | |||||
| 5 |
International Climbing Meat
Head diagonally R from 'Argyle Street' to the crack. Start: Just R of 'Argyle Street'. FA: Chris Baxter & Phil Wilkins, 1984 | 18 | 15m | |||||
| 6 |
★ Nightmare on Elmes Street
Up seam, step L at top into main crack and finish L of wide crack above. Start: 1m R of crack in centre of outcrop. FA: Louise Shepherd & Heather Phillips, 1992 | 19 | 15m | |||||
| 7 |
★ Brand X
Climb to ledge from the R, then into thin crack to the R. Up and then back L. Start: On bushy ledge 3m up, at R end of crag. FA: Kieran Loughran, Terry Tremble & Jane Wilkinson, 1984 | 15 | 12m | |||||
1.15.2. New Image Wall 16 routes in Cliff
- Summary:
-
Mostly Trad climbing
Lat / Long: -36.755262, 141.842697
description
descent notes
23m abseil from rap station above Hidden Secrets.
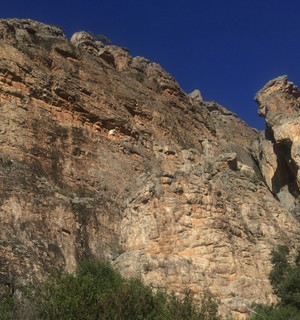 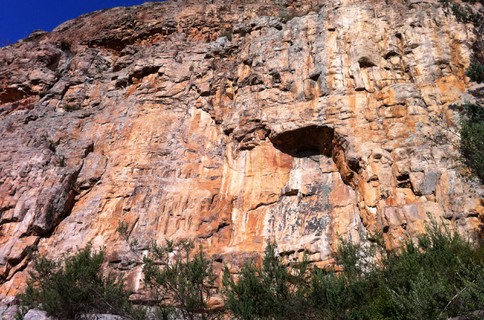 |
||||||||
| Route | Grade | Style | Selected ascents | |||||
|---|---|---|---|---|---|---|---|---|
| 1 |
Antur
Start with left moves off left corner of big boulder in the gully about 20 metres left of New Image. Climb to left of big horizontal then follow the gear to ledge near big guano patch. (25 metres) 14 3 metres left of guano stain climb through roof weakness and steep wall on good pro but tricky moves. Take care of loose boulders at your feet on belay ledge (20 metres to generous ledge) 18 From ledge take easy moves off right side of ledge moving up through slab with limited but sane protection. Tip toe on clean holds through black moss and head up stripe of clean rock saving a purple cam for an essential pocket. Belay past dead tree at base of shallow corner (35 metres) 15 Climb blocky corner left of roof. Easy climbing but careful of rock in places. (25 metres) 10 Rap off perfect bollard at back of pinnacle (5 metres). Walk off up to plateau and right towards lookout road, follow road to central gully track, bring shoes. Or walk and rap down to Pan Grove. (Antur is welsh for adventure) FA: Hywel Rowlands & Anthony Claxton, 10 Oct 2020 | 18 | 110m, 4 | |||||
| 2 |
Imaginarium
The little wall L of Undergraduate. Climb the pleasant grey slab direct up to the ledge below the wall. Pull up on good holds to veer slightly L to a large flat hold, then straight up to double rings (lower-off). FA: Glenn Tempest & Karen Tempest, Jul 2023 | 30m | ||||||
| 3 |
Undergraduate
Faintly initialled. Start: 15m L of the prominent arch of 'Fault Line' is a ledge. FA: Keith Lockwood & Ed Neve, 1973 | 13 | 90m | |||||
| 4 |
★★ Continuum
Up the wall past some thin crux moves, finishing R of rooflet (which is a bit loose). Start: 10m L of 'Fault Line' and 2 m R of hanging black rock a few metres off the ground. FA: Peter Newman, Kim Carrigan & Mark Moorhead, 1979 | 22 | 25m | |||||
| 5 |
★★★ New Image
A reachy start, then sustained climbing straight up on great rock. Start: 8m L of 'Fault Line' at a brushed line, marked "NL". FA: Mark Moorhead, Kim Carrigan & Peter Newman, 1979 | 20 | 25m | |||||
| 6 |
★★ Fault Line Direct
The direct line up the clean wall, joining FL at the end of it's traverse. Perhaps add a few grades if you are under 5'9"? FA: Gareth Llewellin & Jessie Rushbrooke, 26 Jan 2015 | 23 | 25m, 3 | |||||
| 7 |
★★ Loading Zone
From jug, head up wall to L end of roof. Struggle around this, move R and up thin crack (spaced pro). Start: 5m L of 'Fault Line' is a large jug. FA: Mark Moorhead, Peter Newman & Kim Carrigan, 1979 | 22 | 25m | |||||
| 8 |
★★ Fault Line
Follow the arching line to the end of the roof. A reachy clip and a tricky crux make way for an easy finish up 3m R of 'New Image' Start: At the base of the obvious line snaking up the crag. FA: Kim Carrigan, Mark Moorhead & Peter Newman, 1979 | 24 | 25m, 1 | |||||
| 9 |
★★ Je Suis un Legend
Start left of 'Hidden Secrets'. Up rightwards ramp to corner, step right and head then up until above rooflet. Traverse left and finish up 'Loading Zone'. FA: Douglas Hockly | 20 | 25m | |||||
| 10 |
Hidden Secrets, variant start from Je Suis Un Legend
As for Hidden Secrets but take the easier start of Je Suis un Legend instead of the tricky boulder. | 21 | 25m | |||||
| 11 |
★★ Hidden Secrets
Bouldery start up arete leads to a steep flake. Start: 2m R of 'Fault Line' is a hanging arete. FA: Kim Carrigan, Mark Moorhead & Peter Newman, 1979 | 22 | 25m | |||||
| 12 |
★ Linear Transformation
Companion line to 'Hidden Secrets' Start: 4m R of 'Hidden Secrets'. FA: Kim Carrigan, Louise Shepherd & Peter Newman, 1979 | 22 | 25m | |||||
| 13 |
★ Crayons
Another bouldery start, this one with little to no gear. Up wall then finish up seam just L of top crack on 'Crooked Mile'. Good luck. Start: 4m L of small chimney. FA: Kim Carrigan & Louise Shepherd, 1981 | 23 | 25m | |||||
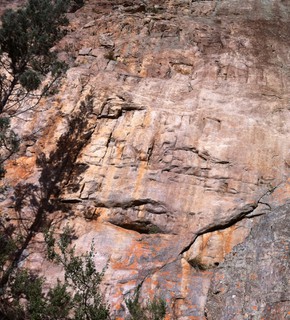 |
||||||||
| Route | Grade | Style | Selected ascents | |||||
| 14 |
★★ Crooked Mile
Boulder up to horizontal break (a few grades harder). Those concerned about their ankles may prefer the chimney or rib on the right until you can join traverse line. Traverse L until crack, up broken line, overlap, wall to rap station on ledge. Start: 2m L of short chimney. FA: Louise Shepherd, Lincoln Shepherd & Kim Carrigan, 1981 | 18 | 20m | |||||
| 15 |
★ Blackguard
Up CM to the break, then continue up black wall above. When it eases, move diagonally L to rap station. Start: As for 'Crooked Mile'. FA: Glenn Tempest, Lucas Trihey & Seamus Brennan. (Independent start was soloed by Kim Carrigan), 1981 | 22 | 25m | |||||
| 16 |
★★ Lick the Spoon
Thin with some long moves on fantastic rock. 5 FHs to the right of Blackguard. Lower off. FA: Gareth Llewellin & Geordie Webb, 4 Nov 2016 | 25/26 | 20m, 5 | |||||
1.15.3. Rats Alley 13 routes in Cliff
- Summary:
-
Mostly Trad climbing
Lat / Long: -36.755251, 141.842443
description
The recess between Voodoo Buttress and the main wall.
Emergency Location: Mount Arapiles, New Image Area
descent notes
25m abseil from the rap station above Blyth Street or 20m abseil from slings above Tarantula.
| Route | Grade | Style | Selected ascents | |||
|---|---|---|---|---|---|---|
| 1 |
★ Glory Road
Superseded by 'Striptease Parade' now, but this was a bold effort back in the day. From the 1978 Lockwood guide: "Necky as anything, committing and sparsely protected." Start: At L end of wall, on a sloping ledge. FA: Andrew Thomson & Greg Child, 1976 | 20 X | 30m | |||
| 2 |
★ Striptease Parade
Shares the start of 'Glory Road', but goes straight up from half-height instead of escaping off left into the mossy ramble. Start at L end of ledge, up to a couple of large pockets at 3m. Traverse left then boldy up to a horizontal break. From this ledge continue straight up without escaping left. FA: Craig Peacock & Malcolm Matheson, 1980 | 20 X | 30m | |||
| 3 |
★ Osmond Terrace
As for SP to pockets, then move R into 'Rats Alley'. Stay with this for 10m, then head straight up brushed steak (where 'Rats Alley' moves L) past bolt and hollow flake. Start: As for 'Striptease Parade'. FA: Nyrie Dodd & Louise Shepherd., 1985 | 21 | 25m, 2 | |||
| 4 |
★★ Streetwise
A thin, almost-eliminate slab. FA: Kieran Lawton, Gordon Poultney, Donna Bridge & Bec Pirzl, 2006 | 21 | 25m, 5 | |||
| 5 |
★★ Rats Alley
Committing slab climbing, but a highly enjoyable route. Unusual style for 'Arapiles'. Approach by scrambling up the easy corner. Start: On the left hand wall, up the gully just before the chimney. FA: Greg Child & Kim Carrigan, 1978 | 19 R | 25m, 1 | |||
| 6 |
★★ Blyth Street
Up 'Rats Alley' for 15 or so metres, then scoot R (across Streetwise) to a welcome bolt. Keep your head together and climb straight up to the top. Start: As for 'Rats Alley'. FA: Kim Carrigan & Hugh Foxtrot, 1978 | 21 | 35m | |||
| 7 |
★ Blyth Street Direct Start
Climb straight up to the bolt on Blyth Street (after it's traverse), then continue to the top as for that. Do not fall. Start: A few metres R of 'Rats Alley'. FA: Warwick Baird, 2000 | 22 X | 12m | |||
| 8 |
Nymph
Thrash up the chimney to a crack on the R wall. Start: Wander up the gully to the base of the chimney. FA: Keith Lockwood & Geoff Uebergang, 1967 | 16 | 42m | |||
| 9 |
Ckoff
"For historical reasons only..." Start: Near 'Nymph'. FA: Norm Osborne, 1970 | 16 | 57m | |||
| 10 |
★ Crystal Prophet
Original start was to bridge up chimney then swing onto R face with no gear! For some reason these days people clip the bolt on Crystal Vision and go L to the flake - still a bit bold. Up flake till it ends and move L and up to an exciting exit. Walk R to rap from 'Tarantula' anchor. FA: Glenn Tempest, Kevin Lindorff & Peter Watson. (Mike Law climbed alt start in from R using a high runner in Tarantula), 1982 | 23 | 15m | |||
| 11 |
★★ Crystal Vision
Climb the thin wall between CP and T. Bring medium cams to make an anchor for belaying. Re-Bolted 2024 FA: John Smoothy & Mark Colyvan, 1986 | 26 | 20m, 4 | |||
| 12 |
★★★ Tarantula
The steep and sustained L-facing corner. Great. FA: Kevin Lindorff, Iain Sedgman (originally with 2 aids & later freed by Kevin), 1975 | 19 | 20m | |||
| 13 |
Crystal Sausage
Steep bolted wall R of 'Tarantula'. Nobody ever does it because it's chipped and the bolts look rubbish, hence nobody knows if there is a rap anchor at the top (is there a rap anchor at the top?) FA: Ant Prehn, 1990 | 27 | 25m | |||
1.15.4. Voodoo Buttress 34 routes in Cliff
- Summary:
-
Mostly Trad climbing
Lat / Long: -36.755030, 141.842382
description
Emergency Location: Mount Arapiles, Voodoo Area
descent notes
25m abseil from the rap stations above Wasp and Chinese Algebra. 30m abseil from the rap station above Voodoo. Or traverse R and scramble down the back into Voodoo Gully. If you go all the way to the summit rap off down the back from slings.
    |
||||||||
| Route | Grade | Style | Selected ascents | |||||
|---|---|---|---|---|---|---|---|---|
| 1 | Fatted Calf | 27 | 30m, 4 | |||||
| 2 |
★ Pyrrhic Victory
Struggle up black crack, past overhang, then grey corner to ledge on R. Climb wall above to summit, it's possible to traverse off R to rap anchor on 'Chinese Algebra'. Start: L of blank orange wall is a black crack. FA: The Rosandra Alpine Club, 1965 FFA: Nic Taylor. (Keith Lockwood eliminated some aid in 1969), 1975 | 19 | 40m | |||||
| 3 |
★ Roundabouts
‘The archetypical wall of impossible-looking rounds’ – Louise Shepherd guide. Very sustained. Up arête 1m right of PV to prominent undercling, then reach to sloper. Crux moving past this to a small horizontal slot (bombproof double RPs), then onwards up slope-riddled slab. Traverse right to First Blood anchor. FA: Kim Carrigan, 1986 | 28 | 15m, 3 | |||||
| 4 |
★★ First Blood
The blank looking beautiful buttress left of Chinese Algebra FA: Alister Robertson, 2013 | 31 | 15m, 5 | |||||
| 5 |
★★★ Chinese Algebra
Move up and L to arete. Climb just R of arete and finish at rap anchor (or continue to the top in a 48m pitch). Start: A few metres R of arete facing Caslte Crag. FA: Peter Morris & Ben Maddison, 1977 FFA: Kevin Lindorff., 1977 | 21 | 48m | |||||
| 6 |
★★ Aussie Logic
Climb straight up middle of wall past 2 carrots. Start: As for 'Chinese Algebra'. FA: Clive Curson, 2001 | 21 | 23m, 2 | |||||
| 7 |
Gimp's Turn on Top
Not the line with the carrot bolts just R of CA. FA: Andrew Collins & Paula Keeno, 1998 | 23 | 24m | |||||
| 8 |
Full Frontal
Girdle of 'Voodoo Buttress'. Start: As for CA.
FA: Louise Shepherd, Kim Carrigan (alt) & Neil Smith, 1979 | 21 | 100m, 3 | |||||
| 9 |
Nausea
Up crack to bulge, step R into 'Voodoo' (at kink). Head up (tricky) and L into easy crack. Start: 1m L of 'Voodoo' is a crack. FA: Jim Van Gelder & Colin Reece, 1979 | 23 | 40m | |||||
| 10 |
★★ Voodoo
Start: 3m R of 'Chinese Algebra' at dog-leg crack.
FA: Rosandra Alpine Club, 1965 FFA: , David Shirra & early's, 1970 | 18 | 65m, 3 | |||||
| 11 |
Black Magic
Overhanging L arete next to pitch 3 of Voodoo. Start: Ledge after pitch 2 of 'Voodoo'. FA: Malcolm Matheson & Dave Mudie, 1989 | 23 | 10m, 1 | |||||
| 12 |
Be Wicked
Roof R of pitch 3 of 'Voodoo'. Start: Ledge after pitch 2 of 'Voodoo'. FA: James Falla & Dave Mudie, 1989 | 24 | 10m, 2 | |||||
| 13 |
★ Sister Sol
A harder variant start to Mother's Son. Simon Mentz has done a more direct version finishing up the crack instead of moving R into Mother's Son (still joins Mother's Son at the ledge and they share the same top half) Start: 2m L of Mother's Son. FA: Kim Carrigan, Eddy Ozols & Louise Shepherd, 1979 | 21 | 25m | |||||
| 14 |
★ Mother's Son
Tricky to start but soon gets easier. FA: Richard Curtis unseconded, 1978 | 21 | 45m, 2 | |||||
 |
||||||||
| Route | Grade | Style | Selected ascents | |||||
| 15 |
★★ Wasp
Straight up pocketed corner to flake. Take LH fork through the bulge. Start: At base of diagonal line uphill from 'Voodoo'. FA: Keith Bell & Keith Lockwood, 1974 | 20 | 30m | |||||
| 16 |
★ Warped Wasp
Half way up 'Wasp' there is a large flake leading right. Follow this to join 'Warped'. | 20 | ||||||
| 17 |
★ Warped
Climb the prominent R-leaning diagonal line to join 'Wurlitzer' below roof. Up to roof, then break L, turn roof and up face. Start: As for Wasp. FA: Kim Carrigan & Eddy Ozols, 1979 | 20 | 20m | |||||
| 18 |
★ Whirling Dervish
Starts a few metres right of Wasp and Warped and a few metres L of Wurlitzer. Carefully up the slabby start for a couple of body lengths to gain the diagonal crack of Warped that comes in from the left. Up another few metres until able to lean out left from the Warped line to clip a bolt and move onto the wall. Up past the bolt then straight up over the little flake/roof to finish up the line/groove finish just right of Wasp’s finish. FA: Kevin Lindorff & Glenn Tempest, 2023 | 24 | 20m, 1 | |||||
| 19 |
★ Wurlitzer
Up then L into line below roof. Around this on R, then up to rap-anchor. Start: 10m R of Wasp. FA: Keith Bell, David Shirra & Ray Lassman, 1971 | 18 | 25m | |||||
| 20 |
Heaven Scent
You might get to smell it yourself if you fall off this one... Start: 4m L of 'Sound Chaser'. FA: Chris Shepherd & Mark Moorhead, 1981 | 23 | 30m | |||||
  |
||||||||
| Route | Grade | Style | Selected ascents | |||||
| 21 |
Sound Chaser Direct Start
Up to and through overhang. Join original and finish as for that. This is 22 in Lou's guide. Start: 2m L of original. FA: Chris Shepherd & Rod Young, 1980 | 20 | 30m | |||||
| 22 |
★ Sound Chaser
Up short flake. Move L, then up and L more to bush. Up steep loose crack above. Heading straight up wall after flake at start is 19. Start: Under R end of grey prow uphill of Wasp. FA: Glenn Tempest & Kevin Lindorff, 1977 | 18 | 30m | |||||
| 23 |
No Stone Unturned
Up SC, then move R into seam (bolt). Start: As for 'Sound Chaser'. FA: Kim Carrigan, 1985 | 23 | 20m, 1 | |||||
| 24 |
Silk Ties, Candle Wax and Ice
Boulder up on slopes and crimpers, till you can traverse L for 4m and into obvious corner (Spider LH Variant). Start: Start 3m L of 'Spider'. FA: Michael Woodrow & Marc Sydnot, 1997 | 20 | 25m | |||||
| 25 |
★ Spider
Up black nose of buttress, passing steepening at top on L. Start: At north shoulder of buttress. FA: Unknown, 2000 | 13 | 25m | |||||
| 26 |
Spider LHV
Was the original route. Start: At north shoulder of buttress. FA: Ray Lassman, Keith Bell & David Shirra, 1971 | 18 | 30m | |||||
| 27 |
★ Social Darwinism
Up face (tricky to place RPs, then bolt) to ledge. Step R and up crack. Start: A couple metres R of 'Spider'. FA: Kieran Loughran & Meg Sleeman, 1992 | 18 | 20m, 1 | |||||
| 28 |
★ Social Darwinism Direct Finish
Start: As for original. FA: Michael O'Reilly, Heather Phillips & Melanie O'Reilly, 1997 | 20 | 15m, 1 | |||||
| 29 |
Artifact
Swing L (hard), up seam to break, finish up SD. Start: At 'Blockwork Orange'. FA: Kieran Loughran & Meg Sleeman, 1993 | 19 | 15m | |||||
| 30 |
Artifact RHV
Follow 'Artifact' for 5 metres to the ledge. Then step down and right and climb wall left of arete. Start: Start as for 'Artifact'. FA: Hoskins & Pritchard, 1996 | 21 | 10m | |||||
 |
||||||||
| Route | Grade | Style | Selected ascents | |||||
| 31 |
★ Blockwork Orange
Up leaning corner to roof, then exit L (at break). Start: Up the gully from previous routes and short corner crack. FA: Peter Newman, 1980 | 21 | 15m | |||||
| 32 |
Blockwork Orange Direct Finish
As for original to break, then climb through roof past bolt. Start: As for BO. FA: Brian Fish, 1982 | 25 | 18m, 1 | |||||
| 33 |
★ Porcupine
Short crack through overlap. Start: 5m R of BO. FA: Wendy Eden & Jo Williams, 1994 | 20 | 10m | |||||
| 34 |
Abacus
Up crack. Start: Opposite 'Sound Chaser' (on other side of gully). FA: Louise Shepherd & Kim Carrigan, 1979 | 18 | 20m | |||||
1.15.5. Waste of Space Gully 5 routes in Cliff
- Summary:
-
Trad climbing and Sport climbing
description
Leads into the cliff from R of the ledge above Blythe St.
Emergency Location: Mount Arapiles, Voodoo Area
| Route | Grade | Style | Selected ascents | |||
|---|---|---|---|---|---|---|
| 1 |
★ Waste of Space
A thin crack to an overhanging corner on the L side of the gully. Pass roof on the L. FA: Chris Shepherd & Keith Egerton, 1980 | 18 | 15m | |||
| 2 |
★ Seething Well's Cheesy Foreskin
Up the wall and thin crack R of WOS to a bulge. Move R to shallow capped corner then exit L. FA: Russell Chudleigh, John Lattanzio & Phil Parker, 1984 | 23 | 15m | |||
| 3 |
★★ I Wanna Be Your Dog
R of SWCF is a R-leaning crack beginning from a hand traverse. Runners were placed with a stick. FA: John Lattanzio & Phil Parker, 1984 | 25 | 15m | |||
| 4 |
★ Double Negative
Set: CJ, 2022 FFA: Christopher Glastonbury, 9 Nov 2022 | 27 | 10m, 3 | |||
| 5 |
★ Nix
Up little groove then R a bit and straight up on little incuts. Start: Opposite WOS at the L side of a mossy wall. FA: Robin Miller & solo., 1982 | 17 | 15m | |||
1.15.6. Dork Wall 5 routes in Cliff
- Summary:
-
All Trad climbing
description
| Route | Grade | Style | Selected ascents | |||
|---|---|---|---|---|---|---|
| 1 |
Dorks on Vacation
Up and L to a stance, then back R and up crack to wide ledge. Finish up steep wall. FA: Mark Witham & Paul Francis, 1988 | 18 | 18m | |||
| 2 |
Asproman
Up prominent crack near gum (L of white streak) to big ledge. Finish over roof. Start: R of DOV is a gnarly dead gum. FA: Mark Witham & Paul Francis, 1988 | 19 | 18m | |||
| 3 |
Romper Room II
Up wall, the head R to ledge. Move R again then up. Start: Just L of 2nd gully is a wall with orange and black rock. FA: Paul Francis & Mark Witham, 1988 | 17 | 15m | |||
| 4 |
Crossing the Tees
Start off the flake then trend L to short L-facing corner. Up this then pass roof above just R of centre. Start: About 2/3rds of the way up the 2nd gully is a flake resting against the wall. FA: Paul Francis & Mark Witham, 1988 | 17 | 12m | |||
| 5 |
Dotting the Is
R-facing corner 2m R of CTT's to ledge, then straight up. FA: Paul Francis & Mark Witham, 1988 | 18 | 12m | |||
1.15.7. Dead-point Wall 20 routes in Cliff
- Summary:
-
All Trad climbing
description
Large wall in front of Voodoo Buttress and Looking Glass Wall visible from the road. Quite a big wall but doesn't offer much consistent climbing.
There are some good short climbs at the left-hand end and a few shorter options in the gully at the righthand end.
Emergency Location: Mount Arapiles, Voodoo Area
approach
Easiest to approach at either end to avoid bush below the middle of the crag. Follow the path from Castle crag car park toward voodoo buttress. As the path brings you close to a sloping wall on the right and heads uphill to voodoo deviate and instead head parallel with the road and follow the base of the crag. The first routes described are immediately on your left as you make a short decent to the base of the wall.
descent notes
Find a big bollard at the base of the summit block, on the south-west corner. Abseil is about 15m.
There are rappel anchors for some climbs.
| Route | Grade | Style | Selected ascents | |||||
|---|---|---|---|---|---|---|---|---|
| 1 |
So Much For Willpower
Some people just can't resist a new route. Short line around left of the main face, at the right end of the side facing Grotto Wall. Hard finish. FA: Rob ? & Dave Moss, 1987 | 22 | 8m | |||||
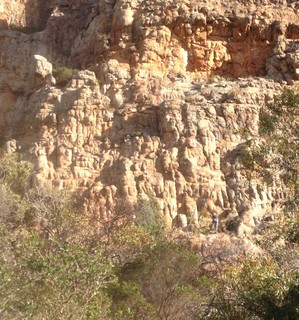 |
||||||||
| Route | Grade | Style | Selected ascents | |||||
|
Tucked away at the bottom left end of this cliff is a lovely winter crag, 3 minutes 50 seconds from the car. All routes end at rap bolts to avoid an awkward and dodgy downclimb off the back of the pinnacle. | ||||||||
| 3 |
★ Pointy End
Committing crux with less-than-the-best gear. Left-facing corner at the left end of the cliff, just right of a callitris tree growing adjacent to the wall. Finish up gentle wall to bolt belay. FA: Keith Lockwood & Kieran Loughran, 18 Jun 2018 | 16 | 20m | |||||
| 4 |
★ Stretching the Point
Lovely rock and cute pro. Starts about 4m down and right of Pointy End. Climb up to and past the prominent white streak. Step left and up the line to the Pointy End bolts. FA: Keith Lockwood & Kieran Loughran, 22 Jun 2018 | 18 | 24m | |||||
| 5 |
★★ Making The Point
Climb straight up to the left side of the bulge immediately right of Stretching the Point. A runner in that climb protects a blind step right around the bulge. Up the ramp a little then up to the headwall. Up the headwall, starting on the right side then moving left into the centre. Step around left to the Pointy End bolts. Originally finished up right of the headwall before cleaning. FA: Kieran Loughran & Keith Lockwood, 22 Jun 2018 | 15 | 25m | |||||
| 6 |
★★ Tatooine
The thin line starting 1m or so left of Zabriskie. Easily top-roped from the Zabriskie anchor FA: Glenn Tempest & Karen Tempest, Jul 2018 | 21 | 22m | |||||
| 7 |
★★ Zabriskie
Very enjoyable with an interesting mix of styles. Starts 8m or so right of Making The Point.
FA: Kieran Loughran, Keith Lockwood & Norm Booth, 23 Jun 2018 | 18 | 22m, 1 | |||||
| 8 |
★ Tipping Point
Quite committing. Starts 3m right of Zabriskie Delicately past BR (hard to see from the ground) and step right into the line which bounds the right side of the steep wall. Follow the line to the ledge and walk left to the Zabriskie bolts. FA: Keith Lockwood & Kieran Loughran, 28 Jun 2018 | 17 | 25m, 1 | |||||
| 9 |
Point Blanc
Another nice little exercise. Climb the clean white slab (tiny RPs and cams) about 3m right of Tipping Point and continue up the steep orange nose. Finish up and left to the Zabriskie bolts. FA: Keith Lockwood, Norm Booth & Pat Ford, 30 Jun 2018 | 15 | 25m | |||||
| 10 |
Point Percy
Good direct climb to top of cliff. Could be split into two pitches if so desired. Starts right of Point Blanc and left of a short left-facing corner further right. Climb a faint vertical bulge in the cliffline and continue up the obvious short crack/groove. Pass the little rectangular roof on the right and bustle your way over the overhang above that guards the upper part of the cliff. Veer slightly right to finish. To descend, scramble down the ridge towards camp then find a bollard to make a short rap into the gully towards the Voodoo buttress (sling needed). FA: Keith Lockwood & Kieran Loughran, 4 Sep 2018 | 17 | 60m | |||||
| 11 |
Point the Bone
About two-thirds of the way from the left on the roadside face is an orange corner which faces left and is low down. Easiest approach is behind the Death Row Pinnacle and walk left along a terrace to its left end. Scramble up and slightly left and climb orange corner. Above the corner there's a little bulge with a stack of loose blocks offering a foothold. Instead move left onto the steep, juggy wall and up past the bulge then step back right into the obvious crack. FA: Chris & Sue Baxter, 1985 | 12 | 40m | |||||
| 12 |
Point of No Return
Start 2 metres right of Point The Bone, below a crack. Climb crack. Where it peters out at bulge step up right. Go up bulging wall. Above, move right at a guano patch on to orange buttress. FA: Chris & Sue Baxter, 1985 | 16 | 45m | |||||
| 13 |
Very Little Point
Up cracks, through the bulge at 10 metres at it's widest point and keep going, tending maybe a little right. Start: Start about 12 metres right of Point Of 'No Return' at the best-looking crack system near the right side of the wall. FA: Kieran Loughran & Peter Mack, 1991 | 16 | 45m | |||||
|
At the right-hand end of Dead Point Wall, behind the left end of Death Row Pinnacle is a little U-shaped gully. At top of this, on left, facing the road is a small face with a prominent native pine at its base. The top of this gully can also be easily accessed from Looking Glass Wall. | ||||||||
| 15 |
The Skeleton Coast
Gets more atmospheric the higher you go. Takes the north ridge of Deadpoint Wall. Start below the U-shaped gully behind Death Row Pinnacle.
FA: Keith Lockwood & Norm Booth, 27 May 2015 | 8 | 75m, 3 | |||||
| 16 |
Was It Good For You, Louise?
Compact yellow face left of pine. FA: Charlie Creese & Andrew McDougall, 1986 | 16 | 15m | |||||
| 17 |
Better Red Point Than Dead Point
Wall just right of pine and move left above flakes to finish straight up above tree. FA: Chris & Sue Baxter, 1985 | 17 | 15m | |||||
|
On the right wall of the U-shaped gully are these two routes. | ||||||||
| 19 |
Triple Nipple
A leftwards diagonal on the right wall of the gully. FA: Tim Ball, Charlie Creese, Nyrie Dodd, Greg Pritchard & Louise Shepherd, 1985 | 18 | 10m | |||||
| 20 |
The Fat One Who Eats Meat
Overhanging crack right of 'Triple Nipple'. FA: Tim Ball, Nyrie Dodd, Greg Pritchard & Louise Shepherd, 1985 | 18 | 10m | |||||
|
On the left of the gully, facing the Pharos is a little grey nose with 2 lines up it and an adjacent wide crack with a rap anchor at top. | ||||||||
| 22 |
Outlaw Oats
Twin seams up the grey nose. FA: Doug Fife & Chris Shepherd, 1982 | 20 | 15m | |||||
| 23 |
★★ Oat Energy
An attractive line that used to be graded a very tough 17! The right-hand, shallow corner just right of Outlaw Oats. Chains on top. FA: Chris Shepherd & Doug Fife, 1982 | 19 | 15m | |||||
| 24 |
★ Triticale
The chimney to off width corner to thin crack right of OE with a flake on the left wall. Belay at abseil station. FA: David Gray & Vanessa Wills, Sep 2018 | 19 | 13m | |||||
1.15.8. Looking Glass Wall 14 routes in Cliff
- Summary:
-
All Trad climbing
Lat / Long: -36.754671, 141.841527
description
The water-streaked slab on the L up the gully behind Voodoo Buttress.
Emergency Location: Mount Arapiles, Voodoo Area
| Route | Grade | Style | Selected ascents | |||||
|---|---|---|---|---|---|---|---|---|
| 1 |
Doo Voo
Orange streak 10 metres right of 'Blockwork Orange'. Finish up crack in headwall. FA: Allan Hope & Peter Watling, 1991 | 9 | 35m | |||||
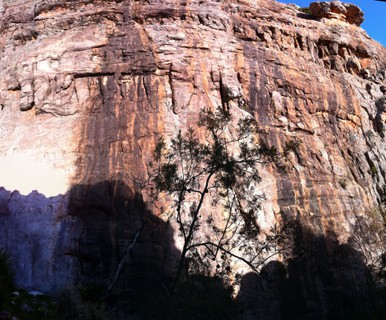 |
||||||||
| Route | Grade | Style | Selected ascents | |||||
| 2 |
Happy Balance
Brushed streak at left end of the main wall. Rock Bollard for sling or abseil Start: Start 5 metres left of Hard And Fast, about 25 metres right of 'Doo Voo'. FA: Lincoln Shepherd & Natalie Green | 21 R | 18m | |||||
| 3 |
Four Wheel Drive
Climb straight up the slab. Finish up on jugs. No Pro. Start: Start immediately R of 'Happy Balance'. FA: Patrick Alseby, 1998 | 25 X | 18m | |||||
| 4 |
Hard and Fast
Contrived and poorly protected. FA: Mike Law & Chris Baxter, 1976 | 19 R | 55m | |||||
| 5 |
★ Hand Job
The lovely water-streak 5 metres right of 'Happy Balance' has a hard, poorly protected start. FA: Chris Baxter, Mike Law & Francine Gilfedder, 1976 | 15 | 23m | |||||
| 6 |
★ Final Blow
Follow intermittent cracks on wall. Finish up lovely twin orange and black streaked rock through short roof. Goes straight to new abseil anchors at 23 m Start: Start between 'Hand Job' and Menage A Trois. FA: Darren Williams & Kylie Burford, 1995 | 20 | 55m | |||||
| 7 |
★★ Menage a Trois
Great climbing up the green crack 3 metres right of 'Hand Job'. FA: Chris Baxter, Mike Law & Mike Stone, 1976 | 16 | 23m | |||||
| 8 |
★ Blow by Blow
A bouldery, unprotected start leads to easier climbing up the centre of the next water-polished area. For added excitement, veer right through the bulge higher up. FA: Mike Law & Chris Baxter, 1976 | 16 R | 59m | |||||
| 9 |
Sore Point
Centre of next water-polished area. Bouldery start eases. FA: Mike Law (solo), 1981 | 18 | 40m | |||||
| 10 |
Rock Soff direct finish
A good way to finish Rock Soff Follow the cracks to theer end then head through the bulge where Blow by Blow head through it FA: adam demmert & @cathdv | 15 | 30m | |||||
| 11 |
Rock Soff
Climb the corner crack behind big dead tree until it eases. There are two options : either, diagonal leftwards on big holds to a nice finish and traverse off to rap anchor, or continue up corner until it ends, move right, climb short corner and step up left over bulge and continue to top (58 metres, original route) FA: Chris Baxter, Mike Law & Francine Gilfedder, 1976 | 13 | 58m | |||||
| 12 |
Grand Prix
Start 1 metre right of 'Rock Soff' and boulder up. FA: Mike Law (solo), 1981 | 19 | 30m | |||||
| 13 |
Hot Tip
Up white streak to short crack in face. Up clean rock and over wee roof. Start: Start 5 metres right of 'Rock Soff' in middle of white streak. FA: Mike Law & Mike Stone, 1976 | 15 | 50m | |||||
| 14 |
Goanna
Climb streak all the way past ledges. Start: Start about 15 metres right of 'Hot Tip' at another water streak FA: Keith Lockwood & Halvard Andersen-Dalheim, 1981 | 12 | 60m | |||||
1.15.9. Ministry Wall 13 routes in Cliff
Fixed Gear: Ministry Wall rap chain
Rap chain on tree at right end of Ministry Wall (between Ministry Wall and Vanoise Area) looks like it is getting tight on the tree. Can it be extended or replaced?

Ministry Wall - P1020104r.jpg
See warning details and discuss
- Summary:
-
All Trad climbing
description
The orange face at the R end of Looking Glass wall.
Emergency Location: Mount Arapiles, Voodoo Area
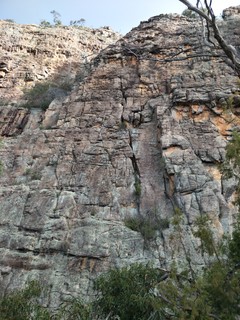 |
||||||||
| Route | Grade | Style | Selected ascents | |||||
|---|---|---|---|---|---|---|---|---|
| 1 |
DSC
"The holds just keep on appearing" Follow the obvious left-leaning diagonal rib to the arete then up. FA: Richard Gaunt, Rhys Boyar & Peter Upton, 3 Jul 2021 | 6 | 30m | |||||
| 2 |
Privacy Invasion
Takes the vegetated trench. FA: Rhys Boyar, 3 Jul 2021 | 10 | 30m | |||||
| 3 |
Come Clean
Climb corner and veer L through the small roof above. Start: Start on L side of 'Ministry Wall' at L facing steepening corner with lichen at base. FA: Jack Lewis & Michael Persin, 1995 | 12 | 45m | |||||
| 4 |
★ Come Clean Direct Finish
After the left-leaning corner, continue over the bulge and straight up. Good rock, good gear. This route assumes the original veered left below the bulge as per the description. FA: Peter Upton, Richard Gaunt & Rhys Boyar, 3 Jul 2021 | 12 | 30m | |||||
| 5 |
Lies
Up until the obvious line veers left up to the roof. Climb the roof and finish straight up. Start: Start as for 'Secret Police' FA: Chris Baxter & Dave Gairns, 1986 | 18 | 25m | |||||
| 6 |
Secret Police
The prominent recessed orange groove to an intimidating roof. Over roof and up black wall. The site of a bee hive as of 2015. FA: Mark Moorhead, Kim Carrigan & Peter Newman, 1979 | 21 | 25m | |||||
| 7 |
★ Wormwood
. FA: Peter Newman, Kim Carrigan & Mark Moorhead, 1979 | 16 | 25m | |||||
| 8 |
★ Undercover Agent
Line 6 metres right of 'Wormwood', passing through two bulges low down (finish right of top roof. FA: Craig Nottle & Mark Moorhead (carrigan led cruxy 2nd bulge on 2nd ascent), 1979 | 21 | 25m | |||||
| 9 |
★★ Big Brother
Up and over hard bulge to ledge. Follow steep flake right to large jug. Dyno up left and up face. Start: Start 3 metres right of 'Undercover Agent' FA: Kim Carrigan, Mark Moorhead & Peter Newman, 1979 | 23 | 25m | |||||
| 10 |
★★ Big Brother Direct Finish
After the dyno move R to the bolt and up through the rooflet. FA: Douglas Hockly, 2015 | 24 | 20m, 1 | |||||
| 11 |
★★ Big Brother Variant Finish
At the end of the flake head R along the tenuous diagonal and up the overhang. Just toproped. FA: Wendy Eden & Douglas Hockly, 2014 | 24 | 25m | |||||
| 12 |
★ Cornflakes
Either of two extreme starts lead to right diagonal flake. Undercling strenuously right and up to cave. Direct finish breaks straight up from diagonal overlap, finishing up and around corner and roof at top. Start: Start 3 metres right of 'Big Brother' FA: Mark Moorhead, Jon Muir. Direct finish : Paul Hoskins & Scott Camps, 1988 | 25 | 20m | |||||
| 13 |
Defector
Stepped crack 10 metres right of 'Cornflakes'. Finish up a small orange corner. FA: Mark Moorhead (solo), 1979 | 13 | 15m | |||||
1.16. The Pharos and Surrounds 465 routes in Crag
- Summary:
-
Mostly Trad climbing
Lat / Long: -36.753541, 141.840995
description
Emergency Location: Mount Arapiles, Pharos Area
1.16.1. The Pharos 153 routes in Crag
- Summary:
-
Mostly Trad climbing
Lat / Long: -36.753659, 141.841252
description
Named for the Pharos of Alexandria (the ancient lighthouse) not the Pharaohs of Egypt, this 100m high pinnacle is separated from the main face by a narrow chasm.
Emergency Location: Mount Arapiles, Pharos Area
approach
10-15 min walk N from the camp ground.
Descent is via a 50m abseil from the rap station on the SW arete, a similar length abseil down Kingdom Come from the top of Lamplighter or a scramble and some short abseils on the east-south-east side
1.16.1.1. Death Row Pinnacle 23 routes in Cliff
- Summary:
-
All Trad climbing
Lat / Long: -36.754017, 141.841984
description
The separate pinnacle on the camp ground side of the Pharos. Birdman of Alcatraz is the L leading diagonal crack.
Emergency Location: Mount Arapiles, Death Row Area
descent notes
Rap off back side from bolts on boulder above 'Bent' or scramble down.
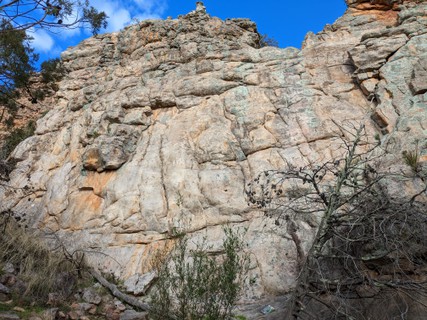 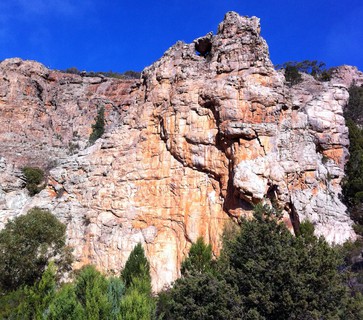 |
1.16.1.2. The Never Boulder 1 route in Boulder
- Summary:
-
All Bouldering
Lat / Long: -36.753810, 141.841603
1.16.1.3. Uncle Charlie 37 routes in Cliff
- Summary:
-
Mostly Trad climbing
Lat / Long: -36.753652, 141.841585
description
Home to some of the hardest routes at Araps, Uncle Charlie is the outcrop at the NE corner of the Pharos, close to the road and recognizable for the twin chimneys.
Emergency Location: Mount Arapiles, Pharos Area
descent notes
Most routes have rap anchors, otherwise top out and scramble (carefully) across the wedged boulder onto the Pharos.
 /75/8f/758ff4187e48ee74bfbfe04453f82710d54873c4)  /28/45/284567827fcc6e42d50ef94dcd8623fea564d341) /53/95/5395eaab6d13faaf1f9b2f41fa4e701665886ab5) |
1.16.1.4. Front Wall and West Face 40 routes in Cliff
- Summary:
-
All Trad climbing
Lat / Long: -36.753485, 141.841277
description
Emergency Location: Mount Arapiles, Pharos Area
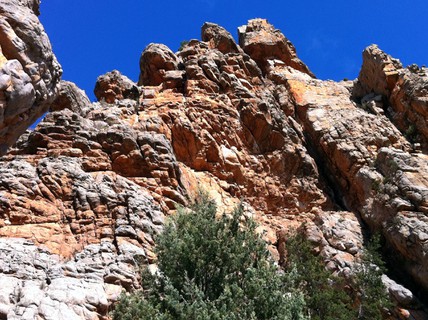 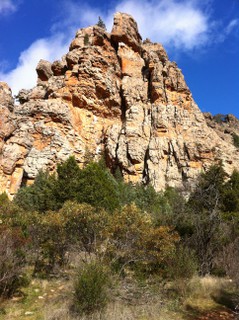 /ed/c3/edc389ec230acfe194f5fe4485f94d0934364271) 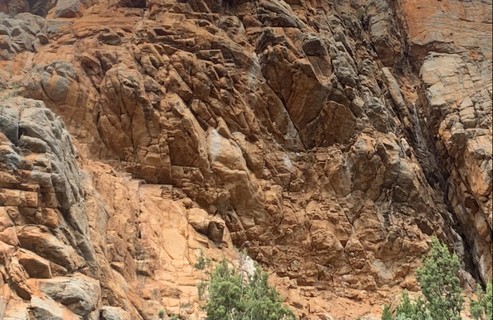 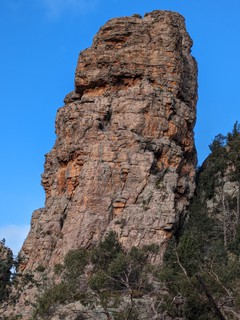 |
1.16.1.5. Back Wall 30 routes in Cliff
- Summary:
-
Mostly Trad climbing
Lat / Long: -36.753879, 141.840667
description
Emergency Location: Mount Arapiles, Pharos Area
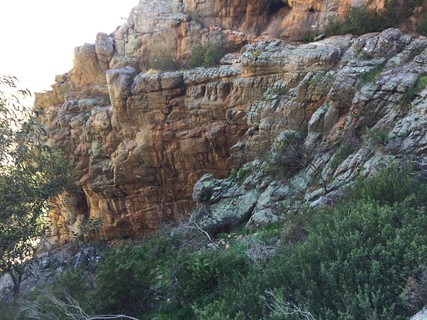 /3d/14/3d1403dda34f34bd6bb30f315fe1da93f02a2300) /3e/c5/3ec58af1b997c7d30ec18f56b2ebe15a9f4a14ff) /55/bd/55bd87d4b86cc815bbfb749dcbf581595a6b189d) /a2/0d/a20d57216b0f9691a04ee4ea57128371663453a6) /fc/57/fc573af65be5b1138905e8c40750e0b39bb87d8c) /04/05/0405d78f27561e3cf343448bb349f031ec3a0ea5) |
1.16.1.6. South Face 13 routes in Cliff
- Summary:
-
Mostly Trad climbing
Lat / Long: -36.753925, 141.841213
description
Emergency Location: Mount Arapiles, Pharos Area
/19/7f/197f314f02495e215b07ce7323f99c3592b3d6f2) 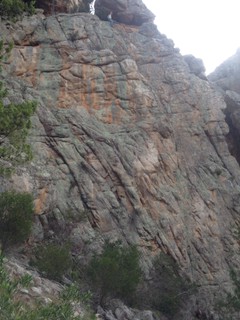 |
1.16.1.7. The French Crack Area 9 routes in Cliff
- Summary:
-
All Trad climbing
description
Emergency Location: Mount Arapiles, Pharos Area
1.16.2. Pharos Gully 169 routes in Crag
- Summary:
-
Mostly Trad climbing
Lat / Long: -36.753801, 141.838856
description
Emergency Location: Mount Arapiles, Pharos Gully Area
1.16.2.1. Vanoise Area 41 routes in Cliff
- Summary:
-
All Trad climbing
Lat / Long: -36.754106, 141.840299
description
Emergency Location: Mount Arapiles, Pharos Gully Area
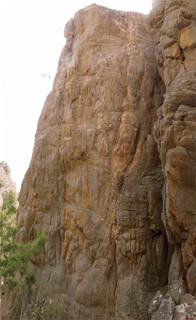  /f6/9f/f69f9621bd1e0c1f13ff25f4083fab46e57e9971) /e2/b8/e2b8507b33c9d352bced6dce0806ddf416dc1eb2)  |
1.16.2.2. Duck Crag 8 routes in Cliff
- Summary:
-
All Trad climbing
description
Short, south-facing overhung orange wall just right of the top of Agent Orange.
Emergency Location: Mount Arapiles, Pharos Gully Area
1.16.2.3. Baker's Wall 15 routes in Cliff
- Summary:
-
All Trad climbing
Lat / Long: -36.754269, 141.839449
description
The impressive-looking orange wall halfway up the left side of Pharos Gully is not as good as it looks but it's still not too bad.
Emergency Location: Mount Arapiles, Pharos Gully Area
approach
It's most easily approached from above via the disabled lookout. From beneath go left below the Voidoid Pinnacle.
 |
1.16.2.4. Heckle and Jeckle Area 24 routes in Cliff
- Summary:
-
All Trad climbing
Lat / Long: -36.754392, 141.839054
description
Emergency Location: Mount Arapiles, Pharos Gully Area
    |
1.16.2.5. Voidoid Pinnacle 9 routes in Cliff
- Summary:
-
All Trad climbing
description
Emergency Location: Mount Arapiles, Pharos Gully Area
 |
1.16.2.6. Huey and Satellites 29 routes in Cliff
- Summary:
-
All Trad climbing
description
Good short climbs on the north side of Pharos 'Gully'.
Emergency Location: Mount Arapiles, Pharos Gully Area
approach
The faces are located on the right-hand (northern) side of the creekbed in Pharos 'Gully'. Walk up the Pharos 'Gully' track until just after the 'Ethereal' buttress a pad leads off left into the creekbed. Follow the creek up until you bump into the Huey wall.
1.16.2.7. Spellbinder Area 17 routes in Cliff
- Summary:
-
Mostly Trad climbing
Lat / Long: -36.753292, 141.838412
description
Emergency Location: Mount Arapiles, Pharos Gully Area.
The routes from 'Young, Old and Amputees' to 'Is It About A Bicycle?' are accessed via a scramble on a boulder, from the track. This area from the ledge is called Angel Buttress.
/13/f1/13f1933f8bcee955640310e8817c4719f9fa4f8f)  |
1.16.2.8. Cheops Buttress 15 routes in Cliff
- Summary:
-
All Trad climbing
Lat / Long: -36.753199, 141.839177
description
Emergency Location: Mount Arapiles, Pharos Gully Area
/d8/56/d856e0154dfbc69802c671e2367d2fba7700b032) |
1.16.2.9. Ethereal Buttress 9 routes in Cliff
- Summary:
-
All Trad climbing
Lat / Long: -36.753311, 141.839385
description
Emergency Location: Mount Arapiles, Pharos Gully Area
/d8/73/d873c18570f6dad33b58c6358d2d42be2825fff7)   |
1.16.2.10. Pharos Gully Bouldering 2 routes in Boulder
- Summary:
-
All Bouldering
Lat / Long: -36.752937, 141.839140
description
Emergency Location: Mount Arapiles, Pharos Gully Area
1.16.3. Yesterday Gully 106 routes in Crag
- Summary:
-
All Trad climbing
Lat / Long: -36.752889, 141.838912
description
Emergency Location: Mount Arapiles, Pharos Gully Area
1.16.3.1. Lower Gully 54 routes in Cliff
- Summary:
-
Lat / Long: -36.752987, 141.839218
description
Emergency Location: Mount Arapiles, Pharos Gully Area
       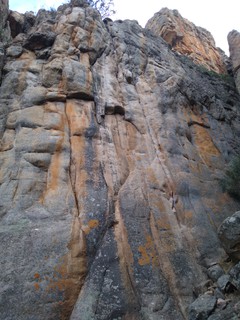 |
1.16.3.2. Upper Gully 52 routes in Cliff
- Summary:
-
Lat / Long: -36.752767, 141.838547
description
A wonderful area that hosts some classic routes.
Emergency Location: Mount Arapiles, Upper Yesterday Gully Area
approach
Yesterday 'Gully' is blocked by a chockstone forming a rock-step just past "Milk Blood". This area covers all of the climbs above this step. Scrambling up and down past this isn't too hard but is awkward with a pack, especially in descent.
Many of the routes can also be approached from above, which can be convenient if you drive to the top, but familiarity with the area is required as this would be almost impossible to describe. If you want to abseil into 'Yesterday', there is a pair of rings at the top of the cliff from which you can go down (and slightly left) about 8m to find the anchors of that route.
/49/5e/495ec1075a627bcf0854b7440aa0372bb23cf1f2)  /f0/1c/f01cf573089b7c23d01fde4c5017079acfb1b321) 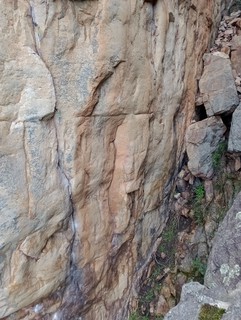 |
1.16.4. Pharos Boulders 37 routes in Crag
- Summary:
-
Mostly Bouldering
Lat / Long: -36.753213, 141.842403
description
Emergency Location: Mount Arapiles, Superman / Around the World Boulders
access issues
Reason for closure, Numerous important cultural heritage sites are evidence of the significance of Dyurrite for Wotjobaluk Peoples and the use of the area for thousands of years.
1.16.4.1. Superman Boulder 7 routes in Boulder
- Summary:
-
All Bouldering
Lat / Long: -36.753129, 141.842835
description
Emergency Location: Mount Arapiles, Superman / Around the World Boulders
1.16.4.2. Around the World Boulder 9 routes in Boulder
- Summary:
-
Mostly Bouldering
Lat / Long: -36.753179, 141.842453
description
Emergency Location: Mount Arapiles, Superman / Around the World Boulders
1.16.4.3. Monkey Puzzle Boulder 13 routes in Boulder
- Summary:
-
Mostly Bouldering
Lat / Long: -36.753121, 141.842308
description
Emergency Location: Mount Arapiles, Superman / Around the World Boulders
1.16.4.4. Finalgon Boulder 6 routes in Boulder
- Summary:
-
All Bouldering
Lat / Long: -36.753441, 141.842380
description
Emergency Location: Mount Arapiles, Superman / Around the World Boulders
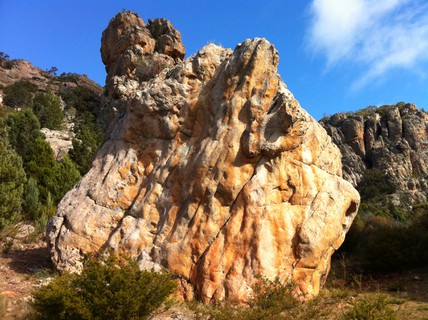 |
1.16.4.5. Uphill from Finalgon 2 routes in Boulder
- Summary:
-
All Bouldering
description
Emergency Location: Mount Arapiles, Superman / Around the World Boulders
1.17. The Watchtower Faces 259 routes in Crag
- Summary:
-
Mostly Trad climbing
Lat / Long: -36.751464, 141.837756
description
One of the most impressive sheer walls at the mountain. Contains many three star multi-pitch classics - some of the best routes Arapiles has to offer.
Emergency Location: Mount Arapiles, The Watchtower Faces Area
approach
The very obvious face about 1km from the campsite heading west.
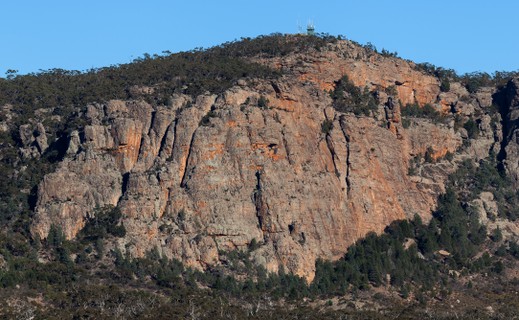 |
1.17.1. Pinnacle Face 51 routes in Crag
- Summary:
-
Mostly Trad climbing
Lat / Long: -36.752372, 141.839151
description
Emergency Location: Mount Arapiles, Pinnacle Face / Tip Toe Ridge Area
1.17.1.1. Wedding Tackle Area 14 routes in Cliff
- Summary:
-
All Trad climbing
description
Emergency Location: Mount Arapiles, Pinnacle Face / Tip Toe Ridge Area
1.17.1.2. Tiptoe Ridge Area 11 routes in Cliff
- Summary:
-
Mostly Trad climbing
description
Emergency Location: Mount Arapiles, Pinnacle Face / Tip Toe Ridge Area
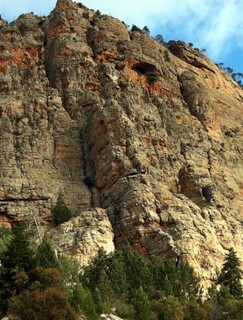 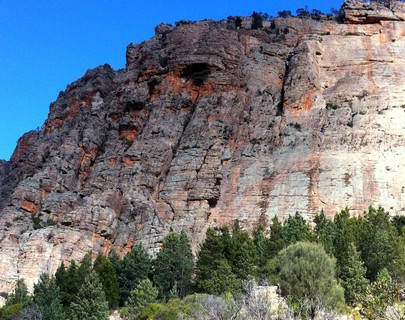 |
1.17.1.3. Area Below Tiptoe Ridge 19 routes in Cliff
- Summary:
-
All Trad climbing
description
Emergency Location: Mount Arapiles, Pinnacle Face / Tip Toe Ridge Area
|
|
1.17.1.4. Siren Area 7 routes in Cliff
- Summary:
-
All Trad climbing
description
Emergency Location: Mount Arapiles, Pinnacle Face / Tip Toe Ridge Area
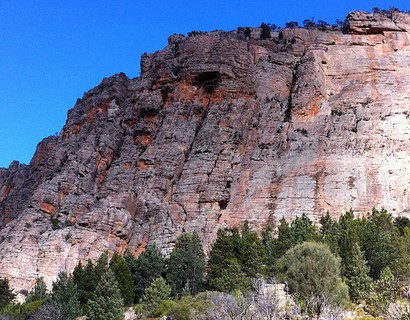 |
1.17.2. Left Watchtower Face 40 routes in Cliff
- Summary:
-
All Trad climbing
Lat / Long: -36.752078, 141.838284
description
Emergency Location: Mount Arapiles, The Watchtower Faces Area
descent notes
There is a abseil line (for now) over Siren, Argonauts and Hot Flap.
The first abseil is quite long, I only just made it on 50m ropes with stretch. Knot the ends. There is a plethora of stuff for the ropes to get hung up on so it's probably best to have the knot on the RIGHT side of anchor (facing in towards the cliff) so you are pulling out away from the corner system of Siren.
Second abseil is down and a long way LEFT (facing in towards the cliff) to the 2nd belay of Hot Flap. It may be possible to get directly to the ground on 60m ropes, but I haven't tried. 50m ropes do not reach.
Third abseil is straightforward.
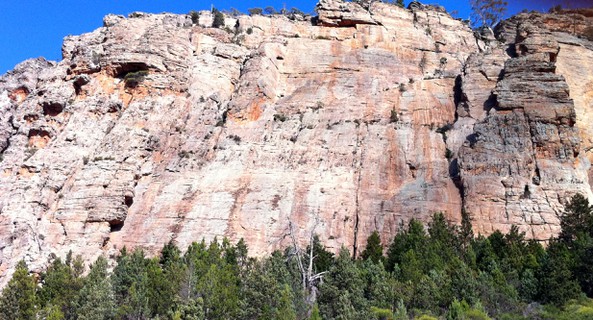 |
||||||||
| Route | Grade | Style | Selected ascents | |||||
|---|---|---|---|---|---|---|---|---|
| 1 |
Rotten Row
Not really a climb, just an escape route. The diagonal ramp leading right from the base of the 'Siren' corner. FA: Steve Craddock & Bob Craddock, 1963 | 5 | 60m | |||||
| 2 |
★ Argonauts
Nice pitch high on the face. FA: Steve Williams & Keith Lockwood, 1986 | 19 | 40m | |||||
| 3 |
Roll Dem Bones
Good 2nd pitch with bold and committing crux well out from gear. (A couple of grades have been added to allow for this.) 'Hot Flap Direct Start' might be a better start than the current first pitch. Take doubles of all cams to #2 1/2 and three #2 TCUs or equivalent. Start as for 'Hot Flap', below the flake marking the left edge of the 'Left Watchtower Face'.
FA: Kieran Loughran, Meg Sleeman & Keith Lockwood, 1997 | 18 R | 100m, 4 | |||||
| 4 |
★★ Hot Flap
Protection is generally reasonable but pitch 2 is sparsely protected. Start below the right-leaning flake that leads into the chimney marking the left edge of the 'Left Watchtower Face'.
FA: John Fahey & Bob Bull, 1965 | 14 R | 170m, 5, 3 | |||||
| 5 |
Tauraroa Direct Start
A logical but not very appealing start. FA: Chris Baxter & Mike Stone, 1978 | 17 | 25m | |||||
| 6 |
★★ Hot Flap Direct Start
This obvious start to 'Hot Flap' is well protected at the hardest point but then has a long runout on mossy rock. Still worth a star though. FA: Phillip Stranger & Rob Taylor, 1967 | 16 R | 50m | |||||
| 7 |
Between the Lines
An interesting exploration that is superseded by other climbs. FA: Ed Neve & Nick Reeves, 1978 | 16 R | 53m | |||||
| 8 |
Sang Froid
Marginal protection on first pitch. Both this pitch and the its next-door neighbour 'Puppet' On A String are very good pitches but possibly the most serious of their grades at 'Arapiles'. Still not sure if they deserve the skull-and-crossbones (have taken them off this climb) but they are very serious. Peter Watling accidentally climbed this pitch in the 70's thinking it was 'Hot Flap' Direct Start!
FA: Malcolm Matheson & Keith Lockwood, 1983 | 18 R | 130m, 4 | |||||
| 9 |
Puppet on a String
Another pitch in a similar vein to 'Sang Froid', possibly the scarier of the two. 'Argonauts' makes a good finish. FA: Dennis Kemp, Stephen Hamilton & Dave Mudie, 1987 | 18 X | 50m | |||||
| 10 |
★★ Creon - Tales of Brave Ulysses
| 18 | 110m, 3 | |||||
| 11 |
★★ Creon
A good climb all of the way. Finishing up Tales Of Brave Ulysses makes it even better. Start on a platform below a seam about 30 metres right of the left edge of the face and 20 metres left of a deep line (Driftwood).
FA: Hugh Foxcroft, Peter Watling & Nick Reeves (alt), 1979 | 17 | 95m, 2 | |||||
| 12 |
★★ New Route (name coming soon))
Start as for C/OR but continue straight up mossy wall where they go left and right. We continued straight up and then through Hot Flap. Could do with a clean up. FA: Gareth Llewellin & Rob Saunders, 2012 | 60m | ||||||
| 13 |
★★ Oedipus Rex
Good long climb but the middle section is nothing special. Start on a platform below a seam about 30 metres right of the left edge of the face and 20 metres left of a deep line (Driftwood).
FA: Peter McKeand, Gordon Talbett & Clive Parker, 1968 | 17 R | 150m, 4 | |||||
| 14 |
★ Oedipal Wrecks
Not a bad start. Reasonable, if fiddly gear. FA: Kieran Loughran, Norm Booth & Ray Lassman, 1994 | 20 | 30m | |||||
| 15 |
★ Home of the Brave
Good climbing with only a short section of nondescript ground at the start of the second pitch. There are some dangerous detached blocks/flakes on both first and final pitches and the final pitch is quite has some committing runouts. Tiny cams are essential on the last pitch. Start: Start at the deep chimney line (Driftwood) that is the major feature of the 'Left Watchtower Face'.
FA: Kieran Loughran, Felicity Rousseaux & Meg Sleeman, 1989 | 16 R | 140m, 4 | |||||
| 16 |
★★ Driftwood
A strange, unbalanced climb. Few people will do the climb as a whole, using the initial chimney as the start of another climb or doing the final, evil chimney after starting up something else. Start: Start at the deep chimney line that is the major feature of the 'Left Watchtower Face'.
FA: Ian Speedie, Mike Stone & Garry Kerkin. FA: Peter Jackson & John Fahey climbed pitch 3 in earlyby traversing in from Siren., 1964 | 18 | 120m, 2 | |||||
| 17 |
★★ Driftwood/Antigone
FA: Speedie, Stone, Kerkin / Caffin & Wilcox | 14 | 120m, 3 | |||||
| 18 |
★★ Antigone
A very nice climb at the grade. Start: Start at the deep chimney line (Driftwood) that is the major feature of the 'Left Watchtower Face'.
FA: Roger Caffin & Sue Wilcox, 1966 | 15 | 120m, 3 | |||||
| 19 |
★★ Sundance
Very enjoyable. The fourth pitch is runout but can be avoided.
FA: Keith Bell & Keith Lockwood, 1976 | 15 | 140m, 4 | |||||
| 20 |
★★ Sunset Strait
Start as for 'Wall of the Afternoon Sun'. Where 'Wall of the Afternoon Sun' traverses right, continue straight up. Belay on ledge between 'Antigone' and 'Sundance'. Either rappel from bolt anchors or continue up one of the other climbs off this ledge. FA: Stuart Hollaway & Dale Thistlethwaite, 2012 | 20 | 60m, 1 | |||||
| 21 |
★ Afternoon Delight
The best way to start Sunset Strait and a worthy pitch in its own right. Starts as for Wall of the Afternoon Sun. Up the easy stuff, then step up and R on to the red streak. Past the bolt and up to stand on the big holds. Move up L to the bolt on Wall of the Afternoon Sun (if joining Sunset Strait) or disregard moving up L to the bolt and instead step up and R to eventually join the last section of the first pitch of Wall of the Afternoon Sun. After its second bolt move across R and up to the ring anchors above Red Sky at Night. FA: Glenn Tempest & Karen Tempest, Jun 2018 | 19 | 35m, 2 | |||||
| 22 |
★★ Wall of the Afternoon Sun
A neat route featuring a classy and thought-provoking first pitch. Start: Start just right of the chimney splitting this face (sundance).
FFA: Peter McKeand FA: Keith Lockwood & Norm Booth, 1969 | 19 R | 140m, 4 | |||||
| 23 |
★★ Red Sky At Night
FA: Glenn Tempest & Karen Tempest, Sep 2015 FFA: Sep 2015 | 20 | 30m, 2 | |||||
| 24 |
★ If You're Lucky
Up short seam 5 metres right of Wall Of The Afternoon Sun. Hard moves lead past a peg runner (if it's still there). Traverse left 2 metres and over bulge to flake. Up then left to first belay of WOTAS. Start: Not a bad line but doesn't see much traffic. FA: Chris Shepherd & Cathy Blamey.., 1982 | 23 | 40m | |||||
| 25 |
★ The Burning Fields
FFA: Glenn Tempest & Karen Tempest, Sep 2015 | 19 | 33m, 2 | |||||
| 26 |
★★★ Take Five
Great climbing up the clean streak starting 15 metres left of 'Watchtower Chimney'.
FA: Robin Miller (solo).., 1982 | 20 R | 130m, 3 | |||||
| 27 |
Tschumpel
Botanical line behind large dead tree at right end of 'Rotten Row'. FA: Bruno Zeller & Anne McKenzie, 1969 | 5 | 42m | |||||
| 28 |
Senile
Crack 5 metres right of 'Tschumpel', 1 metre left of 'Bindi'. FA: Bruno Zeller & Anne McKenzie, 1969 | 7 | 40m | |||||
| 29 |
Bindi
Chimney line 6 metres right of 'Tschumpel' FA: Chris Baxter & Derek Lord, 1967 | 5 | 25m | |||||
| 30 |
Pantouflage
Good finish but the crack is awful. Start: At the end of the first pitch of 'Watchtower Chimney'. FA: Keith Lockwood & Jim Bright, 1973 | 15 | 96m | |||||
| 31 |
The Last Kind of Hunger
Thoughtful and aesthetic climbing with good protection on brilliant rock. Harder and perhaps a bit more committing than 'Take Five' but without the runout at the start (although you want to concentrate for the start of pitch 3). The line is obvious in the photo on p273 of the current Tempest/Mentz guide. Start up 'Watchtower Chimney Direct Start', the bottomless crack 3m R of Take Five.
Follow 'Rotten Row', continue up the wall above or rappel from the rings about 8m R of the corner. There is a single U-bolt overhead at the base of the 'Driftwood' chimney; a 60m abseil from this reaches the ground. Description taken from Stuart's post on Chockstone FA: Stuart Hollaway, Peter Arch & Alice Arch, 2012 | 21 | 90m, 3 | |||||
| 32 |
★★ Watchtower Chimney Direct Start / The Watchtower Chimney DS
Originally named "Pantouflage Direct Start", with the directions to continue up Watchtower Chimney. From this you can deduce hat we thought of one climb and which guidebook editor lacked a sense of humour. Crack 3 metres right of 'Take Five' and 6 metres left of 'Watchtower Chimney'. When it fades continue boldly up to join 'Watchtower Chimney'. FA: Neil Barr & Peter Watling.., 1980 | 20 R | 15m | |||||
 |
||||||||
| Route | Grade | Style | Selected ascents | |||||
| 33 |
★★ Watchtower Chimney
Warning Rock: Rock Fall Pitch 3 A climb which gets the heart going no matter if you're on lead or seconding, with the first pitch, by itself, being a great line! Start: There are two deep cracks at the base of the Watchtower. Start at the left-hand crack.
FA: Michael Stone, Ian Speedie & Garry Kerkin, 1965 | 12 | 110m, 4, 1 | |||||
| 34 |
★★ Chicken Express
The express route to Mr. Chicken!
Set: Ewa Siedlecka, Jacob Bridgeman & Josemalene Ruaya, 28 Sep 2016 FFA: Ewa Siedlecka, Jacob Bridgeman & Josemalene Ruaya, 28 Sep 2016 FA: Ewa Siedlecka, Jacob Bridgeman & Josemalene Ruaya, 28 Sep 2016 | 10 | 75m, 3 | |||||
| 35 |
★ Radio Days
An excellent test-piece pitch and a very bold onsight lead by Maureen back in the day. The grey seam on the slabby wall immediately L of Watchtower Chimney is gained via the concave slab and wall just L of the bulging nose. Awkward and unprotected moves gain the nose, then the seam is climbed until it runs out. Take a deep breath and keep going boldly up the slab to the traverse on Watchtower Chimney. At the ancient carrot bolt, continue straight up the enjoyable crack to a narrow ledge. The original route moved L and finished up the easy arete but it is much more enjoyable to climb the unlikely wall directly above to the lower-off (35m) anchors. There is a 50m wandering finish that no one does. David Gallagher and Sue Baxter seconded the second half of the described pitch as they originally split the pitch at the carrot bolt. Glenn Tempest added the independent start and straightened the pitch near the top in July 2018. FA: Maureen Gallagher, Chris Baxter (alt) & David Gallagher, 1987 | 20 | 35m, 1 | |||||
| 36 |
★ Watchtower Days
An enjoyable combination pitch (Watchtower Chimney and Radio Days) which has already become quite popular. Climb Watchtower Chimney's initial crack to the traverse. Move 2m L to the ancient carrot bolt. Straight up the crack above (Radio Days) to a narrow ledge. Directly up the wall above (avoiding the easier climbing up the arete on the L) to the big ledge and lower-off / rappel anchors. | 18 | 35m, 1 | |||||
| 37 |
Shingleback
A good pitch which essentially straightens out the first pitch of Tiliqua. Up Watchtower Chimney to the traverse. Step L one metre and climb the crack and balancy smooth wall above. After all the drama, step up L on the undercling and pull the final bulge to the ledge and lower-off anchors (35m). FA: Glenn Tempest, Karen Tempest & Geoff Little, Jul 2018 | 22 | 35m | |||||
| 38 |
★ Tiliqua
The first pitch meanders a bit but it does offer some very pleasant climbing. It ends at the shared lower-off / rappel anchors of Shingleback . Originally climbed with further juggy pitches to the top of the Watchtower but they’re probably not worth the wander. Climb the seam immediately R of the start of Watchtower Chimney, which it joins near to its traverse. At the traverse, step 1m L and climb the lovely crack above (same as for Shingleback). After 4m leave the crack and traverse R across and up the wall to to gain an orange L-facing corner. Up this and move over L to the belay / rappel anchors on the ledge. Or... start up Watchtower Chimney and on the traverse left, go up the seam over bulge, and lower off at 30m. FA: Tim Lockwood & Keith Lockwood, 2009 | 19 | 43m | |||||
| 39 |
★ Man Overboard
Start: At foot of Chimney on 'Watchtower Chimney'.
FA: Keith Lockwood & Steve Williams, 1985 | 18 | 55m, 2 | |||||
| 40 |
★★ colonal's eleven
No idea where this is supposed to be | 15 | 30m | |||||
1.17.3. The Watchtower 11 routes in Cliff
- Summary:
-
Mostly Trad climbing
Lat / Long: -36.751890, 141.837614
description
Emergency Location: Mount Arapiles, The Watchtower Faces Area
 |
||||||||
| Route | Grade | Style | Selected ascents | |||||
|---|---|---|---|---|---|---|---|---|
| 1 |
Business as Usual
One move wonder, but not a bad way to fill time if you're queueing for Arachnus (lower off a trad anchor after 25m then retrieve it on your way up Arachnus). May be easier for tall people. Start as for Arachnus, but take thin, left-leaning crack over crux bulge. FA: Chris Baxter & Andrew Bowman, 1972 | 18 | 110m | |||||
| 2 |
★★★ Mr Chicken
Slither like a ferret behind the giant Watchtower flake, starting from Watchtower Crack (top pitch start) and ending up in the Watchtower Chimney. Getting properly stuck in this is a very serious situation. As it says in "Life On A Line" : "We die if we stand still for too long." Don't go alone. FA: Davey Jones, 1996 | -- | 20m | |||||
| 3 |
★★★ Arachnus Chimeny Chimney
Not a new route; just one of many existing variants to Arachnus. See FA notes for details. FA: | 10 | 99m, 4 | |||||
| 4 |
★★★ Arachnus
A truly great climb up the middle of the Watchtower. Many variants are possible, especially in the middle section; yes they have already been climbed. Start up the right-hand of the two deep cracks at the base of The Watchtower. This is just left of the undercut section (Pumping), and 9m R of Watchtower Chimney.
FA: Ian Speedie & Rob McQuilkin, 1964 | 9 | 110m, 4 | |||||
| 5 |
★★★ Arachnus Variant (Minerva) / Minerva
A very popular variant on Arachnus, but more serious because of the poorly protected section on pitch three.
FA: Ivan Dainis & Gwenn Ward, 1965 | 9 R | 110m, 4 | |||||
| 6 |
★★ A Rack of Phobias
The right arete of Arachnus. Quite fun and there are numerous possible variations. | 12 | 110m, 4 | |||||
  |
||||||||
| Route | Grade | Style | Selected ascents | |||||
| 7 |
Unknown
The tough-looking bulge just left of Pumping, to lower-offs. Name TBC. FA: Ingvar Lidman | 28/29 | 12m, 5 | |||||
| 8 |
★ Pumping
The thin undercut seam above the cave left of the start of Watchtower Crack gets a star despite the fiddly gear to start and the pathetic rap sling. The very bold second pitch is rarely done and is written up separately (Pumping Part II), in the Right Watchtower Face section. FA: Kim Carrigan & Mark Moorhead, 1979 | 25 | 12m | |||||
| 9 |
★ Golden Handshake
Climbs the wall immediately R of Pumping. Two cruxy sections. The first few metres as for Watchtower Crack. Then step up and across onto the left wall to the obvious 'letterbox' slot (cam), tricky past bolt then up easy diagonal crack for a couple of body-lengths. Step L and finish directly up grey face past another bolt to a small ledge near the arete. Double rings. FA: Glenn Tempest & Kevin Lindorff, Aug 2023 | 23 | 2 | |||||
| 10 |
Stumpy Tail
Ascends the appealing 8m-wide wall which is left of Watchtower Crack and at right angles to the main slabs. P2&3 are both good. If you want a tougher outing, and/or a line which stays entirely on this slim face, start up Pumping and finish up Xenomorph for pitches of 24, 20, 23 and 26. The recent addition of Golden Handshake offers an even more consistent way to start, by continuing past the anchor of that route up the thin diagonal crack just R of the arete, to join Stumpy Tail part way up pitch 2.
FA: Will Monks & Kevin Lindorff, 2005 | 23 | 110m, 4 | |||||
| 11 |
★ Xenomorph
Might be a tad undergraded... Start at the 3rd belay of Watchtower Crack then take the steep bulge 3m L of p4 of WC. Approach up any one of Watchtower Crack, Stumpy Tail or Arachnus, or rap in from the top. FA: Ingvar Lidman | 26 | 30m, 3 | |||||
1.17.4. Right Watchtower Face 34 routes in Cliff
- Summary:
-
All Trad climbing
Lat / Long: -36.751653, 141.836714
description
The best rock in this area - and indeed on the mountain.
Emergency Location: Mount Arapiles, The Watchtower Faces Area
approach
The big streaked and polished face, right of the Watchtower.
  |
||||||||
| Route | Grade | Style | Selected ascents | |||||
|---|---|---|---|---|---|---|---|---|
| 1 |
★ Flamingo
Start up the Watchtower Crack and then take a crack that leads up left to join original finish of Pumping Part 1, a sweeping crack that leads to the large ledge at the first belay of Watchtower Crack. FA: Hugh Foxcroft, Peter Newman & Nick Reeves., 1978 | 16 | 25m | |||||
| 2 |
★★★ Watchtower Crack
Fantastic climb. Much of this climb remains in the shade until mid-afternoon so it can be feasible on a hot day. Running the first two pitches together can keep the belay in the shade until the top. Despite the daunting appearance a mega-rack isn't required, but make sure you have a couple of bolt hangers and a #4 cam.
FA: John Fahey, Peter Jackson, Ted Batty & Bob Bull, 1966 | 16 | 95m, 4, 3 | |||||
| 3 |
Watches
An obvious link pitch but it doesn't justify the voyage required to do it. Climb Watchtower Crack until level with the Skink traverse, then climb towards the arete and finish up Arachnus. FA: Glenn Tempest & Mark Morhead, 1980 | 18 | 25m | |||||
| 4 |
★★★ Skink
A technical, exhilarating route. A great contrast to its companion climb. The majority of the route remains in the shade until late morning. Start as for Watchtower Crack.
FA: Chris Dewhirst & John Moore, 1966 | 18 | 110m, 3 | |||||
| 5 |
Sidewinder
If anyone suggests doing this climb, make sure they second the dangerous abseil section. If anyone is even considering extending the climb by girdling the left Watchtower face and linking the two, could you please shoot yourself beforehand and save the rest of us the bother. FA: Chris Baxter & Chris Dewhirst, 1967 | 15 X | 180m, 3 | |||||
| 6 |
★ Pumping Part II
The intimidating second pitch is a long, absorbing lead. A much better and more logical version of the old Mark Moorhead route of the same name. Sections of the two original pitches have been combined, the useless remnants of the copper bashie on the crux have been replaced with a bolt and a new first pitch added. Best to use a 70m+ rope. Starts as for Watchtower Crack.
Mark Moorhead climbed the crux section of the second pitch (having come in from Watchtower Crack) before traversing back into Watchtower Crack by reversing the Skink traverse (1979). He returned in 1980 to traverse back out along the Skink traverse and then up across the wall to join Gollum. First climbed as described Glenn Tempest, Karen Tempest. FA: Pitch 1: Mark Moorhead & Kim Carrigan. Pitch 2, 1979 FA: Mark Moorhead & many more., 1980 FA: Glenn Tempest & Karen Tempest, Aug 2023 | 22 | 95m, 2, 1 | |||||
| 7 |
★★ Gollum
Two interesting pitches that used to be thought very bold. But times change. Apparently gear can be found on the first pitch and Keith Egerton proved that even hexentrics in the horizontal breaks on the second pitch were adequate for 10 metre falls. The second pitch has cleaned up enormously over the years. Usually started by climbing The Confession as the first pitch. Belay on the ring-bolts at the top of pitch 1 of Auto Da Fe.
FA: Pitch 1 (Skink Connection) : Peter, Kevin Lindorff. Pitch 2 : Andrew Thomson & Mike Stone, 1976 | 20 R | 60m, 2 | |||||
| 8 |
★★ Salamander
Slabs and awkward cracks provide a good outing. Start as for Watchtower Crack.
FA: John Fahey, Peter Jackson & Bob Bull, 1964 | 14 | 120m, 5 | |||||
| 9 |
★ Smeagol
Great climbing all the way. One of the best and most varied climbs of its grade on the Watchtower Faces. Individual pitch grades were not supplied - the overall grade is 15 but some pitches may be easier. Start as for The Confession.
FA: Tim Lockwood, Keith Lockwood. (alts) This climb has been about 30 years in the making & although the above party were first to do it in its entirety., 2004 | 15 | 110m, 3 | |||||
| 10 |
★★ The Confession
Very good pitch. Make sure to take some tiny wires for the crux move. Start 10 metres right of Watchtower Crack at a little block. Note: this route is marked incorrectly in Simey and Glenn's '99 guide. It goes up the curvaceous white streak at 2/3 height, slightly right of where it is marked on page 230. FA: Ed Neve & Keith Lockwood, 1975 | 16 R | 45m | |||||
| 11 |
★ Skink Connection
Normally done as part of Gollum and is described as the first pitch of that climb. | 18 | 25m | |||||
| 12 |
No Road Between
Generally moderate slab climbing with good but spaced gear leading to trickier terrain up the final streak providing an alternative first pitch for Gollum. Double ropes and a big rack help to arrange protection. Climb midway between The Confession and Auto de Fe, mostly 1.5 – 2m left of Auto de Fe. At about 2/3 height cross the small diagonal overlap and follow the brown streak with 2 parallel white stripes (clearly seen in the topo on p278 of Metz/Tempest guide) to the ledge. This climb description was derived from a Chockstone post by Stuart. FA: Stuart Holloway & Lachie Currie, 2005 | 21 | 40m | |||||
| 13 |
★★★ Auto Da Fe
A fantastic climb with three fantastic pitches of very different styles. Start at a hard move to large dish, avoidable.
FA: Robin Miller & Kim Karrigan, 1982 | 21 R | 90m, 3 | |||||
| 14 |
★ Perentie
The companion route to Auto Da Fe. The first pitch is contrived but the climbing is enjoyable and quite well protected on its head-wall crux. The second pitch is the technical crux and although it is bolt-protected (and therefore far less serious than Auto Da Fe) it is still an intimidating lead. A single rope can be used but bring plenty of slings. Small tri-cams, RPs and a good range of small- and micro-cams are indispensable. Starts four metres R of the jump start on Auto Da Fe at the base of the grey concave wall (at the very bottom of the rap line down the wall on the rough stone pavement).
This route has a complex history. The crux section past the bolt on the second pitch was climbed in June 1996 by Tim Day and Wade Stevens (and named Perentie). The upper head-wall on the first pitch is probably Auto Da Fear by Muki Woods. Significant sections of both pitches have been climbed by others in the past. The route was brushed, added to, straightened, rebolted and climbed in its current form by Glenn and Karen Tempest in winter 2018. FA: Glenn Tempest & Karen Tempest, Jul 2018 | 22 | 85m, 2, 1 | |||||
| 15 |
Auto de Fear
Chop route, no gear, 23 slabbing with an X rating. FA: muki Woods | 22 X | 40m | |||||
| 16 |
★★ Fly Lichen Eagle
The superb second pitch has only one drawback, the possibility of being knocked off by an abseil rope from above. This was an extremely bold, mossy lead before the abseil route went in. Nowadays most leaders keep waiting for the scary runout bit and discover that the gear is fine. Start midway between Auto Da Fe and Gecko below the abseil line.
FA: Chris Baxter, Hugh Foxcroft & Peter Megens, 1983 | 20 | 90m, 2 | |||||
| 17 |
★ Gecko
A nice pitch that can be done as a direct start to Salamander or as a climb in its own right. FA: Chris Dewhirst, Chris Baxter & John Moore, 1965 | 14 | 48m | |||||
| 18 |
★★ Gecko / Salamander Link
As for Gecko (14) to the rap chains then follow Salamander to the top. | 14 | 100m, 3 | |||||
| 19 |
★ Monitor
Starts midway between Gecko and Brolga. Originally finished up Salamander (as described) but stepping left into Smeagol provides a more consistent grade.
FA: Keith Lockwood & Paul Daniels, 1982 | 15 | 110m, 3 | |||||
| 20 |
★★ Waiwera (Brolga DF)
The original finish of Brolga and the best way to finish the climb, if the rap route is not in use. Probably grade 18 if the final bulge to the rap anchor is taken direct or about 14 if taken further left. At end of Brolga P2, up and left to join Fly lichen Eagle. FA: D.Smith, 1994 | 18 | 20m | |||||
| 21 |
★★★ Brolga
Fantastic slab climbing up immaculate rock. With modern gear it is not nearly the scare fest it used to be. Start at the gorgeous water streak up the middle of the face that commences off the slight ledge just above the path.
FA: Keith Lockwood & Andrew Bowman, 1975 | 16 R | 90m, 3 | |||||
| 22 |
★ Thank Heavens for the Tasman
Plugs the gap between Brolga and The Mantle; a void not improved by the filling. Start 3 metres right of Brolga.
FA: Chris & Sue Baxter, 1983 | 16 | 95m, 3 | |||||
| 23 |
★★ Mantle
More great slabbing. Start 8 metres right of Brolga, directly below a thin crack that doesn't quite reach the ground.
FA: Chris Dewhirst & John Moore, 1965 FA: Chris Dewhirst & John Moore, 1965 | 14 | 90m, 3 | |||||
| 24 |
★ Lounge Lizard
The first of a couple of nondescript routes up the vast moss gardens of the right Watchtower. Start 5 metres right of The Mantle at a clean seam.
FA: Kieth Lockwood, Geoff Gledhill & Barry Edwards, 1981 | 14 | 95m, 3 | |||||
| 25 |
★ Blue Tongue
Another mossy filler. Start 8 metres right of Lounge Lizard on cleanish rock.
FA: Peter Kraehenbuhl & Darren Crawford, 1990 | 14 | 85m, 3 | |||||
| 26 |
Chameleon
Another just OK route wandering its way up the moss. Superseded by Chameleon Connection. FA: Norm Booth & Keith Lockwood, 1983 | 14 | 90m | |||||
| 27 |
★ Chameleon Connection
This route combines the best bits of Chameleon and Joyride as well as improving the first pitch of Chameleon. Start 25 metres right of Brolga at a short seam through a bulge, a few metres left of the bolted bulge of Omaha Beach.
FA: See Chameleon & Joyride, 2000 | 14 | 110m, 4 | |||||
| 28 |
★ Joyride
Another climb superseded by Chameleon Connection. FA: Peter Watling, Keith Lockwood & Kathy Burman (alt), 1975 | 13 | 100m | |||||
| 29 |
★★ Omaha Beach
Another clean streak that is proving popular. Start 10m left of Panzer.
FA: Yosef Murphy & Shaun Kratzer | 18 | 80m, 3, 1 | |||||
| 30 |
★ Chockstone staircase
A fun pitch that tackles the left side of the Panzer pinnacle/turret. A nice finishing pitch to Omaha Beach. From the belay after the second pitch of Panzer climb directly up into overhanging corner. Mantle up to reach a second overhang protected by a steep vertical crack. Careful of the loose rock at the top. Belay on top of the pinnacle. FA: Kane Hendy & Geordie Webb, 31 Mar 2016 | 17 | 28m | |||||
| 31 |
★★ Panzer
Start directly below the turret perching high above the right end of the face, just in front of a large boulder.
FA: Bruce Hocking & Mike Stone, 1965 | 12 | 95m, 3 | |||||
| 32 |
★ Battle Of The Bulge
Good climbing. Crux bulge is protected by a bolt. Originally graded 16. FA: Yosef Murphy & John Fischer, 2007 | 19 | 30m, 1 | |||||
| 33 |
Kampfwagon
Start on the terrace of Panzer's first belay, 4 metres right of the Panzer corner. FA: Darren Crawford & Peter Kaehenbuehl (alt), 1990 | 15 | 91m | |||||
| 34 |
Malcolm’s Bent Friends
A gentle introduction to the joys of slabbing. Take a selection of cams, bent or otherwise. Start right of Panzer at clean streak – Battle of the Bulge.
FA: Steve Findlay & Keith Lockwood, 21 Dec 2016 | 11 | 120m | |||||
1.17.5. Amok Wall 17 routes in Cliff
- Summary:
-
All Trad climbing
Lat / Long: -36.751519, 141.835618
description
A steep little orange wall high up the right side of the Watchtower faces. Approach up the Watchtower descent gully to about half height. The ledge below the wall goes right across left to the first belay of 'Panzer'. Unfortunately the top of the climbs tend to fade out into low-angled, mossy choss.
Emergency Location: Mount Arapiles, The Watchtower Faces Area
  |
||||||||
| Route | Grade | Style | Selected ascents | |||||
|---|---|---|---|---|---|---|---|---|
| 1 |
Maginot Line
Faint groove on left side of white streak left of Amok. Hard start and hard bulge at half-height. Absolutely covered in moss these days. FA: Ed Neve & Keith Lockwood, 1993 | 21 | 30m | |||||
| 2 |
Under Control
Steep start left of Walking Simulator to flake and surprising pockets. No gear on crux. FA: Geoff Weigand (solo), 1985 | 22 X | 30m | |||||
| 3 |
★ Walking Simulator
Start up little overhang directly in front of LH tree. Up drifting L past 2 bolts then straight up past small cams and slightly right to finish at lower off. Its possible to traverse off into the moss after the first piece after the bolts, but it's better to finish direct. Two yellow Aliens or equivalent are very handy. Might be 23. Unless you're short, in which case it might be 26. FA: Douglas Hockly & Wendy Eden, 18 May 2016 | 23 | 12m, 2 | |||||
| 4 |
★★ Walking Amok
Link up. Start up Walking Simulator, hard move R over the bulge to join Amok and finish up it. Just toproped, while the climbing is good I'm not sure it's worth another bolt. Mostly did it for the name. FA: Douglas Hockly & Wendy Eden, 28 May 2016 | 23 | 15m | |||||
| 5 |
★★ Amok
Wildy pumpy. Mostly cams, strangely most of them seem to be green camalot size... but save one for the topout. Chains to left or up and right. Start: Start on left side of Amok wall behind two native pines. FA: Mark Moorhead, Chris Shepherd & Roddy McKenzie, 1981 | 23 | 15m | |||||
| 6 |
★★ Running Amok
Where Amok heads left, head straight up past bolt. Much more friendly for short people than the original finish. FA: Wendy Eden & Douglas Hockly, 21 May 2016 | 22 | 15m, 1 | |||||
| 7 |
★ Attractively Restrained
Start as for Amok till the first break at about 6m (where it gets steep). Move R 1m and up 2m to a jug. A long move R off this gives a hidden pocket. Up past a bolt to the top and chains. FA: Douglas Hockly, Wendy Eden & adam demmert, 22 May 2016 | 23 | 15m, 1 | |||||
| 8 |
Small Creeps
Tall creeps will do better. Has a carrot up high. FA: Mark Moorhead, Lincoln & Chris Shepherd, 1983 | 24 | 30m | |||||
| 9 |
★★ Helter-Skelter
Line left of Able-bodied, Boulder over small roof as for that route to get gear in the obvious flake then head left on little pockets to thin break and gear. Straight up past 2 ring bolts. More gear and a tricky sequence getting established on the slab upper wall and then to anchor on right. FFA: adam demmert & Will Monks, 28 May 2016 | 26 | 15m, 2 | |||||
| 10 |
★ Able-Bodied
Start below small roof 10 metres right of 'Small Creeps'. Surmount bulge and take short flake to bolt. Desperately left and up. FA: Kim Carrigan, 1984 | 25 | 30m, 1 | |||||
| 11 |
AB Ciege
Start at right end of wall right of Amok, 2m L of corner. A few hard moves up the seam, then it's easy. FA: Louise Shepherd, Kim Carrigan & Evelyn Lees, 1981 | 24 | 20m | |||||
| 12 |
★ Meekly Unconcerned
Right leading diagonal crack, left of Ice is Nice. Step off block at diagonal crack and follow to under cling where you can step right to vertical crack, head up this and over small roof, to ledge. Some suspect looking rock, but nothing cam off after it was hauled on and kicked. You can rap off Ice is Nice FFA: adam demmert, Wendy Eden & Douglas Hockly, 22 May 2016 FA: Wendy Eden, 22 May 2016 | 20 | 15m | |||||
| 13 |
★ Ice is Nice
'Only in drinks' - Lou's guide Up overhanging corner 2 metres right of 'AB Ciege' to ledge, then move left and up vague orange corner. FA: Craig Nottle, 1983 | 21 | 12m | |||||
| 14 |
★ Chuckle Chuckle
Originally graded 18 without grinning. Really nice rock and climbing. Despite being soloed it has gear, mostly small cams (not available in '83!). Chain on top. FA: Mark Moorhead (solo), 1983 | 23 | 20m | |||||
| 15 |
Crash Bang Wallop
Hard diagonal with tricky start 5 metres right of 'Chuckle Chuckle'. FA: Mark Moorhead (solo), 1983 | 18 | 20m | |||||
| 16 |
Armchair critic
10m along the ledge leading to Amok is an old callitris growing diagonally. Behind it are 2 cracks ending in a bulge. This is the left one. FA: Wendy Eden & Douglas Hockly, 1 May 2016 | 17 | 15m | |||||
| 17 |
★ Guider not a climber
The right hand of the two cracks. Lovely finger locks over the top bulge. FA: Wendy Eden & Douglas Hockly, 18 May 2016 | 16 | 15m | |||||
1.17.6. Kitten Wall Area 89 routes in Crag
- Summary:
-
All Trad climbing
Lat / Long: -36.751919, 141.835817
description
Emergency Location: Mount Arapiles, Kitten Wall Area
1.17.6.1. Kitten Wall 40 routes in Cliff
- Summary:
-
Lat / Long: -36.752142, 141.836474
description
Emergency Location: Mount Arapiles, Kitten Wall Area
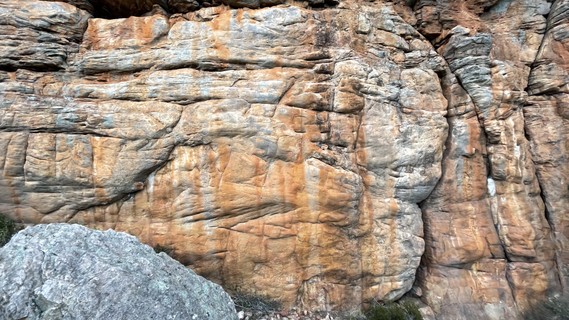 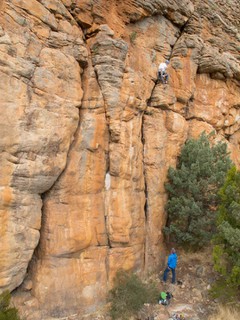 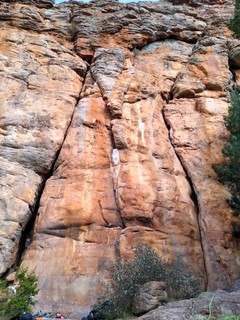 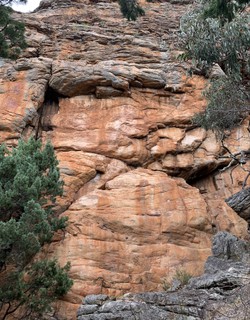 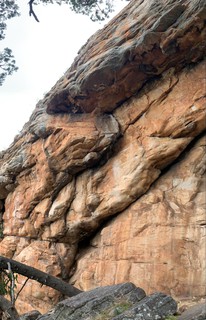 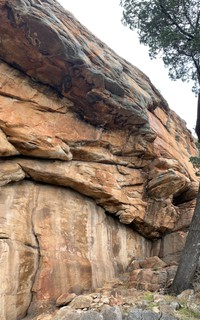     /55/ad/55adf7fa300518ede6db9342a3082590835e4d47) |
1.17.6.2. Tjuringa Wall 35 routes in Cliff
- Summary:
-
Lat / Long: -36.751826, 141.835438
description
Emergency Location: Mount Arapiles, Kitten Wall Area
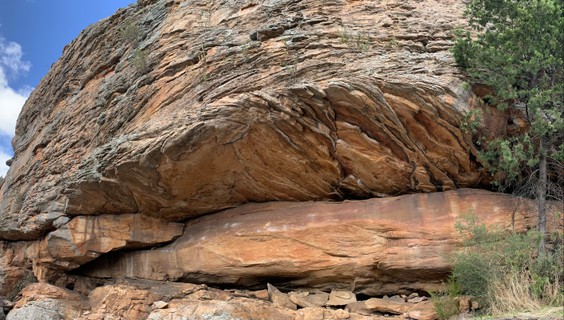 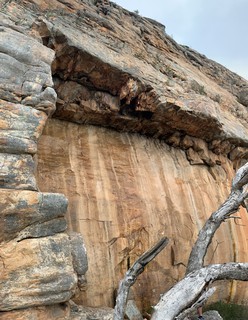    /6b/01/6b01d96e375c0abc9807ff274fdcdefbfa686a6e)   |
1.17.6.3. Bolero Wall 8 routes in Cliff
- Summary:
-
description
Emergency Location: Mount Arapiles, Kitten Wall Area
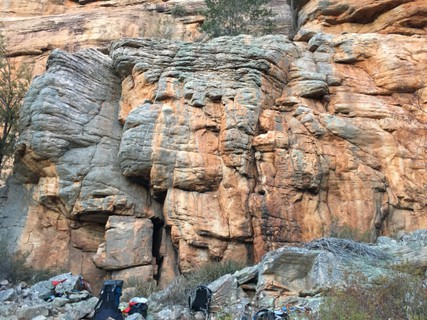 |
1.17.6.4. Hyperbole Buttress 6 routes in Cliff
- Summary:
-
Lat / Long: -36.751484, 141.834905
description
The right side of the main part of Tjuringa Wall is marked by a prominent left-facing flake-chimney.
Emergency Location: Mount Arapiles, Kitten Wall Area
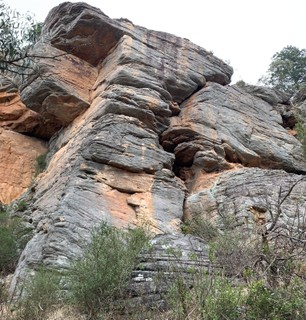 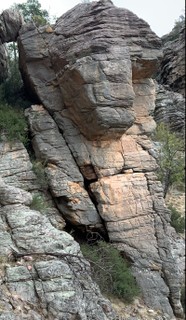 |
1.17.7. Watchtower Area Boulders 17 routes in Crag
- Summary:
-
All Bouldering
Lat / Long: -36.750451, 141.838356
description
Emergency Location: Mount Arapiles, The Watchtower Faces Area
1.17.7.1. Richochet Rock 3 routes in Boulder
- Summary:
-
Lat / Long: -36.751074, 141.839112
description
Emergency Location: Mount Arapiles, The Watchtower Faces Area
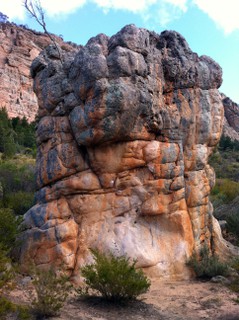 |
1.17.7.2. The Gumnut 10 routes in Boulder
- Summary:
-
Lat / Long: -36.750330, 141.837533
description
Emergency Location: Mount Arapiles, The Watchtower Faces Area
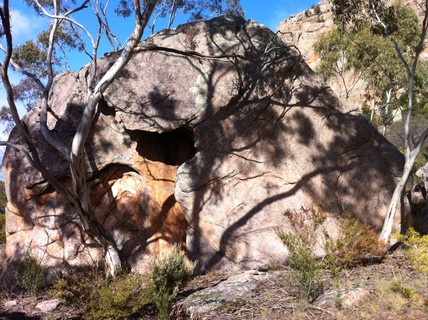 |
1.17.7.3. Moody Blues Boulder 4 routes in Boulder
- Summary:
-
Lat / Long: -36.749415, 141.837441
description
Emergency Location: Mount Arapiles, The Watchtower Faces Area
 |
1.18. Northern Group 242 routes in Crag
- Summary:
-
Mostly Trad climbing
Lat / Long: -36.750329, 141.835082
description
PLEASE NOTE: As it stands (as of 20/07/2018) there are multiple route and area descriptions that are incorrect (most glaringly in the less trafficked areas of the Mount). Efforts are being made to fix this, but be aware that any new-routing activity or general climbing in the Northern Group should be done with consultation to locals, the existing guidebooks, and The Australian Route Register (more detailed information on some single-pitch climbs: http://www.climb.org.au/index.php?page_id=10&action=region®ion_id=8).
Emergency Location: Mount Arapiles, The Watchtower Faces Area
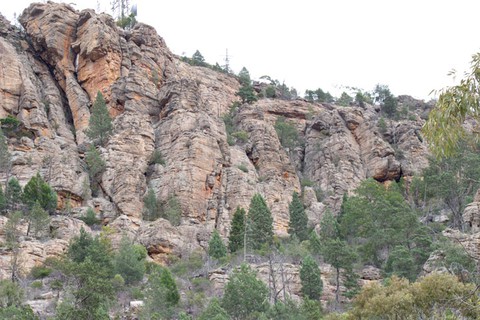 |
1.18.1. Henry Bolte Wall 36 routes in Cliff
- Summary:
-
Mostly Trad climbing
Lat / Long: -36.751279, 141.834806
description
Almost every hold has it's own name.
Emergency Location: Mount Arapiles, Henry Bolte Wall Area
| Route | Grade | Style | Selected ascents | |||||
|---|---|---|---|---|---|---|---|---|
| 1 |
Andrew and Ferret's Bogus Journey
From belay chain on "Slinkin Leopard" step left then up through small cave, back right and up. FA: Andrew Lindblade & Ian Anger, 1991 | 22 | 12m | |||||
 |
||||||||
| Route | Grade | Style | Selected ascents | |||||
| 2 |
Get Your Bloody Fingers Out of My Nostrils
Start as for "Follow Your Nose" then climb straight up from horizontal on jugs to a crux mantle at top. FA: Lionel Clay & Kurt Smith, 1986 | 18 | 10m | |||||
| 3 |
★ Follow Your Nose
Very pumpy. Start: Start near the top left end of the wall. FA: Mark Moorhead, Dave Fearnley & Ian Anger, 1982 | 22 | 12m, 1 | |||||
| 4 |
Follow Your Nose Direct Start
Harder and bolder than the original. Start: Start 2 metres right of "Follow Your Nose". FA: Geoff Weigand, 1989 | 24 R | 8m | |||||
| 5 |
Dropkick The Fucking Carburettor Down The Pines
Traverse as for "Follow Your Nose" and keep going, past "The Fortress" to a bolt on "Lord Of The Rings". Start: Start as for "Follow Your Nose" FA: James Falla & Paul Hoskins, 1987 | 21 | 20m | |||||
| 6 |
★ Mormon Poultry / The Big Wheel
Two bolts left of fortress lead into FYN DS FA: Simon Weill | 27 | ||||||
/4b/21/4b21fe9e3585f35c660cf1a0cce899849b94cd73) /a6/c0/a6c0039d48e6881c6458fc1891e4005191de42fb) |
||||||||
| Route | Grade | Style | Selected ascents | |||||
| 7 |
★★ The Fortress
A few pieces of gear required higher up. Sustained wall leftward past 2 bolts. At jugs, move right and up. (A pumpy variant is to go left instead and finish up Follow Your Nose). Start: Start 6 metres right of "Follow Your Nose". FA: Dave Fearnley & Mark Moorhead via start from left. As described Kim Carrigan, 1982 | 26 | 18m, 2 | |||||
| 8 |
★ The Fortress RHV
Start up Fortress to 2nd bolt, then right and up trying very hard to avoid going back L into the original (and better) version. FA: George Fieg (?), 1995 | 27 | 12m, 2 | |||||
| 9 |
★★ Kinky Leopard
Start as for Slinkin' Leopard, then head left after the crux "drive by" through punchy boulder (trad) then finish up Fortress. FA: Lee Cossey, 2015 | 29 | 20m, 3 | |||||
| 10 |
★★ Gridlock
Straightens out Slinkin'. Start: Start as for Slinkin' but go direct and up to the end of the L-wards traverse FA: Dave Jones, 1998 | 29 | 15m, 3 | |||||
| 11 | Gridlack | 32 | 15m, 4 | |||||
| 12 |
★★★ Slinkin' Leopard
Surely one of the best route names in the country. Start 3m R of 'The Fortress'. A slopey traverse R is protected by a bolt (stick clip). Up past two more bolts before heading L to the crack. Up more easily with trad gear and one more bolt to anchors. FA: Geoff Weigand, 1984 | 28 | 20m, 4 | |||||
| 13 |
★★ Zorlac The Destroyer
A righthand finish to Slinkin'. Start: Start as for Slinkin'. FFA: Jerry Moffat, 1992 | 31 | 15m, 4 | |||||
/34/41/3441c84910827b7b6dc7982c7399512b5fc67e4f) /0c/67/0c67ab6adfd68d17de42c08cc29ebed636e4fc86) |
||||||||
| Route | Grade | Style | Selected ascents | |||||
| 14 |
★★ Wackford Squeers
Brilliant route. Take small cams (00 Friend) + some medium cams (.3BD, .5BD, .75BD) for after the 3 bolts on the traverse. Start: Start 4 metres down from "Slinkin Leopard". FA: Lincoln Shepherd, 1983 | 26 | 30m, 3 | |||||
| 15 |
★★ Destroyer of the Rings
Awesome sustained face climbing linking Lord of the Rings into Zorlac the Destroyer FA: Lee Cossey, 2015 | 32 | 15m | |||||
| 16 |
★★★ Lord of the Rings
Remarkably sustained face on thinner and thinner holds. If you fall off the slab you'll be in good company. Start as for "Wackford Squeers". FA: Stefan Glowacz | 31 | 15m, 5 | |||||
| 17 |
★ Chuckles Bolty
The "crazy linkup" of Lord of the Rings into Slinkin' Leopard. FA: Nathan Hoette, 2004 | 30 | ||||||
| 18 |
★★★ Lord Of The Rings Direct
Start at the weakness down right of "Wackford Squeers" and go fairly much straight up. FA: Nick Sutter early 1990s, 2000 | 31 | 20m | |||||
| 19 |
★ Going For The One
The original route on the wall is quite good but rope drag can be a problem. Start: Start at obviuos weakness right of "Wackford Squeers", as for "Lord Of The Rings Direct". FA: Glenn Tempest & Kevin Lindorff, 1977 | 20 | 30m | |||||
| 20 |
Straight Outta Compton
AKA Straight Outta Wackford. As for Wackford Squeers Direct, then arbitrarily follow the difficult C-shaped sickle to the L in the upper section (rather than the obvious line of least resistance). FA: Geoff Weigand. Carrigan had climbed the lower section on, 1985 | 28 | 25m, 3 | |||||
| 21 |
★★ Wackford Squeers Direct
Very hard crux down low after the pocket (which sadly was a chip ?). Use a short draw and/or a good belayer if this is at your limit as you will fall a few times here. Continue straight up on the R side of the top bulge. There is a very good 3/4 cam placement in a key handhold here so perhaps best to carry it with you and place it at your waist after using it. FA: Kim Carrigan, 1985 | 26 | 20m, 2 | |||||
| 22 |
★★ Bolte Wackford
Soft for the grade and contrived, but the climbing is good. Up Henre Bolte through its crux to the break, traverse L for 2m into the top section of Wackford Squeers and over the top bulge as for that. | 26 | 16m, 3 | |||||
| 23 |
★★★ Henry Bolte
Superb thin face-climbing. (#2 Wallnut after the first bolt, .75BD in the break after the 3rd bolt + a few more cams in the higher easier section to DBB) Start: Start just right of "Going For The One" FA: Lincoln Shepherd & Mark Moorhead, 1983 | 25 | 30m, 3 | |||||
| 24 |
Got It!
Some bouldery moves. There's a good plunge if you miss the final lunge. Start: Start just right of "Henry Bolte" FA: Kim Carrigan, Geoff Weigand & Brian Wright, 1981 | 23 | 27m, 2 | |||||
| 25 |
★ Barbed
A good easy route on a great wall deserves a star. Pitch 2 is really good and eats cams. Great on a warm day. Start: Down and right of the other routes is a prominent crack leading to a bottomless chimney.
FA: Peter Watling & Andrew Hebdon, 1981 | 17 | 42m, 2 | |||||
| 26 |
★ Gurtle Tier
Line of bolts to a lower-off right of "Barbed". Feel like it climbs a bit contrived by where the bolt placements are, but it's a fun little warm up for the main events up the hill. A cam is good for the top if you scare easily FA: Two Germans., 1996 | 23 | 12m, 3 | |||||
| 27 |
White on Black
Up for 2 metres then traverse right to pockets and up brushed wall to ledge. Rap as for "Gurtle Tier". Start: Start 3 metres right of "Barbed" at a short, steep flake. FA: Kim Carrigan, Mike Broadbent & Louise Shepherd, 1982 | 23 | 12m | |||||
| 28 |
★ Big Bird / Guys Don’t Try
Cautiously up the grey pitted face trending R to join School for Scandal. FFA: Christopher Glastonbury & adam demmert, 19 Mar 2021 | 24 R - X | 15m | |||||
| 29 |
★ School for Scandal Direct
An unprotected, dynamic crux leads into School for Scandal. FFA: Christopher Glastonbury, 19 Mar 2021 | 26 | 17m | |||||
| 30 |
★ School for Scandal
Maybe 20m below Barbed and 10m up from the Clown a doglegged thin crack doesn't reach the ground. Up seam in grey slab until desperately thin moves gain crack. Rap anchor. Gear is rather sketchy. | 23 | 25m | |||||
| 31 |
The Pilgrim's Progress
Start as for School for Scandal but continue up and right to small corner leading into The Clown chimney finish. Rap as for SfS. Pro is a bit fiddly, take small wires and cams. FA: Lou Shepherd, Wendy Eden & Kane Hendy, 10 Dec 2016 | 15 | 20m | |||||
| 32 |
The CIown
Not great. Well up the gully left of the main buttress, almost to 'Henry Bolte Wall', is a narrow chimney.
FA: Chris Baxter, Chris Dewhirst, John Moore. Pitch 2 variant : Garry Sudholz, Keith Lockwood & Norm Booth.., 1968 | 12 | 78m, 3 | |||||
| 33 |
★ Serious Callers Only
Pretty good climbing and protection. Start just right of second pitch of 'Barbed'. Access via abseil anchor of 'Not Invented Here'. Easily up to the big break. Straight up the short overhanging wall, 1 metre right of a left-leading diagonal line, to a good flake. Up 3 metres to top of flake, step right and up water-washed streak to little bulge and up to easier ground. Continue straight up through bulges at top. FA: Kieran Loughran, Keith Lockwood, Ray Lassman & Norm Booth, 2012 | 18 | 28m | |||||
| 34 |
★ Not Invented Here
Might seem a bit contrived to people too short to do the move past the bolt at a reasonable grade. Access via 25 metre rappel from anchor above this climb. Double set cams to #1 Camalot, plus 1 each #2 and #4. Easy up to the ledge-break and up the short overhanging wall 1.5 metres right of 'Serious Callers Only'. Reach straight up the smooth wall past the bolt then right a little and up on killer incuts to left side of the roof of 'Clear Conscience'. Swing right above overhang and go up to rap anchor. FA: Kieran Loughran & Keith Lockwood, 2011 | 19 | 25m, 1 | |||||
| 35 |
★ Zero Gravitas
Start at belay anchor for 'Not Invented Here' Up onto the big break and traverse 3 metres right to FH below short, shallow corner. Short jump or hard moves into corner and up to good stance. Up wall (2 FH) to roof then follow seam up steep wall above roof (FH) then final, easier bulge. FA: Kieran Loughran, Louise Shepherd & Norm Booth, 2012 | 20 | 25m, 4 | |||||
| 36 |
★ Clear Conscience
"An obvious leftward-curving line starting high up on the buttress, not far right of the all finish of 'Going For The One' ." The Carrigan guide (ad hence the Shepherd one) has it starting 2 metres right of pitch 2 of 'Barbed' but that doesn't fit the description of the start "under a tight, awkward roof". In fact it appears to be the huge roof-flake up high on the right, which is on the left of the final scramble section of 'Beau Geste' etc. Approach from the right under a tight, awkward roof and then follow the diagonal line over some steep walls and overhangs. FA: Glenn Tempest & Kevin Lindorff, 1977 | 16 | 20m | |||||
1.18.2. Harlequin Cracks Area 30 routes in Cliff
- Summary:
-
All Trad climbing
Lat / Long: -36.750769, 141.835107
description
Emergency Location: Mount Arapiles, Harlequin Cracks Area
| Route | Grade | Style | Selected ascents | |||||
|---|---|---|---|---|---|---|---|---|
| 1 |
Henry's Sample Is Missing
This pleasant, easy crack midway between The Clown and 'Court Jester' was probably first soloed by Louise to get access to the top of School For Scandal during her massive cleaning exercise. | 8 | 12m | |||||
| 2 |
Court Jester
Wanders up the left side of the buttresses. A bit scrappy but worth a look. Start some distance uphill of 'Beau Geste', just left of a deep horizontal break.
FA: John Moore, Chris Dewhirst, Chris Baxter & Laurie Beesley, 1965 | 12 | 100m, 5 | |||||
| 3 |
Last Remake
Not a bad pitch. Could be used as a start for 'Artificial Insemination'. Crack about 10 metres left of Beau Geste, avoiding top overhang to right (dirty) FA: Kieran Loughran, Jopie Bodegraven & Robert Knox, 1980 | 12 | 25m | |||||
| 4 |
Striding Ridge
Another long ramble, about half of which are bits of existing climbs.
FA: Stev Findlay & Keith Lockwood, 15 Aug 2016 | 8 | 140m, 5 | |||||
| 5 |
★ A Whale Of A Time
Another pleasant ramble. Start: At toe of buttress just left of "Beau Geste"
FA: Keith & Tim Lockwood, 2010 | 14 | 140m, 5 | |||||
| 6 |
A Whale Of A Time Variant
A good pitch but a bit out of place with only easy options for approach and finish. Start at second belay; this is also the second belay of "Beau Geste", at the top of the neat little corner. Climb orange wall up and right to arete and continue up arete until it joins the original line (crack curving in from left) and eases. Continue easily to belay. FA: Tim Lockwood, Keith Lockwood, Kieran Loughran & Norm Booth, 2010 | 17 | 25m | |||||
| 7 |
★★ A Whale Of A Time Direct Finish
This great little pitch is not really more direct but it is a good finish to this route, especially if done with the Grade 17 variant, or to "Artificial Insemination". Tiny cams are essential. Start: Start around left of the top pitch of "Beau Geste" at a prominent right curving corner. Climb the arete and face left of the corner. FA: Keith Lockwood & Norm Booth, 2010 | 18 | 12m | |||||
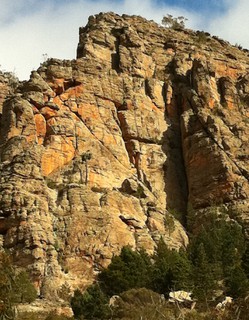 |
||||||||
| Route | Grade | Style | Selected ascents | |||||
| 8 |
★★ Beau Geste
A great adventure. Start below major chimney on left side of cliff. Note that numerous variants are possible, and have been done, from the middle of pitch 3 to the terrace at the end of pitch 4.
| 9 | 140m, 5 | |||||
| 9 |
★ Artificial Insemination
A fairly good direct line with a few nice sections and an exciting finish around the overhang at the top of the face. Big cams needed on first 2 pitches. Even better if finished via Noddy's face 'A Whale of a Time Direct Finish' around left of last pitch of 'Beau Geste'. Start from the terrace, at the base of Beau Geste's second pitch corner.
FA: Roger Webb, Phillip Armstrong. Phillip had climbed the crux overhang with Eddie Ozols & Mark Shelton two months earlier., 1977 | 18 | 130m, 3 | |||||
| 10 |
★ BA Mosquito
Pleasant access route to the big terrace. Blunt, slabby arete starting 10 metres right of Beau Geste. FA: Heather Phillips & Bill Andrews, 1983 | 6 | 45m | |||||
| 11 |
Trouble With Lichen
Follow 2 corners to easy ground, aiming for large left-facing flake. Pass this on left and up. Start: Start at short corner 2 metres right of 'BA Mosquito'. FA: Bill Andrews & GIT course member, 1981 | 11 | 45m | |||||
| 12 |
★ Mr Hoppy
A wonderful excursion all the way. Takes steep wall between Tale of Woe and Bung.
FA: Keith Lockwood & Ray Lassman, 9 Jun 2015 | 16 | 130m, 3 | |||||
| 13 |
★ Tale of Woe
A popular outing following the prominent diagonal line. Not really sure that it warrants a star though.
FA: Mike Stone & Chris Baxter, 1973 | 9 | 85m, 3 | |||||
| 14 |
★ Bung
Looks great but is just OK. Begin up Tale Of Woe then step right and follow sinuous line up and slightly left on wall. FA: Keith Lockwood, Doug & Beryl Palmen, 1977 | 13 | 45m | |||||
| 15 |
XXXX
Similar to Bung. Start as for Bung but after stepping right continue straight up the wall rather than following line. FA: Allan Hope & Bill Andrews, 1983 | 12 | 45m | |||||
| 16 |
Carnivale
Climb Harlequin Cracks until it’s easy to move out onto the left wall. Follow arête, finishing up line past the left edge of the Harlequin Cracks roof. FA: Keith Lockwood & Ray Lassman, 28 May 2016 | 10 | 50m | |||||
| 17 |
★★ Harlequin Cracks
The long corner of the first pitch is lovely.
FA: Ted Batty, Bob Bull, Peter Jackson. Pitch 3 corner : Rob Taylor & Daryl Carr., 1966 | 11 | 80m, 3 | |||||
| 18 |
Columbine Corner
Start: Start as for 'Harlequin Cracks'.
FA: Norm Booth & Keith Lockwood, 2010 | 18 | 48m, 2 | |||||
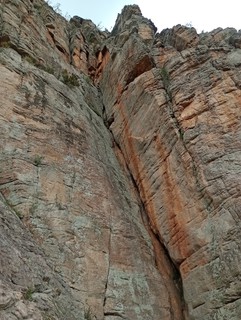 |
||||||||
| Route | Grade | Style | Selected ascents | |||||
| 19 |
★ Calabrese
Very good, but beware the runout halfway up the 1st pitch. Some say that the poor protection is not a problem given the straightforward nature of the climbing. However there is also the case of a leader who backed off this and went on to 'Orestes' for his next, successful, climb.
FA: Kieran Loughran & Bill Andrews (alt), 1982 | 17 R | 55m, 3 | |||||
| 20 |
★ Calabrese Salami Sandwich
A variant that links P1 of Calabrese into P2 of Salami.
FA: benwiessner & Lachlan Milne, 2 Nov 2022 | 17 | 2 | |||||
| 21 |
★★ Salami
FA: Peter Jackson & Chris Baxter, 1965 | 11 | 81m, 3 | |||||
| 22 |
Salami Direct Finish
A good finish for 'Salami', starting from the first belay. Climb steep cracks and corner above the first belay. FA: Daryl Carr & Jerry Grandage, 1965 | 11 | 27m | |||||
| 23 |
Where The F Are We
This monster corner-chimney is not only good fun, but benefits from coming into shade early in the day, but last pitch is in full sun. Great 1st and last pitches with some scrap in the middle.
Walk off the back to finish and down trail to left. Set: Geoff, 2013 FFA: 2013 FA: Geoff, Alicia, Jason & Holly, 2013 | 12 | 97m, 4 | |||||
| 24 |
★★ Industrial Muscle
From 'Salami', move right onto wall at horizontal break. Up past bolt then up and left to crescent-shaped ledge. Up this past two carrots then hard moves up right. Rap rings. FA: Steve Monks & Jane Wilkinson, 1988 | 26 | 30m, 3 | |||||
| 25 |
★★★ The Age of Stainless
As for IM, then take extended leftward finish up the mighty headwall. 30 metre rappel. Start: Start as for 'Industrial Muscle'. FA: Ingvar Lidman, 2003 | 25 | 35m | |||||
| 26 |
Better to Marry Than to Burn
From conifer below 'Salami' climb face on right for 2 metres. Traverse right to weakness in bulge, then straight up. FA: Chris, Sue Baxter, Dave Gairns & Keith Lockwood, 1983 | 15 | 40m | |||||
| 27 |
Happy-go-Lucky
Prominent broken diagonal right of 'Salami'. Start at short red corner some metres right of 'Salami'.
FA: Peter Watling & Anita Lundberg (alt), 1984 | 12 | 91m, 4 | |||||
|
The final three climbs are high on the cliff, starting at the same level, and just right of Salami's first belay. They can be approached by traversing around from Salami, by a dicey scramble in from near Mysteries Gully, or by abseil. | ||||||||
| 29 |
Goonkachoong
Takes the prominent roof. Up clean flake and over roof. FA: Dave Mudie & Dennis Kemp, 1989 | 16 | 15m | |||||
| 30 |
Stop lt Or You'll Go Blind
Climb middle of face right of 'Goonkachoong'. FA: Dennis Kemp & Dave Mudie, 1989 | 14 | 15m | |||||
| 31 |
The Met
Good corner. V-corner a few metres right of Goonkachoong. FA: Peter Watling & Anita Lundberg, 1984 | 13 | 20m | |||||
1.18.3. Mysteries Wall 31 routes in Cliff
- Summary:
-
Mostly Trad climbing
Lat / Long: -36.750537, 141.834511
description
Emergency Location: Mount Arapiles, Mysteries Gully Area
| Route | Grade | Style | Selected ascents | |||||
|---|---|---|---|---|---|---|---|---|
Mysteries Wall | ||||||||
| 2 |
★★ Tigger
Old Paul Hoskins project re-equipped and sent. Ultra-smeary! Start: Start on left side of 'Mysteries Wall' proper. FA: Nathan Hoette, 2004 | 27 | 12m, 2 | |||||
| 3 |
★ Rosshalde
A fingery and scary start and exciting finish up the headwall. The original route followed the line L all the way, but a far better finish is to step airily R off the sloping ledge and up the headwall at a fairly solid 19 (as described). Large cam/s size 4 or 5 could be handy at the bottom and small ones stepping off the ledge. Start to the left of the major crack on the left side of the wall. Traverse right into the left-curving crack and follow it past a bulge. From just past overhang move out right onto face and up. FA: Rod Young, Jeremy Boreham & Geoff Weigand soloed finish Feb 1985, 1979 | 20 R | 35m | |||||
| 4 |
★★ Free Will
A direct on Rosshalde. Up the slippery seam past 2 bolts, follow Rosshalde to the roof and then R and up past another 2 bolts. Take lots of long slings or double ropes. After the first 2 bolts there are good small wires where Rosshalde traverses in but they are hard to see, and after rain the placement sometimes fills up with sand - a nut key may be handy to clean it out as they are pretty crucial. Might be 23. FA: Douglas Hockly & Geordie Webb, 14 May 2016 | 24 | 20m, 4 | |||||
| 5 |
★★ Model Phantom
Thin stuff. Up 'Blue-Eyed and Blond' then veer left into the crack of Mysteries. Undercling the crack to gain gravelly crimps past two bolts, then easier ground above. FA: Geoff Weigand., 1985 | 27 | 25m, 2 | |||||
| 6 |
★★★ Blue-Eyed and Blond
The most attractive climb here. The start requires some small micro cams to protect adequately. If you're not confident at the grade it is recommended to rap in to pre-place or double check the first bits of gear. It is a good idea to anchor your belayer until a few pieces are placed as the consequences of a fall are very serious. Start below vertical seam that crosses a diagonal line (Mysteries) a few metres up. Traverse R to single bolt, up past desperate crux then easier ground. Lower offs at top. FA: Chris Shepherd., 1984 | 24 | 25m, 1 | |||||
| 7 |
★ Mysteries
The diagonal crack leading left into 'Rosshalde' is slick and fiddly to protect but good fun higher up.
FA: Lincoln, Chris Shepherd (pitch 1). Chris Shepherd & Mark Moorhead (pitch 2) 1981., 1980 | 23 | 45m, 2 | |||||
| 8 |
★ Modern History
Nice rock and good climbing but it's not worth doing as the other routes are far more logical lines. Start up 'Mysteries' diagonal, when you reach 'Blue Eyed and Blond' follow it up and right, then keep traversing right. Up higher go right and left a few more times to ensure you've got the most out of the wall, then traverse with your hands on the top and downclimb Rosshalde. FA: Kim Carrigan & Louise Shepherd, 1981 | 23 | 35m | |||||
| 9 |
★★ Historic Events
Climb directly past two bolts into 'Modern History'. Either finish up that climb (as originally done) or continue straight up and into Blue Eyed and Blonde. Start: Start just right of 'Mysteries'. FA: Kim Carrigan, 1985 | 26 | 25m, 2 | |||||
| 10 |
Short 'n' Sharp
Serious unprotected overhung arete right of 'Historic Events'. A rope would serve only to stop a plummet all the way down the gully below. FA: Geoff Weigand (solo), 1985 | 25 X | 15m | |||||
| 11 |
★ Spanish Eyes
Hard dyno up the overhanging line onto the wall. Rather than following easy crack (Gardener's Delight), go left across wall and around arete to finish up flat-tops. Start: Start at the cave about 3 metres right of 'Historic Events'. FA: Glenn Tempest & Steve Lassche, 2000 | 20 | 30m | |||||
| 12 |
Spanish Gardener
Start up the second pitch of Gardener's Delight and finish up Spanish Eyes. | 17 | 25m | |||||
| 13 |
Cundall's Arete
Start at the arete 3 metres right of the cave of 'Spanish Eyes', the start of the second pitch of Gardener's Delight. Pull up onto wall and drift right and up sharp arete. The wall between this climb and Gardener's Delight has been top-roped from the rappel rings. FA: Kieran Loughran & Meg Sleeman, 1998 | 15 | 15m | |||||
| 14 |
A Night to Remember
Nice line with fiddly pro. Thin line up face just around right of Cundall's Arete. FA: Glenn Tempest & Steve Lassche, 1980 | 17 | 15m | |||||
Pooh Gully | ||||||||
| 16 |
Honey Pot
A bolted boulder problem. The holds are generally good, but seeing as they are all vertical - guess what that means for the feet? 'Dynamic' and very powerful. FA: Nathan Hoette | 29 | 5m | |||||
| 17 | Project | 32 | 12m | |||||
| 18 |
Pancho And Pedro Go Bolting
The first route established on this wall. One bolt. Hard start from pockets leads to an easier mid-section. FA: Tom Greenwood, 1989 | 25 | 15m | |||||
| 19 |
★★ Bottom Feeder
A direct start to 'Anus Horribilus'. Start as for that route but go straight up through a small undercling to the 2nd bolt. Cruxy moves lead into the finish of the original route. FA: Steve Kelly, 2004 | 25 | 15m | |||||
| 20 |
★★ Anus Horribilus
A classic at the grade. Bouldery start leads to quite continuous climbing on good slopey holds. Steeper than it looks! FA: Dave Jones, 1998 | 25 | 15m | |||||
| 21 |
★★ Pooh Connection
Climbs the direct start to Pooh Sticks and links that route into Anus Horribilus. Despite being slightly contrived, a brilliant conception. Two distinct halves offering Blue Mountains like crimping to start, followed by gritty slopers. The original start steps off the pillar at the 2nd bolt (left hand in pocket), and is a couple of grades easier. FA: Nathan Hoette, 2004 | 29 | 25m | |||||
| 22 |
★★ Pooh Sticks
Nowadays largely ignored but still worth doing in it's own right. Originally started by stepping off the pillar into the line but now incorporates the direct start from the ground. Where the connection moves left into 'Anus Horribilus', continue straight up via the traditionally protected arete. FA: Roland Foster, 1989 | 27 | 22m, 3 | |||||
| 23 |
Super Pooh
Tweaky Climb the bulging arete to the right of Pooh Sticks - beware the tweak factor! FA: Ingvar Lidman, 2008 | 28 | 15m, 5 | |||||
| 24 |
Eeyore's Thistle's
Good route but runout. Start: Slab route immediately right (around corner) from Pooh Sticks. A few jugs then run-out to first RB, which is clipped while leaning well L off poor handholds and facing a possible groundfall. There's another RB then DRB lower-off. FA: Andrew Martin, 2004 | 17 R | 20m, 2 | |||||
| 25 |
★ Gardener's Delight
First pitch doesn't get a lot of traffic so can be dirty. Great second pitch. Start: Start at the rounded arete, about the same place as Eeyores Thistles.
FA: Jerry Grandage, Rob Taylor (alt), Daryl Carr & Andrew Smith, 1966 | 12 | 60m, 2 | |||||
Lower Mysteries Gully | ||||||||
| 27 |
Wigwam for a Goose’s Bridle
A fun novelty, involving some airy bridging between two aretes. The arete left of Mohawkman, pulling onto the pinnacle for the final moves. FA: Keith Lockwood & Kieran Loughran, 1 Feb 2019 | 10 | 14m | |||||
| 28 |
Mohawkman
2 rings plus a handful of cams to summit loweroff. Start: Lefthand slab route on detached wall just right of Gardener's Delight. FA: Joel wilson | 19 | 12m, 2 | |||||
| 29 |
★ Mohawk Hanky
The natural line on the face, avoiding the hard bits of the other two routes. Quite sustained. Take a few cams with a couple of #1 and #3 in the mix. | 15 | 14m | |||||
| 30 |
★ Mr Hanky
Has a ring with a hard clip for the hard start then drops off several grades. Summit loweroff. Righthand slab route with hard start just right of Mohawkman. FA: Joel wilson | 21 | 12m, 1 | |||||
| 31 |
Beached Wails
Looks good but poorly protected, somewhat contrived and generally not much fun. The best bit is that the first ascent team got to the top, found they were on a pinnacle and started bemoaning that they would have to leave gear behind. Then HB poked his head over the top on the short side... Start: Down right of the 'Mohawkman' face on a narrow south-east face just left of a wide crack. Climb wall just left of wide crack and go up to ledge on the left. Step up and right into left facing flake-crack and follow it. FA: Chris Baxter & Dave Moss, 1983 | 16 | 40m | |||||
| 32 |
A Goat's Song
Sustained face climbing, spoiled a bit by the big ledge at half-height. Wires and cams up to #1 plus #3.5 cam. Start at black face just right of 'Beached Wails'. Up face past 2 FH then move right and up to ledge. Step back up left onto the face, up and left to middle of face. Up past FH to break, step left and up to anchor. Some people have had trouble pulling the rope so be careful where it runs over the edge. FA: Kieran Loughran & Meg Sleeman., 1998 | 17 | 25m, 3 | |||||
| 33 |
Things Fall Apart
Good first pitch but be careful to avoid the dangerous hollow flake immediately left of the start. Start: Start below a crack about 10 metres down right of A Goat\'s Song.
FA: Kieran Loughran, Keith Lockwood & Norm Booth, 1998 | 19 | 30m, 2, 1 | |||||
| 34 |
★★ 100 Acre Wood
Ultra technical face climbing. Start: Attractive orange streak at the very base of 'Mysteries' 'Gully' (downhill from Goats Song). FA: Steve Kelly, 2004 | 25 | 12m, 3 | |||||
 /6a/1b/6a1b08700e9f018a4816c79600650ec4af6282ba) /b9/6c/b96c131996404e013ff5b4f91f8076bd95f5d258) 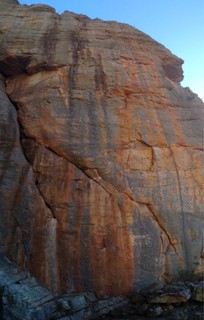 /5c/db/5cdb6d02b5ca16e50b5aa5158c06bc662ef2cea9)  |
||||||||
 Ramon
Ramon 1.18.4. Shiralee Wall 17 routes in Cliff
- Summary:
-
All Trad climbing
description
Shiralee Wall is the substantial orange buttress below Touchstone and bounds the lower left side of the broad gully - Nameless 'Gully' between the 'Northern Group' and the 'Far Northern'.
Emergency Location: Mount Arapiles, Kachoong Area
approach
Park as for Entertainer and walk up the management track, continue past Entertainer path to a cairn by an old fallen dead tree. Head left and up towards the buttress on a vague track with a few more cairns.
descent notes
Rap anchors above Shiralee Direct and I am a Banana Expert
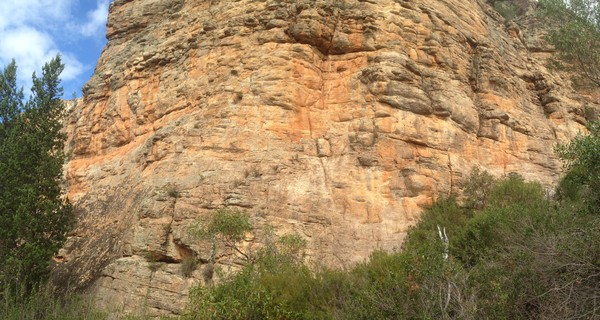 |
||||||||
| Route | Grade | Style | Selected ascents | |||||
|---|---|---|---|---|---|---|---|---|
| 1 |
A Gift From the Gods
The good section hardly makes up for the horrible start and way off. Start: At lowest point on wall. FA: Keith Egerton, Andrew Corlass, Kieran Loughran, Ed Neve & Craig Nottle, 1984 | 22 R | 25m, 1 | |||||
| 2 |
Who Rolled the Stone?
Better than AGFTG despite sharing the start and much the same finish Start: As for A Gift From The Gods.
FA: Chris Baxter, Dave Gairns & Mike Stone, 1984 | 19 | 50m, 2 | |||||
| 3 |
Stone's Throw
Start: As for A Gift From The Gods.
FA: Dave Gairns, Chris Baxter, Mike Stone & Peter Woolford, 1984 | 18 | 50m, 2 | |||||
| 4 |
Banshee
Not worth the star. Protection is a bit fiddly to get though it is good on the hardest moves. Start: Originally started as for A Gift From The Gods but is better as for 'Dingbats'.
FA: Keih Lockwood, Rick Hatch & Ray Lassman, 1983 | 17 | 50m, 2 | |||||
| 5 |
Dingbats
Start: 4 metres left of 'The Shiralee'.
FA: Keith Lockwood & Tony Yap. Start as described by Chris Baxter et al., 1984 | 14 | 50m, 2 | |||||
| 6 |
★★ The Shiralee
Tenuous climbing into the orange scoops that would have been very scary before microcams. Deserves to be climbed more often and might be now that the abseil anchor has gone in Put up in a rainstorm during which a child almost drowned in Central Gully! Start: Start below line of orange scoops.
FA: Keith Lockwood & Reg Marron, 1973 | 15 | 55m, 2 | |||||
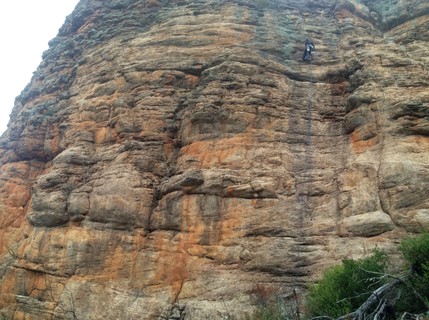 |
||||||||
| Route | Grade | Style | Selected ascents | |||||
| 7 |
★ The Shiralee Direct
A direct start and finish to 'The Shiralee' makes for a very good climb. Take some tiny cams and a #3 (blue) Camalot in your rack. FA: Kieran Loughran & Norm Booth, 2009 | 19 | 20m, 1 | |||||
| 8 |
★ The Crumpet Didn't Front
Start at short crack 6 metres right of 'The Shiralee', up blank wall past pocket (crux and no gear) to crack in overlap then up wall. Quite good climbing on spaced gear. Traverse R to chains on I Am An Expert on Bananas FA: Chris baxter & Keith Lockwood., 1983 | 17 R | 25m | |||||
| 9 |
Tallness is something Other People Suffer From
Takes the deep crack not quite reaching the ground right of Crumpet then step left and up wall past 2 bolts. Traverse off to anchor on Banana Expert FA: Wendy Eden & Douglas Hockly, 26 Mar 2016 | 17 | 25m, 2 | |||||
| 10 |
Great Sleeping Weather
Take right hand line through overlap right of Tallness (the flake on left line is hollow), up past bolt through bulge then easy ground to nice wall. Step left and finish as per Tallness past 2 bolts. Traverse R to chains. FA: Douglas Hockly & Wendy Eden, 26 Mar 2016 | 18 | 25m, 3 | |||||
| 11 |
★ I am a Banana Expert
Up black and orange clean streak left of Cold Episode of Influenza, 2 bolts plus gear, take micro cams and a 3 camalot. Rap anchor. FA: Wendy Eden & Douglas Hockly, 26 Mar 2016 | 15 | 25m, 2 | |||||
| 12 |
★ Cold Episode of Influenza
Takes the low angled groove at right end of wall. Shares anchor with I am a Banana Expert. FA: Wendy Eden & Geordie Webb, 25 Mar 2016 | 8 | 25m | |||||
| 13 |
Tea is Full of Good Things
The Beatuitiful Possiblities of the Northern Group! Ok, maybe not quite, but it is a delicate line up the front of a buttress. Gear is fiddly. Up seam right of Cold Episode, continue up front of buttress and through overlap at top. Traverse to anchor on Banana Expert FA: Wendy Eden & Geordie Webb, 25 Mar 2016 | 14 | 25m | |||||
| 14 |
I will build a great wall
Up wall left of easy crack, past 2 bolts and small bulge. Take a 2 RP. FA: Wendy Eden & Ying Ying He, 12 Jun 2017 | 14 | 2 | |||||
| 15 |
Most persecuted politician in history
Up easy crack in centre of wall, cross left over I will build a great wall to next easy crack. FA: Wendy Eden & Ying Ying He, 12 Jun 2017 | 11 | ||||||
| 16 |
Mind so open his brain leaked out
Up wall left of Unauthorised Mice to small ledge, crank through bulge and up. Fiddly to protect below bulge and on top wall. There is a good cam above bulge on the left that you can't see from under it. FA: Wendy Eden & Ying Ying He, 12 Jun 2017 | 17 | ||||||
| 17 |
Unauthorised Mice
The right arete of the orange wall uphill from Tea is Full of Good Things. FA: Wendy Eden & Jess Hartridge, 7 May 2016 | 13 | 20m | |||||
1.18.5. Heath Row Buttress 6 routes in Area
- Summary:
-
All Trad climbing
summary
A quiet area with a few routes
Emergency Location: Mount Arapiles, Kachoong Area
approach
Either walk up hill from Shiralee Wall or downhill from Evelyn and Lou area.
| Route | Grade | Style | Selected ascents | |||||
|---|---|---|---|---|---|---|---|---|
| 1 |
22% Off Manchester
On left side of arete of Lacuna is an undercut start to easy flake, then slabby wall and short corner to summit opposite Hurts Wall. FA: Sarah Natali, Greg Prit, Greg Pritchard & Wendy Eden, 27 May 2017 | 10 | 40m | |||||
 |
||||||||
| Route | Grade | Style | Selected ascents | |||||
| 2 |
Lacuna
The left arete of the 'Heath Row' buttress. Start as for 'Trotskyist Tendency' and after the initial black bulge, continue up the arete. FA: Kieran Loughran, Keith Lockwood & Norm Booth, 2012 | 15 | 40m | |||||
| 3 |
Trotskyist Tendency
Climbs the centre of the face left of 'Maiden Voyeur' despite continually heading for the left wing. Good climbing throughout but the regular need to step back right to avoid the left arete detracts a bit. Take cams up to 3.5 (blue Camalot). Belay as for Heath Row or on a small stance a few metres higher below the left-hand diagonal line. Move up left to the bulge at the start of the face and pull over onto the black face. Continue, keeping right of the arête. At each bolt, step right below it and climb straight past. Belay on a ledge about 5 metres above the third bolt. Scramble, roped up about another 10 metres to another good ledge that leads off into the gully below Hurts. FA: Kieran Loughran & Steve Greig, 2012 | 19 | 35m, 3 | |||||
| 4 |
★★ Maiden Voyeur
No prizes for guessing who put this up. Following the left-most of the ddiagonal lines this is quite a good climb. Used to be hard to locate because the guidebooks mangled the writeups of this and 'Mammary Lane'. Start: Start as for 'Heath Row' Go up into the left crack and take the wide layback flake (big cam). Finish up nice thin crack. FA: Michael Stone, Chris Baxter & Dave Gairns, 1979 | 15 | 42m | |||||
| 5 |
Mammary Lane
This and 'Maiden Voyeur' were described in the wrong order in the guidebooks so it was hard to work out where things went. The FA date in the Shepherd guide was also incorrect. The majority of this climb is very easy but the upper wall is great. Start: Start as for 'Heath Row'. FA: Chris Baxter, Dave Gairns & Mike Stone, 1979 | 15 | 42m | |||||
| 6 |
Heath Row
Looks quite pleasant despite the odd small shrub. Was upgraded to 15 in Carrigan guide; someone must have strayed onto the then unclimbed Maiden Voyeur! Start: There is a small square chipped in the rock at the base of the route. FA: Ann & Roland Pauligk, 1973 | 8 | 48m | |||||
1.18.6. Echo Crag 22 routes in Cliff
- Summary:
-
Mostly Trad climbing
description
Emergency Location: Mount Arapiles, Kachoong Area
| Route | Grade | Style | Selected ascents | |||||
|---|---|---|---|---|---|---|---|---|
| 1 |
Fiddler on the Roof
Very bouldery. Scramble down from above to reach this big triangular roof above 'Touchwood'. Thin flake out the roof (#3 RP). FA: John Allen & Tobin Sorenson, 1979 FA: Re-established after a hold snapped by Paul Hoskins., 1994 | 26 | 35m | |||||
| 2 |
Christmas Carol
Bald orange arete from ledge just below and right of 'Fiddler' On The Roof. FA: Glenn Tempest & Steve Lassche, 1980 | 20 | 30m | |||||
| 3 |
Touchwood
Not without merit, despite the long scrambling start. Start about 50 metres left of Leaden Echo below black and orange buttress.
FA: Keith Lockwood, Chris Baxter & Ed Neve, 1974 | 8 | 70m, 2 | |||||
| 4 |
Whimsical
The botanical corner left of Leaden Echo.
FA: Keith Lockwood & Murray Taylor, 1968 | 12 | 60m, 4 | |||||
| 5 |
Touch and Go
Some exciting moves up the front of Touchstone's big block but hasn't caught on. The tree at the start has fallen over so start may be a little more challenging. The first pitch could make a good start for 'Touch-Type'.
FA: Ed Neve, Hugh Foxcroft (alt) & Garry Wills, 1980 | 19 | 65m, 2 | |||||
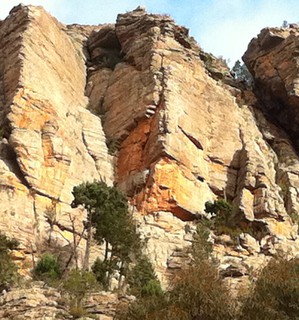 |
||||||||
| Route | Grade | Style | Selected ascents | |||||
| 6 |
★★ Touchstone
Two very nice pitches.
FA: Keith Lockwood, Chris Dewhirst & Chris Baxter, 1974 FFA: Dan Kortschak & Jo Thomas, 2003 | 14 | 60m, 2 | |||||
| 7 |
★★ Touch-Type
A bolted direct finish to Touchstone. Follow second ptich of Touchstone but, instead of veering left, continue directly up wall past two bolts. FA: Mark Wood, Allan McCulloch, Paul Deacon & Simon Mentz, 2008 | 19 | 25m, 2 | |||||
| 8 |
★ Touchstone Right Hand Finish
Seam a couple of metres right of headwall of 'Touch-Type' and just left of the finish of The Singing Wire. FA: Kieran Loughran & Meg Sleeman, 1992 | 17 | 25m | |||||
| 9 |
★★ What the Fuck is Pluto?
This is the name given to the most common way to finish Touchstone and isn't considered a separate climb. This was the first recorded ascent of this variant and left for documentary purposes. FA: Dan Kortschak & Jo Thomas, 2003 | 15 | 60m | |||||
| 10 |
★ The Singing Wire
Nice climbing all the way; a fitting companion route to 'Touchstone'. Follows a direct, continuous crack system in three distinct parts. Some of the first pitch is not new, but the whole climb as described is a new conception. Start: Start 3m right of Leaden Echo.
FA: Keith Lockwood & Noel Whiteside (alt)., 2003 | 17 | 60m, 2 | |||||
| 11 |
The Leaden Echo
The major corner system.
FA: Chris Baxter, John Moore & Phillip Stranger. They later returned to remove their aid point!, 1965 | 10 | 78m, 3 | |||||
| 12 |
Silent Majority
Good overhang approache by abseil to final belay of The Leaden Echo. Start up the last pitch of The Leaden Echo and then take crack through roof on right. FA: Glenn Tempest & Jim Grellis, 1975 | 18 | 25m | |||||
| 13 |
★ Mr Buffalo
Taking the wall left of 'Honeycomb', it is highly likely that this is a retro-bolt of 'Adapter'. Access by 25 metre abseil to small stance in corner. Up wall past 2 bolts and small cams. | 21 | 25m, 2 | |||||
| 14 |
Adapter
Apparently a rope is allowed for the descent, but not the ascent! Unfortunately it seems likely 'Mr Buffalo' is actually a retro-bolted repeat of this route. Rappel down to a small ledge 4m under the second belay of The Leaden Echo. From this climb straight up brushed slab to cave. Traverse 3m right and finish up FA: Patrick Alseby. Solo. Summer., 1998 | 22 | 27m | |||||
| 15 |
★★ Honeycomb
Fantastic finger-crack up the righthand wall of 'The Leaden Echo'. Start: Either scramble in from the right to a stance or abseil 35 metres from the anchor above 'Mr Buffalo'. Follow lefthand weakness through bulge then move left and climb the pencil-thin crack through the overlap and beyond. FA: Tim Beaman & Chris Peisker, 1976 | 22 | 30m | |||||
| 16 |
★★ Nativity
Great flake line which can be escaped at half-height but why would you? Follow left weakness through bulge (as for Honeycomb) then up flake-line above until it rejoins arete. Continue to top, taking care with some hollow rock. FA: Phillip Stranger & John Moore, 1967 | 16 | 36m | |||||
| 17 |
★ Psalm 69
Warning Flora and Fauna: Active Bees The obvious right-hand companion to 'Nativity'. Start as for Nativity but take right-hand weakness through bulge. Up bulging seam directly above to arete and up to re-join Nativity. | 19 | 36m | |||||
| 18 |
★ The Swarm
Orange arête right of Navity past 2 fixed hangers then continue direct up overhung arête on trad to finish at anchors on NDS. Vital #5 wire after 2nd bolt. FA: Neil Monteith, 2011 | 23 | 18m, 2 | |||||
| 19 |
★ Jesus Built My Hotrod / Nativity Direct Start
Originally called 'Nativity' Direct Start and poorly protected. Now retro-bolted and popular. Starting just right of arete, climb pretty orange wall through small overlap. Continue steeply up wall to small stance and rap anchor. FA: Mark Moorhead & Fred From, 1979 | 21 | 15m, 4 | |||||
| 20 |
★ Jugular Freeway
The desperate, unprotected start and the huge detached block higher up make this an unattractive proposition. Start just left of 'Lone Pine Corner'. Up face, moving right to overlap Over and up break between orange and black, past flake to top. FA: Paul Aubrey & Dave Fearnley, 1980 | 21 R | 30m | |||||
| 21 |
★ Lone Pine Corner
Classic, square-cut corner starting dirctly behind small pine. Finish up easy ground above corner. FA: Keith, Timothy & Fiona Lockwood, 1993 | 8 | 30m | |||||
| 22 |
Kabul
Use whatever you can to roll onto ledge above roof, and then climb corner. The grunt can be avoided to the right at about 12. Start: Right of 'Lone Pine Corner' is another sweet little corner with a steep roof in the way at ground level. FA: Richard Smith & Greg Pritchard, 2001 | 16 | 10m | |||||
1.18.7. Kachoong Area 34 routes in Cliff
- Summary:
-
All Trad climbing
Lat / Long: -36.750194, 141.834922
description
Emergency Location: Mount Arapiles, Kachoong Area
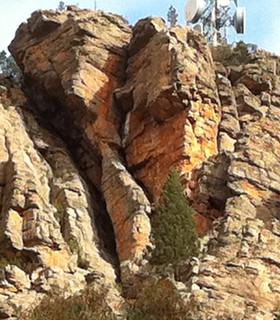 |
||||||||
| Route | Grade | Style | Selected ascents | |||||
|---|---|---|---|---|---|---|---|---|
| 1 |
Echo System
A good approach to 'The Golden Echo'. Start: Start as for 'A Taste of Honey' Direct Start. FA: Mark Witham & Michael Hartman | 17 | 13m | |||||
| 2 |
★★ A Taste of Honey Direct Start
A great individual pitch or an approach to one of the other climbs. FA: John Davis & Jim Smith, 1967 | 20 | 13m | |||||
| 3 |
★ Capilano
Up wall to first horizontal break and traverse spectacularly left to arete and up. FA: Kevin Lindorff, Gordon McCallum & Colin Reece, 1979 | 21 | 25m | |||||
| 4 |
★★ Dr. Paul and the Amazing Dancing Gnome
Start as for 'Capilano' and continue up wall with long reaches to major horizontal. Don't escape left but keep going up for a few more moves until it eases. FA: Paul Smith & Geoff Little, 1985 | 21 | 25m | |||||
| 5 |
★★★ One Day Hero
A better direct. Go straight up from start of Dr Paul. FA: Douglas Hockly & @cathdv, 2015 | 23 | 15m | |||||
| 6 |
★ Golden Echo Direct
The obvious wide line through the roofs above the ledge. FA: Chris Baxter & Andrew Bowman, 1974 | 19 | 20m | |||||
| 7 |
★★ Golden Echo Variant
This was the original route but has moprhed into a variant. FA: John Moore, 1966 | 18 | 25m | |||||
| 8 |
★★ Golden Echo / The Golden Echo
Interesting climbing through some exciting territory. FA: Joe Friend & Ian Lewis, 1974 | 18 | 25m | |||||
| 9 |
★★ Sounds Like
A scary direct start to Golden Echo. Looks worthless but in fact has a fascinating crux section. FA: Kim Carrigan, Nick Plishko & Robin Miller, 1982 | 23 R | 35m | |||||
| 10 |
★★ Echo Chamber
Links the initial wall of Kachoong into the top of Golden Echo RHV via an exciting traverse left at the roof of Kachoong. Bring a #3 camalot for the traverse. For full value, start at the the steep crack/bulge that leads up the the belay ledge of Kachoong. FA: Geordie Webb & Paul Deacon, 29 Oct 2018 | 19 | 30m | |||||
| 11 |
★★ Silence is Golden
Line in between Sounds Like and Kachoong, start directly below where Kachoong is typically started, easiest to rap in from the bolts that get you to the photographer spot. Directly up the orange wall merging with Golden Echo at the left hand end of the Kachoong roof. The wall takes small medium cams, RP's and small wires. Make sure you build a good nest of gear about 4 meters before the roof, then make thin moves to the roof. Bigger gear required from the roof to the top, 0.5 to 3 Camalot. FFA: mark, adam demmert & Geordie Webb, 3 Dec 2018 | 24 | 35m | |||||
| 12 |
★★★ Kachoong
Up on jugs to rest at roof, place bomber cams and then launch out into glory across the roof into the crux at the lip. Easy up headwall to welcome belay Start: Start at the ledge below the big roof with the chalked flakes. FA: Glenn Tempest & Kevin Lindorff, 1977 | 21 | 25m, 1 | |||||
| 13 |
★★ Kachoong Right Hand Variant
The original line through the roof took the little hanging corner on the right. This is worthwhile in its own right. FA: Dave Neilson & Chris Dewhirst, 1968 | 21 | 25m | |||||
| 14 |
★ Kachoong Piker's Variant
Climb to the roof (crux) and then escape out right and up easy wall. FA: Bruno Zielke & Fred Langenhorst, 1969 | 19 | 20m | |||||
| 15 |
★ Achoo
Poorly protected start. Douglas doesn't mind at all if someone puts 2 bolts in the start. Start: Start about 2m R of 'Kachoong'. FA: Douglas Hockly & Gareth Llewellin, 2002 | 23 R | 15m | |||||
| 16 |
★ Ground Cummin
Start just left of Max and go up and slightly further left up overhanging wall. When angle eases, head up to final roof crack. FA: Nick Neagle & Paul Francis, 1987 | 18 | 18m | |||||
| 17 |
★ Max
Lovely short crack on the left side of the 'Hurts' Wall. FA: Roland & Ann Pauligk, 1973 | 10 | 15m | |||||
| 18 |
Consolation Prize
Slightly contrived face climbing between Max and 'Moritz'. FA: Paul Francis & Nick Neagle, 1987 | 15 | 15m | |||||
| 19 |
★ Moritz
Crack 3 metres right of Max is also quite good. FA: Ann & Roland Pauligk, 1973 | 9 | 15m | |||||
| 20 |
Santa Claus Conquers the Martians
Loads of steep traversing. FA: Simon Mentz, Scott Camps, Jared McCulloch & Andrew Eastaugh, 1988 | 21 | 20m | |||||
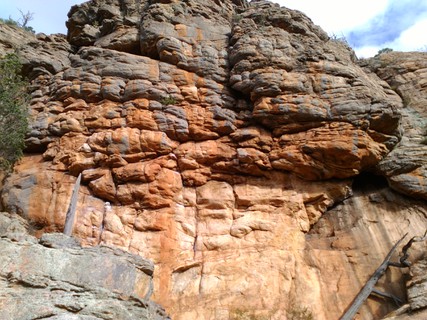 |
||||||||
| Route | Grade | Style | Selected ascents | |||||
| 21 |
Mega
Start L of Hurts and climb up to join Hurts where it steps L. FA: Richard Smith & Greg Pritchard, 2006 | 18 | 10m | |||||
| 22 |
★★ Hurts
Good, pumpy wall. FA: Louise Shepherd & Kim Carrigan, 1979 | 18 | 18m | |||||
| 23 |
★ Hurt Phase link
Start for Hurts and at the obvious big block traverse int In Phase and finish up that route | |||||||
| 24 |
★★ In Phase
Very good and very strenuous. FA: Kim Carrigan, 1979 | 23 | 20m | |||||
| 25 |
★ Cyclic Phase
Avoids the annoying start of Cyclic and makes it into a worthwhile route, unless you are a grumpy old guidebook editor who thinks it ruins the integrity of the existing line. Up In Phase to the finger lock then step right into main line of Cyclic. FA: Wendy Eden, @cathdv & Jess Davies, 22 May 2017 | 22 | ||||||
| 26 |
★ Cyclic
Slight corner 4 metres right of 'In Phase' then traverse 3-4 metres left, over roof and up crack. FA: Kim Carrigan & Louise Shepherd, 1979 | 20 | 20m | |||||
| 27 |
Monkey
Looks awful. FA: Roland & Ann Pauligk, 1973 | 12 | 24m | |||||
| 28 |
Low-rent Rendezvous
Not the best part of town. Start: Takes clean convex wall about 30m right of 'Hurts' Wall. FA: Keith Lockwood & Kieran Loughran, 2000 | 15 | 15m | |||||
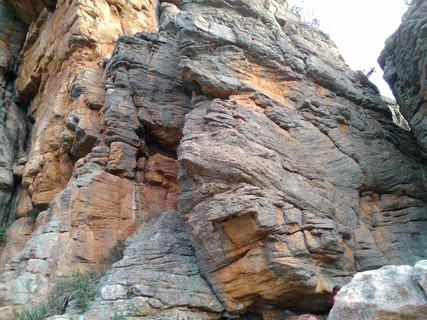 |
||||||||
| Route | Grade | Style | Selected ascents | |||||
| 29 |
★ Constance Little
Nice little wall climb. Faces the same way as 'Hurts', Max and 'Moritz' but just one level below them. Appears to be a repeat of A Taste of Bin Laden. Start: From 'Hurts', go out and drop down through the gap that leads down to Golden Echo DS and Taste of Honey. As you emerge from this chimney there is a face on the right which is undercut on its left side. Start on the right edge of the undercut. FA: K Loughran & N Booth, 2005 | 14 | 12m | |||||
| 30 |
A Taste of Bin Laden
Start: The Right of the 'Taliban Airways' wall. Appears to be the same as Constance Little. FA: Richard Smith & Greg Pritchard, 2001 | 13 | 10m | |||||
| 31 |
Mufti Dive
There are too many aretes in these route descriptions for the available cliff! Given the absence of any thin grey walls right of either arete, I am wondering if this is the thin grey wall left of the arete of CL's wall. It didn't have enough gear to inspire me to check out the grade. Or it may be squished in between Haiku Climbing was Super and CL. Start: Right of the arete is a thin wall. ????? FA: Paul Hoskins & Richard Smith, 2002 | 21 | 10m | |||||
| 32 |
Haiku
The original name was: climbing was super on long steep juggy arete loose jug in my hand Start: The steep left arete of the 'Taliban Airways' wall. FA: Richard Smith & Paul Hoskins, 2002 | 18 | 10m | |||||
| 33 |
Taliban Airways
(Flying into 'New York', twice daily). A good way to get up to the start of 'Kachoong' warm. Even when after climbing here with the first ascentionist, we're not sure where these routes are! Underneath the start of 'Kachoong' is a wall which the track skirts. Unless this is also squished in with Constance Little, it appears to be the line on the next short wall heading directly to the belay for Kachoong. Felt a little more like 15 though. FA: Richard Smith & Greg Pritchard, 2001 | 12 | 10m | |||||
| 34 |
?????
Beneath Kachoong, R of ATOHDS. Up rib then corner to the belay for Kachoong. | 10 | 25m | |||||
1.18.8. High Dive Gully 18 routes in Cliff
- Summary:
-
All Trad climbing
Lat / Long: -36.750302, 141.834012
description
Emergency Location: Mount Arapiles, High Dive Gully Area
/a4/93/a4931fd5f7c2e0d068e79842ddafc1d11572946f) /52/cd/52cdc478dd49ce0fe13e90985c3e0be5d8be7dea) |
||||||||
| Route | Grade | Style | Selected ascents | |||||
|---|---|---|---|---|---|---|---|---|
| 1 |
Cellular Banana
Won't make many "best of" lists but the climbing is surprisingly good. Aside from the off chance of toppling 40m down the gully, it's more like a highball boulder problem. Start up Cellular Destruction, but instead of traversing right, continue up the steep overhanging crack to top out 3m left of the finish of Cellular Destruction. FA: Huw Lewis, 1991 | 23 | 6m | |||||
| 2 |
★ Cellular Destruction
From the big chalked plate at the top of the gully, move up to disappointing holds from where key gear needs to be placed, then right and up to hard (or is it ?) top-out. Only 22 if top roped or gear is in place already FA: Malcolm Matheson & Nic Taylor, 1982 | 23 | 8m | |||||
| 3 |
Don the Cockroach
By quite some margin the most pointless route on the wall - if not Arapiles - and included for historical reasons only. Traverse right from start of "Cellular Destruction" through the letterbox slot on "Power Corruption and Lies" to the easy finish crack of "A Taste of Honey". Up this if you must. FA: Geoff Weigand & Russell Chudleigh, 1988 | 22 | 15m | |||||
| 4 |
★★ Power Corruption and Lies
"Power" your way along the slopey traverse line 4m down and right of "Cellular Destruction" to a bolt. Now up past second bolt to letterbox slot (#0.75 BD cam or better, #0.1 BD cam in the smaller gap leaving space for your hands). Up (being careful not to escape out R to the easier ground on the arete and incur the ridicule of the climbing community) into Cellular Destruction at the end of its traverse and finish as for it, complete with its hideous mantle. FA: Geoff Weigand, 1985 | 27 | 15m | |||||
| 5 |
★ Corruption and Lies / PCL Top Half
This has been a common warm up for the harder routes here since at least the 1990's so not sure of its FA details. Starts at first bolt of Power Corruption and Lies by (clipping first, and then) leaning scarily and irreversibly across the chasm. Shorter people (under 180cm) will not be able to reach and will have to grab the bolt to start. Swing onto the jugs (if you can reach) just under the 1st bolt and climb up past Power Corruption and Lies's 2 FH's to finish as for that route, thereby avoiding the much more difficult crux traverse. Note: The same trick can be done at the 2nd bolt at about grade 23 or 24 and a slightly less reachy (but still intimidating) lean, avoiding Power Corruption and Lies's second crux. | 25 | 10m, 2 | |||||
| 6 |
Belly Flop
Start about 5m up the gully from High Dive at an enormous horizontal break. Forgettable traversing R-wards leads to High Dive, where instead of going up, the route (improves significantly and) continues along the lip of the roof that caps the Taste of Honey traverse, eventually joining that route. (A much better variation is to start up High Dive and finish along this.) FA: Glenn Tempest, Mark Moorhead & Marty Beare, 1983 | 22 | 25m | |||||
| 7 |
★★★ Lats in the Belfry
Originally graded 30, it has settled as a solid grade 28 and offers the longest piece of continuous steep climbing at Arapiles. Start as for High Dive (although the FA started by traversing in from Belly Flop). At the major horizontal break prior to its crux head left and launch up past cam slots to a piton, don't trust this (back it up !), but continue anyway through to "Power, Corruption and Lies" and another, even more horrible piton. Ignore this and instead, clip the 2 bolts and continue straight up to finish as for Cellular Destruction. (Don't escape off R to the arete after the letterbox slot lest you be ridiculed by the climbing community) FA: paul smith | 28 | 20m, 2 | |||||
| 8 |
★★★ You're Terminated
Climb "High Dive" until its crux and continue up underside of arete past 2 bolts to join "Power Corruption and Lies" FA: Geoff Weigand, 1989 | 29 | 20m, 2 | |||||
| 9 |
★★ Terminated Directly
You're Terminated Direct. Open Project. Direct start possible (will require a bolt) up the blunt arete between Dark Matter and A Taste of Honey. Direct finish possible straight over bulge after 2nd bolt on You're Terminated. Would make the line completely independent of Lats in the Belfry. | 29 | 2 | |||||
/59/f3/59f3a3b981745e4087b40583389793ba6d484307) |
||||||||
| Route | Grade | Style | Selected ascents | |||||
| 10 |
★★★ High Dive
Climbs the inverted staircase just left of "A Taste of Honey" and is a superb companion route to it. Dave Jones used to solo this regularly as a warm up for the harder routes in this gully Starts at a heavily chalked ledge low in the gully. Traverse R about 4 metres to a fixed wire before heading up on flat holds to the large break of Belly Flop. Traverse R to just before the arete, then up to the next break just below the first bolt of "You're Terminated" (virtually impossible to clip on this route). Now traverse with difficulty R around the arete to easier ground. Finish up the lovely grade 10 headwall or backjump if you don't suffer from summit fever. For gear, virtually every cam ever made could be placed at some point in this route, but a #0.3BD protects the crux on the arete nicely. FA: Kim Carrigan, 1982 | 23 | 25m | |||||
| 11 |
★ E P extended play / EP
Linking Cavities into this can be combined for a 40m excursion from bottom to top and gives it mega pitch. Careful of rope drag - roller 'biners recommended. Or Start as for High Dive, but before the major horizontal, traverse into A Taste of Honey and along its hand traverse. At the end reach back onto the Belly Flop lip and mantle it just R of the arete up to High Dive. Continue up past previously dodgy death-block (now pinned & glued, staying about 1m R of the arete the entire way. Top out just R of the shared PCL / LITB / YT / CD finish. | 24 | 20m, 2 | |||||
| 12 |
★★★ High Flop
Start up High Dive, finish up Belly Flop. All the fun of High Dive, a roof to finish and with none of the difficulty. FA: Andrew Connolly, 1995 | 22 | 10m | |||||
| 13 |
★★ Sir Latsalot
Open project. Has been attempted on natural gear using 19 camalots (hence the name). Ideally needs a bolt or three in strategic places to keep you away from the gully. Start from the large grey and white ledge 8m beneath High Dive's start. Climb up overhanging corner into flared chimney and follow blunt left facing arete to High Dive's traverse. Cross this, then up grey wall up and slightly left to Belly Flop's traverse line. Cross this, then up (careful of ledges on the side) to meet Power Corruption and Lies near its start. Cros this, then straight up to the 2nd massive jug on Cellular Destruction. Finish as for Cellular Banana. A completely independent companion route to Lats in the Belfry, only longer. | 26 | 30m | |||||
| 14 |
★ Dark Matter
Start just left of "A Taste of Honey Direct Start" at the bottom of the gully. Up overhanging crack (this was Kim Carrigan's "Cavities" from 1984) through bulge and off-width to a large grey and white ledge. Continue more easily up corner to High Dive's initial traverse (thread runner) and step off left to finish. Given that the grade for the first half was 24, this may be quite solid at 23. | 23 | 20m | |||||
| 15 |
Cavities
Originally described as "contrived", this route starts around the corner to the left of A Taste of Honey Direct Start. Climb the flaring crack through an overhanging bulge into an offwidth and up to a grey and white ledge about 8m beneath the start of High Dive. A bit dirty, but also completely superseded by Dark Matter which incorporates all of this into a longer route. FA: Kim Carrigan, 1982 | 24 | 13m | |||||
| 16 |
★★★ A Taste of Honey
Absolutely thrilling, difficult for the grade if you don't like having your heels above your head, and generally more difficult to second than to lead. Start at the belay at the top of the pillar L of the Kachoong wall. This can be approached by "A Taste of Honey Direct Start", "Echo System" or the corner scramble between it and the Kachoong wall. Up surprisingly easy overhanging crack to a very steep section beneath a roof with a fairly blank wall on the right. Traverse R across this wall using the line of jugs just below the roof with disappointingly few footholds to a ledge at the end and safety. The route continues up on lovely rock at about grade 10 to the top. The original aid line was the low crack (now known as "A Taste of Honey Variant") and the original free ascent (Henry Barber) used the roof crack above at the same grade but the best climbing is as described. FFA: Hot Henry Barber FA: Chris Dewhirst & Chris Baxter, 1968 | 21 | 27m | |||||
| 17 |
★★ A Taste of Honey Variant
This was actually the original aid line. Traverse right along the thin crack from the fixed peg. FA: Kim Carrigan & Mark Moorhead, 1979 | 24 | 27m | |||||
| 18 |
Savour The Flavour
Ultra-low variant on Taste Of Honey. Traverse right along the lowest crack, just 20cm or so above the lip, with feet swinging, to the arête, then up to the ledge. FA: Hugh Manoid & Bud Green, 1988 | 25 | 27m | |||||
1.18.9. Evelyn and Lou Area 21 routes in Area
- Summary:
-
All Trad climbing
description
Emergency Location: Mount Arapiles, Kachoong Area
approach
Descend as for Kachoong but where the path heads right underneath Hurts Wall, head out and left to some large callitris. Scramble down the front and you will be at the top of the wall, head left to get to the base. You could also walk uphill from Shiralee Wall.
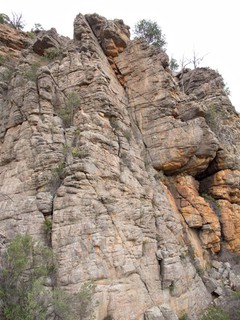 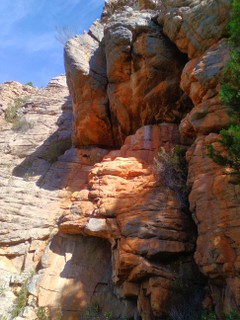 |
||||||||
| Route | Grade | Style | Selected ascents | |||||
|---|---|---|---|---|---|---|---|---|
| 1 |
Better Not Peak
Up the crack then arete till angle eases. Follow sharp arete to spectacular summit. Start: Start at a crack on the east face of the pinnacle. FA: Greg Pritchard & James Falla, 1999 | 8 | 15m | |||||
| 2 |
Noodles Romanoff
Follow arete all the way to top. Start: Slightly uphill of BNP, 5 metres left (description says right but that makes no sense) of the start of 'Generation Gap', at the left arete. FA: Greg Pritchard & James Falla, 1999 | 5 | 45m | |||||
| 3 |
It's Sausage
Up the middle of the wall left of Generation Gap, finishing up left arete. Some friable rock low down. FA: Jess Hartridge & Wendy Eden, 5 Apr 2016 | 13 | 40m | |||||
| 4 |
★ Generation Gap
Pleasant easy climb up a great line. Left facing stepped corner left of the bulging wall with Lou and Evelyn. FA: Chris Baxter, Dave Gairns & Michael Stone, 1979 | 5 | 42m | |||||
| 5 |
Hamish
Start up 'Generation Gap' then step onto right wall above roof at 8m and up. FA: Keith Lockwood & Ray Lassman, 2012 | 14 | 42m | |||||
| 6 |
★ James
Vigorous crack through a ceiling. Start: Start as for 'Generation Gap'. FA: Dave Gairns, Chris Baxter & Michael Stone, 1979 | 20 | 12m | |||||
| 7 |
★ The Foxhole Escape
Follow the black trench up and out through the offwidth roof. Rap station installed. FFA: Chris Ferre, muki woods, Paul Graham & Jae Zhong, 9 Jul 2018 | 18 | 15m | |||||
 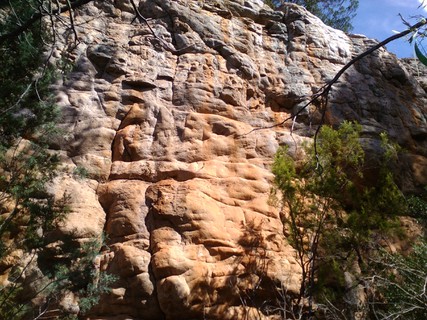 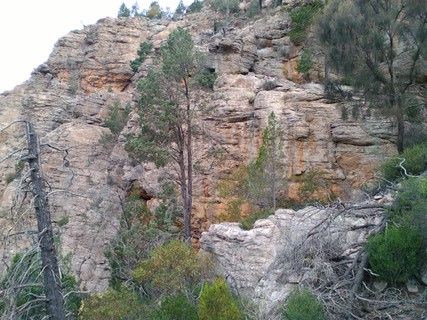 |
||||||||
| Route | Grade | Style | Selected ascents | |||||
| 8 |
Pumparama
Steep but if you have trouble on this leave the rest of the routes on this wall alone. Start: Start at wide crack right of James. FA: Chris Baxter, Dave Gairns & Geoff Gledhill, 1985 | 19 | 15m | |||||
| 9 |
Broom Hilda
Over roof just right of 'Pumparama' and finish up short crack. Start: Start just right of 'Pumparama'. FA: Kim Carrigan & Louise Shepherd, 1981 | 21 | 12m | |||||
| 10 |
★ Man on the Land
Face between 'Broom Hilda' and Evelyn, through bulge. FA: Geoff Little, Jon Muir & Maureen Gallagher, 1988 | 24 | 12m | |||||
| 11 |
★ Garth Douglas Pringle Hockly
A short route with shallow pockets. Three bolts to join Evelyn at about 2/3 height. | 24 | 15m, 3 | |||||
| 12 |
★ Evelyn
Thin and energetic Start: Start at thin crack 4 metres right of 'Broom Hilda'. FA: Kim Carrigan & Louise Shepherd, 1981 | 21 | 12m | |||||
| 13 |
★ A profound debate on an important topic of great significance
Up the crack right of Evelyn then wall past bolt to where crack reopens. FA: Wendy Eden, Douglas Hockly, Jess McMahon & Laurie., 6 May 2016 | 22 | 12m | |||||
| 14 |
★ Order Your Christmas Poultry Now
It'll be too late once you're at grips with this. FA: Jon Muir & Geoff Little, 1988 | 23 | 12m | |||||
| 15 |
Lou
Reputedly a tough lead. FA: Kim Carrigan & Louise Shepherd, 1981 | 19 | 10m | |||||
| 16 |
★ Lou Direct
After the initial crack on Lou, continue up just right of mossy streak to where the crack reopens. Gear is probably better than the original but still a little exciting. Look out for a 3 rock to the left of where you climb (it's in the moss) after the crux. FA: Wendy Eden & Douglas Hockly, 9 Apr 2016 | 22 | 12m | |||||
| 17 |
Greg will be Amused
Right of Lou past 2 bolts and some fiddly cams and small wires FA: Wendy Eden, Lou Shepherd, Gareth Llewellyn & Douglas Hockly, 8 Apr 2016 | 22 | 10m, 2 | |||||
| 18 |
Greg Will be Pleased
Bouldery seam between Greg Will be Amused and Lou's not 19. FA: Hoskins & Smith. late., 1995 | 20 | 9m | |||||
| 19 |
Lou's Not 19 (Anymore)
Short crack. Very short. Start: Start at the right hand end of the wall that contains Lou. FA: Smith, Hoskins & late., 1995 | 17 | 4m | |||||
| 20 |
★★ Glue-ten Free
Start at crack under bolt, move up weakness to second bolt and through roof to fixed anchor. FFA: muki woods & Chris Ferre, 9 Jul 2018 | 24 | 20m, 2 | |||||
| 21 |
Traces Of Nuts
Start in small left facing corner at right-hand end of wall. Follow crack to top. FFA: Jae Zhong & Paul Graham, 9 Jul 2018 | 14 | 19m | |||||
1.18.10. Nameless Gully 11 routes in Cliff
- Summary:
-
All Trad climbing
Lat / Long: -36.749423, 141.832942
description
The upper walls and outcrops in the gully between The Northern Group and The Far North.
Emergency Location: Mount Arapiles, Kachoong Area
approach
Approach from the top as for the 'Kachoong' area but continue past the telecom tower along the road to the left. Follow this until nearly at the power pole, and turn onto a track leading left along the cliff top, after about a hundred metres look for cairns leading down hill to the right, follow the track for another hundred metres until shady cliff is visible ahead
descent notes
Easy walk off
history
First climbed during a VCC visit, then John Muir and Geoff Little created the fantastic climb “Because Its There” in 88 Recent development by Madeleine Woods,Jae Zhong, Chris Ferre, & Muki Woods in 2018 has seen some new climbs at the shady little cliff
/60/20/6020c1c8aa1e1effac4570fc7cf4b942fccfe9b5) /7e/87/7e87b8638c31881625fed72c77767aaf40fe9ee0) /af/79/af79638b89851add4b8284df309140a72f9e9b8e) |
||||||||
| Route | Grade | Style | Selected ascents | |||||
|---|---|---|---|---|---|---|---|---|
| 1 |
★ Devil’s Food Cake
The blocky staircase-like feature that leads right and up. Shares finish with Kueh Lapis. Walk off descent. FFA: madeleine Woods, Jae Zhong & muki woods, 12 Jul 2018 | 12 | 8m | |||||
| 2 |
★ Kueh Lapis
The major left leaning line on the left hand end of Nameless Wall. Tricky moves through overhung blocky territory lead to final crack to top out. Walk off descent. FFA: 12 Jul 2018 FA: Jae Zhong & muki woods, 12 Jul 2018 | 16 | 10m | |||||
| 3 |
The Climb Who Shagged Me
Does your pussy do the dog? 10m. Start: Start: 8m up the hill from 'Because It's There' at point where climbing looks possible. Below end of horizontal break that splits the cliff. Starts off blocky ledge and heads left through left slanting crack, then straight up to top FA: James Falla & Greg Pritchard, 1999 | 18 | 10m | |||||
| 4 |
Apple Crumble
Feisty little overhang must be negotiated via jugs to pleasant face climbing, exit through large obvious groove to the top Set: muki woods, 12 Jul 2018 FA: muki woods & Jae Zhong, 12 Jul 2018 FFA: muki woods & Jae Zhong, 29 Jul 2018 | 18 | 12m | |||||
| 5 |
★★ Because It's There
The face with a wide horizontal. On the other side of the gully from - and facing - 'Stone Age'. Start at right hand end of wall at the right hand of the two weaknesses up hard overhung start to scalloped wall, trending right, then back left and up to finish through the right hand side of the roof at a bolted anchor. FFA: John Muir & Geoff Little, 1988 FA: Jon Muir & Geoff Little, 1988 | 21 | 15m | |||||
/b4/5a/b45a74dbedd1d07dc6e4a390e08924dc021d47ad) |
||||||||
| Route | Grade | Style | Selected ascents | |||||
| 6 |
Profiterole
Far right hand end of Nameless Wall is a short right facing corner, up this and crack above, belay at topmost ledge Walk off descent FFA: 9 Jul 2018 FA: Jae Zhong & Paul Graham, 9 Jul 2018 | 14 | 15m | |||||
| 7 |
Help Meet
The next few routes are in a hidden gully running in between the Lou and Evelyn gully and PB gully. They look better in this topo than they do from the base of the climbs. Anything that does not kill you must make you stranger. Start: In the gully behind the pinnacle with 'Because It's There' at the right end of a small white wall beneath a large fallen tree. FA: Jon Bassindale & Greg Pritchard, 1999 | 19 | 15m | |||||
| 8 |
The Dwarves of Towyn
Up cracks then through 'interesting' headwall. Start: Start: On the next tall buttress down the gully is a wall with an obvious crack on the right. FA: Jon Bassindale & Greg Pritchard, 1999 | 17 | 20m | |||||
| 9 |
Just Another Crappy Route From Late Last Century
Up a shallow corner, curving left at top then up. Start: On the next buttress down from 'The Dwarves of Towyn', in the middle of the south face, is an obvious shallow corner. FA: James Falla & Greg Pritchard, 1999 | 16 | 15m | |||||
Lobster Princess NotchAround right of The Dwarves of Towyn it is possible to scramble around into PB Gully and come out on the terrace next to Black Legend (which is on a small wall on a little terrace, directly opposite PB). The following two climbs are in the notch on a nice little wall which faces east. | ||||||||
| 11 |
The Lobster Princess
Harder than it looks. Needed two leaders to push this mighty 15m line to the top! Start: Start to left of wall, 1m right of arete. FA: Greg Pritchard & James Falla, 1999 | 16 | 15m | |||||
| 12 |
Declan the Crab
No joke. (2 pitches for a 15m route is a bit of a joke though?!) Start: Start on the left side of this wall. FA: James Falla & Greg Pritchard, 1999 | 12 | 15m | |||||
1.18.11. Mermaid Avenue 16 routes in Crag
- Summary:
-
All Trad climbing
description
approach
As for Nameless Gully and Evelyn & Lou area
| Route | Grade | Style | Selected ascents | |||||
|---|---|---|---|---|---|---|---|---|
| 1 |
Oompaloompa
Up streak and continue straight on. Start: About 1m left of 'The First Kiddy Climb' and a bit lower is a orange streak in the middle of black. Sorry kids, but these 2 routes are the complete pox left of the unclimbed grotty corner at the left end of the wall of Mermaid Ave FA: Jack Synnot, Mark Synnot, Zoe Synnot & Pete Canning, 2005 | 8 | 8m | |||||
| 2 |
The First Kiddy Climb
Not destined for greatness, but when you are only 8 and 10 years old putting up a route is exciting. Start: 1m left of the chimney/corner (unclimbed) FA: Zoe Synnot, Mark Synnot, Jack Synnot & Pete Canning, 2005 | 8 | 8m | |||||
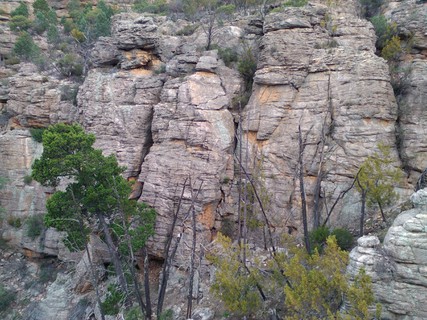 |
||||||||
| Route | Grade | Style | Selected ascents | |||||
| 3 |
Please Don't Talk to the Lifeguard
Not waving, drowning. Start: Start at the left hand edge of the wall, below a smooth black(ish) slab, 2m right of chimney/corner. FA: Kieran Loughran & Meg Sleeman, 1999 | 17 R | 10m | |||||
| 4 |
About a Hedge-Whore
They actually called it "About a Hedge-Whore beggar woman pretending to be sick with Saint Fiacre's Disease, and a long thick gut made by trickery came out of her bum", and then said "Don't blame me, blame Ambroise Pare". Start: Start 5m left of chimney, right of low cave and actually looks quite nice. FA: Greg Pritchard & James Falla, 1999 | 10 | 20m | |||||
| 5 |
About a Fat Wench
Originally "About a Fat Wench from Normandy, who Pretended to Have a 'Snake' in Her Belly". Hard to believe he was the father of modern surgery, isn't it? Start: Start: On top of large boulder leaning against wall 2m left of 'Mermaid Avenue' and also looks ok. FA: Greg Pritchard & James Falla, 1999 | 6 | 20m | |||||
| 6 |
A Cure for Moby Dick
Up chimney for three metres and then swing left onto arete. Follow this to top. Start: Start: At the base of 'Mermaid Avenue'. FA: Jon Bassindale & Greg Pritchard, 1999 | 14 | 25m | |||||
| 7 |
★ Mermaid Avenue
An old fashioned line, or is that lane, as in bus? Good. Start: Between Lou and 'Stone Age' there is an obvious large chimney in the middle of a sizeable wall. This line is 'Mermaid Avenue'. FA: Greg Pritchard & Paul Hoskins, 1999 | 7 | 25m | |||||
| 8 |
The Police Gospel Quartet
Start: Start as for 'Mermaid Avenue' then up right arete. FA: Kieran Loughran & Meg Sleeman, 1999 | 12 | 25m | |||||
| 9 |
Queequeg
Swing desperately over rattly lip of cave; continue in line more pleasantly. Start: Seam between 'Mermaid Avenue' and 'Narwhal Avenue'. It's about 2m right of 'The Police Gospel Quartet' arete. FA: Keith Lockwood & Peter Canning, 2005 | 15 | 20m | |||||
| 10 |
★ Narwhal Avenue
Fun. Start: Start: Right of 'Mermaid Avenue' and before the arete of 'Manatee Fair' there is a crack line up the wall. FA: Greg Pritchard & Paul Hoskins, 1999 | 4 | 20m | |||||
| 11 |
★ Manatee Fair
The best of the lot. Originally graded 10. Start: Start 5m right of 'Mermaid Avenue' just left of arete. FA: Greg Pritchard & James Falla, 1999 | 12 | 20m | |||||
| 12 |
Jonathon Livingstone Baitfish
Not very long and pretty unpalatable. Start: Start in the chimney that 'Stone Age' starts in. FA: James Falla & Greg Pritchard, 1999 | 12 | 20m | |||||
| 13 |
★ Stone Age
Much nicer than it looks. Start: The buttress right of 'Manatee Fair' has a thin seam up a slab capped by a roof. FA: Mike Stone & Chris Baxter, 1985 | 16 | 15m | |||||
| 14 |
★★ Poles Apart
Delightful doddle. Start: Start just right of 'Stone Age' up to right leaning flake FA: Chris Baxter & Mike Stone, 1985 | 9 | 15m | |||||
| 15 |
Melville's Moby Dick, Ooh Er
You know what to do. Start: Start: 2m right of 'Poles Apart' at another line of cracks. FA: Greg Pritchard & Paul Hoskins, 1999 | 6 | 15m | |||||
| 16 |
Frog Death
Start: Start: 2m right of 'Melville's Moby Dick Ooh Er'. FA: Greg Pritchard & James Falla, 1999 | 4 | 15m | |||||
1.19. Far North 213 routes in Crag
- Summary:
-
Mostly Trad climbing
Lat / Long: -36.748585, 141.833478
description
PLEASE NOTE: As it stands (as of 20/07/2018) there are multiple route and area descriptions that are incorrect (most glaringly in the less trafficked areas of the Mount). Efforts are being made to fix this, but be aware that any new-routing activity or general climbing in the Far Northern Group should be done with consultation to locals, the existing guidebooks, and/or to The Australian Route Register (more detailed information on some single-pitch climbs: http://www.climb.org.au/index.php?page_id=10&action=region®ion_id=8).
1.19.1. PB Gully 19 routes in Cliff
- Summary:
-
All Trad climbing
Lat / Long: -36.749127, 141.833348
description
Emergency Location: Mount Arapiles, PB Gully Area
 |
||||||||
| Route | Grade | Style | Selected ascents | |||||
|---|---|---|---|---|---|---|---|---|
Black Legend WallOn the southern side of the gully, directly opposite PB is a small wall up on a terrace. In middle of wall is obvious crack (allegedly grade 6). Probably best approached through the notch from Nameless Gully. | ||||||||
| 2 |
Black Legend
Thin seam on black streak at left end of wall, using left arete where necessary. FA: Glen Donohue & Peter Cunningham, 1987 | 17 | 20m | |||||
| 3 |
Eddie Mabo
Starts just right of Black Legend at the right-slanting line. This could be the ‘’obvious grade 6 crack’’ mentioned in the Black Legend description. Climb the right-slanting line for a few metres, step left at horizontal break and continue up the centre of the wall. FA: Keith Lockwood, Tibor Janos, Kieran Loughran & Kieran Loughran, 1 Aug 2018 | 10 | 25m | |||||
| 4 |
Banjo Opera
Climb the unassuming but nice wall between Eddie Mabo and Is The Pope A Catholic. FA: Kieran Loughran, Tibor Janos & Keith Lockwood, 1 Aug 2018 | 11 | 25m | |||||
| 5 |
Is The Pope a Catholic / Is The Pope A Catholic?
Line 4 metres right of Grade 6 crack. FA: Peter Cunningham & Glenn Donohue, 1987 | 12 | 15m | |||||
| 6 |
Papal Bull
Climb the seam up the middle of the clean wall right of Is The Pope A Catholic. FA: Keith Lockwood, Tibor Janos & Kieran Loughran, 1 Aug 2018 | 16 | 25m | |||||
/a4/b2/a4b2d4094ce4802f165597c0dda236515f44b041) /bb/47/bb47de0bbfb90e3d3b43ae91e69370b08b57661d) |
||||||||
| Route | Grade | Style | Selected ascents | |||||
Upper PB GullyThe gully gets quite steep and fragile so the upper section is best accessed from above by abseil from trees (separate rap rope is useful). | ||||||||
| 8 |
Journey to the Centre of the Earth
Companion route to The Land That Time Forgot. Take some biggish cams. Approach by abseil. Bridge the deep-set corner a few metres left of The Land That Time Forgot. Exit right and continue up the pleasant easy crack in the headwall. This crack is clearly visible from the Telstra tower. FA: Keith Lockwood & Kieran Loughran, 14 Sep 2018 | 14 | 30m | |||||
| 9 |
The Land That Time Forgot
One of the remotest, most primeval parts of 'Arapiles'. A rewarding adventure. Good climbing too. It's clearly visible from the Telstra tower - the big grey wall across the valley. Approach by abseil. Skirt clifftop around left (northish) to head of 'PB Gully'. Down gully system to the main wall. Steeply into right-facing corner which is followed until a terrace appears up on the right. Don't be tempted. Instead, step left and up centre of wall, finishing over central overhang and headwall. FA: Keith Lockwood & Kieran Loughran, 2005 | 15 | 35m | |||||
Main PB Gully | ||||||||
| 11 |
Temporary Imbalance
Thin flake at upper end of main section of gully. Hard move right to ledge then easy climbing. FA: Kim Carrigan & Mark Moorhead, 1979 | 25 | 20m | |||||
| 12 |
★★ Blockade
Start as for 'Impasse', traverse 4m R, go up 2m, then traverse back 3m! Now go up via a desperate crux, then up steep wall on brilliant rock and holds. Chain on ledge above topout. Alternatively, clip the bolt on the direct start, batman up and head R into the crux. Less hassle and still 25. Originally done with very high side runners to the L of the crux. FA: Kim Carrigan & Chris Shepherd, 1982 | 25 | 30m | |||||
| 13 |
Blockade DS
Open project past a bolt. A couple of pretty hard moves. | 20m, 1 | ||||||
| 14 |
★★ Impasse
Wandery but good climbing. Start at a pair of horizontal breaks 4 metres right of 'Temporary Imbalance'. Up to second horizontal, traverse R 4m, go up 2m then diagonally right (not straight up the seam) and up the concavity on pockets and blind holds. Diagonally left to finish. Chain on wall above topout. FA: Mark Moorhead & Jon Muir, 1981 | 24 | 20m | |||||
| 15 |
★★ Flattered and Slightly Curious
Start up PB, at the horizontal go diagonally left and through the bulge to join Impasse at horizontals. Using some of the crux holds on Impasse, move up and slightly right on pockets and then move left and up to finish. Chains on ledge above. Probably the best of the 24s/25s in the gully, though Blockade is very good too. The "R" comes from the scary start of PB, the rest of the route is well protected. FA: Ben Wiessner, Douglas Hockly & Jack Jane, Oct 2015 | 25 R | 20m | |||||
| 16 |
★★ PB
The dominant line on the wall is sustained and has just enough small but good protection on the difficult start - which is the crux. Rings above this also service Tangent. FA: Tim Beaman, 1976 | 23 | 23m | |||||
| 17 |
★★ PB Direct Start
Scary up the shallow corner and thin wall to join PB FA: Mark Moorhead | 23 R | 25m | |||||
| 18 |
★ PB Direct Finish
How hard is this really? Start up PB and continue straight up past two impossible moves. FA: Stuart Williams & Dave Nelson, 1989 | 25 | 23m | |||||
| 19 |
★★ Heavy Horses
Nathan Hoette spent 2 days on this. Even Malcolm Matheson didn't onsight it. It's a shame this has one of the most holdless bums at Arapiles in it - the rest is quite nice 22. FA: Rod Young & Mark Moorhead, 1979 | 25 | 25m | |||||
| 20 |
Angles Up
Devious line starting as for 'Tangent'. Up through the bulge (crux) past RP's / small wires then R to seam just L of Tangent. Up and L to next break, then R and through roof. FA: Kim Carrigan, 1982 | 24 | 20m | |||||
| 21 |
★ Tangent
Start up easy grey crack 2 metres right of 'Heavy Horses'. Traverse right then follow short, left-leaning bottomless crack and head diagonally right to arete. FA: Mark Moorhead & Rod Young, 1979 | 19 | 20m | |||||
| 22 |
Self Contradictory
Tangent direct. Reach problem 3 metres right of start of Tangent. Finish direct through the roof as for Angles Up. FA: Kim Carrigan & Nick Plishko, 1982 | 23 | 20m | |||||
1.19.2. Vandal Area 14 routes in Cliff
- Summary:
-
All Trad climbing
Lat / Long: -36.748993, 141.833671
description
Emergency Location: Mount Arapiles, Intrepid Gully
descent notes
There are double U-bolt anchors above 'Puzzlin' Evidence' and rap anchors on the Vandal ledge (slings and shackle).
 |
||||||||
| Route | Grade | Style | Selected ascents | |||||
|---|---|---|---|---|---|---|---|---|
| 1 |
The Viragoes
Has a few good sections. Takes left arete, starting at little shallow corner on right, then slab to orange crack, to cave, finishing on jugs. FA: Louise Shepherd & Heather Phillips, 1992 | 14 | 50m | |||||
| 2 |
★ Nature's Trip
'Cos it's next to "The Verge". Gets into some pretty sick territory. Worth doing if you're in the area. The second pitch (an exciting roof) can also be climbed as a good second pitch for "The Verge".
Set: muki woods FFA: Robert Mudie & muki woods FA: Robert Mudie, muki woods, Ben Sheppard & Patrick McGovern, 3 Sep 2017 | 23 | 35m, 2, 4 | |||||
| 3 |
★ The Verge
Start just up right of The Viragoes. Straight up and through thin crack in bulge, move right into large, guano-stained, V-scoop. Bridge up scoop to roof, past FH, swing left along lip and up short crack. FA: Kim Carrigan, Chris Shepherd. First bulge was initially climbed as Threshold by Rod Young & Mark Moorhead., 1979 | 24 | 20m, 1 | |||||
| 4 |
The Vagabond / Vagabond
Somewhat disparaged but takes in some interesting country. The traverse on the first pitch is nice but poorly protected.
FA: John Moore, Chris Baxter & Phillip Stranger, 1965 | 15 | 82m, 4 | |||||
| 5 |
Big Silver Rocket
Up diagonal line right until short corner on right of the phallus. Up this behind Phallus exiting around side. Now mount phallus and ejaculate onself through roof. Continue upwards to distinct orange mini-scoop with crack through middle. Don't escape right or left but bridge through roof to belay. Finish up Sweet Surrender's second pitch or do Where's Merilyn? Start: 3m Right of the Verge. FA: Michael Hartman, Mark Witham Deb Churches & Mark Witham Deb Churches | 17 | 20m | |||||
| 6 |
Where's Merilyn?
Start: 4m right of big silver rocket
FA: Mark Witham, Michael Hartman, Deb Churches & Deb Churches | 16 | 85m, 3 | |||||
| 7 |
★★ Sweet Surrender
A pretty good route but escapable in parts. Begin just left of the big tree.
FA: Chris & Sue Baxter, 1983 | 18 | 60m, 2 | |||||
| 8 |
★ Comb-over
Because it's thin. Start up 'Sweet Surrender' and move R to below orange wall. Straight up past two bolts then direct up juggy nose above to ledge. FA: Glenn Tempest & Rebecca Hopkins, Nov 2014 | 22 | 25m, 2 | |||||
| 9 |
Assistance Required Direct Start
Rigt of Sweet Surrender's first pitch, climb to roof, move right around this and up to 'Vandal' terrace. FA: Chris & Sue Baxter, 1983 | 17 | 20m | |||||
| 10 |
★ Assistance Required
Pretty orange wall left of Vandal's main corner. Go up wall to scoop; left here and up. FA: Mark Moorhead & Peter Newman, 1979 | 20 | 25m | |||||
| 11 |
★★ Puzzlin' Evidence
Wonderful direct finish to 'Assistance Required'. Originally climbed Sweet Surrender to the second scoop and then moved right and up wall to high central scoop. Many (most?) parties climb Assistance Required into high central scoop. From the scoop, go straight up steep wall past small cam on lovely rock and over bulge. FA: Jon Muir & Geoff Little, 1988 | 22 | 25m | |||||
| 12 |
★★ Vandal
Used to be vastly undergraded at 14 though older masters of the thrutch maintain that the grade was OK. The route originally started up the diagonal ramp from 'Vagabond' but noone does that now. Start in the gully just above the tree, directly below the big orange corner.
FA: Chris Dewhirst, John Moore, Jerremy Grandage. Pitch 1 : Ian Thomas, Andrew Bowman & David Shirra., 1977 | 17 | 45m, 3 | |||||
| 13 |
★ Another Route
Another inspiring route name.
FA: Jon Muir & Geoff Little, 1988 | 23 | 30m, 2 | |||||
| 14 |
Swallows and Amazons
Originally done with two pitches, the rap anchor at the end of the first pitch turns it into a good single pitch climb. It also comes into the shade reasonably early. Start at flake 5 metres up and right of Vandal. Layback the flake left then climb the right wall of Vandal. Ignore Vandal's first belay and continue steeply up crack in right wall to ledge and bolt anchors 5 metres back. The second pitch went up a little then up the easy arete. FA: Chris Baxter & Dave Gairns (alt), 1983 | 17 | 65m | |||||
1.19.3. Intrepid Gully 13 routes in Cliff
- Summary:
-
Mostly Trad climbing
Lat / Long: -36.748892, 141.833457
description
Emergency Location: Mount Arapiles, Intrepid Gully
| Route | Grade | Style | Selected ascents | |||||
|---|---|---|---|---|---|---|---|---|
| 1 |
★ Angry Penguins
Gear is fiddly, take slings for jugs. You can go L above the roof into a small corner, or just straight up. Start on left arete of gully, right of the start of Vandal. Trend right up face, through bulge, then left and up steep wall. FA: Lincoln Shepherd & Eddy Ozols, 1981 | 23 | 20m | |||||
| 2 |
★ A Shorter History of Women's Bodies
Start 2 metres right of Angry Penguins, up to small roof, up and right to jug on lip of another rooflet. Straight up. Going straight up from the first roof is a variant top-roped from chains. FA: Louise, Lincoln Shepherd & Steve Monks, 1988 | 24 | 22m | |||||
| 3 |
★ Epic Demic
Black and brittle but still good. Take a thin sling for one placement. Start about halfway along the left wall of the gully, about 5 metres right of Angry Penguins. Up vague crack to a good break. Traverse 2 metres left to sickle flake then hard moves up left to jugs. FA: Chris & Lincoln Shepherd, 1981 | 24 | 22m | |||||
| 4 |
★ Cliff Richards
Wall right of Epic Demic past bolts. Continue up Down And Out or traverse off either way. FA: Lincoln & Louise Shepherd, 1988 | 25 | 15m, 2 | |||||
| 5 |
A Step in the Right Direction
A novelty girdle of the right wall with a jump in the tail. Start below the chockstones at the head of the gully. Up right wall to horizontal break and traverse right all the way to Opening and follow that to terrace. Jump the gap and go up to chains (or use Leasehold's chains). FA: Kieran Loughran, Ian Anger & Greg Pritchard, 1992 | 17 | 20m | |||||
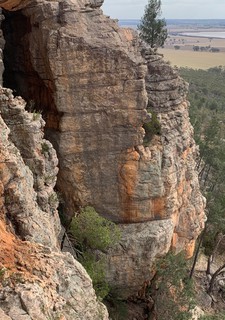 |
||||||||
| Route | Grade | Style | Selected ascents | |||||
| 6 |
★ Intrepid
Steep, wide crack on the right wall, deep in the gully. Poor protection without some really big cams. FA: Murray Taylor & Keith Lockwood, 1967 | 11 | 18m | |||||
| 7 |
Fourteen Days in May
Dimpled grey wall 1 metre R of Intrepid past 2 bolts. FA: Louise Shepherd & Steve Monks, 1988 | 21 R | 18m, 2 | |||||
| 8 |
Pick and Lose
Protection is just OK and rock is a bit fragile. Up the wall 3 metres right of Intrepid to break. Go over bulge at small, left-curving crack. FA: Mark Moorhead & Kim Carrigan, 1979 | 21 R | 20m | |||||
| 9 |
Believe You Me
Ramp as for Opening then straight up groove to break. Step left and take thin crack through bulge right of Pick And Lose. FA: Steve Monks, Louise Shepherd. Chris Shepherd & Cathy Blamey did an incomplete version of this in., 1981 | 23 | 20m | |||||
| 10 |
★ Opening
Good for a hot day. Seem to remember that it is a bit pushy. Climb ramp 1 metre right of Pick And Lose then traverse right to below shallow overhanging corner just left of arete and up this corner. FA: Kim Carrigan & Lincoln Shepherd, 1979 | 18 | 20m | |||||
| 11 |
Hard Snort
Right arete of Intrepid Gully. Now has a new glue-in U-bolt which requires stick-clipping. The Leasehold rap chains are just to your right on top. FA: Lincoln, Louise Shepherd, Steve Monks & Phil Bigg, 1988 | 23 | 20m, 1 | |||||
| 12 |
whatsinaname
FFA: 2020 | 31 | ||||||
| 13 |
★ The Three Rings
The slightly overhanging little wall down and R of the entrance to Intrepid Gully has three ring-bolts. It's quite technical but very short so boulderers will probably just highball it at V2! Set: Glenn Tempest FA: Glenn Tempest, Feb 2017 | 24 | 12m, 2 | |||||
1.19.4. Leasehold Wall 18 routes in Cliff
- Summary:
-
All Trad climbing
Lat / Long: -36.748672, 141.833318
description
This wall around right from the Intrepid Gully and below Hum Terrace has not been very popular but it does have some good climbs.
Emergency Location: Mount Arapiles, Hum Terrace Area
descent notes
Rap chains above Leasehold, otherwise top out onto Hum Terrace.
 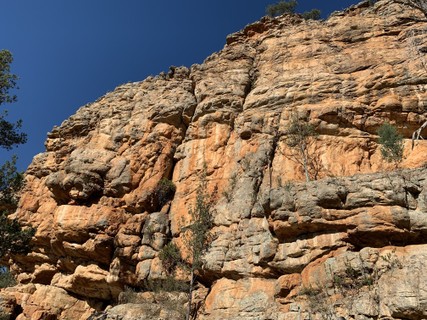 |
||||||||
| Route | Grade | Style | Selected ascents | |||||
|---|---|---|---|---|---|---|---|---|
| 1 |
Leasehold
Start at the left hand end of the wall, about 6-8m R of the entrance to Intrepid Gully. Up wide crack for a few metres then step right and go up steep orange streak. Rap chains. FA: Rod Young & Chris Shepherd, 1979 | 16 | 22m | |||||
| 2 |
Women's Weekly World Discovery Tour
Rarely climbed. The top pitch is supposed to be hard and poorly protected but from the ground it looks like a piece of easy choss and, in fact, it is an easy piece of choss. Start right of Leasehold at a low orange roof, 5 metres left of the heavily chalked roof of Fade Out.
FA: Mark Moorhead & Chris Shepherd, 1980 | 25 | 30m, 2 | |||||
| 3 |
★ Fade Out
A good little roof leads to an interesting wall. FA: Mark Moorhead & Rod Young, 1979 | 22 | 35m | |||||
| 4 |
All in Vein
A filler roof problem. FA: Rod Young & Mark Moorhead, 1979 | 21 | 35m | |||||
| 5 |
★ Friends in High Places
Mostly good apart from a section of poor rock after the initial roof. Take L of two desperate handcracks through roof about 4m R of All In Vein. Rock improves up the corner, then direct through the roof and up to ledge at about 25m. Original route wandered off left before roof but DF is much better. FA: Chris Baxter & Mike Stone, 1985 | 20 | 35m | |||||
| 6 |
★ Bhutan/High Place DF
Inital crack of Bhutan then follow FiHP and take DF through roof. FA: Douglas Hockly & Wendy Eden, 2015 | 20 | ||||||
| 7 |
Bhutan
Start up the hand crack 1m R of FIHP... which is also desperate. Then wander across FIHP and keep going L then up and back R via a loose block. This route is pretty worthless and the only bit worth doing is the start as a slightly easier alternative to the start of FIHP. FA: Chris Baxter & Maureen Gallagher, 1984 | 19 | 35m | |||||
| 8 |
Totally Stoned
The major crack-line 5 metres right of All In Vein offers some good climbing but it's currently ruined by a large bush. This crack is the same one climbed by Intrepid but on the opposite side of the cliff! Thin people may be able to chimney through to Intrepid! FA: Chris Baxter & Mike Stone, 1973 | 15 | 36m | |||||
| 9 |
★ Anchors Away
Another quite good climb. The line was originally gained by traversing in from Totally Stoned but should be started direct, as described. FA: Craig Nottle, Mark Moorhead. Direct Start : Chris & Sue Baxter, 1983 | 14 | 35m | |||||
| 10 |
★ Sandbag Of The Century
The line at the left end of the ledge, starting up an easy corner that is just right of Anchors Away. Good steep climbing on clean rock. The name is referring to the recent sandbagging activities due to flood and is not related to the grade. FA: Keith Lockwood & Kieran Loughran, 2011 | 18 | 30m | |||||
| 11 |
★ Bitterblue
Scramble onto the ledge to start this route, which takes the steep weakness found about halfway along the ledge. Reassure yourself that the numerous rock scars at the start of the route indicate that all the loose rock has been removed by earlier parties. The rock quality soon improves, and the route maintains interest for most of its length. FA: Rod Young & Mark Moorhead, 1979 | 19 | 25m | |||||
| 12 |
Fretwork
Filthy. Start 3 m R of Bitterblue, through overhang, step L then veer R up short wall. FA: Rod Young & Mark Moorhead, 1979 | 20 | 25m | |||||
| 13 |
★ Anchorman's Delight
Crack and wall right of Fretwork. Not too bad but has a few dirty holds. FA: Rod Young & Mark Moorhead, 1979 | 16 | 30m | |||||
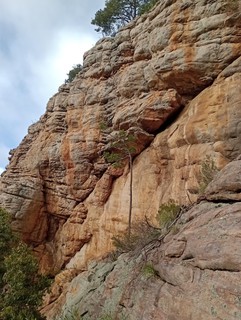 |
||||||||
| Route | Grade | Style | Selected ascents | |||||
| 14 |
Humbug
Right around the corner from Anchorman's Delight is a large corner system, left of The First Affinity. Start at the base of the crack in this corner. Up crack to roofs and through these. Continue up, stepping to the left of the arete to avoid the worst excesses of the crack. Then up mossy wall. FA: Richard Smith & Greg Pritchard, 1999 | 19 | 30m | |||||
| 15 |
★ GoatyMcGoatface
Start up Humbug, go straight through the excesses of the crack until it eases into the rest below Infinity's corner. Up this, step right off ledge and up steep wall. FA: Wendy Eden & Jess McMahon, 24 May 2016 | 19 | 25m | |||||
| 16 |
★ Infinity
It's not 19 and it's not at Frog. Start as for Humbug. Follow roof around right into low angle terrain then up obvious corner to ledge and up wall on left. FA: Richard Smith & Greg Pritchard, 1999 | 17 | 45m | |||||
| 17 |
★ The First Affinity
Originally the first pitch to Affinity (Hum Terrace) but the two are rarely done as one climb. FA: Rod Young & Chris Shepher, 1979 | 18 | 24m | |||||
| 18 |
Cognitive Dissonance
Pump-action. Worthwhile. Start as for The First Affinity. FA: Jon Bassindale & Deb Sweet, 1999 | 21 | 30m | |||||
1.19.5. Hum Terrace 31 routes in Cliff
- Summary:
-
All Trad climbing
Lat / Long: -36.748717, 141.832950
description
Emergency Location: Mount Arapiles, Hum Terrace Area
| Route | Grade | Style | Selected ascents | |||||
|---|---|---|---|---|---|---|---|---|
| 1 |
★ Over and Out
A girdle traverse of the left side of the wall. Start 5 metres northwardsish of most southerly conifer. FA: Alistair Mark, Dave Vass, Fiona Bowie & Marcus Wallaby., 1988 | 18 | 30m | |||||
| 2 |
★ Jugs and Fun
From cave left of Down And Out climb out right and up overhanging wall. FA: Jon Muir & Geoff Little, 1985 | 20 | 22m | |||||
  |
||||||||
| Route | Grade | Style | Selected ascents | |||||
| 3 |
★★ Down and Out
Start from the big chock stone. Left to thin crack then up through roof to steep wall. FA: Mark Moorhead & Craig Nottle, 1979 | 20 | 25m | |||||
| 4 |
★ Mark and Craig
A few more repeats might help clear up the route description. Option 1: From halfway along the Down And Out traverse, go up through bulges on tiny edges (and no gear?), to prominent flake. Option 2: Traverse a quarter of the Down And Out traverse, then go up via thin seams and decent gear, before spanning a metre left to gain the prominent flake. Follow the glory jugs to the Down And Out anchor (found tucked around the corner). FA: Jon Muir & Geoff Little, 1985 | 21 | 24m | |||||
| 5 |
Lord of the Rings Variant Start
Up breaks L of red streak at top of Intrepid Gully. FA: Wendy Eden & Douglas Hockly, 2014 | 17 | 20m | |||||
| 6 |
★ Kansas City Direct Finish
Nowhere near Kansas City! Quite good but quite reachy and closer to 22 if you're short. FA: Mark Moorhead & Kim Carrigan, 1979 | 19 | 18m | |||||
| 7 |
★ Waddy Mackenzie
Pull up on jugs behind small tree immediately right of Kansas City DF, over bulge and up. FA: Craig Nottle, Chris Baxter & Dave Gairns, 1983 | 16 | 20m | |||||
| 8 |
★ Exodus 2.5 Direct Finish
Start direct if you want but guard against cracked red hold with small cam (green Alien size). Otherwise start up Waddy Mackenzie. FA: Douglas Hockly & Wendy Eden, 2014 | 19 | 18m | |||||
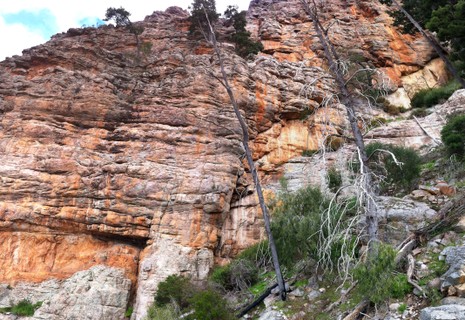 |
||||||||
| Route | Grade | Style | Selected ascents | |||||
| 9 |
★ Four Spooner
Start 8m R of Kansas City Direct Finish. Boulder the hard start using square pocket and minimal pro, then up to the right of the left-leading diagonal, before following jugs to top. FA: Peter Newman & Mark Moorhead, 1979 | 21 | 20m | |||||
| 10 |
★ Nihilism
One very long move on nice rock. FA: Douglas Hockly, Kate Finnerty & Callum Dougal | 22 | 18m | |||||
| 11 |
Heavy Breathing
Steep wall on incuts to finish through overhang. FA: Keith Lockwood & Dave Gairns, 1983 | 15 | 20m | |||||
| 12 |
★ Heartless Heart
? repeat of Heavy Breathing. 1.5 metres left of Heavy Petting. FA: Martin Lama etc, 1991 | 15 | 20m | |||||
| 13 |
Heavy Petting
Fill in the double-entendres if you're so inclined. Start 3 metres left of Menagerie. FA: Chris & Sue Baxter, 1983 | 15 | 20m | |||||
| 14 |
★ Munchkin
Strenuous for the grade but has great jugs. The Shepherd guide description for Menagerie followed this line but the original Menagerie description clearly places it further right. Start at top of rise behind the largest conifer (?same place as Heavy Petting). FA: Unknown, 2000 | 9 | 20m | |||||
| 15 |
★ Menagerie
Start right of largest conifer. Short red groove, traverse right then up to left-facing corner. Up corner and exit left. FA: Keith Lockwood & Ed Neve, 1977 | 9 | 20m | |||||
  |
||||||||
| Route | Grade | Style | Selected ascents | |||||
| 16 |
★ High Sigh
Direct finish to The Second Affinity. Go straight through roof or left and up. FA: Dave Gairns, Chris Baxter & Craig Nottle, 1983 | 17 | 25m | |||||
| 17 |
★★ The Second Affinity / Affinity
Absorbing climbing on immaculate rock. Originally the second pitch of a 2-pitch route; the first pitch is now The First Affinity. Start 5 metres down and right of large conifer. FA: Rod Young & Chris Shepherd, 1979 | 17 | 22m | |||||
| 18 |
★ Dinger
Warning Flora and Fauna: Nesting Birds Start as for Hum. Where Hum heads off R step L to slot under overlap. Pull through overlap and straight up with a steep finish. FA: Mark Wood & Eddy Mofadin, 30 Dec 2014 | 17 | 22m | |||||
| 19 |
★ Dinger direct start
Warning Flora and Fauna: Nesting Birds Straight up to the break with not enough gear. FA: Douglas Hockly, 2011 | 18 R | 25m | |||||
| 20 |
★ Hum
An enjoyable pitch with an exciting crux. Start 4m R of Affinity. FA: Ed Neve, Andrew Bowman & Lyle Closs, 1977 | 16 | 30m | |||||
  |
||||||||
| Route | Grade | Style | Selected ascents | |||||
| 21 |
★ Jug City
In fact it's a nearly blank wall. Pass the fixed hanger of High Kicks, and continue past a ringbolt, before getting to the honeycomb featured rock and a lower off. FA: Geoff Little & Jon Muir, 1988 | 24 | 13m, 2 | |||||
| 22 |
★ High Kicks
Start just left of enormous conifer and just right of the rock step down and right from Hum. Technical moves lead to a delicate flake. The old carrot bolt, although poking out attractively, has been replaced. Finish at lower off where the nest of viper like rap slings once lurked ready to strike. FA: Lincoln Shepherd, 1981 | 23 | 13m, 1 | |||||
| 23 |
★ Starlets in Tow
Desperate start. Start 3m R of High Kicks. FA: Mike Law & Charlie Creese, 1981 | 25 | 20m | |||||
| 24 |
★★ Stormalong
Sustained jamming and underclinging with feet cycling on glassy rock. The second pitch is fun in an adventurous way. Start below the right-leading roof-crack right of High Kicks.
FA: Jeremy Boreham & Rod Young, 1977 | 20 | 32m, 2 | |||||
| 25 |
★ Afternoon Cloud
A harder variant on the second pitch of Morning Thunder. The first pitch appears a bit pointless, and the route is best done by starting up Morning Thunder.
FA: Jon Muir & Tony Dignan, 1985 | 24 | 35m, 2 | |||||
| 26 |
Krakatoa
FFA: Kevin Lindorff | 25 | 30m, 5 | |||||
| 27 |
★★ Morning Thunder
A great climb up the best section of the wall. Best done in one long pitch which will be pumpy to start and run-out to finish. Start at weakness 10m R of Stormalong.
FA: Kim Carrigan & Mark Moorhead (alt), 1979 | 24 R | 30m, 2 | |||||
| 28 |
★★ Sufficiently Alarming
Very serious route up the Morning Thunder wall (although the addition of extra bolts to the second pitch has helped tame that part).
FA: Jon Muir & Geoff Little, 1988 | 25 X | 35m, 2, 3 | |||||
Above Hum TerraceThe small wall found on top of Hum Terrace (above Menagerie) contains some mini-routes. | ||||||||
| 30 |
From the Ridiculous to the Sublime
Climb past short wall and ledge to gain thin crack. FA: Phil Benson, Martin Lama & Graeme Smith, 1991 | 12 | 12m | |||||
| 31 |
Up in Arms
Wall 2 metres to right of FTRTTS with big pockets at 2 metres. FA: Martin Lama, Phil Benson & Graeme Smith, 1991 | 18 | 12m | |||||
| 32 |
★★ Sole Sister
Go up 1 metre right of Up In Arms and right to overhang, step right, up. FA: Graeme Smith, Phil Benson & Martin Lama, 1991 | 17 | 12m | |||||
1.19.6. Lower Curtain Wall 20 routes in Cliff
- Summary:
-
All Trad climbing
Lat / Long: -36.748336, 141.832622
description
Emergency Location: Mount Arapiles, Lower Curtain Wall Area
 |
||||||||
| Route | Grade | Style | Selected ascents | |||||
|---|---|---|---|---|---|---|---|---|
| 1 |
★ Dante's Inferno
Top pitch is excellent. Some like the first pitch and others think it's rubbish.
FA: Chris Dewhirst & Alec Campbell, 1966 | 15 | 70m, 2 | |||||
| 2 |
★ Tinsel Town
Start from the top of pitch 1 of Dante's Inferno. Line left of the arete of Shaky Town, which is just left of the pitch 2 flake of Dante's Inferno. Knee pad recommended, it has been known to tear pants. FA: Geoff Little & Maureen Gallagher, 1988 | 23 | 15m, 3 | |||||
| 3 |
Shaky Town
Very poor protection. Coming in from left, gain arete left of the Dante's Inferno's 2nd pitch flake. FA: Mark Moorhead, Kim Carrigan & Louise Shepherd, 1979 | 23 X | 15m | |||||
| 4 |
Racey
Nice but a bit bold. Bold groove 2 metres right of pitch 2 Dante's Inferno. FA: Kim Carrigan, Mark Moorhead & Louise Shepherd, 1979 | 18 R | 15m | |||||
| 5 |
Bog On Up
Direct line between 'Racey' and 'Censorship', finishing up smooth headwall FA: Jon Muir, Geoff Little & Maureen Gallagher, 1988 | 21 | 15m | |||||
| 6 |
Censorship
Good line but you'll have no chance if the huge block goes. Take the major corner 7 metres right of Racey. Climb directly past the huge apparently detached block in the overhang and continue up. The original finish to Day Of Rest starts up this pitch and traverses right below the overhang. FA: Kim Carrigan, Mark Moorhead, Louise Shepherd & Rod Young, 1979 | 16 R | 15m | |||||
| 7 |
★ The Joker
The arete left of Sideshow, another good approach to the second pitch of 'Dante's Inferno'. FA: Clive Curson, 1998 | 15 R | 25m, 1 | |||||
/d4/76/d47683fd2c59deb126351c9515ca0b7939eded87)   |
||||||||
| Route | Grade | Style | Selected ascents | |||||
| 8 |
★★ Sideshow
Start: Left-most route on the main, orange face. Head up right side of block on left then through weakness in overlap | 19 | 35m | |||||
| 9 |
★★★ Entertainer
Up weakness to the right of Side Show following left-facing flake system to the roof. Head left along under this until an exit can be made straight up to rap station. For a more exciting finish (still grade 18), go straight through the weakness in the roof Start: Two metres right of Side Show, a vague "E" can be found scratched on the rock | 18 | 20m | |||||
| 10 |
★★ Round Up
Start as for Entertainer. Originally started up 'Comic Relief' but you really need double ropes for that. Up Entertainer then follow right-hand weakness at flake. Veer right to shallow corner. Hard moves up corner and through bulge to ledge. Up major flake until it ends then either up or move right to anchor. FA: Chris Shepherd & Steve Moore, 1981 | 21 | 30m | |||||
| 11 |
★★★ Comic Relief
Start in the middle of the wall about five metres right of Entertainer, a vague "CR" can be found scratched on the rock Up bulging weakness and pockets (very pumpy to get good gear in) to left-facing flake system that leads to dark overlap. Through this then up wall trending right. Move right rather than going straight up final corner. Rap anchors. This climb has been the scene of a number of ground fall accidents including broken legs, head injuries and a belayer seriously injured by the falling leader. Take care at the first section. Consider the use of mats, spotters (but see above) and helmets. Gear Beta Spoiler The initial big flake has garbage placements followed by an insecure move. People rip this gear and deck. The thin horizontal break just above the flake (which many climbers fail to notice) offers an opportunity to place bombproof gear before doing the hard move. | 21 | 20m | |||||
| 12 |
★ Last Laugh
Up 'Comic Relief' to its good rest at the horizontals. Traverse R for a couple of metres and pull around the R side of the bulge (crux) and up onto the stance. Step R and climb the lovely orange wall (R of the upper part of 'Comic Relief') until it joins the last moves of 'Comic Relief' and reaches its anchors. The careful use of a few slings will reduce any rope drag. FA: Glenn Tempest & Karen Tempest, Aug 2016 | 22 | 27m | |||||
| 13 |
★★ Hello Hollywood
Exciting traverse of the lower wall. | 24 | 50m | |||||
| 14 |
★★ Showstopper
One very, very hard move.. hence the name. FA: Paul Hoskins, 1999 | 28 | 27m, 3 | |||||
 |
||||||||
| Route | Grade | Style | Selected ascents | |||||
| 15 |
★ Pet Abuse
Chipped, hence not very popular. FA: Kim Carrigan | 26 | 30m, 2 | |||||
| 16 |
★★★ Bada boom
Climb Cut Short for a few metres until you can gain the hanging orange/grey wall to the left. Up this on delightful incuts, slopes, razors, and pockets to gain a series of beautiful pockets above an orange overlap. Make a span leftwards above the lip to pick up a vertical seam through a bulge then stagger over this to join Tapestry at the end of its traverse. Finish up Tapestry. FA: Ingvar Lidman, 2009 | 27 | 30m, 5 | |||||
| 17 | ★ Tapestry | 23 | 40m | |||||
| 18 | ★ Cut Short | 21 | 30m | |||||
| 19 |
★ Final Bough
Contrived crux but nice top wall. Up Cut Short to roof then follow line right up shallow groove to ledge. Delicately over bulge. Note: The 2 undercling blocks have now fallen out, and might make the moves and placing gear more difficult. FA: Kim Carrigan & Robin Miller, 1982 | 22 | 35m | |||||
| 20 |
★★ Day of Rest
Starts at ground level, a few metres right of 'Cut Short' at a right leaning diagonal crack. Although it is written up as 3 pitches, the first pitch finishes near a rap anchor, and this is where most people tend to finish the route.
FA: Chris Dewhirst Chris Baxter, 1979 | 15 | 85m, 3 | |||||
1.19.7. Upper Curtain Wall 13 routes in Cliff
- Summary:
-
Mostly Trad climbing
Lat / Long: -36.748233, 141.832220
description
Superb hanging slabs, capped by a flowing curtain like roof system.
Emergency Location: Mount Arapiles, Upper Curtain Wall Area
approach
Far 'Northern Group'
   |
||||||||
| Route | Grade | Style | Selected ascents | |||||
|---|---|---|---|---|---|---|---|---|
Routes starting from Day Of Rest P2 traverseThese routes start from various points along the second pitch of 'Day of Rest' which traverses underneath the left hand end of Upper Curtain Wall. This area is usually accessed by climbing either 'Cut Short' or 'Day of Rest P1'. | ||||||||
| 2 |
Sharp Objects
Precision climbing. Take some micro cams. The wall L of Short Cut, starting from the lower off / belay anchors on Cut Short. Up the wall, then up R-wards past 2 BRs and straight up the up the wall to finish at the lower-off rings. FA: Glenn Tempest & Karen Tempest, Aug 2018 | 23 | 15m, 2 | |||||
| 3 |
★★ Short Cut
A serious continuation up the wall beyond 'Cut Short'. From ledge climb short sickle and press on after it stops. FA: Mark Moorhead & Chris Shepherd, 1981 | 23 R | 20m | |||||
| 4 |
★★ Stranger Things
Technically interesting with a tricky crux. Take some micro cams for the start. The orange wall between Short Cut and Day of Rest Direct Finish. The first BR is reachy to clip (a panic draw makes it easy) but not unreasonable if you are climbing at this grade. Up past a second BR to a rest. Clip the next BR, then stretch up and traverse L on horizontals to a fourth BR. Up past this then drift R to lower-off rings. FA: Glenn Tempest, Aug 2018 | 23 | 20m, 4 | |||||
| 5 |
★★ Day of Rest Direct Finish
As for Day of Rest, or come in from Cut Short, to top of Day of Rest first pitch.
FA: Kim Carrigan Barry Young, 1979 | 22 | 30m, 3 | |||||
Upper Curtain Wall Right SideOn the upper section of Curtain Wall is a broad series of rooflets, from which the wall gets its name. The following routes start underneath those rooflets, on a sloping ledge. Common means of reaching the base of these routes is to climb 'Day of Rest' P1 then escape off right towards the end; climb the "dicky wall" to the right of 'Day of Rest' (grade 12ish); or rap in. | ||||||||
| 7 |
★★ Cheap Trip
Start on ramp at base of wall, step across curving crack, into small hanging corner on the left, up to horizontal break, above are two short seams, take the one on the right till it ends, then run it out till it eases. Start: On the ramp at base of wall
FA: Mark Moorhead Chris Shepherd, 1980 | 23 R | 35m, 2 | |||||
| 8 |
★★ A Hundred Little Baby Bums
The establishment of Drama Queen has partially retro-ed this route, making it significantly safer (and more likely to receive a future ascent). Start below a protruding carrot, up past this and on to face to clip Drama Queen's first FH, then go diagonally up and left (note it is also possible to go straight up then move L from Drama Queen's 2nd FH at the same grade) before heading straight up past very good small cams to the second carrot, then another of Drama Queen's FH's through the crux which was originally a very bold undertaking. Original finish was as for Drama Class but you may as well keep on clippin' and finish as for Drama Queen now you're here. FA: Ingo Knapp Hienze Zak, 1985 | 25 | 30m, 4 | |||||
| 9 |
★★★ Drama Queen
An Arapiles sport route - bolts where you need them (and nowhere else). Straightens out A Hundred Little Baby Bums by going straight up the brown streak past 7 bolts. Somewhat ironic given every other route here induces brown streaks of their own ... Clip protruding carrot of Hundred Little Baby Bums under the roof and monkey on to the face. Straight up past 3 more fixed hangers in the middle of the brown streak (escape out left into AHLBB is possible at both bolts 3 and 4 at grade 25 and 26 respectively). Up on to slab and AHLBB's 2nd carrot and a final sting direct up past another 2 FH's though a steep finish. FA: Gordon Poultney | 26 | 25m, 7 | |||||
| 10 |
★★★ Terminal Drive
Start at small tree at the middle of wall, over bulge, then up crack to slab, up this aiming for crack through next bulge, up to roof then desperately out crack and up to top. FA: Mark Moorhead Paul Aubrey (wall 79) Kim Carrigan Rod Young (roof), 1979 | 24 R | 30m | |||||
| 11 |
★ Encore
Start as for Cliffhanger. Continue straight up passing a bolt. At the roof reverse Curtain Call for 3m. Gain the headwall above via a neat pocket sequence (crux) passing two bolts. FA: Ingvar Lidman, 2009 | 27 | 30m, 3 | |||||
| 12 |
★★ Cliff Hanger
Start below a right leading crack, up this then through small overlaps to main roof, up steep corner to bolt, then up to horizontal, then traverse two meters right and up to mantle finish. Start: at rightward leading crack to the right of a small tree. FA: Kim Carrigan Rod young (wall)Mark Moorhead Chris Shepherd (roof 81), 1979 | 24 | 25m | |||||
| 13 |
★★ Drama Class
A girdle traverse of the lower curtain, start right of Cliff Hanger at small corner, up to traverse line and follow this to the cave on Day of Rest Direct Finish, either keep going or go straight up. FA: Kim Carrigan Louise Shepherd, 1981 | 24 | 30m | |||||
| 14 |
★★★ Curtain Call
Right of Drama Class is a crack through a roof, hard moves around this lead to the main roof or curtain, follow this all the way left just under the roof the whole way. Start: Left of Phys Ed. FA: Louise Shepherd & Kim Carrigan, 1981 | 23 | 35m | |||||
| 15 | Stage Fright | 24 | 15m, 2 | |||||
1.19.8. Echidna Wall 15 routes in Cliff
- Summary:
-
All Trad climbing
Lat / Long: -36.748118, 141.831929
description
Effectively the right end of Curtain Wall.
Emergency Location: Mount Arapiles, Lower Curtain Wall Area
approach
An easy walk 50m uphill to the right from Lower Curtain Wall. But most easily approached by driving to the top, then its a flat 200m walk on a well formed track.
   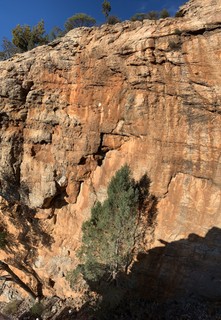 |
||||||||
| Route | Grade | Style | Selected ascents | |||||
|---|---|---|---|---|---|---|---|---|
| 1 |
Phys Ed
A gymnastic ceiling crack that requires lots of technique, up corner right of Cliff Hanger, or pitch one of No Soft Options then out the the obvious roof crack. Start right of Cliff Hanger, then up corner. FA: Mark Moorhead Brian Fish, 1981 | 23 | 15m | |||||
| 2 |
★ Race Apart
A huge rising traverse, start below left end of No Soft Options' crack.
FA: Chris Shepherd Kim Carrigan, 1982 | 23 | 60m, 2 | |||||
| 3 |
★ No Soft Options
The left hand of two diagonal cracks. Two hard pitches, gear to #4 cam.
FA: Tim Beaman Roland Pauligk, 1977 | 20 | 60m, 2 | |||||
| 4 |
★ Touchdown
Start as for No Soft Options, but take the right hand of the two diagonal cracks, hard laybacking past cave to ledge, then right and up through easy roof. FA: Rod Young Kim Carrigan Mark Moorhead, 1979 | 21 | 50m | |||||
| 5 |
Hop It
Extremely slick. Start as for Gillette behind huge conifer. Up flake to ledge on left then across to bolt (a high runner in tree helps). Pedaling hard, slip left and up to next bolt. Flake, then corner to roof. Up groove through roof just left of Touchdown. FA: Kim Carrigan & Chris Shepherd, 1982 | 25 | 50m, 2 | |||||
| 6 |
Gillette
For a close shave! Start right of Touchdown at thin flake behind huge conifer. From top of flake, clip piton with wire(!). Levitate to stance at 15 metres. Either belay here or continue on jugs. FA: Mark Moorhead & Kim Carrigan, 1981 | 24 R | 40m | |||||
| 7 |
Ants Pants
Starts right of Gillette, midway between the two giant callitris trees. Climb the short crack and continue up the creamy corner to the roof. Left on the hanging slab, pull over the roof (BR) and up the corner/groove to the top. Rap rings. FA: Keith Lockwood, Maureen Little & Geoff Little, 21 Feb 2018 | 19 | 40m, 1 | |||||
| 8 |
★ Flying Ants
Up between Ants Pants and Noddys Route, just left of the callitris. Bolt at lip of first bulge, step left around roof above the prominent diagonal and up wall past a few more bolts. Take some trad gear as well. Rap rings. FA: Geoff Little & entourage | 19 | 4 | |||||
| 9 |
★ Noddys Route
Start at the right-hand callitris tree. Straight up past two BRs to the overlap. Step left, then veer back right above the overlap to a nice seam which leads to the top. Rap rings. FA: Keith Lockwood, Maureen Little & Geoff Little, 14 Feb 2018 | 20 | 35m, 2 | |||||
| 10 |
★ Unknown Project
Lime green FH 3m L of SS, with a faded tag on it. 24/5 for the start. Presumably it then joins into the big undercling flake up and leftish. | 1 | ||||||
 |
||||||||
| Route | Grade | Style | Selected ascents | |||||
| 11 |
★ Shoe Shuffle
Bold climbing up blankest section of black face right of Gillette. Start below small pedestal 5 metres left of Old Mates. The start now has a FH. Scarily up and left to pedestal then over smooth bulge and onwards. FA: Mark Moorhead & Rod Young, 1979 | 21 R | 35m | |||||
| 12 |
★ Old Mates
The main left-facing corner at the right side of blank face, with a tricky start then lovely all the way. Rap rings at top. FA: Chris Baxter & Mike Stone, 1982 | 16 | 18m | |||||
| 13 |
★ Sugar Plum
Easier and airier than it looks. Start up Old Mates for 5m to the base of the main corner. Move R onto orange nose and rock onto blank slab. Continue diagonally R over orange bulges (lots of pro, it’s above you), crossing Gene Vicious, to R end of big roof. Finish direct up clean cut grey dihedral. Wander 5m L to rap rings, or top out. FA: Emily Monks & Will Monks, 11 Apr 2022 | 17 | 20m | |||||
| 14 |
Gene Vicious
Start is poorly protected. Start 3 metres right of Old Mates and go up diagonally left and over bulges, finishing through middle of final roofs. FA: Louise Shepherd & Mike Law, 1983 | 22 R | 15m | |||||
| 15 |
★ Puggles
At the right-hand end of Echidna Wall is a pretty orange slab with a black stripe up the middle. Puggles takes this line, starting straight up the fingery wall and bulge below the black stripe. Note: an earlier route up the middle of Echidna Wall was called Puggles, but it’s been consumed by other climbs. So by popular demand we moved the name Puggles up the hill to a new patch of rock. FA: Keith Lockwood, Ray Lassman, Paul Kinnison & Kieran Loughran, 3 Oct 2018 | 16 | 20m | |||||
1.19.9. Intermission Wall 3 routes in Cliff
- Summary:
-
All Trad climbing
description
The nondescript left-most blob of rock below (downhill from) the main face of Lower Curtain Wall. Although the underlying rock is excellent there's a fair bit of moss but, if you're in the area the climbs aren't too bad.
Emergency Location: Mount Arapiles, Lower Curtain Wall Area
| Route | Grade | Style | Selected ascents | |||
|---|---|---|---|---|---|---|
| 1 |
Small Change
The flake then up left. It may finish up the continuous orange strip. Start: Scramble in from the left to a ledge below a small right-facing flake near the centre of the wall. FA: Chris Baxter & Mike Stone, 1986 | 15 | 15m | |||
| 2 |
First Night Nerves
At the right side of the cliff at a little arching flake line. This is about 12 metres right of 'Small Change' and just left of the second dead tree from the left. FA: Keith Lockwood, Tim Lockwood & David Spike, 1999 | 17 | 20m | |||
| 3 |
Lights, Camera, Action
Start at right-hand big dead pine tree, about 5 metres right of 'First Night Nerves'. FA: Pat Ford & Keith Lockwood, 1999 | 18 | 25m | |||
1.19.10. Windy Buttress 4 routes in Cliff
- Summary:
-
All Trad climbing
description
Emergency Location: Mount Arapiles, Lower Curtain Wall Area
| Route | Grade | Style | Selected ascents | |||
|---|---|---|---|---|---|---|
| 1 |
Kim Cardigan
The left-hand chimney with awkward start. FA: Bill Andrews & Allan Hope, 1982 | 15 | 26m | |||
| 2 |
He's a Lumberjack
Up 'The Closet' for 3 metres and step left. Veer left until beneath rooflet, right and up over bulge and a few ledges, to final steep wall. FA: Bill Andrews & Allan Hope, 1982 | 16 | 27m | |||
| 3 |
The Closet
Huge old-fashioned chimney. FA: Bill Andrews & Allan Hope, 1982 | 6 | 30m | |||
| 4 |
Cantaloupe
Up crack just right of 'The Closet' for 10 metres then up front of buttress. Finish up good short crack. FA: Allan Hope & Bill Andrews, 1982 | 12 | 35m | |||
1.19.11. Cliche Wall 16 routes in Area
- Summary:
-
All Trad climbing
summary
You are guaranteed not to see anyone else here
Emergency Location: Mount Arapiles, Lower Curtain Wall Area
approach
Walk from summit car park to top of Upper Curtain Wall. Take descent track down and the top of Cliche Wall is directly ahead of you. Rap in.
| Route | Grade | Style | Selected ascents | |||
|---|---|---|---|---|---|---|
| 1 |
A Carriganesque Proposal
Wall to overhang and blunt arete above, veering slightly right near top. Start: Start just right of large tree at left end of Cliche Wall. FA: Dave Gairns & Chris Baxter, 1982 | 17 | 30m | |||
| 2 |
Knee High to a Bull Ant
On wall right of 'A Carriganesque Proposal' is short corner capped by wee roof. FA: Kim Carrigan & Louise Shepherd, 1981 | 15 | 20m | |||
| 3 |
Noggers and Joggers
I guessing this is the short orange wall to the overlap just left of the short crack of Schoney. Breaks then delicate face to roof then over roof. Start: Start 1 metre right of Knee High To A Bull Ant FA: Stephen Hamilton & Peter Stevens, 1988 | 19 | 18m | |||
| 4 |
Schoney
Right of Noggers And Joggers, climb crack to small stance, then arete. I am guessing this is the short crack leading to the same ledge as the corner of Off the Beaten Track. FA: Stephen Hamilton & Peter Stevens, 1988 | 16 | 16m | |||
| 5 |
Off The Beaten Track
Climb the corner to a ledge up half height, then straight up the seam in the wall above. Start: Start at the corner left of Middle Of The Road. FA: Keith & Tim Lockwood, 2001 | 14 | 15m | |||
| 6 |
★ Middle of the Road
Start up thin crack in white slab just right of the obvious corner of Off the Beaten Track FA: Kim Carrigan & Glenn Tempest, 1981 | 19 | 15m | |||
| 7 |
★ Left, Right and Centre
Take arete on right of white slab with bulging start (very committing) into vague scoop. FA: Kim Carrigan & Glenn Tempest, 1981 | 19 | 15m | |||
| 8 |
★ Top Gear
Good fun wall climbing on great rock; in the same vein as Middle Of The Road. Up into the orange scoop then up wall past horizontals, be careful of detached flake up high. Start: Start between Left, Right And Centre and 'Just Like Your Father'. FA: Keith Lockwood & Noel Whiteside, 2003 | 20 | 15m | |||
| 9 |
Just Like Your Father
Short hand-crack above small cave on right side of Cliche Wall. FA: Kim Carrigan (solo), 1981 | 17 | 12m | |||
| 10 |
Redback
Appropriate that these two should be new route hunting near JLYF. Start: Start right of 'Just Like Your Father'.- I assume this is the obvious corner on the right end of the wall FA: Keith & Tim Lockwood, 2001 | 11 | 15m | |||
| 11 |
Gone Walkabout
Stepped corner towards left side of Walkabout Wall. FA: Tim & Keith Lockwood, 2001 | 10 | 20m | |||
| 12 |
Cuddapan
Good rock. FA: Keith & Tim Lockwood., 2001 | 12 | 18m | |||
| 13 |
Rocky Road
Trend up to huge block perched on wall right of 'Cuddapan'. Step left at block and climb up its left side. From top of block, climb wall direct to top. FA: Keith Lockwood, Noel Whiteside & Peter Canning., 2003 | 14 | 18m | |||
| 14 |
Sidetrack
Where the seam thins down, climb wall on the left until the line can be regained.Onwards up line to top. Start: Thin seam between 'Rocky Road' and 'Hump The Bluey'. FA: Noel Whiteside, Keith Lockwood & Peter Canning, 2003 | 17 | 18m | |||
| 15 |
Back Roads
Climb the middle of the wall between Sidetrack and Hump the Bluey. FA: Keith Lockwood, Norm Booth & Paul Kinnison, 20 Oct 2018 | 13 | 18m | |||
| 16 |
Hump The Bluey
Diagonal line slanting slightly left. FA: Keith & Tim Lockwood., 2001 | 12 | 20m | |||
1.19.12. Werewolf Area 20 routes in Cliff
- Summary:
-
Mostly Trad climbing
Lat / Long: -36.747618, 141.832191
description
Emergency Location: Mount Arapiles, Lower Curtain Wall Area
| Route | Grade | Style | Selected ascents | |||||
|---|---|---|---|---|---|---|---|---|
| 1 |
Silver Lining
Pad up the centre of the lovely clean slab left of Silver Bullet. FA: Noah, Mayank from Balwyn High School, Keith Lockwood & Paul Noah Mayank from Balwyn HS, 17 Sep 2015 | 5 | 35m | |||||
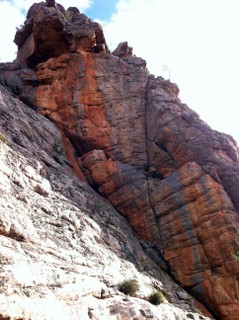 |
||||||||
| Route | Grade | Style | Selected ascents | |||||
| 2 |
Silver Bullet
The huge slabby corner which is essentially the approach ramp for 'Solar City' and 'Werewolf'. FA: John Chapman, 1976 | 8 | 40m | |||||
| 3 |
Solar City
Not quite as good as it looks but still not a bad route up the orange wall up left from 'Werewolf'. Scramble up 'Silver Bullet' and find a belay ledge part-way. From here, continue up 'Silver Bullet' until you can step right onto the wall to gain the seam (some people can span this move, others may need to jump to the jug). The rock quality in the middle of the route detracts, as does the sit down rest in the cave. You can build a belay from the cave and walk off, or do the exciting overhang (which is over very quickly). FA: Mark Moorhead & Rod young, 1979 | 21 | 20m | |||||
| 4 |
As You Like It
The face between 'Werewolf' and 'Solar City' has very fiddly gear. Start: Start from 'Silver Bullet', midway between 'Solar City' and 'Werewolf'. FA: Chris Shepherd & Allan Adams, 1982 | 23 R | 20m | |||||
| 5 |
★★ Werewolf
The lovely corner up the right wall of 'Silver Bullet' was probably the hardest climb in 'Victoria' in its day. It's probably best to belay from the ground but some parties insist on scrambling up a few metres to belay at the very base of the line. FA: Daryly Carr & Rob Taylor, 1966 | 20 | 24m | |||||
| 6 |
★ The Trial
Epic route-finding, but most people would ignore the indirect start described here and start up 'Tribulation'. Start on arete right of 'Werewolf', aiming to eventually climb the hanging corner high on the arete. FA: Mark Moorhead & Jon Muir, 1981 | 25 | 35m | |||||
| 7 |
★★ The Vampire
A good find by Muki Woods finishing up the funky wall to the right of 'Werewolf'. Start: Start as for 'Tribulation'. FA: Ingvar Lidman, 2009 | 28 | 18m, 8 | |||||
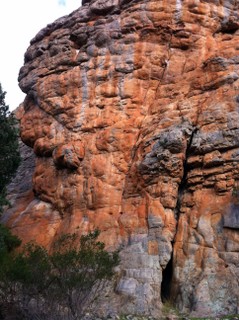 |
||||||||
| Route | Grade | Style | Selected ascents | |||||
| 8 |
Tribulation
Boulder up seam past bolt to good ledge; there's actually 2, an old carrot and new FH placed for 'The Vampire' and it seems you can either go direct past the FH or go slightly right via the carrot.. Continue to jug just left of 'Colour Scheme' then go left a little and up headwall. Start: Start at seam 3 metres right of 'The Trial'. FA: Kim Carrigan, 1984 | 26 | 25m, 1 | |||||
| 9 |
★ Colour Scheme
The lovely orange wall is pretty hard for the grade. Start as for Full Moon, then left and up past knifeblade. FA: Chris Shepherd, 1981 | 24 | 25m | |||||
| 10 |
★ Monochrome
Up Color Scheme to the pin, then move right to the rail. Straight up to join Goodbye. FFA: Christopher Glastonbury, 22 Aug 2022 | 26 | 25m | |||||
| 11 |
★★ Goodbye
Thank your lucky stars that this is no longer graded 19. Start: Start as for 'Full Moon'. FA: Colin Reece, 1979 | 22 | 30m | |||||
| 12 | ★ Goodbye Direct | 24 | ||||||
| 13 |
The Turkey Federation Of Australia
FA: Jon Muir, Maureen Gallagher & Geoff Little, 1988 | 23 | 40m, 2 | |||||
| 14 |
★ Full Moon
Two good pitches with quite a hard start.
FA: Keith Egerton & John Chapman, 1976 | 16 | 85m, 2 | |||||
| 15 |
Full Moon Variant finish
Start: Start as for 'Full Moon'.
FA: Keith Lockwood & Noel Whiteside., 2003 | 16 | 80m, 3 | |||||
| 16 |
★ Let's Get Pissed
Tackles the steep rock immediately left of the 'Full Moon' corner. Start: Start 4 metres right of 'Full Moon' below a small corner in the overlap. FA: Jon Muir, Maureen Gallagher & Geoff Little, 1988 | 24 | 40m | |||||
| 17 |
Harry V Dirchy
An easier, earlier excursion around Let's Get Pissed, but no improvement on the name. FA: Kieran Loughran & Keith Egerton, 1985 | 21 | 35m | |||||
| 18 |
Dead Ringer
Short brown corner left of Red Zinger. Verge right and over bulge. Continue via pockets. FA: Tim Lockwood & Keith Lockwood, 2014 | 17 | 20m | |||||
| 19 |
Red Zinger
Thin moves left to base of flake then hard moves lead to roof. Traverse right to exit crack. Chossy rock to finish. There's also a direct finish, grade 22, going straight up over roof. Jon Muir, Geoff Little 21-11-1988. Start: Start 50 metres right of 'Full Moon' at smooth wall capped by overhang. FA: Mark Moorhead & Craig Nottle, 1979 | 21 | 27m | |||||
| 20 |
A Chemical Reaction
Up 4 metres right of 'Red Zinger' to bulge. Up on good breaks. FA: Jon Muir, Maureen Gallagher & Geoff Little, 1988 | 21 | 20m | |||||
1.19.13. Bonsai Buttress 5 routes in Cliff
- Summary:
-
All Trad climbing
description
Emergency Location: Mount Arapiles, Lower Curtain Wall Area
| Route | Grade | Style | Selected ascents | |||||
|---|---|---|---|---|---|---|---|---|
| 1 |
Weak Daze
On the back of the buttress (ie South facing). Climb the crack between the main wall and the detached block to the V cave, step left and through the overhang. FA: Dan Flynn & Chris Jillard, 28 Sep 2018 | 13 | 10m | |||||
| 2 |
Daze Gone By
Detached pillar on left end of 'Bonsai' Buttress. FA: Jon Muir & Mark Moorhead c., 1980 | 15 | 15m | |||||
| 3 |
★ Dave
Dubious pro. Noddy thinks this is almost identical to 'Daze Gone By' but the routes will have to be repeated to make certain. FA: Dave Gairns & Chris Baxter, 1982 | 18 | 20m | |||||
| 4 |
A Fish Called Wanda
Crack behind left-most tree and on up smooth wall. FA: Geoff Little & Jon Muir, 1988 | 17 | 15m | |||||
/f7/18/f71868acc927896f440a0a5197bd7d718a7729b9) |
||||||||
| Route | Grade | Style | Selected ascents | |||||
| 5 |
Bonsai Banzai
Take right crack via tree. When crack ends, move right and up. A short little seam on good rock. Take care at the start. FA: Jon Muir & Geoff Little, 1988 | 24 | 13m | |||||
1.19.14. Winterset Wall 9 routes in Cliff
- Summary:
-
All Trad climbing
description
Emergency Location: Mount Arapiles, Lower Curtain Wall Area
| Route | Grade | Style | Selected ascents | |||||
|---|---|---|---|---|---|---|---|---|
| 1 |
Wall Flower
Shabby left wall of broken corner immediately left of 'Winterset'. 'Contrived' up middle of slab to finish just left of roof. FA: Dave Gairns & Chris Baxter, 1982 | 9 | 18m | |||||
   |
||||||||
| Route | Grade | Style | Selected ascents | |||||
| 2 |
★★★ The Reckoning
Climb Wall Flower or Trouser Sighs to bolted anchor in back of cave. Bridge through cave and then offwidth like a beast through the roof crack and out. Sent! Bring your mates, give it a burn, and take some pics! FA: Chris Ferre, 29 Sep 2018 FFA: Chris Ferre, 10 Jun 2019 | 25 | 20m, 2 | |||||
| 3 |
★ Trouser Sighs
Wall 2 metres left of 'Winterset'. FA: Chris Baxter & Dave Gairns, 1982 | 16 | 25m | |||||
| 4 |
★★ Winterset
The obvious crack through a roof bulge, good jambs through a steep bulge leads to easier finish up to ledge. FA: Jeremy Boreham, Rod Young & Greg Child, 1978 | 19 | 15m | |||||
| 5 |
★★ Go Big
Start up winterset, then move right under the roof bulge to bolt. Go Big ! Then right and up to finish at ledge. FA: muki woods & Pauly G, 29 Dec 2018 FFA: muki woods, Jae Zhong & Pauly G, 31 Dec 2018 | 23 | 20m, 1 | |||||
| 6 |
★★ Dismember
More grunting. Crack and ceiling 8 metres right of 'Winterset'. FA: Kim Carrigan & Louise Shepherd, 1979 | 20 | 15m | |||||
| 7 |
★ Courting Daze
Crack just right of 'Dismember' FA: Chris Baxter & Dave Gairns, 1982 | 13 | 30m | |||||
| 8 |
Angstrom
A very small unit. Well below and north of 'Winterset' is a tiny crag with corner and roof. Hard start FA: Kieran Loughran, Bill Andrews & Peter Watling, 1989 | 19 | 7m | |||||
| 9 |
No Lichen on My Moccasins
Hero thinks this might have been done earlier by Noddy. Start: The clean line 50m right of 'Courting Daze'. (A large dead conifer leans against the cliff nearby). FA: Iain Sedgman, Lesley Roberts & Leanne Matheson., 2002 | 16 | 20m | |||||
1.19.15. Far North Bouldering 13 routes in Boulder
- Summary:
-
All Bouldering
Lat / Long: -36.747756, 141.834624
description
Emergency Location: Mount Arapiles, The Northern Group Carpark
1.19.15.1. Caving Boulder 11 routes in Boulder
- Summary:
-
Lat / Long: -36.747996, 141.834816
description
Emergency Location: Mount Arapiles, The Northern Group Carpark
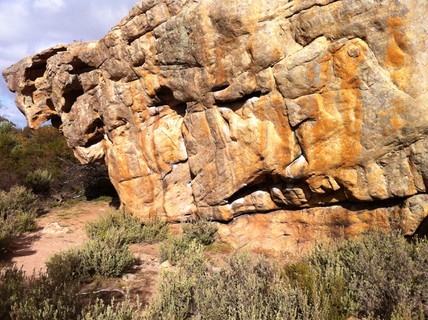 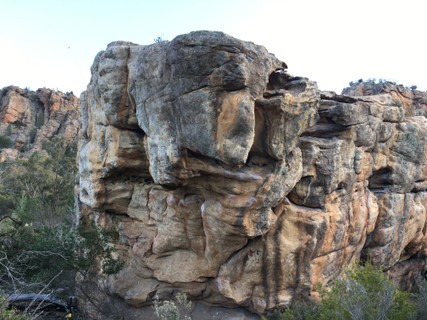 |
1.19.15.2. Boulder near caving boulder 2 routes in Boulder
- Summary:
-
Lat / Long: -36.747593, 141.834596
description
Emergency Location: Mount Arapiles, The Northern Group Carpark
approach
Park at far north car park, walk passed the gate up the track for about 150m until a smaller track splits of to the right into the bush. Cross a small dry creek and follow track until you reach caving boulder on the right of track. Screaming boulder is located about 40m north of caving Boulder.
  |
1.20. Mitre Rock 127 routes in Crag
- Summary:
-
All Trad climbing
Lat / Long: -36.737048, 141.832048
description
Emergency Location: Mount Arapiles, Mitre Rock South Area or Mitre Rock North Area
1.20.1. South Mitre 55 routes in Cliff
- Summary:
-
Lat / Long: -36.736835, 141.831505
description
Emergency Location: Mount Arapiles, Mitre Rock South Area
| Route | Grade | Style | Selected ascents | |||||
|---|---|---|---|---|---|---|---|---|
| 1 |
★ West Ridge of Mitre
FA: Eric Shipton & Bill Tilman | 1 | 100m | |||||
| 2 |
Sky Pilot Direct Finish
After pulling onto the grey nose, continue straight up the arete. FA: Bert Levy (solo), 1998 | 13 | 20m | |||||
| 3 |
Sky Pilot
An OK route by a couple of disruptive characters. Scramble up to wall at left end of cliff. There's a blocky grey nose atop an orange overlap. FA: Keith Lockwood & Tony Yap, 1983 | 13 | 35m | |||||
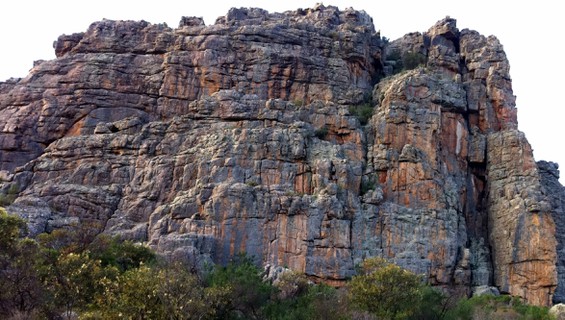 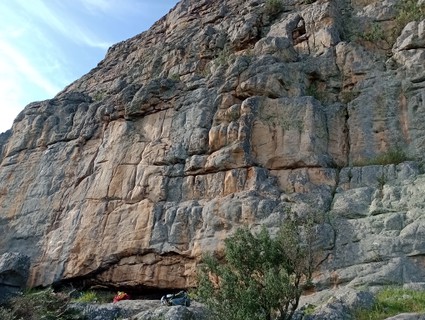 |
||||||||
| Route | Grade | Style | Selected ascents | |||||
| 4 |
★ The Baptism
The second pitch is pretty stiff for the grade. The Shepherd guide has the second pitch going right and up what is now Wee Skerrick though that's hard to reconcile with the, admittedly vague, text in the Lockwood guide. Start at the easy-angled grrove about 20 metres left of Acapulco Gold.
FA: Paul Gillis & John Bowen, 1970 | 13 | 30m, 2 | |||||
| 5 |
★★ Acapulco Gold
Warning Rock: Halfway Jug about to break Great dogleg crack up smooth wall at the left end of the cliff. FA: Tony Dignan & Kevin Lindorff, 1978 | 19 | 10m | |||||
| 6 |
★★ Whispy Things
Start from a cairn 2 metres right of Acapulco Gold and boulder up to join Loudly Inferior. FA: Dave Mudie, 1989 | 24 | 10m | |||||
| 7 |
★ Loudly Inferior
Up to small bush and then left and up to tricky finish. Start at undercling 4 metres right of Acapulco Gold. FA: Brent Davis, Steve Lassche & Glenn Tempest, 1980 | 23 | 10m | |||||
| 8 |
★ The Squeaky Wheel
A worthwhile companion route to 'Acapulco Gold'. Hard start with no gear till a few metres up. Pumpy continuation up and right. Start as for Loudly Inferior. FA: Unknown, 2000 | 19 | 10m | |||||
Routes starting off ledgeThe following two routes start off a ledge about two thirds of the way up the cliff. | ||||||||
| 10 |
★ Wee Skerrick
This is the next line up the ramp from the first belay of The Baptism. | 12 | 12m | |||||
| 11 |
★ Skarramunga
Pumpy wall-climbing starting just right of Wee Skerrick from a block. FA: Simon Mentz, Donald Smith & Ronnie Sammut, 1998 | 18 | 15m | |||||
Starting at ground level | ||||||||
| 13 |
★ Noa Zark / Ben Hur
A quite good top pitch. This old route originally started up The Baptism and then traversed right in a very strange way only a few metres below the major ledge system. Here it's described with a direct start just left of The Nude Balloon Dance, offering a much better climb. The first pitch can be done as an easy climb in it's own right - has some OK moves but is a bit broken.
FA: Paul Gillis & John Bowen, 1970 | 14 | 42m, 2 | |||||
| 14 |
★ The Nude Balloon Dance
Not as good as first thought but not bad and shady for most of the day. Usually done in one pitch. Start below the right of two obvious weaknesses right of Acapulco Gold.
FA: Unknown, 2000 | 7 | 30m, 2 | |||||
| 15 |
Ancient History
A wandering excursion that has not captured the imagination. Start as for The Nude Balloon Dance.
FA: Chris & Sue Baxter, 1985 | 18 | 47m, 2 | |||||
| 16 |
Renunciation
Hard start and finish. Grade is very height-dependent, especially the start of the final wall which will be easy for people well over 180cm tall and desperate if much shorter than that. Originally started up first few metres of The Nude Balloon Dance but now has a direct start and a bolt added to final wall (with permission of Phil Armstrong). Phil originally stormed up the final wall oblivious to the lack of protection after a major falling out with his climbing partner. Start midway between The Nude Balloon Dance and Serpent below a short incipient flake and FH. Up past FH to ledge, step left and then up right-tending ramp to next ledge. Go up to steep, left-leading flake and follow this to below final wall. Past FH and up to ledge and traverse right to anchor of Serpent. FA: Phillip Armstrong & J. Bohills, 1979 FA: Kieran Loughran, Maureen Little & Norm Booth, 2013 | 19 | 30m, 2 | |||||
| 17 |
★ Pygmy Whale
The start is a bit like Paladin but three grades easier. Beware a large loose block at 8m. Overhanging seam between Renunciation and Serpent LHS, ramble up a bit then arete and wall past two bolts to Serpent chains. Pro is hard to place on the start. Directly below the Serpent chains if you'd prefer to TR. FA: Douglas Hockly, Geordie Webb, Ben Wiessner & Wendy Eden, Mar 2016 | 23 | 25m, 2 | |||||
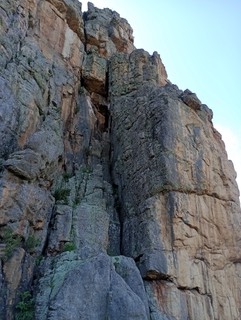 |
||||||||
| Route | Grade | Style | Selected ascents | |||||
| 18 |
★★ Serpent
Fantastic climbing. There is a variant start to the left at the painted initial "S" but the way described is better. Start below right-hand line up the sombre cleft, right of the initial "S".
FA: Keith Lockwood, Geoff Uebergang & Gary Sudholz, 1967 | 10 | 43m, 2 | |||||
| 19 |
★ Serpent Direct Finish
Sustained with a good finish. Start as for Serpent. Follow Serpent for 25 metres then up the steep corner on the right. Pull through overhang and up. FA: Kim Carrigan & Malcolm Matheson, 1982 | 20 | 35m | |||||
| 20 |
★ The Serpent's Venom
Fairly dramatic but not obviously appealing. Start as for Serpent.
FA: Maurice Leslie & Garry Sudholz, 1967 | 10 | 60m, 2 | |||||
| 21 |
★ The Fall of Man
A weird crux on pitch 2 could fool some people. Pitch 1 is very worthwhile however and it's easy to step R a few metres to finish up Revelations pitch 2 or The Bishop pitch 2 if you don't like the look of the roof slot.
FA: Chris Baxter & Keith Lockwood (alt), 1983 | 14 | 45m, 2 | |||||
| 22 |
★ Revelations
The deep cleft isn't the problem; it's the technical crack at the finish. Start at the right-hand line in the cleft, as for Serpent.
FA: Phillip Stranger, 1968 | 17 | 48m, 2 | |||||
| 23 |
★★ The Bishop
Start as for Revelations, Serpent, etc.
FA: Garry Sudholz & Rod Sutherland, 1967 | 11 | 50m, 2 | |||||
| 24 |
Stinkbug Shuffle
FA: Rich Stiles, Andrew Hume & Nick Stiter, 1989 | 17 | 50m, 2 | |||||
| 25 |
★ Seamy Side
Exciting route on overhanging orange wall at front of the buttress. Start on righthand edge of the cleft as for Stinkbug Shuffle. FA: Kim Carrigan, 1982 | 25 | 18m, 1 | |||||
| 26 |
★ Delusions of Grandeur
Start 5m right of Seamy Side. Follow black streak up thin crack through bulges. When crack ends at around the 10m mark, step left and continue up clean headwall to top. Descend off Seamy Side anchors. FFA: Joel Wilson, 26 Jun 2020 | 29 | ||||||
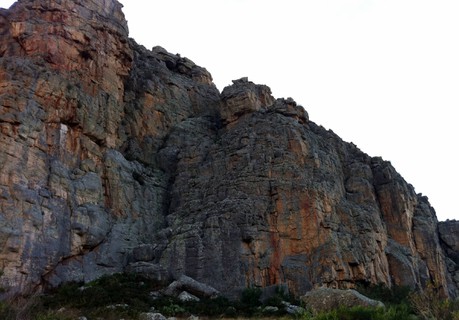 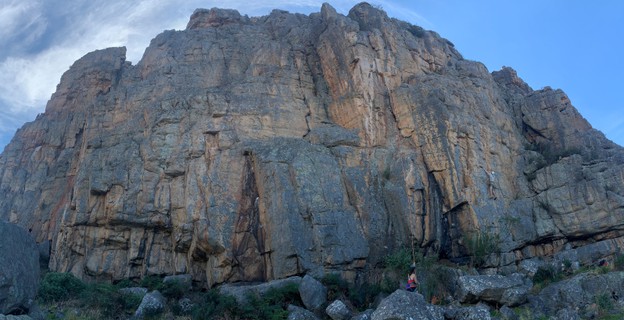 |
||||||||
| Route | Grade | Style | Selected ascents | |||||
| 27 |
★ The Empire Strikes Back
Subtle and sustained with small protection at start which is hard to place. Start about 6-7 metres right of the arete at a clear initial C. FA: Jeff Lamb, Paul Tattersall & Peter Krammel, 1982 | 23 R | 25m | |||||
| 28 |
Not What it Seems
Thin, poorly protected line then easily right. Now up left to large ledge, or could continue up Jidas which is directly above. Start about 3 metres right of the initial C. FA: Kim Carrigan & Malcolm Matheson, 1984 | 24 R | 20m | |||||
| 29 |
Holy Roller
A wandering route that isn't worth it. Start 5 metres right of Behemoth below box-groove.
FA: Chris & Sue Baxter, 1983 | 15 | 55m, 2 | |||||
| 30 |
Jidas
A topo of this route was posted on the Arapiles toilet notice-board. A dramatic link-up from Holy Roller into Youth In Asia. There's a fair bit of lichen and the rock looks suspect in places but could be worth a look. However, the time for naming the climb after the climbers has long passed. Start as for Holy Roller or Behemoth. FA: Jiri Srutek & Dasa Srutkova, 2010 | 19 | 45m | |||||
| 31 |
Youth in Asia
A major line with lots of scary loose blocks. Start 5 metres right of Behemoth below box-chimney.
FA: Chris & Sue Baxter, 1983 | 15 | 50m, 2 | |||||
| 32 |
★★ Behemoth
Dramatic route but the rock can be quite alarming. The route originally only had the top pitch. They scrambled up the gully to the first belay. The first pitch was originally part of Youth In Asia. The climb is often done as a single long pitch. Start about 3 metres right of the initial C, but there's no good reason not to start a few metres further right directly below the box-chimney.
FA: Chris & Sue Baxter., 1983 | 17 | 45m, 2 | |||||
| 33 |
The Bishop's Crook
This probably originally started in the same place as The Empire Strikes Back at the letter C, which is where we've placed it, but it would be more logical to start further right as for Behemoth.
FA: Murray Taylor & Rod Sutherland, 1967 | 10 | 52m, 2 | |||||
| 34 |
He Certainly Is
Doesn't look much but has easy climbing on superb rock. Start as for Youth In Asia.
FA: Kieran Loughran & Meg Sleeman, 1999 | 9 | 40m, 2 | |||||
| 35 |
Twinkle Twinkle
Takes prominent ramp on the wall left of Guiding Light. Essentially provides an easier finish to He Certainly Is. Start in the gully uphill from The Bishop’s Crook.
FA: Keith Lockwood & Ray Lassman, 24 Sep 2015 | 8 | 50m | |||||
| 36 |
Guiding Light P1 Variant
Climbs pitch one of Guiding Light to ledge, then through gully to exit. | 4 | 35m | |||||
| 37 |
★★ Guiding Light
A quirky ramble that is very enjoyable. There was a serious accident on this climb a couple of years back, showing that a lapse of concentration can get you hurt anywhere. Start at the foot of the chimney-gully.
FA: Simon Mentz & James Falla, 1998 | 6 | 60m, 3 | |||||
| 38 |
★ Guiding Light Variant
| 4 | 50m, 2 | |||||
| 39 |
★ Immaculate Deception
Some nice moves. The gear is poor until the V-groove is reached but the climbing is easy to that point; better protection is available for the harder climbing. FA: Chris & Sue Baxter, 1983 | 16 | 15m | |||||
| 40 |
★ The Mitre
The major orange corner has a few boisterous moves. Be aware that the first gear is too low to keep you off the boulder if you come off the balancy slab. FA: Unknown., 2000 | 14 | 25m | |||||
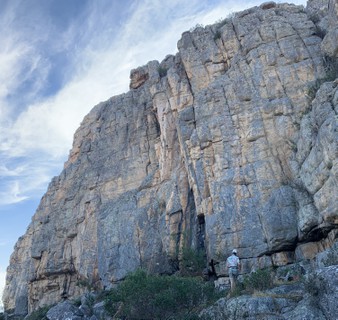 |
||||||||
| Route | Grade | Style | Selected ascents | |||||
| 41 |
Vow of Silence
An enigmatic start up thin crack left of Hopscotch. After 6 metres head up right to a ledge on the arete and finish as for Hopscotch. FA: Chris Baxter & Dave Gairns, 1983 | 20 | 30m | |||||
| 42 |
Hopscotch
Used to be a grade 21 sandbag. FA: Mark Moorhead & Chris Shepherd, 1981 | 23 | 20m | |||||
| 43 |
★ Herbs and Spices
Up to the roof, left through it and up. Quite fun on toprope. FA: Geoff Weigand (solo), 1985 | 23 | 15m | |||||
| 44 |
★★ Cayenne
Red-hot start then good pumpy climbing. Start at a small cave below curving line 4 metres right of Hopscotch. FA: Mark Moorhead & Chis Shepherd, 1981 | 24 | 15m | |||||
| 45 |
★ Cooking For Beginners
Start up arete just right of Cayenne and go into a short seam which joins Cayenne below the top. FA: Glenn Tempest, 1984 | 24 | 15m | |||||
| 46 |
★ Walk On
The distinctive black corner 5 metres right of Cayenne, finishing left above the corner. FA: Mark Moorhead & Steve Lassche, 1980 | 22 | 15m | |||||
| 47 |
★ The Pearly Gates
A good technical crux and delightful top crack. Start just left of Mum's The Word at a nice-looking crack. FA: Chris & Sue Baxter (alts), 1983 | 18 | 33m | |||||
| 48 |
★ Helium
Consistently interesting climbing and a worthwhile addition to the wall. Up the leaning, awkward corner of Mums the Word. Step L, up the cracks, then pull the fingery arete (bolt) to reach the narrow ledge. Resist the temptation to pull up and stand on the ledge, instead step across R into the finishing crack of Speechless. Lower-off anchors to the R. FA: Glenn Tempest & Kevin Lindorff, Mar 2024 | 20 | 23m, 1 | |||||
| 49 |
Mum's the Word
Variant start to Speechless. FA: Chris Baxter & Dave Gairns, 1983 | 19 | 8m | |||||
| 50 |
★★ Speechless
This short steep, left-leaning, black-streaked corner system closely resembles Walk On. Make sure you are on the correct route! Originally climbed using two protection pegs which disappeared decades ago. A bolt added in lieu of the old pegs was chopped, presumably because of the possibility of a lower cam placement behind a dubious block. That block has fallen out (the climbing is now a grade harder than when the route was established) and the bolt has been replaced (to avoid a ground-fall that a fall from the crux would otherwise entail). FA: Chris Baxter & Dave Gairns, 1984 | 22 | 20m, 1 | |||||
| 51 |
★ Mediterranean Sundance
An unusual pitch that is both harder and better than it looks. Start as for Speechless, pull around the arete on the right, then up the blocky line to move up left to an interesting exit left of the thin crack through the bulge. FA: Kevin Lindorff & Eddy Ozols, 1978 | 22 | 20m | |||||
| 52 |
★ Mediterranean Sundance Direct Start
start a few metres right of the original (a metre or two right of the arete). Straight up to join the original line. FA: Glenn Tempest & Kevin Lindorff | 22 | 1 | |||||
| 53 |
Club Med
Start up Mediterranean Sundance Direct Start, then through the incipient seam midway between M.S and AaA. A nest of little cams can protect the crux finish FA: Kevin Lindorff & Glenn Tempest | 24 | 1 | |||||
| 54 |
★★ Anything At AlI
Good sustained climbing. Protection is good but placing it is tiring. Double ring belay/rap anchor. FA: Chris Shepherd & Mark Moorhead, 1980 | 21 | 20m | |||||
| 55 |
Stuff
Toprope up the wall R of Anything At All. OK, nothing special. FA: Douglas Hockly, 2012 | 23 | 25m | |||||
| 56 |
Off the Shelf
Not that good, a bit loose and contrived. Start 2 metres right of Anything At All. FA: Hugh Foxcroft & Chris Baxter (alt originally done in 2 pitches), 1984 | 18 | 20m | |||||
| 57 |
Shelf Life
Another OK climb that's in the shade on a hot morning. Shares the good start of Off The Shelf and takes an easier logical finish just left of the easy corner. Good rock and protection. FA: Unknown, 2000 | 16 | 30m | |||||
1.20.2. Hells Bells Area 11 routes in Cliff
- Summary:
-
Lat / Long: -36.736809, 141.832433
description
Emergency Location: Mount Arapiles, Mitre Rock South Area
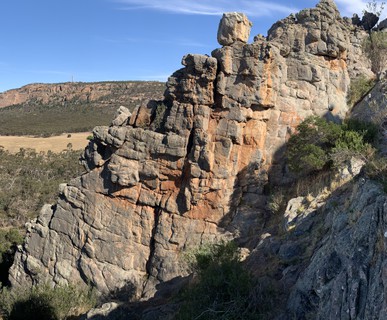 |
||||||||
| Route | Grade | Style | Selected ascents | |||||
|---|---|---|---|---|---|---|---|---|
| 1 |
★ Mark Route #1
2 meters L of When Kim Was a Girls Name, up weakness to front of butress and R to finish a the top of WKWAGN FA: Mark Thomas Jonathan Kendall, 2003 | 10 | 12m | |||||
| 2 |
★ When Kim Was a Girl's Name
Climb wall direct to a prominent sentry-box at top of cliff. FA: Chris, Sue Baxter & Dave Gairns, 1983 | 14 | 12m | |||||
| 3 |
★ Altar Boy
Face left of "Armageddon" to orange bulge which is turned on right. The bulge has been taken direct at 20 via a line half a metre left of this one. FA: Peter Martin, Ian Howe & Merv Trease, 1980 | 16 | 11m | |||||
| 4 |
★ Armageddon
The sustained dog-leg crack to a steep, juggy finish. FA: Chris Baxter & Andrew Smith, 1967 | 11 | 13m | |||||
| 5 |
★ Hell's Bells
Traverse left and up through a wide crack. Start: Start 5 metres up and right of "Armageddon" at initials "HB" FA: Chris Baxter & Andrew Smith, 1967 | 9 | 13m | |||||
| 6 |
★ Hell's Bells Direct
Go straight up, moving slightly right to a contrived, but worthwhile finish. Start: Start as for "Hell's Bells" FA: Peter Martin & Ian Howe, 1980 | 17 | 11m | |||||
| 7 |
★ Lucifer
Offwidth crack 2 metres right of "Hell's Bells" FA: Chris Baxter & Andrew Smith, 1967 | 13 | 8m | |||||
| 8 |
★ Might...not
A steep, pure hand-crack splits the front of the second outcrop at the base of the gully. FA: Dave Gairns & Chris Baxter (FRA), 1983 | 16 | 12m | |||||
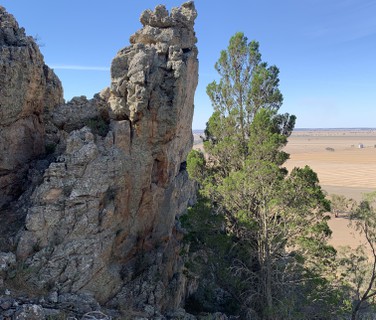 |
||||||||
| Route | Grade | Style | Selected ascents | |||||
|
Gab Wall is a small marbled wall on the right side of the gully. This is worth a look even just to throw a top-rope on the bold routes. Walk up the Hells Bells track and cut across rather than going directly up the gully below the outcrop. | ||||||||
| 10 |
The Gab Gets Up
A most sustained mini-route. Crack-seam on left edge of face. FA: Geoff Butcher, Richard Smith & Dave Mudie, 1989 | 18 | 8m | |||||
| 11 |
Screwloose and Sexless
Good but there's only a 30-year-old piton between you and the deck on the crux and it's a long way up to the next runner. Hard start 3 metres down right of The Gab Gets Up leads past pin and up to pocket (cam). Finish to right. FA: Dave Mudie & Richard Smith, 1989 | 19 R | 10m | |||||
| 12 |
Gabdnas
Lovely face but the cryptic name and ascentionists should give pause; the eman is not a misnomer. The grade has been arbitrarily bumped up from 18 to 20 and the deadly flag applied to give fair warning. A toprope inspection is advised. The original description says "seam in middle of wall right of The Gab Gets Up" but it only makes sense as the seam in the middle of the wall right of Screwloose And Sexless. FA: Initially Sado Masochistic Items That Hurt & Shonkis with a bit of fiddling, 1995 | 20 X | 10m | |||||
1.20.3. Deacon Area 8 routes in Cliff
- Summary:
-
Lat / Long: -36.736261, 141.831410
description
Emergency Location: Mount Arapiles, Mitre Rock North Area
| Route | Grade | Style | Selected ascents | |||||
|---|---|---|---|---|---|---|---|---|
| 1 |
★★ Invaders From Mars
A number of climbs have been done on the little pinnacles in the middle of the gully but this is the only one recorded. Up the gully, on the pinnacle opposite 'Prelate', on the side facing the carpark. Through the overhang then balancy moves to top. FA: Ryan Robertson, Peter Kraehenbuhl & Glen Hordacre, 1987 | 17 | 10m | |||||
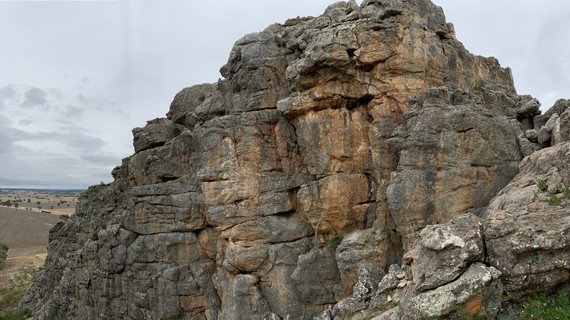 |
||||||||
| Route | Grade | Style | Selected ascents | |||||
| 2 |
★ Prelate
Testy overhang. Start: At top (right-hand) end of wall facing into the gully is obvious overhang with an unusual peanut-shaped jug above. Up faint corner then swing onto the peanut and pull up the tricky wall above. FA: David Shirra & Chris Baxter, 1980 | 18 | 14m | |||||
| 3 |
★ Hollingworth and the Little Boy
Up past hole and up arete, through small steepening. Start: Squeezed between the 'Prelate' and 'The Priest' (ooh er). FA: FRA Richard Smith & Greg Pritchard, 2002 | 15 | 10m | |||||
| 4 |
★ The Priest
Chimney-crack 2 metres left of "Prelate". FA: Murray Taylor & Rod Sutherland, 1967 | 9 | 20m | |||||
| 5 |
Gloop
Face 1 metre left of 'The Priest' FA: Eddie Ozols (solo), 1978 | 9 | 16m | |||||
| 6 |
★ Deacons Dilemma
Delightful moves up wall and thin bottomless crack 2 metres left of "The Priest" FA: Peter Martin & K. Deacon, 1979 | 15 | 16m | |||||
| 7 |
★ The Deacon
The crack at the left end of the wall has a tricky move at half-height. Start: Start 5 metres left of "Deacon's Dilemma". FA: Murray Taylor & Rod Sutherland, 1967 | 9 | 12m | |||||
| 8 |
★ The Deviant
Not a bad lead with enough gear in horizontal breaks (take cams) and interesting moves in between. FA: Unknown, 2000 | 7 | 10m | |||||
1.20.4. North Mitre 53 routes in Cliff
- Summary:
-
Lat / Long: -36.736179, 141.831917
description
Emergency Location: Mount Arapiles, Mitre Rock North Area
/46/b0/46b061b8e266b3fecbe0fd3a30e88767e5eb67bc) 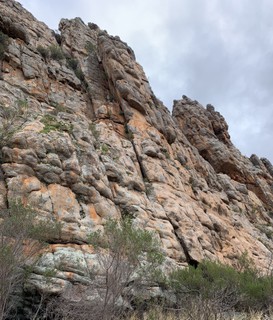 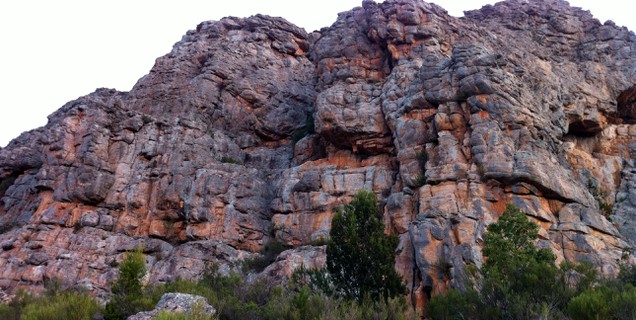 |
||||||||
| Route | Grade | Style | Selected ascents | |||||
|---|---|---|---|---|---|---|---|---|
| 1 |
★ Boring Boring Boring Boring
If you're tired of Arapiles you're tired of life. And you'll be tired after this. Overhung undercling flake with stuff all for your feet. You might not be surprised to find it hard for the grade. FA: Jon Muir, 1984 | 24 | 10m | |||||
| 2 |
Choirboy
Requires a bit of a grope around the bulge. The line about 3m left of The Archbishop. Groove to bulge, then on easily up to scoopy wall and upper wall. FA: Ray Lassman & Keith Lockwood, 24 Sep 2015 | 16 | 40m | |||||
| 3 |
★★ The Archbishop
Start at the painted initial 'A'.
FA: Geoff Uebergang & Keith Lockwood, 1967 | 11 | 48m, 2 | |||||
| 4 |
Witch Craft
Start 2 metres right of The Archbishop and go straight up wall to flat roof below left arete. Over this to seam just right of arete. If you climb this route direct it's about 22, it was originally given 18, not sure if this was just meant to be a sandbag or if they avoided the hard bits! FA: Peter Martin & Andrew Oates, 1992 | 22 | 40m | |||||
| 5 |
★★ Witch Hunt
FA: Rod Young & Phillip Armstrong, 1977 | 14 | 40m, 2 | |||||
| 6 |
★ Penny Dreadful
Start below thin seam on the first bit of orange rock left of the gully, 8 metres right of the initial A marking the start of The Archbishop.
FA: Peter Watling, Andrew Bowman, Gen Corcoran & Phill Hay, 1973 | 11 | 40m, 2 | |||||
| 7 |
★ Leather Bound
Quite good moves on the top flake. Start as for Penny Dreadful or at the next seam to the right. Up to the blocky ledge then take the flake-crack right of the Penny Dreadful corner. FA: Keith Lockwood & Peter Watling, 1984 | 13 | 40m | |||||
| 8 |
Knee Trembler
Takes the big wall around right from Leather Bound. So-so. Start up the gulch between Leather Bound and The Great White Hope, moving left to the prominent crackline on the wall around right from Leather Bound. Up crackline, step right through bulge, then finish up corner system on the front shoulder of the buttress. FA: Keith Lockwood & Kieran Loughran, 1 Feb 2016 | 14 | 40m | |||||
| 9 |
★ The Great White Hope
Old-fashioned jamming up the line through a couple of overhangs. Be wary of loose blocks near the top. Start immediately left of Bangla Desh at obvious crack-line. FA: Chris Baxter, Andrew Bowman, Keith Lockwood & Peter Watling, 1973 | 17 | 35m | |||||
| 10 |
★ Bangla Desh
Worthless. Has lots of loose blocks as well. FA: Keith Lockwood & Chris Baxter, 1973 | 11 | 36m | |||||
| 11 |
★ The Parson's Nose
Good rock. Takes the prominent prow 30 metres down left of Mason's Apron. There's a small, chipped mark near the ground.
FA: Peter Watling, Andrew Bowman, Glen Corcoran & Phil Hay, 1973 | 9 | 35m, 2 | |||||
| 12 |
★ Snout Out and Spin
A series of sustained moves.
FA: Hywel Rowlands & James McIntosh, 1 Nov 2016 | 17 | 35m, 2 | |||||
| 13 |
★ Cloaca
Warning Flora and Fauna: Skeleton Fork Fern A good climb for beginners to follow as protection is limited. Start 2 metres left of V-corner of Pete Made Us Do It. FA: Greg Pritchard & Paul Hoskins, 1993 | 6 R | 30m | |||||
| 14 |
Pete Made Us Do It
Space filler. FA: Bendigo CAE Students, 1990 | 8 | 30m | |||||
| 15 |
Through the Dardenelles
An enormous pile of bat guano. Start below middle of big diagonal crack and scramble up to a ledge with an enormous pile of bat guano beneath roof. FA: Chris Baxter & Dave Gairns, 2000 | 17 | 30m | |||||
| 16 |
Regarding Apocalyptic Simpleton
The full name is "Regarding Apocalyptic 'Simpleton' 'Simpleton' Fun Penis Shooter Shrug Woof Hello". Despite this, it is not a great climb. Start 2m left of Through the Dardanelles. FA: Richard Smith, Greg Pritchard, Keiran Loughran, Paul Hoskins, Deb Sweet, James Falla, Jan Pritchard, Bryn Smith, Jon Bassindale & Salix, 1999 | 18 | 25m | |||||
| 17 |
Short and Curly
Done Exodus and Cloaca and looking for another easy route? Below the Mason's Apron (left of Exodus) is a short pinnacle. This climbs the tallest part of the outside face. FA: Woodser & Kirsty Hamilton, 1996 | 6 | 8m | |||||
| 18 |
Apron Strings
Bolted line on back wall of Mason's Apron. Short and powerful. Start on the back of the Mason's Apron block. FA: Steve Kelly, 2004 | 24 | 10m, 2 | |||||
| 19 |
The Old Man and the Kid
The little crack on the right wall of the gully around left from Lema Sabachthani has a hard start. Clipping the first bolt of Apron Strings might be tempting. FA: Geoff Weigand & Bert Levy, 1980 | 16 | 13m | |||||
| 20 |
Lema Sabachthani
The poorly protected start makes the left arete of Mason's Apron a serious lead. FA: Chris, Sue Baxter & Mike Stone, 1984 | 16 R | 15m | |||||
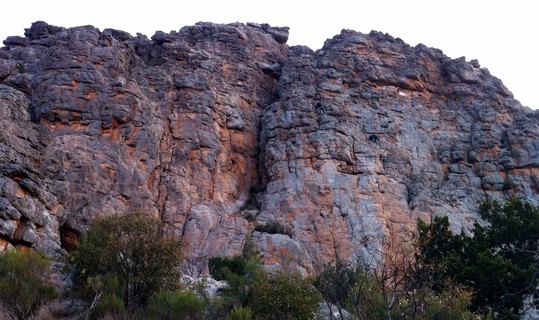 |
||||||||
| Route | Grade | Style | Selected ascents | |||||
| 21 |
★ Mason's Apron
Nice climbing, just avoid the hollow rock at the start. Start in the middle of the wall left of Exodus, behind little pinnacle. FA: Dick Evans & John Stone, 1979 | 13 | 24m | |||||
| 22 |
★ Diaspora
A bit contrived. FA: Kieran Loughran & Meg Sleeman (FRA), 1991 | 17 | 25m | |||||
| 23 |
★★ Exodus Scramble
An awesome climb if you're not a fan of exposure. 1) 23m (6) Start on exodus for 16m and then head up the sloping belay ledge on L. 2) 15m (2) Up the corner then traverse R then straight up. FA: jen findlow & Daniel Howell, 5 Oct 2017 | 6 | 38m, 2 | |||||
| 24 |
★★ Exodus
Delightful. Start just right of a detached little pinnacle and just left of Edgell Gerber at a shallow corner. FA: Keith Lockwood & Geoff Uebergang, 1967 | 6 | 36m | |||||
| 25 |
★ The Wilderness
Usually top-roped. FA: Peter Martin & Andrew Oates, 1992 | 17 | 30m, 2 | |||||
| 26 |
★★ Edgell Gerber Memorial Flake Climb
An exciting flake though maybe only just scrapes in for the star. Start as for The Devil's Advocate. FA: Phillip Armstrong & Roger Murphy, 1977 | 17 | 30m | |||||
| 27 |
★ The Devil's Advocate
Climb short crack 1 metre right of Exodus to ledge then the chimney-gully on the left side of the Salem wall. FA: Chris Baxter & Andrew Smith, 1967 | 8 | 45m | |||||
| 28 |
Morgul Won't
Below Edgell Gerber is a short crack to gain the ledge.
FA: Hamilton & Woodser. (alt), 1996 | 14 | 40m, 2 | |||||
| 29 |
★ Iago
OK. Start as for Morgul Khan. FA: Rod Young (solo), 1977 | 12 | 45m | |||||
| 30 |
★★ Morgul Can't
Obvious direct finish to Morgul Khan but a crucial flake is suspect. Start as for Morgul Khan. FA: Richard Smith & Sonia Jones, 1986 | 19 | 40m | |||||
| 31 |
★★ Morgul Khan
More very nice climbing which is quite satisfying even though it squibs the obvious direct finish, Morgul Can't, which is just that bit more serious. Start at easy corner 3 metres left of Salem. FA: Jeremy Boreham & Rod Young, 1977 | 18 | 40m | |||||
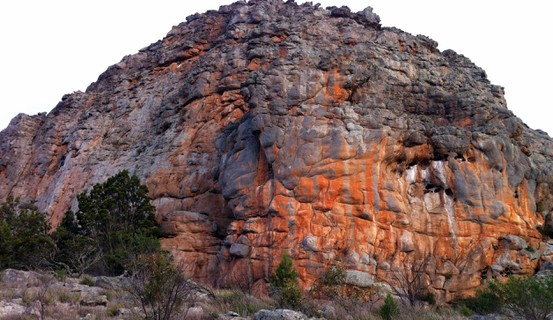 |
||||||||
| Route | Grade | Style | Selected ascents | |||||
| 32 |
★★ Salem
Sustained technical climbing on beautiful rock. Shallow flake-corner 12 metres left of Gulp. FA: Rod Young & Kevin Lindorff, 1977 | 18 | 40m | |||||
| 33 |
★ A Dream Of Pink Tse-Tse Flies
This route starts up Salem for a few meters then uses balancy moves to step right. For the direct and bold start see A Dream Of Pink Tse-Tse Flies Direct. FA: Rod Young & Kevin Lindorff, 1977 | 20 | 42m | |||||
| 34 |
★ A Dream Of Pink Tse-Tse Flies Direct
Desperate start with cosmetic protection into easy line right of Salem. FA: Kim Carrigan, 1984 | 23 X | 25m | |||||
| 35 |
★ The Power Of Positive Thinking
This is looking a bit lichenous. Start 7 metres left of Gulp. FA: Keith Lockwood & Dave Mudie, 1988 | 20 | 40m, 1 | |||||
| 36 |
Passover
Start as for Gulp.
FA: Keith Lockwood & Kieran Loughran. (alt), 1998 | 17 | 50m, 2 | |||||
| 37 |
★ Gulp
Up and right to ancient peg runner then left and up onto grassy ramp and wander up this. Start 8 metres left of the conifer near the Bostok ramp. There's a ramp of spiky grass at 8 metres. FA: Shorty Turner & members of Z Commando Company, 1967 | 12 | 45m | |||||
| 38 |
Striking Chords
Boulder up tiny smooth bulge straight to the peg on Gulp. Go diagonally right (in Mullumbimby Madness for a move), pull bulge then left to incipient cracks 2 metres right of Gulp. FA: Keith Egerton & Jane Wilkinson, 1983 | 16 R | 40m | |||||
| 39 |
★ Mullumbimby Madness
Good climbing with a committing bulge at 7 metres. Start 1 metre left of Bostok at 2 vertical seams. FA: Tony Dignan, Phillip Armstrong & Tony Marian, 1977 | 15 | 40m | |||||
| 40 |
★ Bostok
Scramble to the top of ramp. Now go up short crack and scoop, trending right, and then back left and through overlap. Start at a ramp running up diagonally right 12 metres left of Belltower and just left of a large conifer growing against the cliff. FA: Phillip Armstrong, Tony Marian & Tony Dignan, 1977 | 13 | 40m | |||||
| 41 |
Forgotten Archive
The initial wall of this is pretty crowded with 3 independent starts within about 3 metres. Start 4 metres left of Belltower. FA: Dave Mudie, Keith Lockwood & Richard Smith. Keith Egerton had possibly climbed the initial wall earlier., 1988 | 20 R | 30m | |||||
| 42 |
★ Bellfry
Bouldery problem 3 metres left of Belltower, just left of the first FH of Nuns Love It. Walk off right into the base of Belltower. FA: Dave Mudie, 1988 | 19 | 10m | |||||
| 43 |
★ Nuns Love It
Up cruxy bulging face past fixed hanger to ledge, then trad up easier face and crack to overlap past second fixed hanger, crux, then up to rap station. FA: muki Woods/toby | 23 | 20m, 2 | |||||
| 44 |
★ Belltower
Chimneying to good wall climbing. Easy bridging up deep chimney left of Beelzebub with poor protection. Now finish up the centre of the wall above. FA: Keith Lockwood & Geoff Uebergang, 1967 | 13 R | 40m | |||||
| 45 |
★ Template
"You'll need the reach of a sick dog", Tony Marian. FA: Kim Carrigan & Tony Marian, 1978 | 24 | 25m | |||||
| 46 |
★ Beelzebub
A funky little thing. Double ropes help and a #4 cam helps to ignore unnecessary atrocious bolt. Start at the right edge of the deep cleft of Belltower. Up to horizontal and traverse 5 metres right to layback crack to ledge. Up crack past old bolt to chimney. FA: Chris Baxter & Andrew Smith, 1967 | 17 | 27m | |||||
| 47 |
★ Beelzebub Direct Start
A ridiculously hard start for Beelzebub. Start as for Tayloring A Trend, below bolt. FA: Tony Marian & Kim Carrigan, 1978 | 21 | 10m, 1 | |||||
| 48 |
Tayloring a Trend
A beautiful wall but with chipped holds. Start below a bolt 3 metres left of Tinker Taylor. FA: Nic Taylor & Craig Nottle, 1983 | 23 | 25m | |||||
| 49 |
★ Tinker Taylor
Nic Taylor chipped the holds but couldn't do the climb. FA: Kim Carrigan, 1984 | 25 | 25m, 2 | |||||
| 50 |
★ Soldier Sailor
All natural, but painfully small holds. Start as for Roadside Attraction. FA: Kim Carrigan, 1984 | 26 | 20m, 1 | |||||
| 51 |
★ Roadside Attraction
Warning Flora and Fauna: Skeleton Fork Fern Strange climbing up the guano-stained scoop with minimal protection at the crux. There's a fairly worthless direct start (23) 3 metres to the right past a bolt (John Gandy, Simon Carter 11-89). FA: Kevin Lindorff, Rod Young & Phillip Armstrong., 1977 | 18 | 20m | |||||
| 52 | Roadside Attraction Direct Start | 23 | 20m, 1 | |||||
| 53 |
★ One For The Road
Short but worthwhile. Start at right side of wall at a cluster of pockets. FA: Kieran Loughran & Chris Baxter, 1985 | 21 | 15m, 1 | |||||
1.21. Western Side 199 routes in Crag
- Summary:
-
All Trad climbing
Lat / Long: -36.754536, 141.816650
description
PLEASE NOTE: As it stands (as of 20/07/2018) there are multiple route and area descriptions that are incorrect (most glaringly in the less trafficked areas of the Mount). Efforts are being made to fix this, but be aware that any new-routing activity or general climbing on The Western Side should be done with consultation to locals, the existing guidebooks, and The Australian Route Register (more detailed information on some single-pitch climbs: http://www.climb.org.au/index.php?page_id=10&action=region®ion_id=8).
1.21.1. Mean Green Wall 3 routes in Cliff
- Summary:
-
description
This little outcrop between the 'Far North' and 'Cyclop's Eye' isn't hard to get to from the top but navigating is difficult because it isn't visible on the shortest approach. It's a lovely wave of rock that does not have much potential. Dave Mudie toproped a bunch of things here, which probably means everything as there isn't much.
Emergency Location: Mount Arapiles, Mount Arapiles Telstra Tower Carpark
approach
Being buried on the plateau only the top of the outcrop is visible and that's best seen from Mitre Rock. The tiny face with the climbs is obscured by trees. look at the Google map to see exactly where it is. Access starts from the Telstra towers. The best access is to start out on the approach to Cyclops Eye from the Telstra towers and cut off to the north quite early on. Alternatively, follow the pad around to the top of the far Northern Group above Bonsai Buttress. Now, walk 150m north-west along cliff top and you should be able to pick the crag out 150m to the south-west on the plateau.
| Route | Grade | Style | Selected ascents | |||
|---|---|---|---|---|---|---|
| 1 |
The Galloping Green Gallant
Hero writes: "I'm reasonably sure the route Klaatu, Veradu, Nicto by Sedgie, et al was done by Richard Smith and I in early 'September' 2001 and we gave it 12." (Note that the name Klaatu... was later re-used at Christmas Walls) FA: Hero Fukutu & Richard Smith, 2001 | 15 | 10m | |||
| 2 |
Mean Green Bean Machine
Start a couple of metres right of a bottomless left facing (and crackless) corner capped by a small roof. Climb the obvious overhanging fingery crack on steep red wall. FA: Dave Mudie & Richard Smith, 1989 | 23 | 10m | |||
| 3 |
Levi-tation
Well over to the right of Mean Green Bean Machine just before the wall finishes at a steep face. Up behind the tree to a traverse line. Go left about 4m until a juggy weakness allows progress upward. FA: Greg Strain, Sandi Martin & Iain Sedgman, 2010 | 14 | 14m | |||
1.21.2. Zareba Wall 7 routes in Cliff
- Summary:
-
description
Located on the ridge below and slightly NW of MGBM Outcrop. Written up in July 2016 Argus
approach
From in front of MGBM Outcrop descend the gully and veer north onto the ridge to the rocky outcrop a couple hundred metres below.
Can also be accessed from the track on the west side of Arapiles. Head up to the cliff which is easily visible well on the left of the gully north of Cyclops Eye Cliff.
| Route | Grade | Style | Selected ascents | |||
|---|---|---|---|---|---|---|
| 1 |
Father Perrill
Start At the left end of the wall below the pinnacle. Up moving right to the bulge. Up. FA: Ryan Doe & Iain Sedgman, 16 Apr 2016 | 16 | 18m | |||
| 2 |
Valley of the Blue Moon
Start as for Father Perrill. At the bulge move right a few metres and up. Can be climbed direct too. FA: David Mitchell, Iain Sedgman & Jannie Chin, 2008 | 16 | 20m | |||
| 3 |
Three Steps
Start near the right side of the lower pinnacle face at the blocks. Head on up across some gaps and up on the right side of the face. FA: Iain Sedgman, David Mitchell & Jannie Chin, 2008 | 14 | 14m | |||
| 4 |
Dangle
Start Up right of the pinnacle face at the left end of the amphitheater is a short steep angled buttress with an overhanging start. Bridge the gap and awkwardly up the nose. FA: Ryan Doe, 16 Aug 2016 | 19 | 10m | |||
| 5 |
Ode To Olde Men
Right of Dangle near the middle of the amphitheater is a prominent buttress with an orange streak. Start just R of this. Up overhanging line and follow line veering leftwards. FA: Iain Sedgman & Peter Canning, 2007 | 14 | 14m | |||
| 6 |
Mobius Strip
Start 30m R of OTOM at a small block sticking out at the foot of the wall. Up awkwardly onto horizontal, on up to jugs and at the main horizontal move left to below bulges and up. FA: Iain Sedgman & Peter Canning, 2007 | 16 | 11m | |||
| 7 |
Deception
Start 5m right of Mobius Strip and 2m right of where a diagonal white intrusion ends. Move up and then veer diagonally left and up the middle of the steep wall and the obvious weakness above. Variant Finish: Move right at the top to avoid technical crux finish. FA: Ryan Doe & Iain Sedgman, 16 Apr 2016 | 19 | 10m | |||
1.21.3. Cyclop's Eye Area 9 routes in Cliff
- Summary:
-
Lat / Long: -36.748794, 141.825956
description
The 'Cyclops' Eye cave would be an 'Arapiles' landmark if it wasn't hidden from casual viewers on the south side of the ridge. Situated on the highest outcrop on the western side it is best approached from above but it's a good idea to check things out from the vehicle track below before going in.
There are a few good hard, pumpy numbers here and the climbs on the eye side are in the shade until mid-afternoon.
Emergency Location: Mount Arapiles, Mount Arapiles Telstra Tower Carpark
approach
From the telecommunications tower follow the ridgetop due west. The ridge is fairly indistinct at first but soon becomes more pronounced. From the end of the ridge scramble down the gully that splits the outcrop and cut around to the climbs.
| Route | Grade | Style | Selected ascents | |||
|---|---|---|---|---|---|---|
| 1 |
★★ Radio Free Arapiles
The original description : This is an easy route to find. Head out towards Goroke and turn back at Mitre. Look up at the north face of the mountain. Up high (left of the red wall that houses Pressure Pete) is a line diagonally right. Yep, that's it. Start: Left of the red patch is a line going diagonally right. FA: Richard Smith & Greg Pritchard, 2001 | 10 | 45m | |||
| 2 |
Pressure Pete
Can't stop, pressure's on. FA: Geoff Little & Jon Muir, 1988 | 24 | 12m, 1 | |||
| 3 |
Oh I Hadn't Thought About That
Overhanging nose just right of 'Pressure Pete'. FA: Geoff Little & Jon Muir, 1988 | 23 | 15m | |||
| 4 |
★★ Is Your Washroom Breeding Bolsheviks?
The central line through the cave. Stick-clip bolt (actually 2, one old Mammut ring with shackle and a FH next door) and motor on big slopes. FA: Jon Muir & Geoff Little, 1988 | 26 | 12m, 1 | |||
| 5 |
The Bolshevik Connection
Desperate start past bolt with insitu krab. After 2nd FH move left past another to finish as for Is Your Washroom Breeding Bolsheviks? The bolts are looking a bit cruddy. FA: Nathan Hoette, 2003 | 28 | 12m, 3 | |||
| 6 |
Is Your Kitchen Cooking Communists
Same desperate start as for The 'Bolshevik' connection but at second FH go straight up past a third FH to thin crack. FA: Nathan Hoette, 2003 | 28 | 12m, 3 | |||
| 7 |
★ Let's Not Beat About the Bush
The next three routes are on a wall underneath the cave. Past fixed wire, move right a few metres and continue up overhanging wall Start: On left end of wall, left of 'Chaos'. FA: Jon Muir & Geoff Little, 1988 | 25 | 15m | |||
| 8 |
★ Chaos
Up corner right of LNBATB with weird move past bolt and finish up white streak. FA: Geoff Little & Jon Muir, 1988 | 22 | 15m | |||
| 9 |
On Some Faraway Beach
Left-facing corner right of 'Chaos'. FA: Jon Muir (solo), 1988 | 19 | 15m | |||
1.21.4. Twin Rocks 1 route in Area
- Summary:
-
description
A new crag at Araps! In the headwaters of Basin Creek this little crag is cute but has no potential. From the summit car park, when standing at the gate, the outline of the crag can be seen to the west. It's about a 10 minute, unpleasant approach through scrub from here.
Emergency Location: Mount Arapiles, Mount Arapiles Telstra Tower Carpark
approach
At the firetower car park, walk towards the Telstra tower for
100m and then head south-west through scrub for 10 minutes to rocky rise with small outcrop on eastern end.
When standing at the road-barrier at the car-park the outline of the crag can be seen to the west.
| Route | Grade | Style | Selected ascents | |||
|---|---|---|---|---|---|---|
| 1 |
Charlotte's Web
Start: The small crack up the front. FA: Sedgman. FA: Mike Wust, Lesley Roberts & Iain, 2000 | 15 | 12m | |||
1.21.5. Possum Rocks 28 routes in Cliff
- Summary:
-
Lat / Long: -36.749725, 141.823462
description
The long ridge opposite Cyclops' Eye has some good rock dotted among the dross.
It was originally named Flop Wall but got renamed because people thought that cliff was elsewhere.
Emergency Location: Mount Arapiles, Campbells Kingdom Carpark
approach
Best approach from the below.
Routes are described right to left.
| Route | Grade | Style | Selected ascents | |||||
|---|---|---|---|---|---|---|---|---|
| 1 |
Hocus Pocus
Jam-crack through first large roof. FA: Mark Moorhead, 1981 | 23 | 10m | |||||
| 2 |
Why Not
Leaning corner at left end of 'Hide and Seek' wall, finish up wall. FA: Jon Muir (solo), 1988 | 17 | 15m | |||||
| 3 |
Why?
Worthless. Start: Weakness left of Hide And Seek FA: Jon Muir & Geoff Little, 1988 | 17 | 20m | |||||
| 4 |
Why Not, Indeed!
Climb just right of Why? to roof. Right and around roof past peg. Up wall between Why? and 'Hide and Seek' Direct. FA: Jon Muir & Geoff Little, 1988 | 25 | 20m | |||||
| 5 |
★ Hide and Seek
A scary start leads to a great face. Start: Start left of arete of outcrop. FA: Chris Shepherd, Mark Moorhead 1981. Direct: Geoff Little & Jon Muir, 1988 | 24 R | 20m | |||||
| 6 |
★ Sidestep
Layback flake right of Hide And Seek FA: Chris Shepherd & Malcolm Matheson., 1981 | 22 | 10m | |||||
| 7 |
Shyster
Left-facing corner crack with a little roof about 20 metres left of and up from 'Myles'. FA: Keith Egerton, Francine Gilfedder & Peter Watson, 1975 | 14 | 10m | |||||
| 8 |
Myles
Climb the wide crack which is the major feature of this outcrop and is clearly visible from the road. FA: Keith Egerton & Peter Watson, 1975 | 11 | 20m | |||||
| 9 |
Faggot
Wide corner crack right of 'Myles'. FA: Iain Sedgman & Francine Gilfedder, 1975 | 7 | 18m | |||||
| 10 |
Playing Possum
Corner leads to pillar/flake at half-height. Start: Just left of 'Phalangaphobia' at small, right-facing corner. FA: Mike Wust, Jeremy Boreham & Greg Garnham, 1990 | 22 | 12m | |||||
| 11 |
Phalangaphobia
Large broken left-facing corner about 30 metres left and uphill from 'Cuscus'. Continue up crack in wall. FA: Greg Garnham, Jeremry Boreham & Mike Wust, 1990 | 15 | 25m | |||||
| 12 |
Cuscus
The right hand end of the cliff has an obvious sentry box with a hole through to the descent gully in the back. Up to hole then right over roof. Start: Start 1.5 metres left of 'Vile Habits' below hole through cliff. FA: Chris Baxter, Francine Gilfedder & Mike Stone, 1980 | 20 | 14m | |||||
| 13 |
Vile Habits
Start as for 'Phalanger' and then take the crack on the left. FA: Mike Law & Mike Stone, 1980 | 23 | 14m | |||||
| 14 |
Phalanger
Up to small ledge just off ground. Step right and up crack which is difficult to protect. Start: Start at tiny corner left of 'Ringtail'. FA: Mike Stone, Dave Gairns & Peter Watson, 1980 | 20 R | 14m | |||||
| 15 |
★ Ringtail
Bulging crack at right end of face. Good climbing, fairly staunch. FA: Mike Stone & Dave Gairns, 1980 | 21 | 14m | |||||
| 16 |
Fairy Glider
Small and appealing thin crack around R from Ringtail. Good climbing, reachy at start, be careful of some detatched blocks. FA: Mike Stone, Chris Baxter & Francine Gilfedder, 1980 | 17 | 11m | |||||
| 17 |
Sugar Glider's Delight
The smooth wall and capping ? at the top. Start: Start on the wall immediately left of "Central Corner" FA: Vince Waters & Trevor Wall, 2004 | 14 | 11m | |||||
| 18 |
Central Corner
The right-facing corner to large blocks at the top. Start: Start about 35 metres up the gully above 'Cuscus'. FA: Iain Sedgman & Lesley Roberts, 2004 | 7 | 11m | |||||
| 19 |
Common Ringtail
The line up the wall to a ledge with a large loose block. Start: Start 2 metres right of "Central Corner". FA: Trevor Wall & Vince Waters, 2004 | 12 | 9m | |||||
| 20 |
Elsan (Fuck Off Its My Ten)
Wander up this to top trying to find best rock. Start: 8m left of 'El Posso', five left of Its the Tens (?where is that?), is a scrappy corner. FA: Richard Smith & solo, 1995 | 10 | 10m | |||||
| 21 |
El O'Cution
Good. Crack and arete. Start: 4m left of 'El Posso'. FA: Smith & Hoskins, 1995 | 19 | 22m | |||||
| 22 |
El Posso
Head around the nose right of Ringtail, through a little col above the pinnacle of Pygmy Possum, to wall facing Campbell's kingdom. Fairly good corner that used to have a star once upon a time so we've given it back for luck. FFA: a FA: Chris Baxter, Dave Gairns & Mike Stone, 1978 | 16 | 22m | |||||
| 23 |
El McPherson
Swing out through bulbous nose above. Start: Start 1m R of 'El Posso'. FA: Smith & Hoskins, 1995 | 23 | 15m | |||||
| 24 |
Great Route, El Goodo
An acronymic jibe? Start: Start right of EL Mc. FA: Hoskins & Smith., 1995 | 20 | 10m | |||||
| 25 |
The Mega Route
Steep grey crack starting from ledge up and left from Pygmy Possums. Faces back towards Fairy Glider. FA: Wendy Eden & Simon Mentz, 8 Oct 2017 | 16 | 8m | |||||
| 26 |
Dame Edna
The series of lines to the roof, step right and up. Start: Start several metres left of "Pygmy Possum". FA: Iain Sedgman & Lesley Roberts, 2004 | 7 | 15m | |||||
| 27 |
★ Pygmy Possum
Chimney leading to overhang and crack on the pinnacle at the foot of the ridge. FA: Chris Baxter & Mike Stone, 1980 | 15 | 14m | |||||
| 28 |
Elessdee
Start up short corner left of arete then up wall keeping left of arete. Start: 2m left of Warrant (? which is where?). FA: Hoskins, Smith & Pritchard, 1995 | 17 | 20m | |||||
  |
||||||||
1.21.6. Fox Rocks 19 routes in Cliff
- Summary:
-
Lat / Long: -36.751332, 141.822436
description
Another collection of small outcrops on a ridge.
Emergency Location: Mount Arapiles, Campbells Kingdom Carpark
approach
The next west-leading ridge south of 'Possum Rocks'. Head towards the toe of 'Possum Rocks', sidle past it and uphill through scrub.
| Route | Grade | Style | Selected ascents | |||||
|---|---|---|---|---|---|---|---|---|
| 1 |
A Bucket Full Of Yabbies
Line at left end to finish up seam in prominent little headwall FA: Geoff Little, Nyrie Dodd & Jon Muir, 1988 | 22 | 15m | |||||
| 2 |
Hog Will Face Protest
Seam to right of Bucket Full Of Yabbies with hard, unprotected start. FA: Jon Muir (solo), 1988 | 21 R | 15m | |||||
| 3 |
The Worst Route In The World
Rounded arete with awkward start just right of 'Hog Will Face Protest'. FA: Jon Muir, Nyrie Dodd & Geoff Little, 1988 | 21 | 15m | |||||
| 4 |
Foxtrot
Good climbing up obvious line taking overhang on right. Sustained in upper half. Start: Start below thin, right-leaning corner towards left end of face. FA: Ian Ravenscroft & Chris Baxter, 1988 | 17 | 20m | |||||
| 5 |
Wild Goose Chase
Over bulge then easily up to steepening. Up right onto arete, over loose block, then back left to finish. Start: Start 15 metres or so right of 'Foxtrot', in middle of next buttress down right. FA: Chris Baxter & Ian Ravenscroft, 1988 | 16 | 20m | |||||
| 6 |
Dead Fox
Follow a series of little corners just left of steep ground. Start: Start towards left end of lower tier, immediately left of small cave and about 8 metres left of a major V-corner. FA: Chris Baxter, Dave Gairns & Francine Gilfedder, 1981 | 13 | 25m | |||||
| 7 |
Frank Kilby Memorial Route
Beautiful rock but the 20+ year-old sling will need replacing. Originally written up as starting up 'Dead Fox' after mis-identifying the easier climbs in the area. FA: Jon Muir & Geoff Little, 1988 | 3 | 20m | |||||
| 8 |
Get It Together
Rounded, undercut arete just right of 'Frank Kilby Memorial Route'. FA: Geoff Little & Jon Muir, 1988 | 24 | 20m | |||||
| 9 |
Eternal Youth
The most obvious line at Fox Rox. A grade 18 direct finish to this route was written up in May 2005 Argus by Trevor Wall, Vince Waters thinking it was a DF to "Dead Fox". It's not clear wheer the DF goes, possibly high up the righthand wall. FA: Chris Baxter & Dave Gairns, 1981 | 15 | 25m | |||||
| 10 |
Roxanne
Cracks to bushy ledge. Easy corner above. Start: Start about 20 metres right of 'Eternal Youth' at little jam-crack in small bay. FA: Dave Gairns & Chris Baxter, 1981 | 14 | 30m | |||||
| 11 |
★★ The Stout Steps Out
Obvious left-leaning crack then rounded arete. Start: Start right of 'Roxanne'. Originally described as "at right end of bay" but probably quite a long way right of 'Roxanne'. FA: Jon Muir & Phil Wilkins, 1988 | 21 | 20m | |||||
| 12 |
Nuptial Pads
Cracked arete at left end of upper tier. FA: Maureen Gallagher & Nyrie Dodd, 1988 | 18 | 12m | |||||
| 13 |
★★ Four Fs and a Cabbage
Sustained overhung crack 8 metres right of 'Nuptial Pads'. FA: Jon Muir, Nyrie Dodd, Maureen Gallagher & Geoff Little, 1988 | 23 | 15m | |||||
| 14 |
Might As Well
Roof and crack right of Four Fs FA: Jon Muir, Maureen Gallagher & Geoff Little, 1988 | 23 | 10m | |||||
| 15 |
Emotionally Crackers
The middle line, slightly left-leaning. FA: Jon Muir, Geoff Little & Maureen Gallagher, 1988 | 21 | 15m | |||||
| 16 |
Evil Angels
Take the left line up and slightly left then follow groove right and over bulge. FA: Geoff Little, Maureen Gallagher & Jon Muir, 1988 | 21 | 15m | |||||
| 17 |
A Momentary Lapse of Reason
Two loose blocks to start then line which curves right at top. From ledge on right, finish up slab. Start: Towards right end of upper tier. FA: Chris Baxter & Ian Ravenscroft. Maureen Gallagher did a more direct finish in late., 1988 | 20 | 30m | |||||
| 18 |
Cubby Trail
The easy stepped line, moving right at the top to below a steep wall. Move up to a ledge and step right, exposed, and up on jugs. Start: Start about 15 metres left of "Eternal Youth, 7 metres left of "Dead Fox" behind a large block at the left and front end of the lower tier. FA: Iain Sedgman & Lesley Roberts, 2004 | 2 | 20m | |||||
| 19 |
Dead Fox variant
This was written up as a new route "Foxy Lady" in Argus May 2005, however that was based on thinking that "Dead Fox" was the major corner taken by "Eternal Youth". FA: Vince Waters & Trevor Wall, 2004 | 18 | 14m | |||||
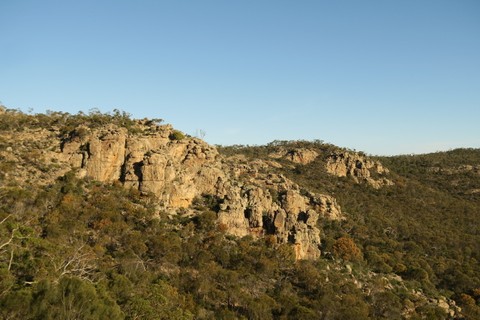 |
||||||||
1.21.7. The Menagerie 1 route in Area
- Summary:
-
description
Another outcrop on a ridge. This one is on the ridge between Fox Rox and Christmas Wall and faces slightly south-west(?). Possibly best to approach via Fox Rox or to stay away altogether.
Emergency Location: Mount Arapiles, Campbells Kingdom Carpark
| Route | Grade | Style | Selected ascents | |||
|---|---|---|---|---|---|---|
| 1 |
Psycho Goat
The central steep line on the lower section of cliff. FA: Iain Sedgman & Peter Canning, 2004 | 16 | 12m | |||
1.21.8. Christmas Walls 15 routes in Area
- Summary:
-
description
This cliff is further east and slightly north of Campbell's Kingdom. The broken buttresses are generally unimpressive though a pleasant day could be had ticking the handful of good cimbs. In short, this is one of 'Arapiles' least appealing crags. No stars have been allocated to the better climbs because they simply do not warrant them.
James McIntosh and Iain Sedgman inspected the cliff prior to the first climbing visit but McIntosh has not been moved to return
Emergency Location: Mount Arapiles, Campbells Kingdom Area
approach
Access is as to Campbell's Kingdom but don't proceed up to that cliff instead head east on the edge of the eucalypt treeline to the crag about 15 minutes further on.
Climbs are described from right to left, as they will be approached.
The small outcrop appearing in the topo behind 'Christmas Walls' is Sutherland Shire.
| Route | Grade | Style | Selected ascents | |||
|---|---|---|---|---|---|---|
| 1 |
★ Swingtime
One of the better climbs on the outcrop. At the right end of the cliff is a closed gully. Start on the right wall of the gully at a steep and slightly left-leaning line, obscured low-down by a beautiful casuarina. FA: Peter Canning, Iain Sedgman & Keith Lockwood, 2003 | 15 | 18m | |||
| 2 |
★ The Atlantic Wall
Start on the left wall of the 'Swingtime' gully, about 4m from the back of the gully. FA: Iain Sedgman & Ron Spence, 2003 | 15 | 30m | |||
| 3 |
Miss All Toes
Up the obvious crack for a few metres, step left and follow the main, slightly recessed line on the left side of the wall. Start: Start as for 'The Atlantic Wall'. FA: Iain Sedgman & Ron Spence, 2003 | 6 | 30m | |||
| 4 |
Klaatu, Verada, Nicto
Start about 40 metres left of 'Swingtime', 40m right of 'The Grinch', and just left of a gully next to what looks like a small pinnacle. Sedgie also used this name for his route near 'Mean Green Bean Machine'. FA: Iain Sedgman & Peter Canning., 2003 | 16 | 30m | |||
| 5 |
The Grinch
Up the line to a ledge on the left side of the buttress. Move to the back (?) and finish straight up passing under an old she-oak. Start: About 5m right of 13 Norman Knights is a loose blocky line on the left side of the buttress. 4m right is a line up the centre of the buttress. This is about 100 metres left of Atlantic Wall. FA: Vince Waters, Noel Whiteside & Iain Sedgman., 2002 | 14 | 25m | |||
| 6 |
13 Norman Knights
Doesn't look too bad. About 100 metres left of the 'Swingtime' gully is a squarish gully with two chimney lines at the back. On the right wall of this gully is a diagonal line. FA: Iain Sedgman & Peter Canning., 2003 | 13 | 18m | |||
| 7 |
Three Wise Men
Start 3m left of the right-side of the slab, 4 metres right of 'First Noel' at a broken crack in a very small left facing corner. FA: Iain Sedgman & Ron Spence, 2003 | 5 | 22m | |||
| 8 |
First Noel
Quite pleasant. Start 7m left of the right-side of the slab at a black streak. FA: Noel Whiteside, Vince Waters & Iain Sedgman., 2002 | 12 | 22m | |||
| 9 |
Ode To Mistletoe
Start 3m left of 'First Noel'. FA: Vince Waters, Noel Whiteside & Iain Sedgman., 2002 | 8 | 22m | |||
| 10 |
Victoria C. Woodhull
Up the line to a left facing corner. Move left onto the slab and up avoiding the corner to finish up a crack/groove. Start: A few metres left of Ode to 'Mistletoe' and about 4m right of a large old conifer. FA: Iain Sedgman & Peter Canning., 2003 | 8 | 24m | |||
| 11 |
Slay Rites
Probably the best climb on the outcrop. Starts 15 to 20m left of 'Victoria' C. Woodhull at a prominent corner crack with a hanging flake a few metres up. FA: Iain Sedgman, Noel Whiteside & Vince Waters., 2002 | 15 | 20m | |||
| 12 |
Robbie The Reindeer
Climb the corner crack past the flake too an overhanging crack on the left and up. Start: Start at 'Slay Rites'. FA: Rod Neil Rob Martin, 2005 | 15 | 20m | |||
| 13 |
Mistletoe
Start: 20m left of 'Slay Rites' is a small prominent corner. Up. FA: Iain Sedgman & Peter Canning., 2003 | 14 | 9m | |||
| 14 |
Tinsel Town
The wall, a ledge, the jam crack corner finishing left of large dubious blocks. Start: Below the upper slab on the lower buttress is a prominent jam crack corner. Start on the wall below the corner, 2m right of a line and just left of corner. FA: Peter Canning & Iain Sedgman., 2003 | 12 | 18m | |||
| 15 |
Myers Window
Once gaining the ledge, move up and step left to gain the crack on the face and up. Start: Start as for 'Tinsel Town'. FA: Rob Martin Rod Neil, 2005 | 15 | 18m | |||
1.21.9. Campbell's Kingdom 78 routes in Cliff
- Summary:
-
Lat / Long: -36.754740, 141.811935
description
Emergency Location: Mount Arapiles, Campbells Kingdom Area
approach
Park at the bee hives then a reasonable trail (cairns and pink tat) heads up to the cliff, arriving at the far left outcrop. Melting Moments is the obvious shallow orange corner. The next buttress right has Zorba on the front and Marmite on the right, then you hit the main cliff near the bulbous nose of Boogie Up the Nose.
descent notes
Rap anchor above Coeur de Lion (50m). Walking descent to climber's left.
| Route | Grade | Style | Selected ascents | |||||
|---|---|---|---|---|---|---|---|---|
| 1 |
Thin Spread
Lots of Traversing. Start: Start 3 metres left of 'Marmalade'.
FA: Ed Neve, Nick Reeves & Joe Lynch, 1979 | 17 | 50m, 3 | |||||
| 2 |
Marmalade
Thin seam 3 metres left of 'Cream Between' through two roofs. FA: Tony Dignan & Phillip Armstrong, 1978 | 20 | 18m | |||||
| 3 |
★ Cream Between
Originally graded 16! Delightfuly smooth groove past small roof then easily up. Start: Start at groove 2 metres left of 'Butternut Snap'. FA: Hugh Foxcroft & Nick Reeves, 1979 | 20 | 30m | |||||
| 4 |
Butternut Snap
Originally graded 18 ... Steep, wide crack 3 metres left of 'Benign' provides entertaining desperation. The upper crack past many stacked blocks ruins the fun. FA: Nick Reeves, Hugh Foxcroft & Peter Megens, 1979 | 22 | 30m | |||||
| 5 |
Benign
Up thin crack just right of arete, hard section with loose blcok between the two ledges, then right a little and up front of buttress. Start: Start 15 metres left of 'Sporus' at seam just right of left of buttress. FA: Keith Egerton & Kieran Loughran, 1980 | 19 R | 30m | |||||
| 6 |
Sporus
Up groove. At halfway ledge cross over gully and finish steeply up wide crack on left. Start: Start at groove on left side of face about 12-13 metres left of pinnacle. Inital S (don\'t get on 'Sundowner' by mistake). FA: Keith Lockwood & Murray Taylor, 1967 | 8 | 33m | |||||
| 7 |
★ Melting Moments
Start about 8 metres left of the small pinnacle where the paraglider's track meets the cliff. Desperate start to orange crack sprouting the odd goodenia. Looks good, but probably 24 judging by the other Foxcroft routes nearby. FA: Hugh Foxcroft, Peter Megens & Nick Reeves, 1979 | 20 | 15m | |||||
| 8 |
★ Jam Jar
Starts uphill and right of 'Melting Moments', just before the gully containing Zorba. Pleasant corner to ledge then grunty crack above to larger ledge. 2nd pitch or solo up chimney to top. FA: Hugh Foxcroft, Peter Megens & Nick Reeves, 1979 | 20 | 25m | |||||
| 9 |
Kiwi Usurper
The next 6 routes are actually above Cream Between.. Either walk up the descent at the far left of the wall (you'll approach the routes in order) or scramble up from Sundowner (you'll approach the routes backwards) Thin, R-leading crack L of RR to ledge. Finish as for that climb. FA: Murray Cullen & Mike Ashton, 1995 | 13 | 30m | |||||
| 10 |
Rover's Revenge
Middle of short wall (with roof at half height) round L of 'Mad Dogs and Englishmen' past tree to ledge. Wide crack. FA: Paul & Brian Williams., 1995 | 13 | 28m | |||||
| 11 |
Mad Dogs and Englishmen
FA: Brian Williams, Mike Ashton & Paul Williams, 1995 | 13 | 20m, 2 | |||||
| 12 |
Up Where We Belong
Short, orange corner 15m L of 'Little Ripper', then L to grey, L-facing corner. Up this to tree. FA: Mike Ashton & Jenny Ashton, 1995 | 9 | 23m | |||||
| 13 |
★ Little Ripper
Start in the centre of the pinnacle up and left of Zorba, about 3 metres left of Leprechaun. Up the face just right of the corner to big horizontal then up central crack. Roped scramble off back necessary. FA: Alec Campbell & John Veasey, 1967 | 9 | 28m | |||||
| 14 |
Leprechaun
Some nice moves but a bit scrappy. Right arete of pinnacle above and left of Zorba. Start about 10 metres up left of 'Sundowner' at clear initial L. Roped descent off back of pinnacle necessary. FA: Alec Campbell & John Veasey, 1967 | 11 | 30m | |||||
| 15 |
★ Sundowner
Lovely-looking climb. Start: Start at clear initial S just right of a scrappy corner. FA: Alec Campbell & Ray Lassman, 1967 | 13 | 30m | |||||
| 16 |
★ Plumber's crack
Great line with hard start. You would have to assume that 'Zorba' was an easier start to this line. Start: Start at the main line on the wall, 1.5 metres left of 'Zorba'. FA: Ben Cirulis, Andy & James McIntosh, 2004 | 18 | 30m | |||||
| 17 |
Zorba
Climb crack for 4 metres. Surmount clean-cut, triangular overhang to ledge. Up shallow groove and line (I'm guessing that this top bit is shared with Plumber's Crack). Start: Start 3 metres left of 'Perpetual Motion' at sloppy initial Z FA: Alec Campbell & Ray Lassman, 1967 | 16 | 33m | |||||
| 18 |
★ Perpetual Motion
Start: Start at line 1 metre left of arete and 3 metres right of the sloppy initial Z.
FA: Chris Dewhirst, Keith Lockwood, Chris Baxter. Variant: Chris Baxter & Dave Gairns (alt) 16-06-1979, 1973 | 18 | 48m, 2 | |||||
| 19 |
★ Perpetual Standstill
Start up Perpertual Motion, ignore any ideas of going right and left and head straight up the crack then the wall above until you join crack on arete and up arete to top. FA: Wendy Eden, Douglas Hockly & Andrew Clark, 1 Jun 2016 | 18 | 40m | |||||
| 20 |
Loose Lesley
Extremely bold. Start: Start at the left end of the narrow ledge that 'Marmite' also starts from. FA: Jon Chester, Peter Martin & Tony Marian., 1978 | 22 R | 30m | |||||
| 21 |
Project bolting unfinished no. 3
black corner needs a bolt and some cleaning. | |||||||
| 22 |
★ Marmite
Start: Start in a square-cut recess, right of a black, right-facing corner.
FA: Ed Neve & Chris Baxter, 1974 | 20 | 30m, 2 | |||||
| 23 |
★★ Only Fools Eat Marmite
Obvious direct finish FA: Ed Darling & Gareth Llewellin, 1998 | 21 | 30m | |||||
| 24 |
Soft Centre
Unusual and poorly protected first pitch. Start: The climb proper starts from about 5 metres up the gully which starts about 6 metres of 'Spontaneous Combustion'. It is probably best to belay at ground level rather than a few metres up the gully.
FA: Keith Lockwood & Andrew Thomson, 1974 | 15 R | 70m, 2 | |||||
| 25 |
Spontaneous Combustion
Harder than it looks. Start: Start 10 metres left of Boogie Up 'The Nose' at a vague, lichenous groove below a jutting arete. FA: Keith Lockwood, Ed Neve & Chris Baxter, 1973 | 18 | 60m | |||||
| 26 |
Boogie up the Nose
Charming name but the first pitch looks good. Start: Start 4 metres left of 'Gobbledegook' below the bulbous nose 20 metres up.
FA: Mark Savage & Bernard Whitelock, 1992 | 20 | 70m, 2 | |||||
| 27 |
Hard Core
Not very attractive. The grade of each pitch is unknown so all pitches are given the same grade. Start: Start as for 'Gobbledegook'.
FA: Mike Stone & Chris Baxter, 1974 | 14 | 70m, 3 | |||||
| 28 |
Gobbledegook
Start up gully and continue straight up to a belay ledge with conifer. Conitune straight up a square-cut chimney. Start: Start at scrubby gully 8 metres left of Heart Full Of Soul. The gully leads past the right side of a bulbous nose. FA: Chris Baxter & Keith Lockwood, 1973 | 10 | 66m | |||||
| 29 |
Heart Full of Soul
A bit of an adventure. Start: Start just left of 'Dilettante', mid-way along tallest part of cliff. It's a bit hohum where you start. Just wander up the least loose and filthy easy stuff.
'Direct Finish' (13) is the obvious way to go. From second belay bridge steep corner line rising on left. Geoff Scvhirmer, Keith Lockwood 1977. FA: Alec Campbell & Ray Lassman, 1967 | 14 | 60m, 3 | |||||
| 30 |
★ Cactus Fuctus
Scrappy. Used to get a star but I'm not sure about that. Start: Start as for 'Dilettante' at ramp below guano patch.
FA: Chris Baxter & Andrew Bowman, 1974 | 13 | 60m, 3 | |||||
| 31 |
★★ Dilettante
Solid (and really good) second pitch surrounded by easy climbing. New rap anchor installed above second pitch. 60m rope needed. Start: Start about 20 metres left of 'Snorkler' at an easy grotty corner.
FA: Keith Egerton & Kieran Loughran (alt), 1980 | 20 | 50m, 3 | |||||
| 32 |
★ Rain Aneurysm
FA: Wendy Eden & Douglas Hockly, 9 Jun 2016 | 23 | 35m, 2, 2 | |||||
| 33 |
Project bolting unfinished no. 2
slightly easier project needs some bolts still | |||||||
| 34 |
Silent Running
Very good second pitch. Start: Starts at the obvious wide, right-facing corner below the main corner of 'Snorkler', 3 metres left of the open groove that 'Snorkler' starts in.
FA: Kieran Loughran & Keith Egerton (alt), 1980 | 19 | 59m, 3 | |||||
| 35 |
★ Silent Senile Running Foxes
Up the cracked arête between Silent Running and Snorkler into Senile Foxes then the diagonal of Silent Running. Makes for a line you can run in a single pitch to the new anchor above Dilettante. FA: Wendy Eden & Douglas Hockly, 5 Jun 2016 | 19 | 35m | |||||
| 36 |
Snorkler
The best line on the cliff with some great climbing in the corner. However the start's a bit unsatisfactory and it wanders off left at the finish. Originally the route had a belay out on the left halfway up the corner but the anchors are poor : an ancient peg and not much else so this belay has been omitted. Note that previous guides gave the route length as 62 metres despite the listed pitch lengths adding up to 72 metres. Start: Start at an open groove below the obvious large corner. This is 3 metres left of 'Mr Crab'. There is a square-cut, wide corner 3 metres further left.
FA: Alec Campbell & John Veasey, 1987 | 15 | 62m, 3 | |||||
| 37 |
Senile Foxes
Direct version of 'Snorkler'. Needs checking out and cleaning up but could well be very good climb. Have given it a star for luck Start: Start at the open groove as for 'Snorkler'.
FA: Pitch 1: Ed Neve, Chris Dewhirst. Pitch 2: Roark Muhlen & Phil Cullen 01-02-1976, 1973 | 17 | 45m, 2 | |||||
| 38 |
Mr Crab
Looks quite OK. Start: Start at blocky groove 1.5 metres left of Couer De Lion. Faint initials MC. FA: Chris baxter, Chris Dewhirst & Keith Lockwood, 1973 | 11 | 48m | |||||
| 39 |
★★ Coeur de Lion
Lovely first pitch. Really deserves some traffic. Start: Start at pale, water-washed groove 3 metres left of 'Promite'. FA: Mike Stone, Chris Baxter & Keith Lockwood, 1973 | 19 | 43m | |||||
| 40 |
Battle of the Bilge
Difficult climbing but very contrived. Start: Start 3 metres left of 'Promite' at the groove of Coeur De Lion.
FA: Kim Carrigan & Louise Shepherd, 1982 | 24 | 50m, 2 | |||||
| 41 |
★ Promite
Exciting climbing. Protection may be not so good if memory serves. Start: Start at the incipient seam 4 metres left of 'Vegemite'.
FA: Kim Carrigan & Colin Reece (alt), 1979 | 22 R | 40m, 2 | |||||
| 42 |
★ Dynomight
Explosive stuff up a strong line. Start: Start at incipient groove 4 metres left of 'Vegemite'. This is also the start of 'Promite'.
FA: Dave Gairns, Chris Baxter (alt). Louise Shepherd, Kim Carrigan & Robin Miller added the direct start as described on., 1982 | 22 | 50m, 2 | |||||
| 43 |
★★ Vegemite
Start: Start 4 metres left of 'Cancer', at a line where the rock changes colour, plae on the left and dirty brown on the right.
FA: Chris Dewhirst, Chris Baxter & Keith Lockwood, 1973 | 20 | 50m, 2 | |||||
| 44 |
★ Cancer
Fun old school climbing with multiple tricky sections. Start: Start at sharp right-facing corner about 40 metres left of 'Swill' wall and 10m right of Vegemite.
Can be done in 1 pitch FA: Keith Lockwood, Chris Baxter & Ed Neve, 1973 | 14 | 45m, 2 | |||||
| 45 |
★ The Seven Year Itch
Supposed to be pleasant face-climbing. Start: Start at in indistinct groove 1.5m right of a sharp, right-facing corner (Cancer). FA: Chris Baxter, Keith Lockwood & Ed Neve, 1973 | 13 | 45m | |||||
| 46 |
Sour Grapes
An awful approach leads to a good corner high on the climb. It would be better to traverse into the terrace from the descent gully and avoid the start. Start: Start by finding a conifer growing against the mossy cliff about 30 metres down left of the 'Swill' wall. There\'s actually a set of 3 conifers against the wall at what seems to be the correct place and another tree 5 metres to the right. FA: Chris Baxter, Keith Lockwood & Ed Neve, 1973 | 13 | 50m | |||||
| 47 |
★★ Beginners' Luck
Line with great rock on small wall at head of descent gully. FA: Ed Neve, Chris Baxter & Keith Lockwood, 1973 | 11 | 12m | |||||
| 48 |
Sausage Tart
Up to break. Step left and up continuation to roof. Walk off. Start: Seam left of 'Deep Throat', 1.5 metres right of easy corner. FA: Kim Carrigan, Louise Shepherd & Robin Miller, 1982 | 21 | 15m | |||||
| 49 |
★ Deep Throat
More interesting wide crack stuff, best in it's lower half, with the top losing the line and gaining the usual moss. FA: Andrew Thomson & Keith Lockwood, 1974 | 16 | 15m | |||||
| 50 |
★★ Caught in a Crossfire
Face climbing, bouldery off the deck then a one move wonder up high, that one move being particularly desperate for midgets before retreating to the ubiquitous moss. Start: The thin line 1.5 metres left of 'Swill'. FA: Russell Crow, Richard Smith & John Chapman, 1982 | 21 | 15m | |||||
| 51 |
★ Swill
Interesting and challenging crack climbing at the grade, a few bulges, and minimal grotty stuff. The last little overhang brings you into a bit of moss fest. FA: Keith Lockwood, Jim Bright & Ed Neve, 1974 | 17 | 15m | |||||
| 52 |
★ Hair of the Dog
Supposed to be hard for the grade and was originally graded 18! The right-hand line on the wall is a crack with hard bulge at top. There's also a "tower of novel rock in the back of the corner" so take care. FA: Keith Lockwood & Ed Neve, 1977 | 19 | 15m | |||||
| 53 |
Rabid Foxes
Up to large block, step left to easier ground. Go up to finish back on right. Originally climbed bridging back onto the tree for a rest and finishing off left. Baxter returned to do it "clean" and direct on 31-05-1986. Start: Start behind tree a few metres left of 'Natural Causes' and 1 metre right of tight chimney. FA: Chris Baxter & Dave Gairns, 1984 | 21 | 11m | |||||
| 54 |
Natural Causes
From chimney on left climb pocketed hand-crack 2 metres left of 'Crankster' past blocky ledge. FA: Kim Carrigan, Paul Daniels & Bob Killip, 1982 | 20 | 10m | |||||
| 55 |
Crankster
Wall then steep crack to fork. Take left fork. Start: Start 2 metres left of 'Stoker' below thin finger-crack. FA: Kim Carrigan, 1982 | 24 | 14m | |||||
| 56 |
★★ Stoker
Steep jamming just left of 'Barleycorn'. FA: Keith Lockwood, Chris Baxter & Ed Neve, 1973 | 18 | 13m | |||||
| 57 |
★ Barleycorn
Looks good but protection could be poor. Start: Start just left of arete left of 'Carthaginian'. FA: Rod Young, 1978 | 21 R | 15m | |||||
| 58 |
Carthaginian
Takes the major right-facing corner that starts from the ledge 25 metres up the cliff.The first pitch is rubbish but the corner is superb. Originally graded 9.
FA: Alec Campbell & John Veasey, 1967 | 9 | 50m, 2 | |||||
| 59 |
★ True Grit
The crack in the middle of the wall right of 'Carthaginian', FA: Chris Baxter, Keith Lockwood & Ed Neve, 1973 | 17 | 20m | |||||
| 60 |
First Aids, Last Rites
Follow line up right from start of 'True Grit'. From stance on arete traverse left and go up first weakness. FA: Chris Baxter & Dave Gairns, 1986 | 18 | 25m | |||||
| 61 |
Cold Comfort
Bridge up next corner right of 'Carthaginian' then left to wide crack above. FA: Chris Baxter, Keith Lockwood & Ed Neve, 1973 | 17 | 20m | |||||
| 62 |
Small Fry
Thin crack on right wall of 'Cold Comfort' with short hard section. FA: Dave Gairns & Chris Baxter, 1986 | 19 | 20m | |||||
| 63 |
Thistledown
The finish up a delicate pinnacle right of the upper wall of 'Carthaginian' is attractive but the approach leaves a lot to be desired. Start: Start somewhere in the vicinity of a little right of the first pitch of 'Carthaginian'. FA: Ed Neve & Keith Lockwood, 1974 | 14 | 35m | |||||
| 64 |
Scarper
Up the curving crack. Finish back up right. Start: Star at the curving crack on the left (east) side of the buttress. There\'s a small cave just left of the start. FA: Keith Egerton, Phil Wilkins & Jane Wilkinson, 1983 | 11 | 13m | |||||
| 65 |
The Ill Wind
Not much good. FA: Keith Lockwood, Chris Baxter & Chris Dewhirst, 1973 | 13 | 30m | |||||
| 66 |
Clog Dance
Romp up to big ledge below the wall and then steep corner-crack on right, Start: Start directly below the guano-stained orange wall. FA: Rein & Jeanette Kamar, 1982 | 10 | 40m | |||||
| 67 |
Andrew's
The left-hand line on the wall, 3 metres left of 'Kickapoo Joy Juice', has a good start but breaks down quickly. FA: Glen Donohue, Iain Sedgman, Peter Cunningham & Andrew Webb, 1986 | 17 | 15m | |||||
| 68 |
★ Kickapoo Joy Juice
Good-looking thin crack to flake near top. Start: Start at crack 5 metres left of Piss. FA: Ed Neve & Nick Reeves, 1979 | 18 | 15m | |||||
| 69 |
Bonk, the Duck
The description of this doesn't make a lot of sense but it looks fairly clear where it should go. Protection could be iffy. Start: Start 3 metres left of Piss. FA: Mark Savage, 1992 | 22 R | 15m | |||||
| 70 |
Piss
Nice looking crack. FA: Joe Lynch & Nick Reeves, 1979 | 16 | 15m | |||||
| 71 |
Piss de Resistance
Take flake L and up from halfway up Piss. Fiddly pro at crux. FA: Mark Savage & Bernard Whitelock, 1992 | 19 | 15m | |||||
| 72 |
Goose Neck
Start: Start towards the right side of the orange and grey wall at clear initials GN.
FA: Alec Campbell & Ray Lassman, 1967 | 12 | 45m, 3 | |||||
| 73 |
Impala
Up line behind conifer into corner then right through bulges. Start: Scramble up right from 'Goose Neck' to a terrace and line behind large conifer. FA: Peter Cunningham, Andrew Webb, Iain Sedgman & Glenn Donohue, 1986 | 18 | 20m | |||||
| 74 |
Captain Zigzag
Aesthetic but tiny zigzag crack up little wall facing road. FA: Tim Day & Louise Shepherd, 1993 | 20 | 10m | |||||
       |
||||||||
1.21.9.1. Sutherland Shire 4 routes in Cliff
- Summary:
-
All Trad climbing
description
A short but clean outcrop about 200m left of Campbell's Kingdom.
Emergency Location: Mount Arapiles, Campbells Kingdom Area
approach
Take the Cambpell's Kingdom track up to Melting Moments, then sidle left and up to a small NW facing crag high in the gully between Campbell's and Christmas Walls.
1.21.10. Deep South 20 routes in Cliff
- Summary:
-
description
Strangely enough this is the western-most outcrop at 'Arapiles' not the most southerly. It consists of two small collections of buttresses west of Campbell's Kingdom with a reasonably high percentage of worthwhile climbs.
Emergency Location: Mount Arapiles, Campbells Kingdom Carpark
approach
Park just south of the Monument sign and walk east to the outcrops
| Route | Grade | Style | Selected ascents | |||
|---|---|---|---|---|---|---|
| 1 |
Lazarus Arisen
From behind the pedestal just left of the gully in the recess, go up the line in centre of face to a small roof(and, presumably, over it) FA: Iain Sedgman & Wayne Maher, 1999 | 16 | 15m | |||
| 2 |
Cotton Balls
Start just right of the gully and climb narrow east face of buttress. FA: Dave Gairns & Chris Baxter, 1979 | 11 | 15m | |||
| 3 |
Shackled
Protection is hard to arrange. FA: Kim Carrigan & Kevin Lindorff, 1979 | 20 R | 20m | |||
| 4 |
South Carolina
A distinctive wide crack with an overhang 2 metres left of chimney. FA: Mike Stone, Chris Baxter & Dave Gairns, 1979 | 16 | 20m | |||
| 5 |
Chattanooga Choo Choo
Surprisingly pleasant. Start: The chimney splitting the left outcrop just left of 'Alabama'. FA: Iain Sedgman, Peter Canning, Andrea Wall & Stuart Dobbie, 2001 | 10 | 20m | |||
| 6 |
★ Alabama
Start up diagonal seam leading right from base of chimney (CCC) then go straight up through little roof. Above roof, step left from ledge. FA: Chris Baxter & Dave Gairns, 1982 | 21 | 20m | |||
| 7 |
Southern Fried
Seam 1 metre right of 'Alabama'. FA: Kim Carrigan & Kevin Lindorff, 1979 | 21 | 20m | |||
| 8 |
Tennessee Birdwalk
FA: Chris Baxter, Dave Gairns, Francine Gilfedder & Mike Stone, 1979 | 13 | 11m | |||
| 9 |
★ Rape and Carnage
Very hard start tnen flake on front wall. Finish right over overhang. FA: KIm Carrigan & Kevin Lindorff, 1979 | 24 | 15m | |||
| 10 |
★ Dixie Chicken
Start up corroded pillar, 2 metres right of Rape And Carnage, then strenuous diagonal . FA: Kevin Lindorff & Kim Carrigan, 1979 | 22 | 15m | |||
| 11 |
Kentucky Frazzled
Left diagonal, 2 metres right of 'Dixie Chicken'. FA: Kevin Lindorff & Kim Carrigan, 1979 | 21 | 10m | |||
| 12 |
Jambalaya
Up to pillar at about half height, pull up and move half metre right and straight up. Start: Start as for 'Kentucky Frazzled'. FA: David Wilson. FA: Leanne Matheson & Sam Wilson, 2001 | 13 | 15m | |||
| 13 |
★ Sleight of Hand
A little gem. Right-leading diagonal until it ends, then up. Start: This is on the highest main buttress which is a little recessed. FA: Mark Moorhead & Jon Muir., 1981 | 23 | 14m | |||
| 14 |
Moaning Sirens
Follow left corner avoiding urge to bridge off opposing wall, then up headwall tending left. Start: Start: About four metres downhill from 'Sleight of Hand'. FA: Andrew Collins & Samantha Shelley, 1998 | 21 | 20m | |||
| 15 |
★ Kaitland
The grades of the individual pitches are not known, though first one looks harder, so both are given 20. On first glance it hardly seems worth splitting this into two pitches but it makes sense. Start: Start 4 metres left of 'Big Bungies'.
FA: Wayne Maher & Iain Sedgman (alt), 1999 | 20 | 17m, 2 | |||
| 16 |
★ Big Bungies
Orange face on front of buttress closest to road. Wall then short diagonal crack. Awkward near top then go left. FA: Jon Muir & Mark Moorhead.., 1981 | 19 | 8m | |||
| 17 |
Marius Christmas
Follow crack to ledge. Middle of upper wall includes a festive move R to link the seams. Start: Starts around R of 'Big Bungies', at a V-crack. FA: Keith & Tim Lockwood, 1995 | 14 | 10m | |||
| 18 |
★ Bye for Now
Crack on buttress around the corner and up right of 'Big Bungies'. FA: Mark Moorhead & Jon Muir., 1981 | 21 | 10m | |||
| 19 |
Oldies But Boldies
The line at the left end of the wavy overhang. FA: Peter Canning & Iain Sedgman, 1999 | 16 | 13m | |||
| 20 |
Doodad
The prominent corner and roof several metres right of 'Oldies But Boldies', exiting right at roof. FA: Iain Sedgman & Peter Canning, 1999 | 11 | 10m | |||
1.21.11. Pop Wall 12 routes in Cliff
- Summary:
-
Lat / Long: -36.756518, 141.808342
description
Pop Wall faces south and is just around the corner from The Deep South. It is not one of the better crags at Arapiles; most of the climbs are not good and the scrub is very prickly on approach and descent. That said, the harder climbs on the yellow tower could be worthwhile on a warm day.
Emergency Location: Mount Arapiles, Campbells Kingdom Carpark
| Route | Grade | Style | Selected ascents | |||
|---|---|---|---|---|---|---|
| 1 |
Birthday Blues
Corner crack on right edge of black slab about 20 metres left of the yellow buttress. FA: Bill Andrews, Barry Edwards & Doug Kerton, 1976 | 12 | 23m | |||
| 2 |
Country Cousin
Rubbishy corner just left of chimney to ledge. Finish up face-crack. FA: Mike Stone, Chris Baxter & Francine Gilfedder, 1976 | 8 | 18m | |||
| 3 |
Hidden Vice
Apparently there is (or was) a small vise hidden on this climb, which is the unpleasant-looking chimney. FA: Mike Stone & Chris Baxter, 1976 | 10 | 16m | |||
| 4 |
Sticky End
OK climbing but probably dirty. FA: Chris Baxter & Mike Stone, 1976 | 14 | 16m | |||
| 5 |
Tobacco Road
Awkward and unpleasant climbing up crack left of the yellow buttress. FA: Phillip Stranger, Chris Baxter, Chris Dewhirst & Clive Parker, 1968 | 14 | 19m | |||
| 6 |
Tuff
Start at the same spot as 'Tobacco Road' and follow the corner system up the left side of the yellow buttress. FA: Clive Parker & Chris Baxter, 1968 | 10 | 15m | |||
| 7 |
Snap, Crackle
Seam just left of Riders On The 'Storm'. Finish on left arete. FA: Geoff Little, Nyrie Dodd & Jon Muir, 1988 | 22 | 15m | |||
| 8 |
Riders on the Storm
Probably the best climb on the crag. It used to have a star so it's been given back for luck. FA: Hugh Foxcroft, Chris Baxter & Dave Gairns, 1980 | 18 | 15m | |||
| 9 |
It's Pretty OK
Rounded right arete of yellow buttress. Finish around roof to right. FA: Jon Muir & Geoff Little, 1988 | 21 | 15m | |||
| 10 |
As Tears Go By
Corner crack to narrow chimney on right side of buttress. Exit on wall just below chockstone. FA: Chris Dewhirst & Phillip Stranger, 1968 | 11 | 21m | |||
| 11 |
Possum on the Rocks
Up right-hand side of buttress, move left from a V-crack and up wall. Start: Start at thin buttress about 30 metres right of and around corner from the yellow buttress. FA: Chris Baxter, Francine Gilfedder & Mike Stone, 1976 | 12 | 20m | |||
| 12 |
Scoot Up
Overhanging jam-crack on lowest buttress. FA: Peter Cunningham, Iain Sedgman, Peter Canning, Glenn Donohue & Andrew Webb, 1986 | 18 | 10m | |||
1.21.12. Western Creek Valley 6 routes in Area
- Summary:
-
description
Western Creek doesn't offer much. The northern side has a few tiers of broken rock which aren't very inspiring. These are best left for the wallabies to shelter from the heat. The south side has a little outcrop with lovely rock but there's not a lot of it.
Emergency Location: Mount Arapiles, Campbells Kingdom Carpark
approach
The outcrops are on either sides of Western Creek, the valley east of Pop Wall.
Walk east up the valley until below the outcrop of your choice and then go up to it. The google map marker indicates the location of Western Creek Outcrop.
| Route | Grade | Style | Selected ascents | |||
|---|---|---|---|---|---|---|
| 1 |
Yniguez vs Arizona
Locate the prominent nose. Several metres right is a steep open corner. FA: Iain Sedgman & Noel Whiteside, 1999 | 17 | 12m | |||
| 2 |
Bonsai
The left-hand of two corners facing the valley. FA: Keith Lockwood & Iain Sedgman, 1979 | 7 | 13m | |||
| 3 |
E Pluribus Unum
Up the thin crack in the orange section to 'THE' bucket. Step left below the bulge and up the line. Start: Start 3 metres right of 'Bonsai'. FA: Iain Sedgman, Leigh Penna & Noel Whiteside, 1999 | 15 | 13m | |||
| 4 |
Sunday School
Up the corner 7 metres right of 'E Pluribus Unum' and finish right. FA: Noel Whiteside, Iain Sedgman & Leigh Penna, 1999 | 7 | 11m | |||
| 5 |
Hook, Line and Sinker
Head up (poor protection), mantle and then follow the main line just right of the small roof. Start: At the right end of the cliff is the John Wayne Pinnacle. On the west face, start at the right side. FA: Vince Waters, 2001 | 21 R | 14m | |||
| 6 |
Too Grit
This was originally called 'True Grit' but there is already a climb of that name nearby at Campbell's Kingdom. Start: Around right of Hook, Line and Sinker. FA: Iain Sedgman, Vince Waters, Nicky Symons, Elaine Stevenson & Karoline Ebner, 2001 | 17 | 10m | |||
1.22. Playground/Golf Links 1 route in Field
- Summary:
-
All Bouldering
summary
Esoteric outcrop/small buttress away from main crags, all bouldering, tbc.
1.22.1. Shawldale Boulder 1 route in Boulder
- Summary:
-
description
TBC.
| Route | Grade | Style | Selected ascents | |||
|---|---|---|---|---|---|---|
| 1 |
Strudel
Proj! | |||||
1.22.2. Willoughby 0 routes in Boulder
description
TBC.