Help

Celestial Wall

14

Seasonality

J
F
M
A
M
J
J
A
S
O
N
D

Description

Blessed with afternoon shade, 'Celestial Wall' offers multipitch sport climbing in an amazing, exposed position. Standing in the carpark, Celestial is obvious as the gobsmacking bright orange swathe of steep blocky rock on Tibro's SE corner. Even though it's sporty, don't forget where you are - take helmets, prussiks, and a healthy dose of caution! As for gear, all routes in this sector are bolted with fixed hangers, so 12 quickdraws will do it, along with the usual slings and screwgates. It's possible to get away with one 60m rope and two ropes allow you to get down from any rap station (via multiple abseils). The most straight-forward descent is by rappelling down Clemency from halfway house. From halfway house, look for the tree with a fixed line leading down to a set of anchors. With a 60m rope you'll get down in three raps - 30m, 30m, 20m. Always tie stopper knots and carry prussiks when abseiling here!

© (gremlin)

Access issues inherited from Glasshouse Mountains

Most 'Glasshouse Mountains' climbing is within the Glass House Mountains National Park. Please respect the environment and other people's enjoyment of it. Access to climbing here is a privilege, not a right.

The 2019 Ngungun track expansion & fortification work is now complete, and the mountain is once again fully open.

Approach

Access as for 'Clemency Wall' sector. From the carpark, walk up the track towards the mountain for 200m until it forks. Take the L branch (signposted Tibrogargan Picnic Area 1km) and follow this for approximately two minutes (100m). If you reach the bench you have gone too far. 5m before walking over a 'gully' paved with large rocks, turn R on a small but distinct foot track. Follow this track past a warning sign and towards the wall for eight minutes up to the SE corner of the mountain. The track meets the rock at 'Heliosphere' on 'Celestial Wall'.

© (gremlin)

Ethic inherited from Glasshouse Mountains

Modern climbers establishing new routes have taken great pains to ensure any new routes do not interfere with the historic routes established many decades ago.

Retro-bolting of existing routes is unacceptable!

New routes shall make use of traditional protection where available.

Tags

Some content has been provided under license from: © Australian Climbing Association Queensland (Creative Commons, Attribution, Share-Alike 2.5 AU)

Routes

Add route(s) Add topo Reorder Bulk edit Convert grades
Grade Route
1 21
2 19

Start 10m left of Troposphere P1 on flat ground on the track leading towards Slider Gully.

  1. 30m 21 - Up fairly easy ground past 3 bolts to the first ledge which has a hanging on top of it. Up 2 large steps to a bolt and a couple of jugs. Haul yourself upwards on easy but impressive feeling moves to a cardboard feeling jug. Clip the next bolt and work your way through the crux moves. Clip another bolt and then traverse left and up to the obvious ledge to the belay anchors. A tight but bomber 0.5 camalot protects the traverse for the second.

  2. 28m 19 - Start out on easy ground up to an orange corner. Work your way up through the crux moves and a few more bolts. There is room to place another bomber 0.5 camalot to make the next section feel less run out, then up past 2 more bolts to the anchor.

Currently, the best option is to rap from here, although you can climb up through the bit of bush and link it to the mixed climb NGFG.

FA: Matt Hunter & Alex Cristino, 14 Mar 2021

This climb starts 20m up and to the left of the 3rd pitch of "Troposphere" or directly above "Fat shamed by gravity". It is the obvious arete and it can be approached from either climb although most easily from FSBG.

There is still a lot of loose rock including a couple of real show stoppers which are easily avoided. The climbing is fun but committing. Be careful of rope drag. This pitch will be better once it has cleaned up a little and be extra careful to not destroy people below by pulling off loose blocks.

Start at the set of anchors for an unnamed sport climb just on the left of the arete although the belayer may prefer to stand down on the grassy ledge.

  1. Move up and right, finding a couple of C3 cam placements. Then push on through blocks while resisting placing any gear in bad rock. Climb past a bolt and a cruxy move. You will find some good gear for the next 5 or so metres and then bust out right around the corner to some more good gear. Plug it in and move up and slightly left past some not inspiring placements on fairly easy ground to finally arrive at the anchors.

Rapping down to the base of the pitch and then down through bush to the anchors of "Fat shamed by gravity".

FA: Matt Hunter & Hamish Ousby, 6 Aug 2019

1 15 30m
2 17 15m
3 18 15m
4 15 20m
5 16 30m
  1. 30m (15) 11 bolts. Starts about 30 metres to the left of the access track, marked with a 'T'. Look for high fixed hanger on very easy terrain. First pitch is very easy, a little wandery over ledgey terrain.

  2. 15m (17) 7 bolts. Starts to get a bit steeper now with a lovely bit of ramp to make you think. The blocks before the corner system may be a bit disconcerting for some. Just head across these gingerly and pull into the awesome orange corner.

  3. 15m (18) 6 bolts. This is a brilliant corner with a bit of a sting at the crux {naturally}. Check out the biggest bucket in the world as you pull back left when you get higher on the pitch.

  4. 20m (15) Pretty much straight up from the anchors then trend right and on to a large vegetated ledge.

  5. 30m (16) Head right from the belay and step around the large gendarme with the two bolts on it. The step across the void after the gendarme is breathtaking. Route joins the top of Voyager shortly after this. Head on up to the halfway House terrace ledge for more sport goodness. Use long extenders (120cm+) for at least the first 5 bolts.

Descent: Abseiling back the way you came is not recommended and has resulted in numerous stuck ropes. It is recommended you head up to Halfway House, follow the fixed ropes up and left from the anchor. Once at Halfway house head right and abseil down Clemency. The top anchors for Clemency are beneath the tree with the fixed rope.

Please note that there is a fixed rope heading down and right from the anchor of Troposhpere, this does NOT lead to an anchor that you should abseil from.

FA: Lee Cujes & Phil Box, 2004

Start: At the belay anchor at the top of Troposphere's first pitch.

Move up one or two bolts and move to the L into a rising traverse L and then up to move R to the station at top of pitch 3 of 'Troposphere'. Some interesting and spicy moves but rope drag may be an issue as the route moves through a very large arc, hence the name. To reduce the traverse's spice to 'mild', bring some medium cams to minimise the risk of a scary pendulum swing.

FA: Phil Box & JJ O'Brien, 2007

Start: At the belay anchor at the top of Troposphere's second pitch.

Step L using delicate moves up to giant jug, trend L for a couple of moves and then up to join 'C Section'. Very fun; wish it was a whole route using similar moves as the start.

FA: Phil Box, 2007

1 16 35m
2 21 12m
3 23 18m
4 17 30m

All protection is fixed hangers. Max number of draws needed is 10.

  1. 35m (16) First pitch is the same as Aphelion pitch 1.

  2. 12m (21) From the belay, take the overhung line leading up Left. Powerful.

  3. 18m (23) Enjoy the moves leading up the superb slab to roof. A tricky little bouldering sequence.

  4. 30m (17) Last pitch ends at top of fixed rope traverse.

Descent: Abseiling back the way you came is not recommended and has resulted in numerous stuck ropes. It is recommended you head up to Halfway House, follow the fixed ropes up from the belay and head right toward Halfway House. Once there, head right and abseil down Clemency. The top anchors for Clemency are beneath the tree with the fixed rope.

FA: Cameron Fairbairn & Phil Box, 2004

Warning Fixed Gear: Loose bolt

1 16 35m
2 21 12m
3 22 30m
4 22 10m

Great climbing in a superb position.

Start: 6m L below apex of overhanging orange wall.

  1. 35m (16) At mark climb slightly left to first FH. Nine FH's up to rap station below steep wall on L. The fifth bolt is invisible. When the way appears blocked by a ferny ledge, climb onto the ledge via its left side and it should become apparent.

  2. 12m (21) Climb R past two close FH's. Then straight up past a third FH to rap station on pedestal.

  3. 30m (22) Straight up orange corner and face above. At ninth FH step R and up to rap station on sloping ramp. This is the standout pitch of 'Celestial Wall'.

  4. 10m (22) Short and a bit awkward. Mount bulge from L. At ledge on top, rap anchor is on L. A fixed rope leads up and R onto 'Halfway House' terrace.

Descent: Abseiling back the way you came is not recommended and has resulted in numerous stuck ropes. It is recommended you head up to Halfway House, follow the fixed ropes up and left from the anchor. Once at Halfway house head right and abseil down Clemency. The top anchors for Clemency are beneath the tree with the fixed rope.

FA: Cameron Fairbairn & Phil Box, 2004

Warning Fixed Gear: Loose bolt

1 18 45m
2 22 30m
3 22 10m

Start: 10m R of Aphelion, below first FH.

  1. 45m (18) 15 FH's. This long and varied pitch features interesting black slab climbing before steepening into a lovely sculpted orange corner. Belay at rap station on R.

  2. 30m (22) Nine FH's lead up some bulgy, wacky territory to exposed, blocky arête which bounds the R side of 'Celestial Wall'. Finish at rap station as for p3 of 'Aphelion'. Rap off here, or..

  3. 10m (22) As for fourth pitch of 'Aphelion' onto 'Halfway House' ledge.

Descent: Abseil back the way you came is not recommended and has resulted in numerous stuck ropes. It is recommended you head up to Halfway House, follow the fixed ropes up and left from the anchor. Once at Halfway house head right and abseil down Clemency. The top anchors for Clemency are beneath the tree with the fixed rope.

FA: Lee Cujes & Phil Box, 2004

Up the slab passing ten FH's to rap station. For the descent, a doubled 60m rope will get you to a ramp where you can scramble off (care!).

Start: About 25m L of Aphelion's first pitch, just R of the access track. Marked with a small, scratched 'H'.

FA: Phil Box, 2004

R of Zenith. Closed project for now.

Start: At the top of 'Heliosphere', but scramble carefully (roped) up L to ledge to bolted belay station.

Steeply up orange rock past four FH's to bivi ledge. Up ramp, leaning out to clip two FH's before committing to the wall proper. Increasingly pumpy moves past the final two bolts sets up an interesting exit.

FA: Lee Cujes & Phil Box, 2004

Start: At the top of 'Heliosphere'.

A long, exciting pitch.

FA: Lee Cujes

Warning Rock: Death block above 3rd FH

Warning Rock: Death blocks all along the route

Start: At the top of 'Heliosphere'.

The line directly above the belay. Probably the lowest quality route here due to the amount of ledges, but worth doing if you've done the other routes here. One tricky boulder problem constitutes the crux. A 60m rope gets you back on the ledge from the lower off.

FA: Phil Box Lee Skidmore, 2004

1 16
2 19
3 17
4 20
5 20

A wild jaunt up some unlikely looking territory that deposits you on Halfway House ledge. Nice climbing movement with placements where you need them on some really amazing rock. Leader should be solid at the grade to avoid an epic. Take two racks of cams, one set of wires and rp's.

Start right of Rubicon and 3m left of Clemency below orange cave.

  1. 15m (16) Climb delicately trending slightly leftwards heading for sloping block at small ledge at base of vertical wall. Some solid placements if you search around. Trad belay at base of block. Note: beware large detatched block to right of belay.

  2. 15m (19) Mount block and dont miss RP placement at chest height before balancing straight up the wall on sidepulls and high feet heading for left side of orange cave. Trad belay in large crack on left end.

  3. 15m (17) Step left from belay to lip of cave and head straight up through steep blockiness on great rock until you reach Rubicons' first bolted belay on left.

  4. 20m (Crux) (20) Step right from belay to steep groove right of arete and straight up. This pitch has some fantastic movement on great rock. Head straight up staying right of the arete to belay from small crack at back wall of orange alcove.

  5. 10m (20) Trend diagonally left up headwall to surmount large bulge 5m right of Rubicons exiting moves. Hand traverse the lip until reaching a spot to mantle onto ramp. Head left to belay from Rubicons' final bolted belay.

FFA: Matt Fingleton & Rafael Miura, 18 Apr 2021

Hello!

First time here?

theCrag.com is a free guide for rock climbing areas all over the world, collaboratively edited by keen rock climbers, boulderers and other nice folks.

You can log all your routes, connect and chat with other climbers and much more...

» go exploring, » learn more or » ask us a question

Selected Guidebooks more Hide

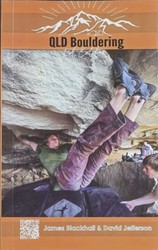
Author(s): Jimmy Blackhall & David Jefferson

Date: 2021

ISBN: 9377779499658

Hidden within the ordinary people of Queensland there exists a tight-knit community of scabby knuckles, grazed knees, massive forearms and iron-clad wills. This guidebooks seeks to shed light on this community and blocks of choice with all the information, skills and knowledge to open the door for you to explore all the bouldering that Queensland has to offer.

Author(s): Simon Carter

Date: 2018

ISBN: 9780958079068

A few years ago there was basically Frog Buttress and Coolum. Since then there has been more development than Barangaroo and South East Queensland should be on any climbers radar no matter what your style. Except ice climbing, definitely no ice climbing. But over 1250 routes with hard sport, multipitches and quality trad to make a great trip.

Accommodations nearby more Hide

Share this

Photos Browse all photos

Upload a photo of area

Thu 8 Jun
Check out what is happening in Celestial Wall.

Get a detailed insight with a timeline showing

  • Ticks by climbers like you
  • Discussions of the community
  • Updates to the index by our users
  • and many more things.

Login to see the timeline!

Deutsch English Español Français Italiano 한국어 Português 中文