Help

Carborundum Wall

Seasonality

J
F
M
A
M
J
J
A
S
O
N
D

Description

A diverse wall with classic old school multipitches and single pitch sport routes co-exist in harmony.

Access issues

Peregrine Falcons sometimes nest in the caves above this wall from August to December. At this time, birds will defend anything within their line of sight, meaning that routes such as Remains of the Day and Phoenix might be off limits for many months of the year. Check the ACAQ Facebook page for relevant updates.

Approach

Opposite the carpark is a signposted walking track. Walk up the track towards the mountain for 200m until it forks. Take the R branch (signposted 'East Face' rock climbers access 600m) and follow this for 400m where it's possible to break L on a smaller track past a Warning sign. Take this, which angles up toward the middle of the east face (200m uphill). The track meets the rock between 'Carborundum Chimney' and 'Patience Crack'.

© (gremlin)

Ethic inherited from Glasshouse Mountains

Modern climbers establishing new routes have taken great pains to ensure any new routes do not interfere with the historic routes established many decades ago.

Retro-bolting of existing routes is unacceptable!

New routes shall make use of traditional protection where available.

Tags

Some content has been provided under license from: © Australian Climbing Association Queensland (Creative Commons, Attribution, Share-Alike 2.5 AU)

Routes

Add route(s) Add topo Reorder Bulk edit Convert grades
Grade Route

The walking track meets the cliff at this point.

Start: 2m R of 'Liquid Skin' and 3m L of obvious sickle crack. Some small gear below headwall, up this, passing 4 FHs to shared chains. Often wet.

FA: Gareth Llewellin & Ross Ferguson (both led), 2006

Start: 3m right of Patience Crack. Up slab on small gear to headwall, up this passing 5 FHs to shared chains. Often wet.

FA: Ross Ferguson & Gareth Llewellin (both led), 2006

This is a great, well-protected route

Start: about 4m right of a big tree at the apex of the path. Faintly marked 'Pc'.

  1. 36m (15) Up nice crack to top of white rock (see topo) with good gear, to overhang, then traverse left to small ledge & up onto a more positive ledge, follow this along Right, for about 18m to base of obvious crack corner (see topo for pitch 2).

  2. 32m (15) Up the obvious crack corner, beautiful laybacking, bridging and wall climbing & solid gear. Gain a small stance where Faith crosses wall and belay off tree/bush.

  3. 32m (12) Traverse R and up continuation of corner, to finish on ledge & TB. From here, head up Right, across a vegetated scree slope, to join the Caves Route below Trojan.

FA: Les Wood & Woody Milroy, 1966

FA: Les Wood & Don Groom, 1966

  1. 30m (19) Start as per PC, up crack on good gear to overhang, then straight up through the shallow chimney on scant holds & gear, to gain ledge above, then trend Right along this to crack corner & belay.

  2. 32m (13) Up the obvious crack corner, beautiful laybacking, bridging and wall climbing & solid gear. Gain a small stance where Faith crosses wall and belay off tree/bush.

  3. 32m (12) Traverse R and up continuation of corner, to finish on ledge & TB. From here, head up Right, across a vegetated scree slope, to join the Caves Route below Trojan.

FA:

1 19 25m
2 15 25m
3 21 20m

Rising out of the ashes of the 2014 tibro fires.

  1. 25m (19) 5FHs: Start at the big tree at the apex of the path (just to the right of CC). Veers left for first 2 bolts then straight up past 3rd FH to old rap chain on ledge, then continue up and R past 1 FH to DBB.

  2. 25m (15) 7FHs: Nice moves keeping L of the FHs all the way up the black wall to the big belay ledge and DBB. Sustained and enjoyable climbing.

  3. 20m (21) 8FHs. Up slabby climbing past 3FHs to good rest before powering up the crux section consisting of 2 small parallel chimneys to nice foot ledge. It's not over yet, then balancy, crimpy climbing for 2 bolts and easy moves to DBB.

Rap down the way you went up.

Set: Zac Trembath-Pitham & Nigel Joyce, 2013

FA: Nigel Joyce & Zac Trembath-pitham, 2014

FFA: Zac Trembath-Pitham & Nigel Joyce, 2014

1 35m
2 25m
3 11 17m
4 15m

A time-honoured bumbly classic. So named because of its abrasive properties, this route follows the large, prominent chimney on the E face. When you're wedged in the chimney, spare a thought for when this was climbed with nothing more than a rope and a couple of slings!

Start: Beneath the L-leaning pocketed crack 5m or so L of where the E face walking track meets the rock (35m L of the Caves Route). Marked 'CC'.

  1. 35m (-) Originally the crux pitch. Up face, then follow the crack with bridging moves to a rest position. Up face above passing a PR to large ledge. Bridge up the gully to the second ledge. Belay from collection of small-ish trees.

  2. 25m (-) Up easy wall (good pro) to tree. Up and L to enter the chimney. Climb up wide groove to big sling belay in the 'Bomb Shelter'.

  3. 17m (11) (crux). Harder since repeat ascentionists have trundled some chockstones used by original party. Bridge up into the chimney to stance and pro. Chimney up past chockstones and hidden PRs (on back wall) to ledge. Belay off large chockstone at back of ledge.

  4. 15m (-) Continue up chimney until it finishes at a ledge and TB. Take care, the ledge is covered in loose rock which will rocket down the chimney if released. From the belay ledge scramble down and right some 30m along Spooky Ledge to locate the chains at the top of p3 of Remains of the Day. From there, 2 x30m and 1 x 20m gets you to the deck. Alternatively you can bush bash up and right from Spooky ledge to meet Caves Route at the Big Scrub above Cave 2

FA: Neill Lamb & Mark Andrews, 1955

Warning Flora and Fauna: Microbat in trad placement.

1 17 20m
2 15 28m
3 16 28m
4 16 30m
5 13 30m

First bolted route as the track begins to dip.

Due to nesting peregrine falcons, this route should remain off limits from August - November.

  1. 20m (17) - The most difficult moves on the route are found in the first few bolts which is always off-putting to some. But get through here and you're away on a grand adventure. 7 FH's to rap station.

  2. 28m (15) - Step off right and down to ledge as for Carborundum Chimney first pitch. Traverse part-way across ledge and climb easy wall to high FH. Follow the FH's with good, fun climbing through some drummy rock to rap station below steep wall.

  3. 28m (16) - It's all systems go straight off the belay up the steep wall passing several FH's but it soon eases to a naturally protected crack and short chimney. On to spooky tree-covered ledge and rap station.

  4. 30m (16) - Easily up to the left of the belay to high FH but keeping right of arete to stance below steep wall. Crank your way up on good edges passing several FH's to rap station.

  5. 30m (13) - Good vertical face climbing on natural pro up the intermittent crack to a slabby finish passing 2 FH's and an old rap station to newer one on the next ledge up.

FFA: Ross Ferguson, Gareth Llewellin & Bill Strachan, 2007

Warning Flora and Fauna: Wasps

Warning Flora and Fauna: Wasps midway through 4th pitch

1 18 30m
2 17 30m
3 20 20m
4 17 35m
5 16 25m
6 14 25m

3m L of Remains Of The Day.

  1. 30m (18) Trends ever so slightly left. Awkward and a wee bit exciting with long runouts. Scamper quickly up easy ground to single ring and double ring anchor.

  2. 30m (17) Trends quite a way towards the left, avoid the ancient relic carrot and hanger at about half way. Mind the choss before the belay.

  3. 20m (20) Up through some bad rock to small roof, left and up with balance and strong manoeuvres to once again encounter easier ground above the bulge.

  4. Pitch 4 options: 4a) 35m (17) Wander right off the belay, up the steep gully and skirt under overhang then continue up using a couple of chimney moves or brave the face out to the right. Up slab to step left onto stoney ledge, up through the shrubbery to belay on right hand end of bushy ledge. This pitch is very wandery and should not be rappelled. 4b) 28m (24) From belay, head straight up and over slab passing a single ring and chain belay. Continue left up the tricky overhanging corner and pull the lip with a few punchy moves. over the lip head right through shrubbery to a DBB on a bushy ledge.

  5. 25m (16) Up from belay avoiding the 'less than inspiring rock'. Move across left to gain easier ground around a gentle corner.

  6. 25m (14) Up and gingerly step left across gap continuing up and then right avoiding the hanging blocks, very easy ground to the top of the ridge, look for the Airtime rap and belay hangers over on the left, they are on vertical rock under an overhang. Don't climb any higher as rap becomes problematic from here. You would also need trad gear to continue to the top on the top pitch of Airtime.

Ten sport draws are sufficient however two additional long or extending draws would help to smooth out rope drag in places. Take a 70m rope if intending to link pitches.

Rap using one of the options:

A) Rap back down route.

From Airtime anchors rap by walking backwards along tip toe ridge trending slightly to the right (looking back up the ridge) to the bushy ledge anchors at the top of the 4th pitch. Rap from the top of the 4th pitch by walking back left i.e. down the alternate (24) pitch not down the (17) pitch, you can rap to the 3rd pitch DBB by doing it this way. From the top of the 3rd pitch rap to the top of the second pitch, you'll have to rap past the rap anchors due to the overhanging nature of the terrain, climb about 2 metres back up to the DBB. From here you can either rap to the ground via an intermediate rap chain half way directly down or continue rappelling down via the 1st pitch by rapping to the end of your rope and carefully walking 10m to the right to the DBB anchor of the 1st pitch. Due to the rappels being not straight down be mindful to not let go of your rope when anchoring in at DBB's. You should only need one 60 metre rope for climbing and rappelling if you follow instructions.

B) Down Airtime Over Pumicestone.

2x 60m ropes required. Straight down the bushy gully for about 40m. Then small belay ledge on left. Straight abseil to hanging belay under a tiny overhang on right. Then rap to ground.

FA: Phil Box, Jay MacGechan & Steve Kloske., 2011

This section is where Insurrection Wall begins, it offers a handful of moderate single pitch sport routes. Great for an afternoon.

First Contact begins 5m L of Banished For Infidelity. 7 FHs, lower-off.

2m L of FC. Shiny silver FH's, finishing at the slightly lower, visible anchor.

FA: John J O'Brien & Lee Cujes, 2013

4m L of FC. The obvious arcing line up the marbled white rock in the middle of the wall.

4m downhill of Insurrection. Stickclip. Up past three FHs to join original. Perhaps a bit harder?

4m L of Insurrection VS. Thuggy off the ground. Straight up and through the overlaps. Slightly L, slightly R. 8 FHs, lower-off. Harder than LOAJP.

3m L of NMS, starting up on little platform. Stickclip. Tricky little start, then smooth sailing through mini roof and up blocky wall. 8 FHs, lower-off.

Bugger all gear. Dangerous.

Inspired by the activity on Carborundum Wall in 2019. Aptly named for the the zig-zagging nature of the route and a couple of random boulders dislodged along the way. This is an adventure route that takes you into some very impressive country with some wild positions.

Routes lengths are unverified.

Gear: A single rack to #3 and a set of wires. Due to the traversing nature of the climb, it is best to bring at least 6 extenders.

  1. 35m (15) Starting to the very LHS of Insurrection Wall. Climb up from here, clip solitary hanger and punch through the little rooflet. Climb corner and keep trending right to final rap anchor of Banished.

  2. 30m (14) Up easy ground until the wall steepens finding okay placements and a hanger along the way. Trend right and join the 2nd pitch of Banished for Infidelity approx 10m before the anchors.

  3. 30m (16R) The real adventure begins! From the belay, move left committing to an airy and unprotected traverse into wild country. Follow the corner up and right where a nice cam placement can be found. Keep moving whilst clipping an ancient piton, a single hanger and commit to a delicate dance rightwards around the obvious bulge to a natural belay which can be seen from the corner. Tibro adventure climbing at its best.

  4. 30m (16) An outstanding pitch with enormous exposure. A few difficult moves to the right of the belay will get you to the first cave. Climb onto its roof and move left into the next cave with amazing gear to be found on your journey. Place a C3 in the roof to clear the head and proceed with the wildest of moves to get you to relative safety. A bomber 0.5 camalot awaits your arrival! Up on easy ground before enduring another exposed traverse aiming hard left for the vegetated gully where you will find a natural belay up high. Use your extenders on this pitch!

  5. 45m (14R) Move up the gully for 5m before moving around the next cavey looking feature. Keep on moving up dancing between the gully and the RHS face before the final moves around a broken feature 8m to the right of the main crack. Finish at Airtime over Pumicestone anchors.

Decent: Either finish up the excellent final pitch of Airtime over Pumicestone (Grade 19, 40m) or rappel the route from where you are. Three rappels with 2 x 60m ropes will bring you to the ground.

FA: Hamish Ousby & Jay, 27 Oct 2019

Warning Fixed Gear: Rusted Anchor

1 18 35m
2 18 30m
3 21 40m
4 19 40m
5 2 60m
6 19 40m

Take wires and cams to #3, with a strong emphasis on small cams such as aliens.

  1. 35m (18) Easily up L trending ramp to white corner (FH). L up this and R onto ledge above bush. Traverse R up slab (FH) to vertical section. Carefully place gear then crank up this to easier ground. Two close FHs lead up slab and over small rooflet to rap station.

  2. 30m (18) Take lots of small cams. Up and slightly L 5m, then almost directly L 3m past gear slots. Move up past FH to gain corner on R side of the big orange roof. Through corner to rest ledge above roof. Straight up from ledge without falling for 5m to FH, then a big traverse back R above your belayer to solid black rock. Up past FH to rap station under blocky arête (60m rap to ground). Mind rope drag on this wandering pitch.

  3. 40m (21) Cruxy right off the belay. 11 FHs up exposed blocky arête. The arête terminates into a wide gully with a rap station on L. Peregrine Falcons nest just 10 metres to the right of this pitch so best to avoid in breeding season (August to November).

  4. 40m (19) Climb the nice wall on L side of gully (four FHs) to an easy slab. Run up this (two FHs and gear) to where it steepens. Two FHs and a big hollow flake allow you to get across the chasm to ledge and rap station.

  5. 60m (2) Climb up onto vegetated ridge. Walk L until it's possible to scramble up onto the next terrace. Walk all the way back R along this to find a FH on the wall.

  6. 40m (19) An unlikely but excellent start past the FH leads into a groove. Carefully up this to ledge on L. Up the headwall slab above (four FHs) to rap station.

Either scramble up 50m to summit and walk off, or rap the route.

FA: Lee Cujes & Phil Box, 2003

An old school adventure with everything you know and love about Tibro - marginal gear, questionable rock, weird slabs and plenty of exposure! The name is a nod to the pioneers of yesteryear who encouraged us to put this route up in traditional ground-up style, as well as a reference to the relics found enroute which suggest it was attempted and abandoned some decades previous.

Gear: Single rack to #3 Camalot with doubles/triples in microcams such as X4's or Aliens. RP's, ball nuts recommended. Double ropes and a VERY solid leader mandatory.

  1. 30m (15) Start approximately 20m left of Airtime Over Pumicestone. Climb left facing corner, trending left and up to bowl. Gear improves as you go. Tree belay with ancient tat from abandoned attempt.

  2. 65m (20R) Might only be a 18/19, but the grade reflects the serious nature of this pitch. Up and left from the belay to an old piton that appears to have been the high point of a prehistorical attempt. From here, an airy traverse takes you rightwards across the "Diving Board" feature on very marginal gear and occasionally horrific rock. Keep trending right and up to a small arete with committing moves upwards to a PR. Keep climbing to a ledge, then up the short technical corner with bad fall potential. Thank your chosen deity as you arrive on an easy slab, following this leftward with spaced gear to a tree belay. Option exists to split this pitch with a semi-hanging belay at the base of the slab.

  3. 55m (17R) From the belay, a rightward traverse with tremendous exposure and spaced gear leads to a shattered corner. Up this on spooky rock and thin gear to a chimney. Climb this, following a natural weakness to a bushy alcove with a natural belay.

  4. 50m (9) Up unprotected but easy slab with a bit of bushbashing. At the small headwall, take the gulley to the left then follow the line of least resistance to the top of the vegetated pillar. The line then merges with Airtime Over Pumicestone.

Descent: Either finish up the excellent final pitch of Airtime over Pumicestone (Grade 19, 40m) or carefully follow the vegetated ridge down and right to a DBB under a small alcove. Three rappels with 2x 60m ropes will bring you to the ground.

FA: Alex Mougenot & Ryan Siacci, 30 May 2019

Hello!

First time here?

theCrag.com is a free guide for rock climbing areas all over the world, collaboratively edited by keen rock climbers, boulderers and other nice folks.

You can log all your routes, connect and chat with other climbers and much more...

» go exploring, » learn more or » ask us a question

Selected Guidebooks more Hide

Author(s): Jimmy Blackhall & David Jefferson

Date: 2021

ISBN: 9377779499658

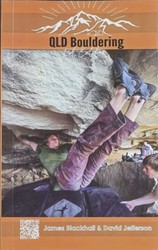
Hidden within the ordinary people of Queensland there exists a tight-knit community of scabby knuckles, grazed knees, massive forearms and iron-clad wills. This guidebooks seeks to shed light on this community and blocks of choice with all the information, skills and knowledge to open the door for you to explore all the bouldering that Queensland has to offer.

Author(s): Simon Carter

Date: 2018

ISBN: 9780958079068

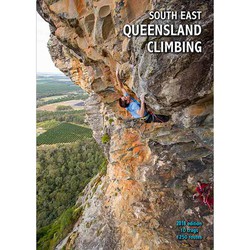
A few years ago there was basically Frog Buttress and Coolum. Since then there has been more development than Barangaroo and South East Queensland should be on any climbers radar no matter what your style. Except ice climbing, definitely no ice climbing. But over 1250 routes with hard sport, multipitches and quality trad to make a great trip.

Accommodations nearby more Hide

Share this

Photos Browse all photos

Upload a photo of area

Sun 28 May
Check out what is happening in Carborundum Wall.

Get a detailed insight with a timeline showing

  • Ticks by climbers like you
  • Discussions of the community
  • Updates to the index by our users
  • and many more things.

Login to see the timeline!

Deutsch English Español Français Italiano 한국어 Português 中文